I am writing about socks again which is not as interesting as my last post about helping my mom with her memoir. I understand if you want to stop reading here!
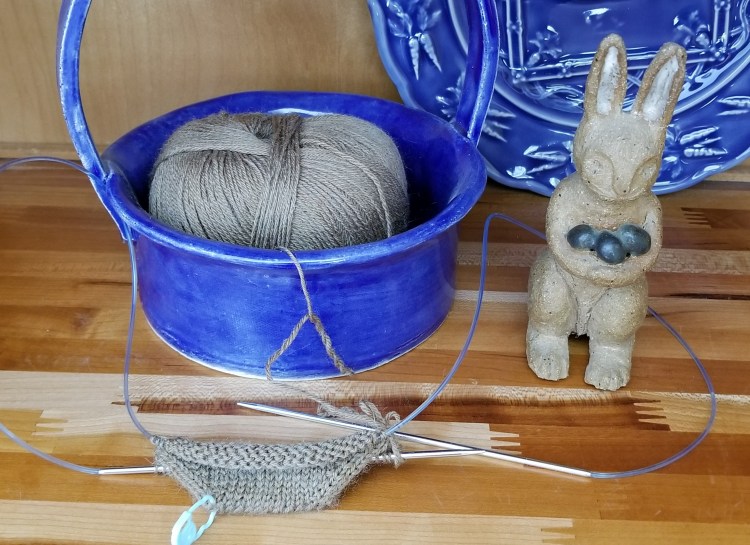
After completing the cable pattern socks over the winter that took two months to finish I wanted to use thicker yarn for my next sock project so they would knit up faster. After looking over my yarn on hand, I decided to go with some MillaMia Naturally Soft Sock 75% Wool / 25% Polymide yarn which turns out to be thinner rather than thicker. However I really liked the color and feel of it, and they look nice with both my pairs of my sneaker type shoes. This time I used a basic pattern instead of the complicated cable pattern, with a short cuff which does not take as long to make.
Polyamide, also known as nylon, is a petroleum product. It is commonly used in sock yarn to add strength, durability and elasticity. Ideally we should be using less petroleum based products, but there are always multiple factors to consider. If your socks wear out faster because they do not have nylon and you have to make or buy another pair, is that better?
Nylon, which is a type of plastic, was invented in 1935. The first successful use for nylon was in place of silk for stockings, and then after that for military uses during WWII. It is not biodegradable and sheds microplastics into the water. Other synthetic fibers made from petroleum with the same issue include polyester, acrylic, rayon, and microfiber. I read recently that microplastics have now been found in people’s blood. That is scary. I wonder what other things we are doing and manufacturing today that in the future we will realize are having impacts on the environment that we did not foresee.
Toe of a sock
I started out trying to do turkish cast on for 2 socks at a time on magic loop needles size one. The stitches were slipping all over the place and falling off the needle. Plan B was to knit the toe for the first sock and put it a holder while I knit the other toe.
After the toes were completed with both of them back on the needles for two at a time magic loop knitting, I knit a couple of inches of foot. I ripped it back and started over a couple of times before I was satisfied that the number of stitches around was right. I would rather start over and get it right than complete the project and not be happy with it.
When it was time for the heel, I considered a method of “afterthought” heel that has extra rows in the corner where the heel meets the leg. Afterthought heel is a technique where you knit past the place where the heel will be, and then later go back and knit the heel. I decided against it since an afterthought heel requires two more ends to be woven in. Instead I knitted the Fish Lips Kiss heel one at a time while the other sock was held on double pointed needles. Both the afterthought heel and the Fish Lips Kiss heel come out a little tighter around the ankle than a traditional flap heel based on the geometry of the pattern. When I got to the end of the heel, I added another stitch in the corners to add a little width. Following is a photo of both socks, with the heel completed on one sock.
Heel complete on one sock
I am always coming across new ideas and variations for improving the fit and construction of socks. I like to browse on Pinterest, so once it knows you are looking at sock ideas, it sends you more and more. Now I also get lots of ideas on Pinterest for recipes with rhubarb haha. I found a pattern specifically for sneaker socks that makes an adjustment to a short row heel of adding some extra rows so that the completed sock will not slip down into your shoe in the back. That was happening with the first pair of sneaker socks I made, so I decided to try it. This pattern also suggested using knit 1 purl 1 for the ribbing instead of knit 2 purl 2, as well as using something called “Italian bind off” that I had not heard of.
Following is a photo of one of the socks after I finished knitting. Somehow I ended up with a big hole in only one out of four heel corners. I was able to patch that up with a scrap of yarn.
Oh no, there is a hole in the corner where the heel meets the foot
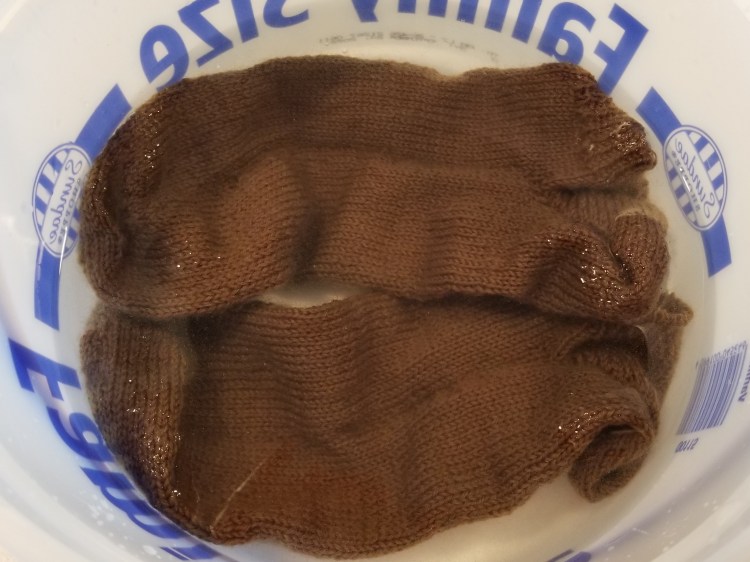
It is hard to avoid having a funny uneven column where the two halves of the sock meet when knitting with magic loop. Because the stitches are all connected by one continuous piece of yarn, it will eventually even itself out with wear and washing. I put the just completed pair of socks into an empty ice cream tub (ice cream is a staple at our house so we have a bunch of those that I use for various purposes) with some wool soap to get the process started.
Washing the completed socks in an ice cream bucket
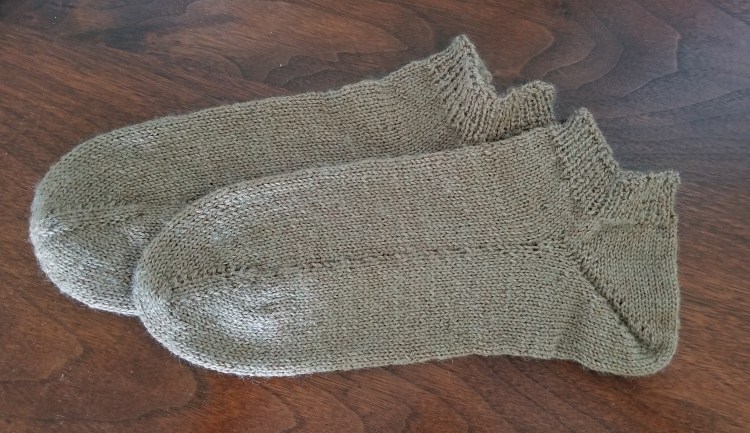
All in all I was happy with how this pair of socks came out. The Italian Bind Off looked nice and neat, but was a bit tight. Even with the extra stitch I added in each corner of the sock they could have more room in the heel diagonal, but they work.
Sneaker socks completedAnother view of just completed sneaker socks
I wanted to make another pair out of the same yarn to try a few variations in different parts of the pattern, but I had to figure out if I had enough yarn left. I had started with two 50 gram balls of yarn, one for each sock. When the socks were complete I weighed them on my kitchen scale. Subtracting the weight of the socks (39 grams) from the original weight of the yarn (100 grams) told me that the remaining yarn (61 grams) was enough to make another pair of sneaker socks. It is fascinating to me that the weight of the yarn used for a project is exactly equal to the weight of the completed project. That works when spinning wool into yarn too, except that when spinning bits of the fiber get removed in the process, so the final product might be a little less that what you started with.
I knit another pair of sneaker socks using the same pattern and yarn but with a few adjustments. First I used yarnover increases when making the toe instead of knit in the front and back. Normally yarnovers are used to make an increase, and then when you knit it on the next row it makes a hole which can be a design element. In this case I knit through the back loop so there is not a hole. I made a couple of increases in the foot just before getting to the place where the heel started, in addition to adding a stitch in each corner at the end of the heel. Lastly, I used Jeny’s Suprisingly Stretchy Bind Off instead of Italian Bind Off. It does not look as neat, but it works better for this purpose.
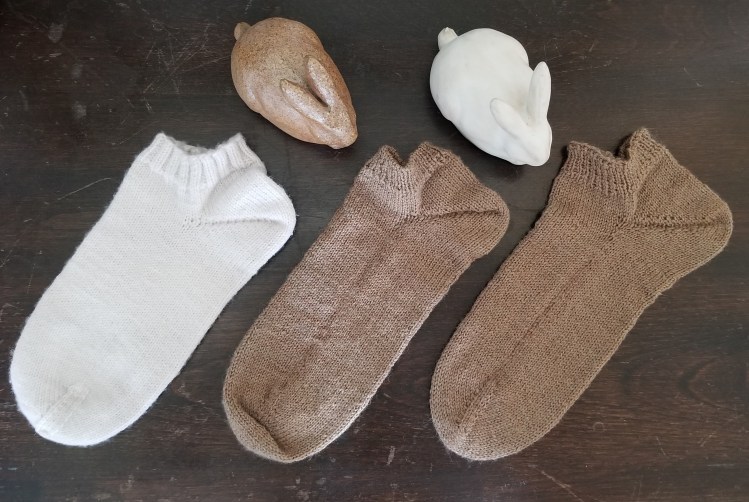
Version two of ankle socks from MilliMia yarnWearing my new socks
I have made three pairs of ankle socks. They all have a Fish Lips Kiss heel, but variations affecting the fit. The first pair fit nicely, but slip down in the back of my show. The second pair fits a tiny bit tight in the heel diagonal and the bind off at the ankle is tight. The third pair fits perfectly and does not slip! I have more sock yarn that I bought last winter so I will be knitting more socks but I promise I will mix up my blog with something else next.
My mom abandoned her ceramic studio and started her writing career when she realized that my sister did not know where our mother had been born. Clay projects were left partially completed, with tools scattered on her work table. The kiln was never used again. From that day on all my mom’s energy was focused on documenting the story of her large chaotic family during the 1940’s and 1950’s. She joined a writing group in Fergus Falls, and in the following years attended classes and workshops to improve her skills. She made a lot of progress in a few years, including having several short stories published in the Otter Tail Review and Lake Region Review, anthologies with stories, essays and poems by regional authors.
In the early years of this period my mom was successfully doing her writing thing. I was busy with my own life, job, and family three hours away in Minneapolis. At that time I wasn’t paying much attention to the details of her memoir in progress. Computers and technology were never her strength though, and as she got older and farther along in the project, my sister and I starting receiving regular panicky phone calls asking for assistance to figure out what happened to sentences, paragraphs, or entire documents that had gotten accidentally deleted or moved, or she simply could not locate. We both helped as well as we could from afar. I don’t know how many times we tried to explain “undo”, but she never did get it.
Around this time I started using Google Docs at work, which allows document sharing so that more than one person can see and edit the same text in real time. I could see how Google Docs would be a good way to help my mom with editing from a distance.
I also realized that assistance was needed to get the memoir beyond a large number of disorganized files and into a format suitable for publication. I did not need another activity, but without spending a lot of money that was not in her budget there was no one else to do it. I had the right skill set, so I made a commitment to be her book’s “project manager”. It took over the next three years of my life, but I would do it again.
One thing my mom had not understood was “save” versus “save as”, so there were three or four versions of each section of text or story. There were also multiple chapters saved inside one document, resulting in versions of chapters being buried in a document with a different name. My first task as project manager was to create a single Google Document for each chapter, and then paste the text from all the versions into the appropriate document.
After we had worked together to edit the text down to one workable document for each chapter, I shared them with myself so I could see what my mom was doing as she continued to make revisions and add more material. I made minor edits, fixed typos, moved paragraphs around at her request, and restored text that she accidentally deleted (regularly), and most importantly, saved backup copies. To be clear, the writing was all my mom’s. All I did was the most basic editing. This was not like Rose Wilder Lane collaborating with Laura Ingalls Wilder to transform Laura’s stories into the polished books that were published.
Other book project tasks that I helped with were fact checking, looking for instances where the same anecdote or story was used in two or more places, making sure events and text were in the correct order, making minor wording suggestions, formatting a family tree for use in the book, scanning photos, helping write captions for the photos and suggesting where they could be placed, creating the table of contents, and doing research on options for publishing.
One example of fact checking related to my grandmother’s younger sister. She had married young and had a daughter. Both sets of parents were unhappy about the union. We knew the birth date of the child, but we had trouble determining the marriage date. It seemed like it might have been a shotgun wedding, and my mom had written her first drafts under that assumption but without really saying it in so many words. Even though all the people concerned were no longer with us, it seemed right to confirm the dates. The records office in Des Moines where the marriage took place had the information but would not give me the date over the phone. We considered making a 400 mile road trip to Des Moines, which could also include visiting my dad’s older sister who we had not seen in many years. After finding out she had passed on, we gave up on that idea. I learned that we could hire someone to go to the records office for us, so we determined the marriage date that way. It turned out that my grandmother’s sister did not “have” to get married. My mom edited some of the text accordingly, and we were glad we made the effort to verify the information.
Eventually all the chapters were combined into one large cumbersome Microsoft Word document. After a lot more updating, a professional editor that my mom had taken a class from reviewed the document, providing helpful input for changing the flow of the story and making other improvements. Several trusted friends and relatives also proof read the text.
My husband designed the book cover using part of a painting my mom had done in 1957. My artist sister-in-law created a professional looking map of my mom’s childhood neighborhood from a sketch my mom had drawn. My cousin’s photographer wife, Kim Eriksson, took the author photo for the back of the book.
Author photo of my mom taken by Kim Eriksson
After considering options for self publishing, we hired a woman in Fergus Falls to format the text for publication using the software Adobe InDesign. She would format 10 or 12 pages at a time and email them to me and to my mom for proofreading. This was supposed to be final checking for typos or mistakes, but my mom never stopped rewriting sentences and making editing changes until the last possible opportunity. She wanted it to be perfect. Finally, paperback copies of the book were printed in Fergus Falls in the fall of 2014. I later published the book in Amazon print-on-demand format. After that I prepared the book text for Amazon Kindle which included removing page numbers and most of the other formatting, reducing the number of photos in half, and other changes so that it would work across many different Kindle platforms. You can find the Amazon paper and Kindle book listings here.
There is a page on my blog about the book which you can get to here. Following is the front cover.
Front of the book
The next image is the back of the book with the author bio and a short summary of the memoir.
When we received the first proof copy from the printer, it seemed like such a huge accomplishment that I started to cry. We were all very pleased with the outcome and got positive feedback from friends and family, people who lived or had lived in Otter Tail County or in the neighborhood where my mom’s family had settled in Minneapolis, and others including complete strangers. Despite a couple of not so great comments on Amazon, most of the responses were good. My mom loved getting emails and praise from people she knew who had read the book.
In retrospect, there were times when I pushed my mom a little too hard to accomplish a lot in a short period of time. Since I was working full time and had other responsibilities, the time I had available to work with her was usually in the evening when she was starting to get tired. Also, it was around this time when I first noticed that she was starting to have some memory challenges, which was unsettling to realize, and caused frustration for both of us. I could see that we needed to finish this project sooner rather than later, if it was going to happen at all. My sister and I are very grateful that the project was completed before it was too late.
I assumed we would be able to place a copy in the Hennepin County Library system in the Twin Cities. It turns out there are some big hoops to jump through in order for that to happen. There is not enough room for every self published book, and many are not very well done. I believe that the writing quality and presentation of my mom’s book is of a higher caliber than many of the memoirs I have checked out of the library, but we decided it wasn’t worth the trouble. On the other hand, the Fergus Falls library was happy to take several copies.
My mom’s two youngest brothers both objected to the way their grandfather, Leonard Eriksson, was portrayed. Some of the information about Leonard was written from my grandmother’s point of view of a young bride living in her father-in-law’s male dominated household in the 1930’s. My grandmother also may have been mistaken about some information that she shared with my mom. My uncles knew Grandpa Leonard at a different time in his life, and had a different relationship with him. They felt that some of the statements about Grandpa Leonard were unfair and possibly even slanderous.
There were seven siblings in my mom’s family with a 14 year age difference. My mom was the second oldest. She consulted with her older sister for memories and information about their parents’ early marriage and some of the details relating to their grandfather’s law practice. Grandpa Leonard had many positive qualities and accomplishments that were portrayed in the book as well as his more problematic traits. The four oldest children lived a very different life from the youngest three. Each person in the family would inevitably have a different story or version or memory of the same events, and not everyone was present during every event. Memories are not perfect.
I know that my mom made an effort to be accurate and produce a quality product. I believe she accomplished her goal, in spite of varying perspectives, imperfect memories, and possible misinformation. I loved participating in the book project despite the amount of time and energy it consumed. I learned a lot about my family history, spent many hours of quality time with my mom, and learned new skills. I am so happy to have the resulting product for my children, extended family, and anyone who likes memoirs.
The Shepherds Harvest Sheep and Wool Festival was happening in the Twin Cities over Mother’s Day weekend when I was in the area for some other commitments. At first I did not make the connection that I would be in Minneapolis that weekend. Then, I concluded that I had too many other things to accomplish while I was in town, and that I did not need the temptation of buying additional fiber when I already have more at home than I can ever use.
On that Sunday it turned out I had some free time after all, so at the last minute I decided to go for it. I am glad I did as it turned out to be a nice Mother’s Day treat for me, given that Wayne was out of town for the fishing opener and my grown children live in other states. It is always fun to walk around at a fiber festival and check out all the vendors, get new ideas, listen to live music, and look at fiber animals. I always notice new products I have never seen before, and keep my eye out for fiber that is different than what I have at home.
Lately, I have been knitting socks, so this time I noticed circular sock knitting machines for sale, sock “blanks” that is sock yarn knitted into a square and custom dyed that you unravel as you knit into a sock, and tube socks all knitted and ready to knit on your own heels. There were also regular knitting machines for sale. And of course bags of raw wool and other fiber for spinning, fiber already prepared for spinning, and lots of yarn. There were some live fluffy angora rabbits on display, with their owners selling the angora fiber which is super soft and warm. And many other things I cannot remember at the moment.
Years ago I saw a vendor selling recycled silk saris at the Sheep and Wool Festival. She was demonstrating how you could cut it on the diagonal into thin strips and then spin it into yarn. That day I browsed at the many beautiful saris before selecting a purplish one to buy. Later, I made it into yarn that I used as part of a knitted shawl. I will tell you about that another time.
Of course I was not able to get away from the festival without buying anything! I bought some roving made out of 50% baby camel and 50% tussah silk. It was more expensive than what I usually use for spinning, and the colors are a little dark so I am thinking of blending it with some merino wool to made it go farther, lighten up the color, and make it easier to spin.
50% Baby Camel, 50% Tussah Silk
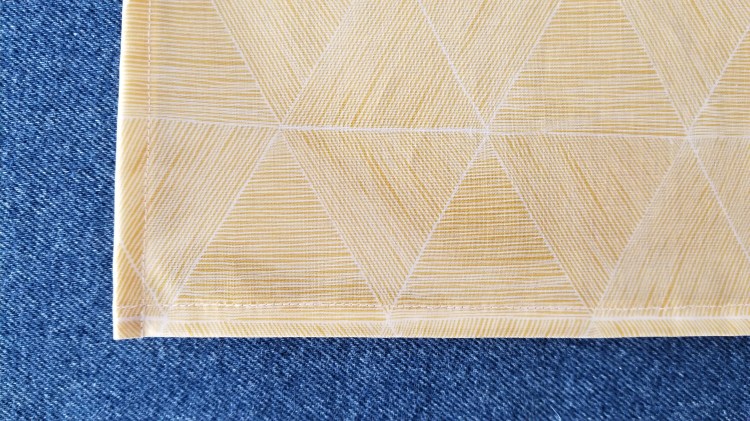
I also bought some flax fiber for spinning. Spun flax is linen. I have used linen blend yarn for knitting and weaving, but I have never spun any. Flax is very unlike the other fibers people typically spin such as wool and alpaca. The individual fibers in flax are longer and stiffer, and spinning is somewhat different. The vendor gave me a few tips including that you should get the flax damp while you are spinning it. I will have to do some research when I get around to spinning the flax. Assuming I am able to successfully make some linen yarn out of the flax, it will be good for weaving tea towels. The color in the photo below is more gray than the actual, which is closer to a tan. It looks like hair.
Flax fiber to spin into linen
Another time when I was at the Sheep and Wool Festival with my daughter, she bought some fish leather which she used to make a wallet. Fish leather is an eco-friendly product made from fish skins that would normally be discarded. I have read that it is nine times stronger than cow leather because of the crisscross pattern of the fibers.
Wallet my daughter made out of fish leather, folded up and showing the front side of the leatherWallet made out of fish leather, showing the inside of the wallet and back side of the fish leather
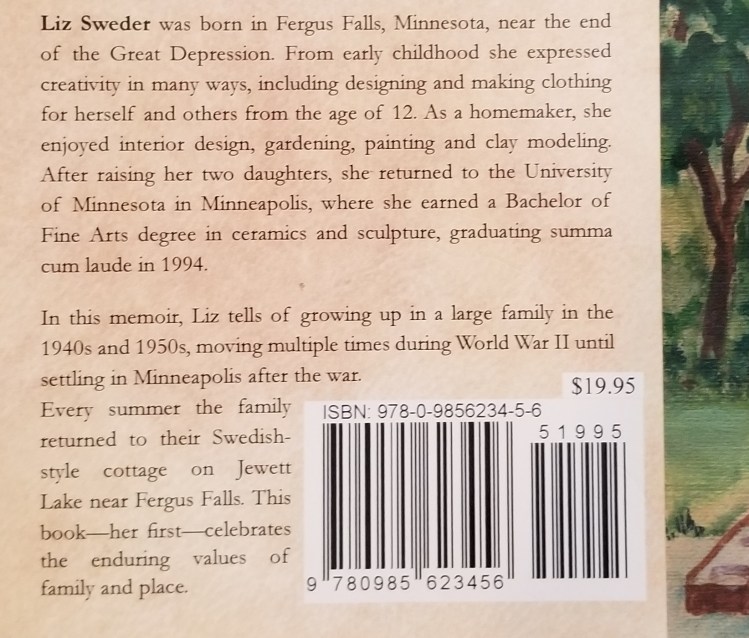
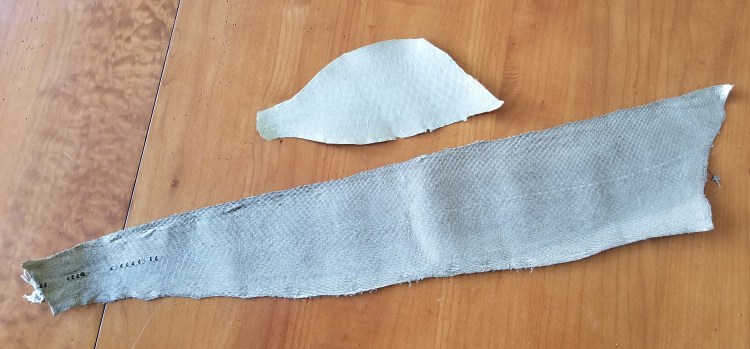
I saw the fish leather booth at the festival again this time, so I bought two pieces to give my daughter as a gift. The smaller piece in the photos below is Tilapia, and longer piece is Salmon. She recently learned how to tan hides herself and has been making cool things out of leather such as bags, backpacks and clothing items. I hope she can use the fish leather for a small project, or as trim on a larger product.
The smaller piece if Tilapia leather, the longer piece is Salmon leatherCloser up view of the fish leather
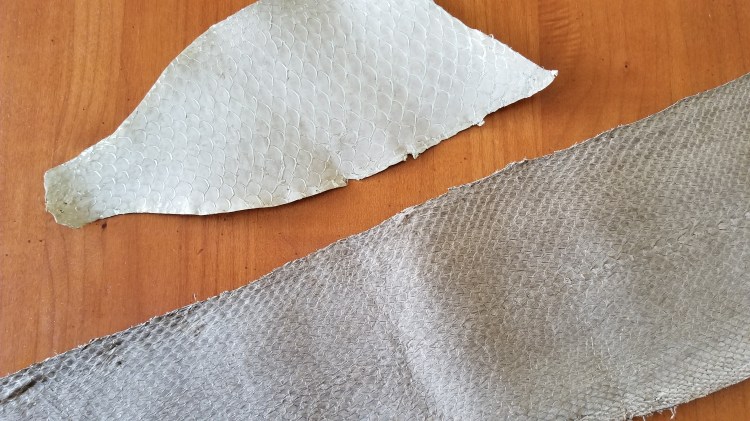
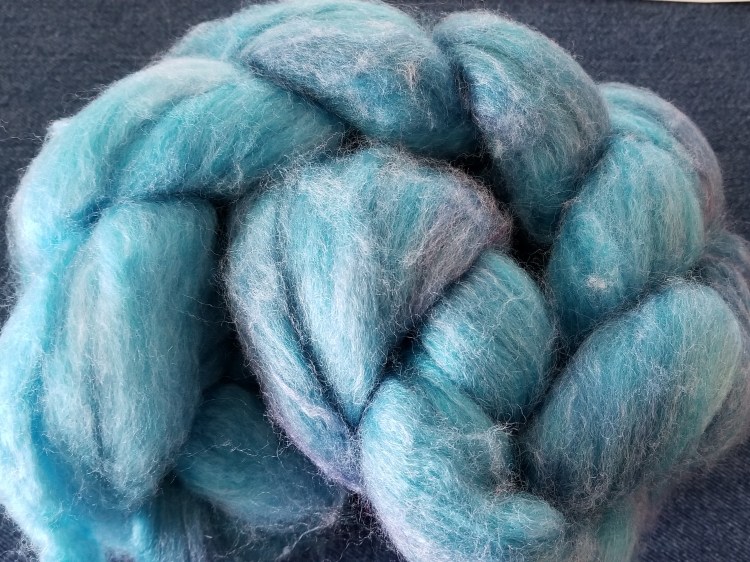
The last thing I bought on this Mother’s Day outing was some roving ready to spin, made out of merino wool, bamboo, and nylon in pretty shades of blue with a little purple.
60% Merino Wool, 30% Bamboo, 10% Nylon
I had not worked on a spinning project since last fall, so I was excited to start spinning the merino/bamboo/nylon fiber right away. I had the idea of making sock yarn, since I have been into knitting socks, and it is the right combination of fibers for that. However I don’t think I can get it thin enough and also there is somewhat of a risk that they will not fit right. It would be safer to use this hand spun yarn in a woven scarf, with some other commercially prepared yarn. Following are photos of the fiber being spun into singles (one ply) yarn, in process and then on two bobbins completed.
Spinning the wool / bamboo / nylon blend fiberThe fiber spun onto two bobbins
Normally when making hand spun yarn I divide the fiber into equal parts by weight and then spin onto an even number of bobbins. Once the yarn has all been spun into singles, I make two ply yarn by spinning two singles together. Invariably, even though they have the same amount by weight, one of the bobbins will have more yardage and so at the end of plying the two singles together there is still some yarn left on one of the bobbins. I had heard about plying from both ends of a center pull ball of yarn, so that you will not have any waste, so I decided to try that. I used my ball winder to make center pull balls out of each bobbin of the singles yarn. At one point in the process the yarn broke, so I just overlapped the ends together and kept going.
Center pull balls of yarn from each bobbin of singles yarn
I plied two strands of yarn from one of the center pull balls by using the end coming out of the middle, and the other end coming off the outside. It turned out to be difficult as the yarn coming off the outside kept twisting around the strand coming from the middle and getting tangled up. Maybe there is a way to avoid this problem but I did not stop to research it. I had to keep stopping to get the singles yarns lined up nicely for plying, so it took longer than it usually does, but finally I got to the spot where the two ends met and no yarn was leftover.
I should have done some research on this method of plying, but instead I decided to split the second ball of yarn into two balls and then ply those together so I would not have to fight with tangling strands. I used my ball winder and scale to wind another center pull ball from the end of the first one, until they were the same by weight. Then I was able to ply those two together using one end from the center of each ball, ending up with only a couple of inches of waste when one of the balls ran out before the other one. When I got to the place where the yarn had broken, I overlapped it and keep plying. It blended together nicely and looked normal, and I am hopeful it will not come apart later.
When hand spinning, it is challenging to spin the fiber so that the yarn comes out with a consistent thickness throughout the entire supply of fiber. There are tips for how to do this, but I always feel that I am doing well if I am actually able to spin my fiber into any yarn, much less to spin it so that it is all exactly even. When the two skeins of two ply yarn were complete, I measured the length and weight of each. One skein was 2 ounces and 130 yards. The other one was 2.2 ounces and 158 yards. Using some math to determine the yards per pound, which is a way of measuring yarn, it was not a surprise that one of my plied skeins of yarn was a bit thinner than then other one. It is not enough to cause a problem. Other than that, I was happy with how it turned out.
It will be a while before I get around to doing any more spinning as the busiest time of summer is coming up. There will be people coming and going at the family cabin, family visitors at our house, our annual family reunion at the cabin, and a girls trip at the end of July.
I love eating fresh home grown vegetables, but I do not enjoy the work necessary to have them. I like the look of pretty flower gardens, but I don’t like working outside in the dirt to make that happen.
At our old home in the Twin Cities we had an au naturale yard with a few flowers in the back and side of the house, and a couple of pots of flowers on the front steps and in hanging baskets. When my first child was born I got rid of all the indoor plants because that was just one too many things to manage. If someone gives me an indoor plant today, it looks nice for a little while until it dies because I don’t take care of it.
My parents always had beautiful immaculately manicured yards that they landscaped themselves. They had flower gardens, a rhubarb patch, a small vegetable garden, apple trees, raspberry bushes, and border plants around the house and side yards.
Now that we live in their house, it is hard to follow in their footsteps. I am afraid it isn’t going to happen. I have other things I would rather do with my time than garden, such as knitting, spinning and weaving, and Wayne likes to fish and golf. Normally Wayne takes care of most of the outdoor chores and I do more of the indoor chores. I will help outside when necessary, he will help inside as needed. But no way is Wayne going to spend all day every day all summer maintaining the yard and gardens like my dad did.
Just mowing this big yard takes many hours, and Wayne also regularly mows the large lawn at our family cabin property near by. Wayne read an article recently advising that the ideal timing for moving a lawn is once or twice a week. Around here at this time of the year with normal rain levels, the lawn needs to be mowed about every three days. One time my parents planted native prairie grass in a couple of areas of the yard to reduce the amount of mowing and provide a welcoming environment for insects and animals. What happened was that thistles took over in the prairie grass. My dad was spending more time attempting to remove thistles than he had been on mowing, so he gave up and returned the lawn to regular grass.
We are doing what we can to make the yard look presentable by maintaining one annual flower bed, some hanging baskets and pots of flowers in front of the house, as well as low maintenance border plants, and trying to keep the weeds at bay. We are also keeping up the raspberry and rhubarb patches, and growing a few vegetables.
At one time there were a couple of apple trees, but the sandy soil is not ideal for them. They did not make it and eventually were cut down. Maintaining the raspberry bushes is very confusing, since there are different kinds and conflicting suggestions for when and how to prune and manage them. The raspberries have been meaningful to our children, nieces and nephews over the years to the point that our daughter and two nieces got matching raspberry bush tattoos. So I guess we are obligated to keep them going. Two years ago the raspberry plants were looking very sad, so we dug them all up and started over with two different types of plants. There were a minimal number of berries last summer. We’ll see what happens this year. Following is a photo from years ago when my parents had an especially productive raspberry season. This is not what it looks like now.
The raspberries in a good year when my parents grew themMatching cousin raspberry plant tattoos
The weeding is especially discouraging. I can spend hours picking out all the weeds that fill in between the bricks in the front walk and patio, and in the front flower garden. In a matter of weeks they are back. A few years ago we started getting an invasive species of weed from hell in the side yard areas. At first it was just a few plants here and there, but over the years it has taken over in all the border areas of the yard, and even along the road. The roots look like a miniature carrot. If these are edible, we won’t have to worry about going hungry in case of a global food crisis. The next two photos show the horrible weed growing in with some Hosta and among landscaping rocks, and then a close up of one plant I pulled out.
The awful weed growing in the Hosta and between the landscaping rocksThe weed from hell that looks like a mini carrot
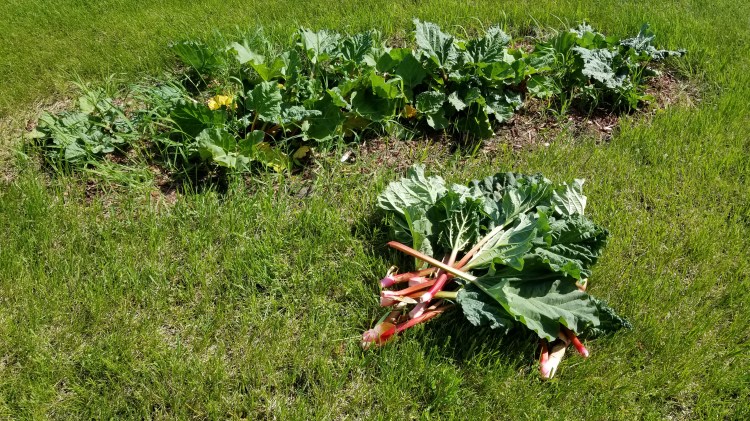
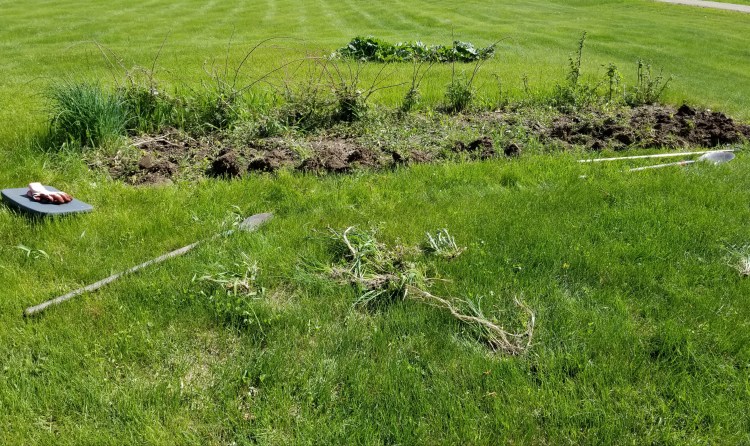
We got a late start in the yard this year due a cold spring and fishing season. I finally did a little weeding in the front of the house on May 29 to prepare that area for annual plants. On May 30 Wayne got out the shovels and tools to turn over the vegetable garden. Depending on where you live, this might seem very late. It is a bit later than normal here, but not that much. I went out to help and found that there were rhubarb stalks ready to pick!
Rhubarb ready to pick The raspberry bush and vegetable garden area being prepared for a new seasonGetting the garden ready to plant a few vegetables
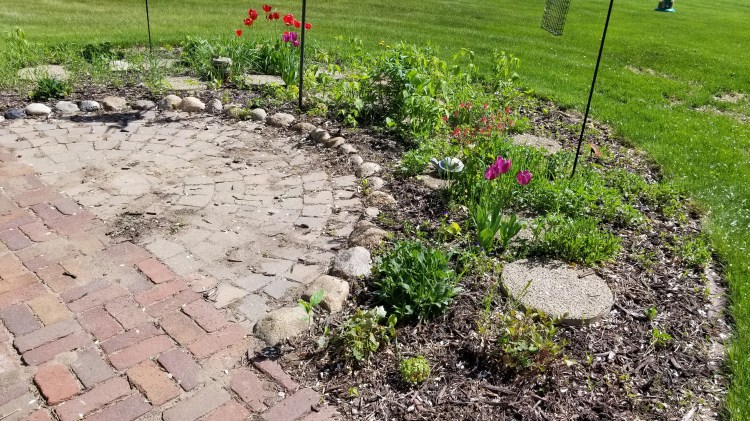
The flower garden in front of the house was full of tall grass and weeds. Following are photos after I had done some of the weeding, and then after annual flowers and new mulch were added. It looks decent but not as nice as when my parents were here.
Before photo of the flower garden in front of the houseFlower garden after weeding, adding annual plants, and spreading mulch
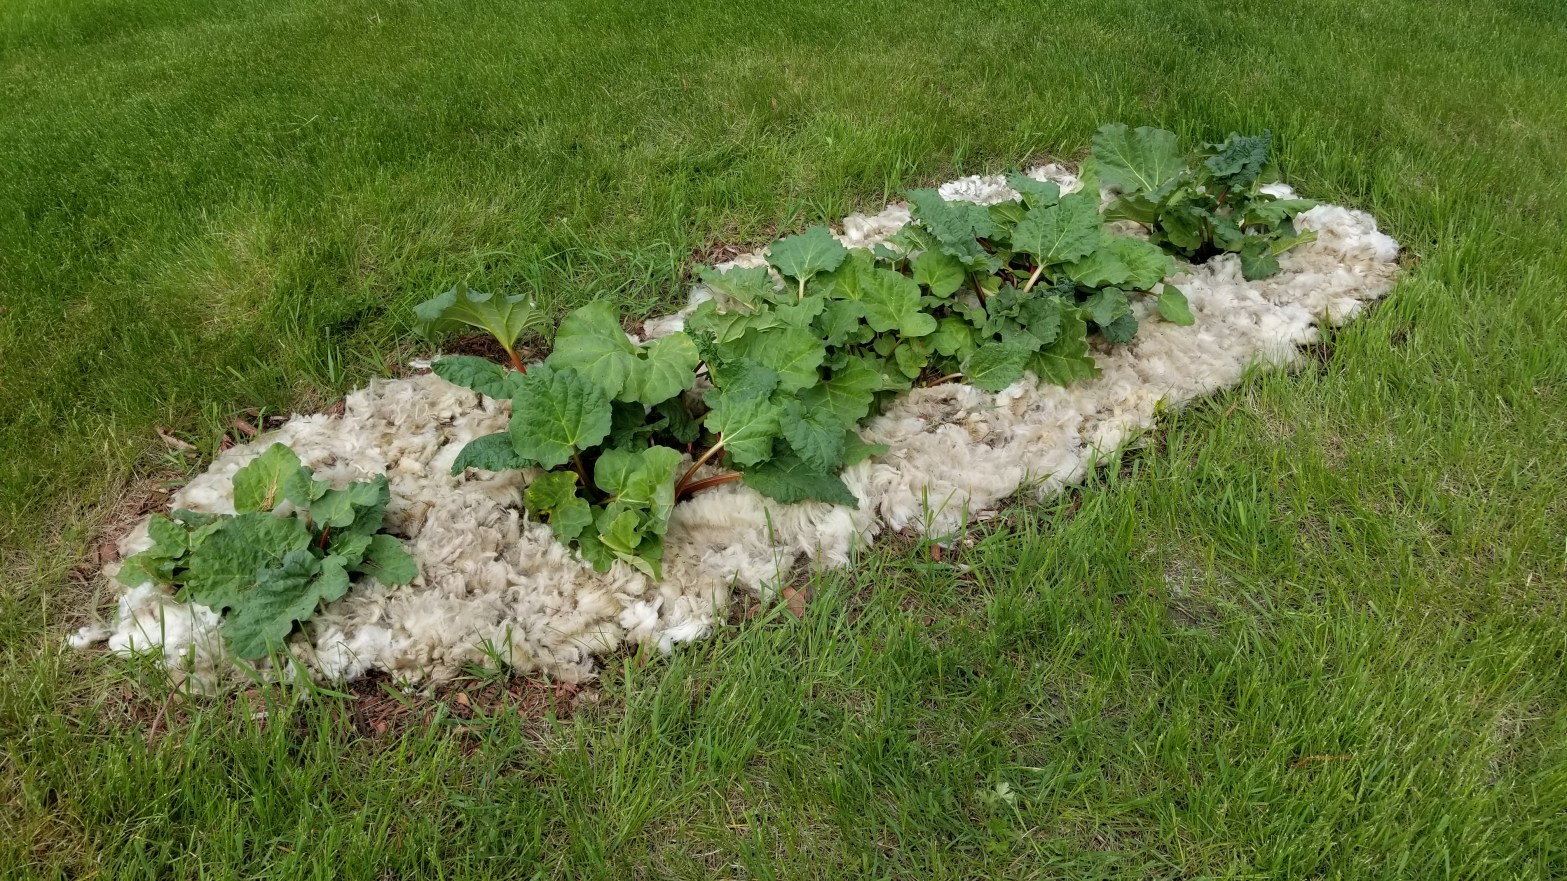
At sheep shearing day they were giving away garbage bags of fleece waste to use for mulch. It works great for mulch by protecting the soil from extreme temperatures, holding moisture, repelling critters, keeping weeds at bay, and providing nutrients. I brought a bag of the stuff home and although Wayne was skeptical, I used some around the rhubarbs and raspberries after pulling out the weeds. It looks unique and I wonder what folks walking by on road are thinking.
Rhubarb bed after weeding and adding sheep fleece mulch
I don’t mind picking fresh produce later in the summer. The green beans usually do very well and we eat them almost every day. I will be happy if I get a couple of carrots and beets. We have had mixed success with tomatoes, but any that we get are so much better than the hard tasteless version at the grocery store. Watch for another post in August with details about the results of our harvest. There might be a photo with my favorite summer meal of freshly caught fish, just picked green beans, locally grown corn on the cob, potatoes from my uncles larger garden, bread from the bread maker, and rhubarb pie for dessert.
I am willing to assist with the work that is necessary to have a nice yard and small garden as long as Wayne is up for doing most of the work. But if some day, by some unforeseen event beyond my control, I end up by myself, I would have to move to a condo where there is no gardening or yardwork.
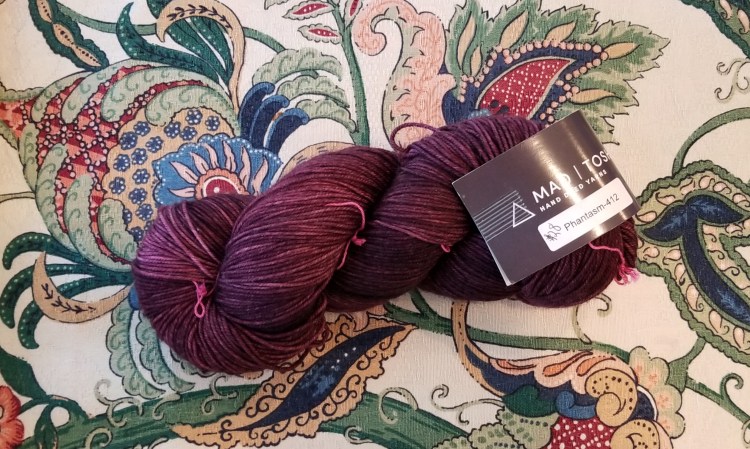
While we were in Arizona over the winter I knit another pair of socks using Madeline Tosh Twist Light yarn. This is the same merino/nylon blend and the same needles I used in two previous pairs of socks. I like this yarn and I wanted to see how variations in the pattern would affect the fit.
The purple pair I knit before were cuff down with an afterthought heel. The off white low cuff sneaker style pair were also knit cuff down, but with a Fish Lips Kiss short row heel. They both had 64 stitches around which turns out to be a little too big for my narrow foot. At the time I knit those, I was still getting comfortable with the construction of socks, and I did not understand how to get them to fit. There are suggestions for how many stitches to use for a ladies sock, but apparently my foot is not average.
This time I started at the toe, knitting two at a time. The other pairs are a little too loose, especially in the ankle, so this time I used only 56 stitches around instead of 64. I came up with that by measuring the other pairs, and by looking at my cardboard foot template as I knit the toe.
In order to knit two socks at a time, I had to divide the skein of yarn into two balls. I used my ball winder to make one big center pull ball, and then used the outside end from that to wind another ball, until the first one weighed half of the original weight. Interestingly, the first larger ball was very dense. When I wound the second ball with half of the yarn from the first ball, it looked a lot bigger and was less dense than what was left of the first ball, although they weighed the same.
Toes completed, the two balls of yarn weigh the same
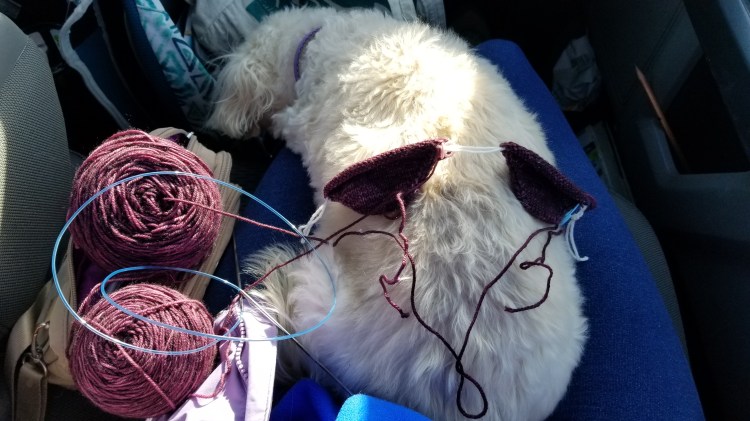
I got a good start on this project knitting in the car on the way to Arizona, with the dog napping on my lap.
Knitting in the car with the dog on my lap
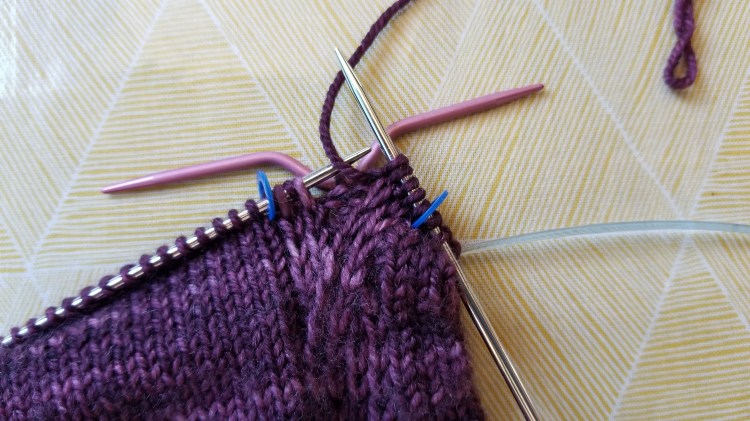
After getting some of the toe done, I came across a sock pattern called Rayanne Socks with a cable design going up one side. I decided that would be a good challenge and look interesting with the variegated yarn. The pattern uses two different yarns, alternating every other row, but I used the same yarn for every row.
Beginning of the cable pattern
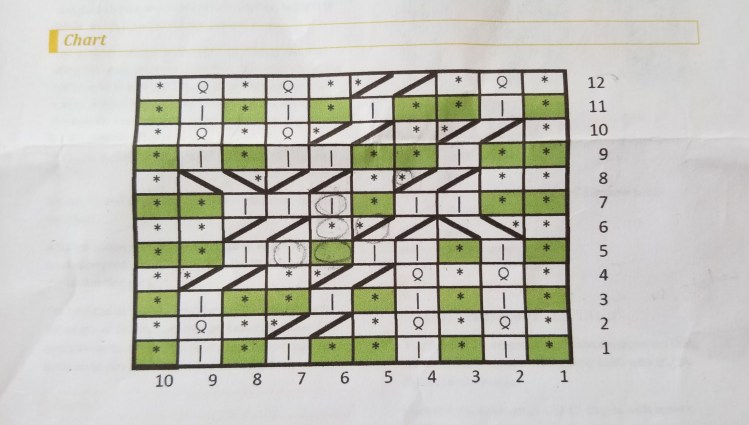
A cable pattern in knitting uses a small extra needle with a bend in it to hold one stitch while you knit the next stitch, and then you go back and knit the stitch on the cable needle. The stitch on the cable needle can be held in back or in front as you work the next stitch, which results in swapping the position of two stitches and gives an overlapping curving pattern. The Rayanne sock pattern has a chart with 12 rows showing the pattern. Within the 12 rows of the pattern are three different variations of cable stitch indicated by slanting lines and an asterisk. It looks intimidating at first, but I got the hang of it after several repeats. Following is a photo showing the chart.
Cable pattern chart
This pattern required a lot more attention and ways to keep track of things than I usually need. I had stitch markers at the beginning and end of the cable pattern on the needle, a stitch marker at the beginning of the round, the row counter, and the cable pattern chart.
The cable needle ready for the next rowToe and part of the foot complete
Usually I would stick the cable needle through the toe of the sock in progress until I needed it again. One time I could not find it, and looked all around on the floor, in the cushions of the chair where I usually knit in the RV, and in the front seat of the truck. I could not find it anywhere. I thought I was going to have to buy a new one and even checked the knitting aisle at Walmart when I was there for something else. Walmart has some yarn and knitting supplies, but they did not have a cable needle. I knit a couple of rows using a straight double pointed needle I had on hand, which actually worked pretty well. Then I found my missing cable needle. It was pushed all the way inside the ball of yarn! The cable needle is almost the same color as the yarn and about the same length as the diameter of the ball of yarn at that time. I got a laugh from that and was very relieved to have it back.
A stitch on the cable needle, held in back
I tried another type of heel that I found on Pinterest for this pair of socks. The Fleegle Heel involves increases on each side of the heel while continuing to knit the stitches on the front of the foot, until you have double the amount of heel stitches that you started with. Short rows are then used to decrease the heel stitches back to the original number. The pattern is free on the author’s blog and on Ravelry.
While knitting the increase rows for the heel, I was also continuing the cable pattern on the front. I made a chart to keep track of which row number of the heel I was on, which row of the cable pattern I should be on, and how many total stitches I should have. Add that to the list of ways to keep track of things for this pair of socks.
My row chart came in handy when I had a knitting crisis that was my own fault. I know better than to try to knit on a complicated section of a pattern when the light is not good, I am tired, the TV is on, and the dog is on my lap. In this case it was late in the evening with the TV on, and the dog was wining to get on my lap. I should have asked Wayne to take care of her, but instead I leaned over across my knitting, picked her up and plopped her on my lap ON TOP OF THE KNITTING. Then when I tried to extricate the knitting out from under her, it was tangled in her feet and tail and she growled at me. Wayne reached over and lifted her off, but in the process one of the needles came out of the knitting and a couple of stitches started dropping back to earlier rows. It is easy enough to put the needles back in if there is just plain knitting. But this was the section with the cable pattern. I was in tears at this point and set the whole thing aside until morning.
I was in better shape the next day with a good nights sleep and natural light. However I had to rip the knitting back several rows to get to a place where I could make sure the cable pattern was restored correctly on the needles. There were other times when I had to restore dropped stitches or reknit sections and it is likely there are a couple of mistakes sprinkled throughout the sock. The cable pattern, along with the variegated shades of color in the yarn are good for camouflaging any minor problems. No one will know.
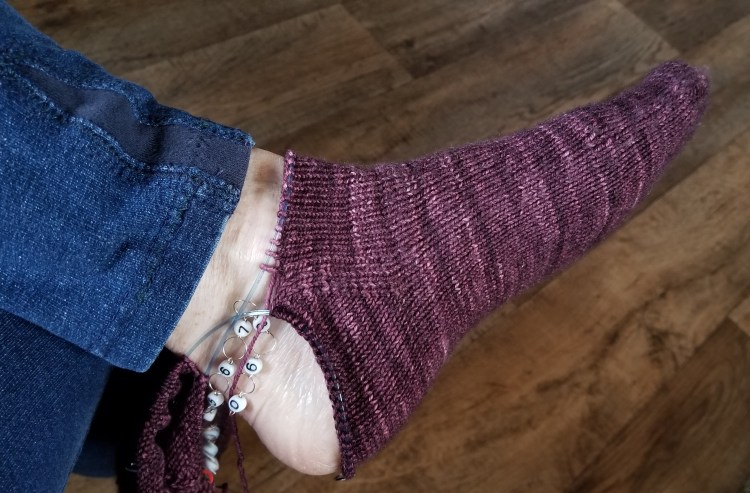
Following is a photo with the sock in progress on my foot after most of the heel increases had been completed. The pattern says to us “lifted” increase, but instead I used “knit in the front and back”.
Increases for the heel
You can see in the photo my leggings that were too tight in the ankle. First I had just slit open the side hem and worn them for a year with the fabric at the ankle flapping around. Later I sewed a piece from an old pair of sweat pants in the space with zig zag top stitching. It is not pretty but works. Now there is a hole near the knee, and the fabric is starting to wear out around the inside of the thighs. Maybe time to get a new pair.
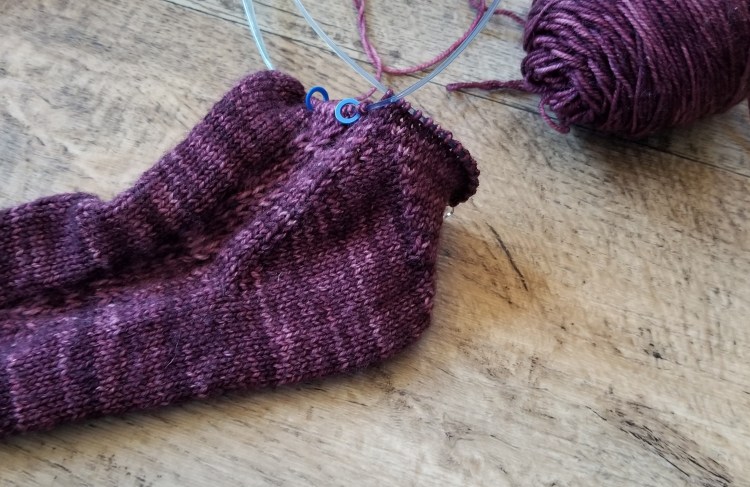
The Fleegle heel pattern has instructions for avoiding a hole in the corner that can be applied to other types of sock heels. It worked out very well. Following are photos showing the completed heel from the side and back.
Side view of the heelBack view of the heel
I like this heel pattern. There are not any funny gaps or holes at the corners of the heels. The Fish Lips Kiss Heel pattern is pretty good too as far as no gaps or holes, but you do have to pay attention and pull the yarn snugly at a couple of key points.
When you are done with the heel, there are two extra stitches so you have to decrease one more time on each side to get back to your original number. In order to do 2×2 ribbing, I needed to have the total number of stitches divisible by four. My sock was barely big enough around, so I did not want to decrease the two extra stitches. Instead I added two more to get up to 60 stitches around for the ribbing. I probably should have had that many stitches from the beginning but it was too late for that at this point.
It was a relief to be done with the cable pattern which required more concentration than ribbing, and was more prone to mistakes. The ribbing is mindless.
It was interesting trying out the cable pattern going up the side of the sock, but I am not sure it was worth the extra energy required. I would most likely be wearing these socks with pants, so the pattern will not show anyway.
The other socks I made with the same yarn and needles seemed too loose, but this pair is a bit too tight. The yarn is the same as the other pairs in a different color, but does not feel the same. If I could start over I would use 60 stitches around instead of 56. I also made the foot part a bit too long, although there were some very specific instructions using the your actual row gauge to determine when to start the heel.
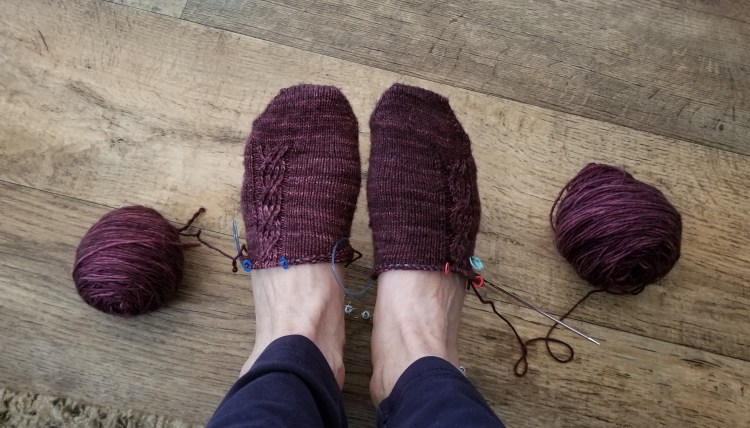
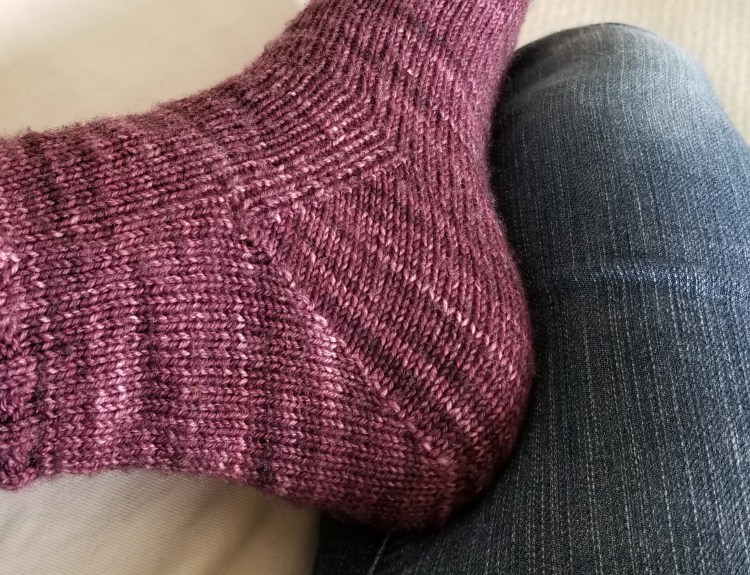
Completed socks back at homeClose up of the heel
Following is a photo of the three pairs of socks made with different colors of the same yarn. I liked knitting the Fleegle heel, but I wonder if the way the heel slants back instead having more of a right angle contributes to it feeling a bit too tight. Maybe the cable pattern pulls the stitches closer together to make it tighter. Or maybe it feels tight because I used 56 stitches instead of 60. There are so many variables between the yarn, the heel pattern, and the stitch count it is hard to know what is causing what. Maybe my next pair will be the perfect combination.
Three pairs of socks using Madeline Tosh Twist Light yarn
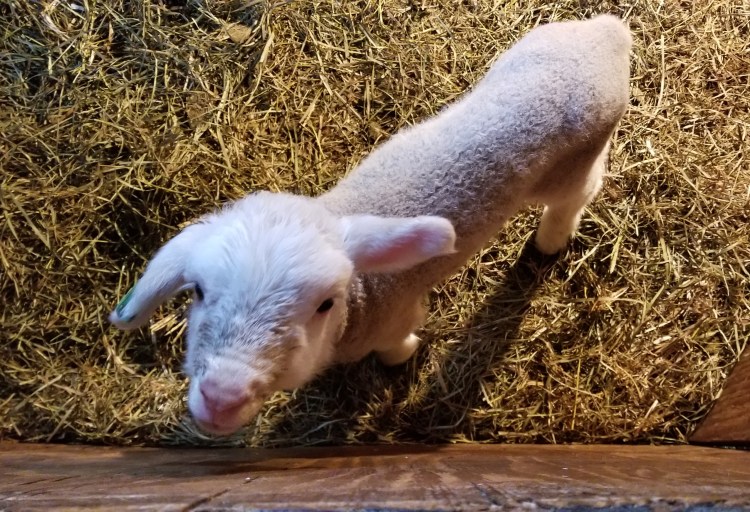
I love shearing day at Joanie and Dave Ellison’s sheep farm. There was a time when I dreamed about owning sheep, but I really just want to look at the sheep and let someone else do the work. Getting up every morning to feed the sheep in all weather conditions does not appeal to me. My ideal morning is getting up at 8:00 am, and then catching up on email, news and Facebook on my laptop for an hour in my pajamas, while drinking a hot mocha. Holding a newborn lamb is amazing, but I don’t know about checking on the ewes every few hours all night during lambing time. On a nice day I could sit for hours outside in a chair with my knitting watching the sheep. However, if the weather is nasty I would rather be inside watching out the window.
Participating in shearing day gives me a chance to be part of the process on a limited basis. It is exhilarating to be in the barn with the sounds and smells and movement. Two years ago I was all prepared to go, but there was a blizzard that day and it was not safe to drive to the Ellison’s farm 10 miles from us. Last year was still in the middle of the pandemic and I did not even inquire about helping. This year we got home from Arizona just in time. My sister and a friend with her young adult daughter came from Minneapolis to attend with me.
Some of the photos below were taken this April, others were taken a different year. They all show what it is like in the yard and barn during the shearing event.
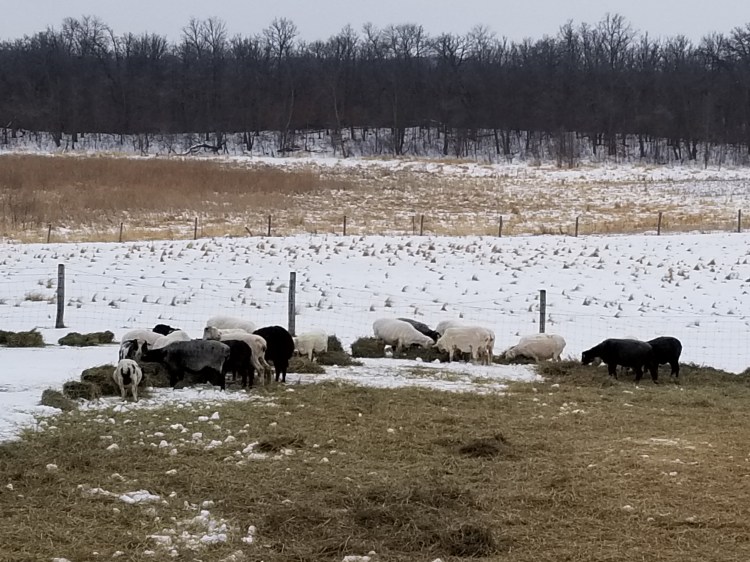
Shearing is most commonly done in the spring before lambing. The Ellisons have usually done shearing near the end of January, which is determined by their ideal schedule for lambing. When the sheep are sheared in January or February, it is cold but the sheep are comfortable and will stay close to the barn, having their lambs there rather than out in the field. This year shearing was at the beginning of April, after the new lambs had already been born. The reason was related to covid rather than lambing. They wanted to hold off until it felt safe to invite a group of people over, and when they could have the doors to the barn open.
The only heat in the barn comes from the animals and a heat lamp over the shearing space. There is enough activity going on so that the temperature feels comfortable. One year it was minus 10 degrees Fahrenheit on the morning of shearing. This year it was around freezing at 8:00 am, but by midmorning there was a muddy mess outside the barn. I was grateful for my rubber boots which can be easily cleaned off.
Sheep with their coats on waiting to be sheared
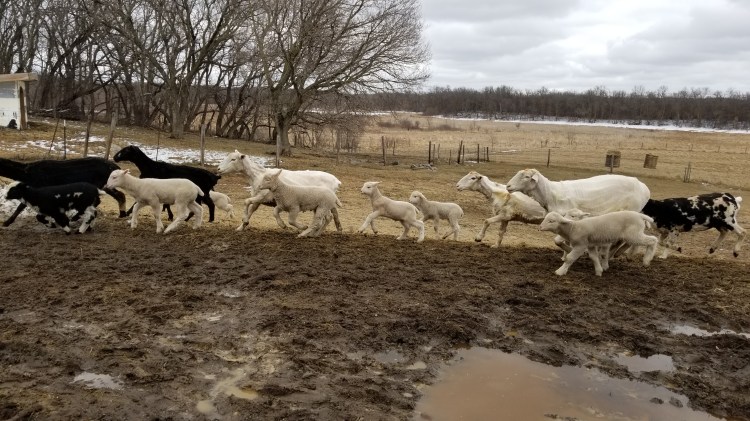
On shearing day all 35 sheep are in the barn which is divided into areas by movable fencing sections. This year forty or more lambs were there too which added to the cuteness and noise level. The sheep waiting to be sheared are in one area. There is another section set up where the shearing takes place. The rest of the barn is open for helpers performing related support tasks. The process starts with making an opening in the fence so that four or five sheep from the waiting area can be moved into the shearing area. This can be chaotic with sheep getting spooked, running in circles and trying to get away or jump over the fence. Next Dave Ellison grabs a sheep inside the shearing area by the leg and flips it over on to its back, or this might take several people. The sheep’s coat is removed. Yes, the sheep wear coats to keep their fleece clean. Once on its back the sheep will normally be somewhat docile and allow helpers to trim its hooves and give it vaccinations with a needle. Another helper notes the ID for the sheep from a plastic ear tag. The ID gets written with sharpie marker on a large garbage bag which is used to store its fleece.
Oh no! A tiny lamb with a broken legAnother young lamb
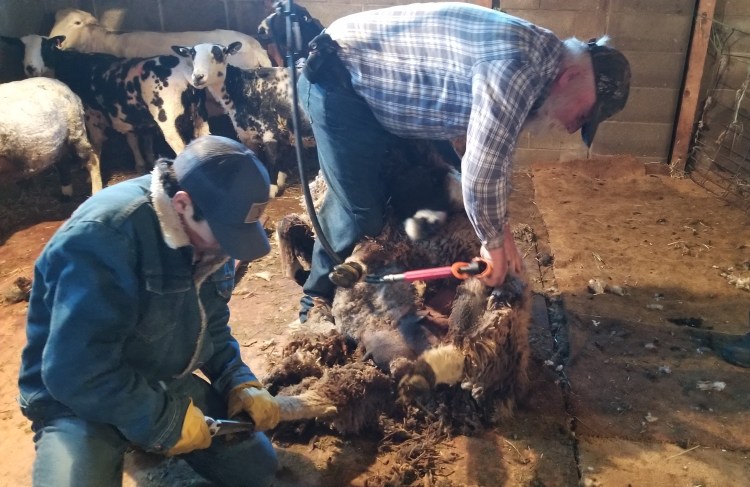
When the trimming and vaccinating is done, the shearer uses special electric clippers to quickly shave off all the fleece which falls in a big mound. At this point the “bagging” helper scoops up the fleece, trying to roll it up in a bundle, and stuffs it into the garbage bag with the correct ID for that sheep. The weight of the fleece is determined by hanging the bag on the hook of a scale suspended from the ceiling. The weight is written with sharpie marker on the bag next to the ID. Fleeces can vary in weight from around 2 to 6 pounds before any processing.
Shearing and nail clipping in progressDocumenting that I was there
When one group of sheep have been sheared, they are very happy to be let out of the barn. The next group are not pleased to be herded into the shearing area.
Shearing one sheep takes only a few minutes, so the bags of fleece start to pile up while another group of helpers work on “skirting” the fleeces which takes longer. Skirting is removing the dirty or undesirable parts of the fleece that are not suitable for processing or using in a fiber project. The fleece to be skirted is dumped out of the bag on to a surface that looks like a giant cooling rack hanging from the ceiling. When skirting is complete the fleece gets rolled up, put back in the garbage bag and tossed into another area.
Joanie with a huge fleece on the skirting rackHelpers skirting a fleece
Shearing starts first thing in the morning. The time goes fast and by about 10:30 am it is time for a break of cookies and coffee while standing around in the barn. People who where bundled up upon arriving have shed layers and some are in shirtsleeves depending on the temperature outside. Trips to the house to warm up or to use the bathroom are allowed. After the mid morning break, work resumes in assembly line fashion until early afternoon when all the sheep have been sheared and fleeces skirted.
Other tasks for helpers include sweeping and picking up bits and sections of fleece from the shearing area and from under the skirting rack. All the reject pieces of fleece get saved and used for mulch. Another helper task is using a plastic sled to drag bags of fleece from the “complete” pile to a shed for storage until they are needed.
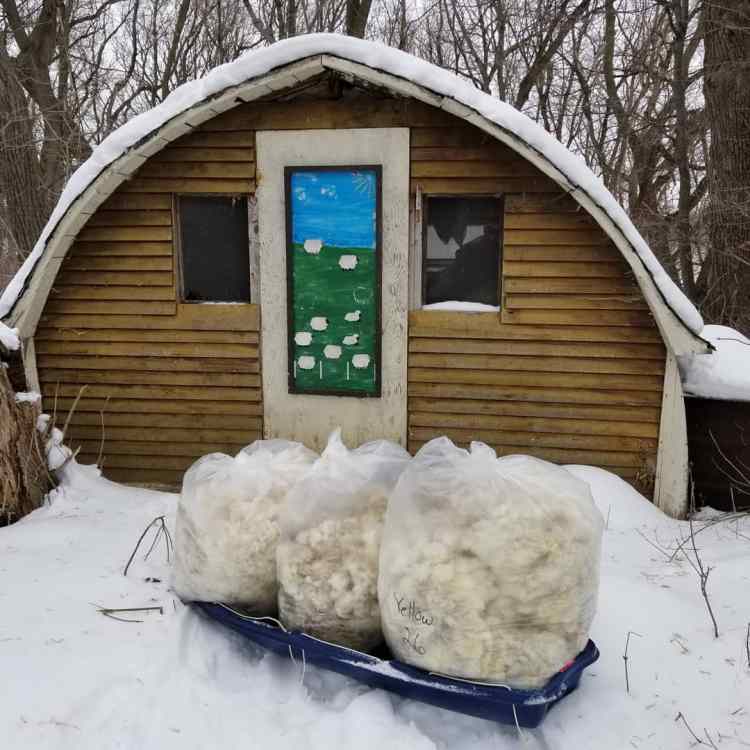
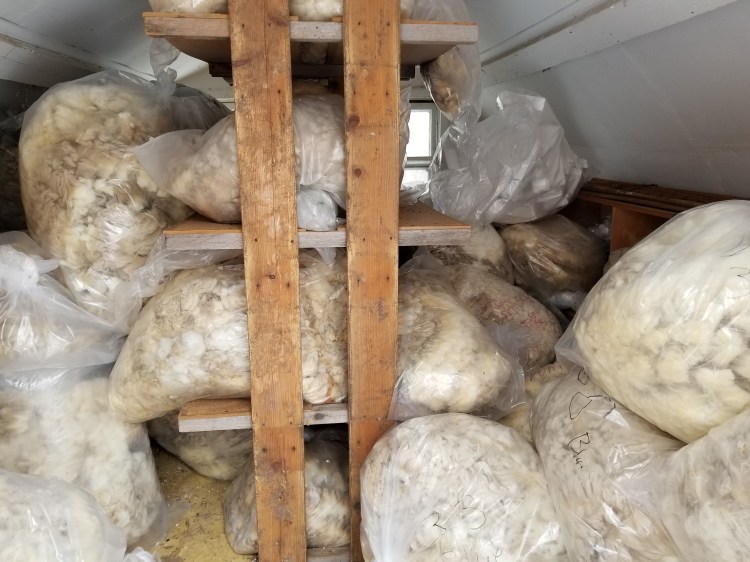
Bags of fleece on their way to the storage shedShed where the fleeces are storedMany fleeces in the shed are waiting for processingDave Ellison in the yard
Lunch and social time follows in the house. Later, Joanie will check over the fleeces and do more skirting. Most of them are sent to a mill for processing into roving or yarn. Like fiber day, it is a fun time interacting with an eclectic and interesting group of people. Helpers are offered some fleece or roving in exchange for their labor. I have more than I can use already stuffed in my stash closet, so I did not take anything this time. Participating in shearing day is a wonderful experience. I think many city people would pay them to be a part of it!
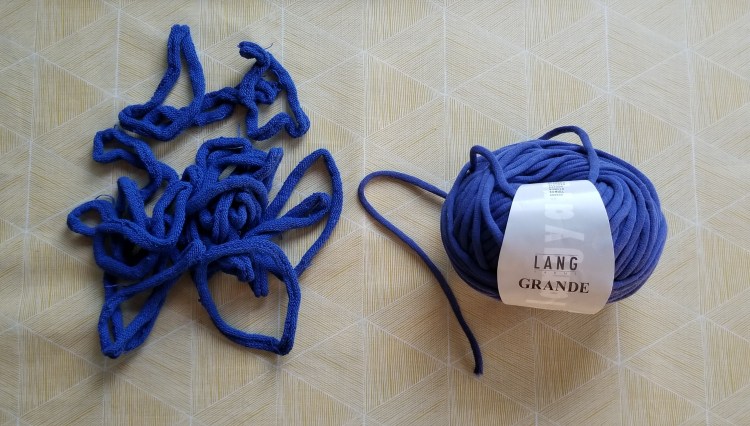
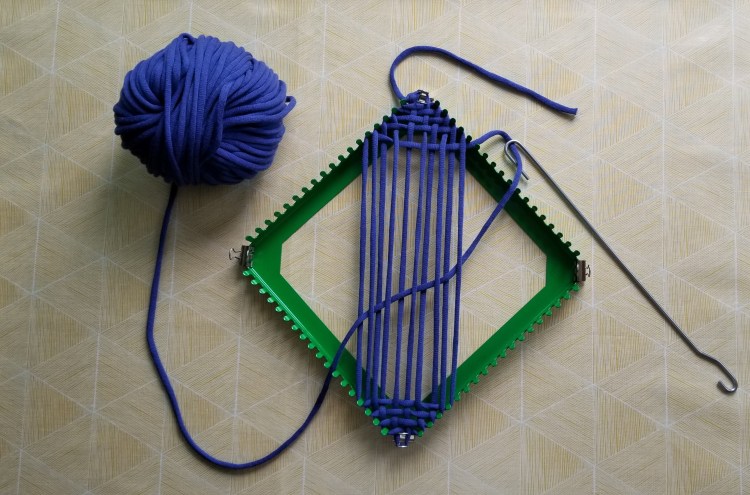
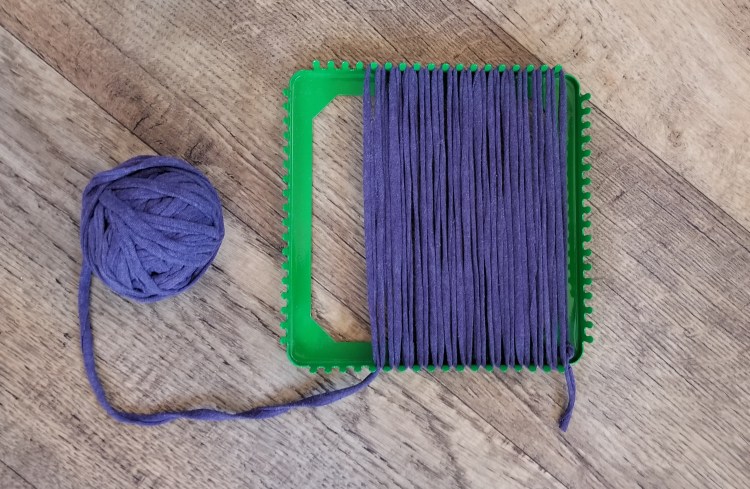
After finally completing a pair of socks I worked on for most of our two months in Arizona, it was time to dig into the supplies I had in the RV and decide what to work on next. To mix things up a bit, I decided to experiment with weaving on my potholder loom. The next photo shows some of the cotton loops that came with the potholder loom, next to some 100% cotton yarn I had brought that is like a stretchy tube.
The stretchy loops that came with the loom next to some stretchy cotton yarn
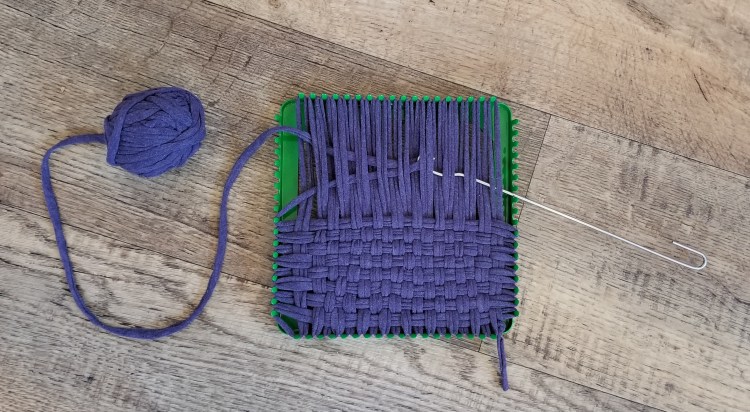
I found some YouTube videos with instructions for diagonal continuous weaving on a pin loom or potholder loom. A pin loom is a basic small loom with nails or posts on all sides for wrapping the yarn around. The potholder loom does not have posts in the corners which is necessary for diagonal weaving, so I had to improvise with office clips which can be seen in the photo below. It is hard to communicate the process with words and photos. I had to watch several different videos, but once I figured out how diagonal weaving works it was easy. Starting in the upper corner, you alternate between weaving the yarn across over and under the vertical rows, and then wrapping the yarn vertically around the next set of pegs on each side.
Beginning of diagonal weaving on the potholder loom
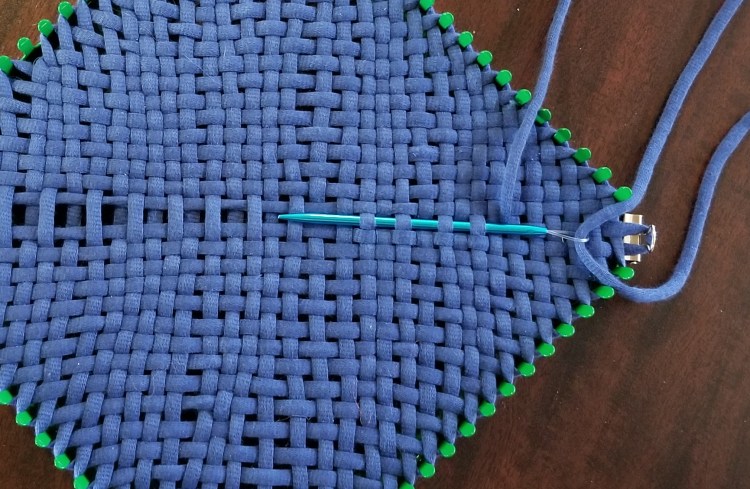
As you get closer to the middle, it is hard to get the metal hook through the open space, so I started using a crochet hook. That was easier, but the hook part was not really deep enough to hold on to the yarn. For the very last row I used a darning needle to pull the yarn through.
Using a crochet hook instead of the metal hookUsing a darning needle for the last row
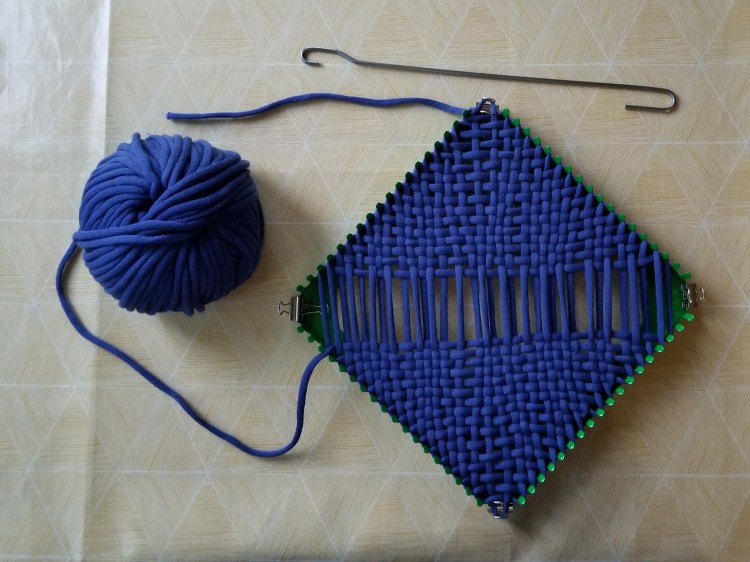
The weaving looks very uneven, but once removed from the loom it naturally evens itself out.
Done with weaving
The next photo shows the weaving off the potholder loom. It is not thick enough for a potholder, but would make a very nice washcloth. It could be used with the sides left as is, after weaving in the ends.
Removed from loom
Later I crocheted around the sides to give it a firmer border, but in the meantime I had another idea. I had read about making tee shirt yarn, which would be similar to the stretchy cotton yarn in the project above and suitable for weaving on the potholder loom. When I told my husband I wanted to go to the thrift store to buy a tee shirt to make yarn, he could not wrap his head around it and made a comment about how that did not make any sense. Soon after that I did make a trip to Goodwill and bought a plain purple tee shirt for $2.29. I had to browse through quite a few racks to find a plain tee shirt that was appropriate with no side seams. I wanted a solid color, although you could end up with an interesting effect with some graphics on the fabric.
One of the fun outings we had in Arizona was getting together with two couples we know from Minnesota who were also snowbirding there. Deb is a former coworker from the Twin Cities who is a knitter. Deb’s husband and Lauri’s husband were coworkers. Lauri is a knitter and lives with her husband in Ottertail County 30 miles from our home. Deb connected me with Lauri after we moved to the lake. Even though we all live in Minnesota, it seemed easier to get together in Arizona. The three couples met at the house Lauri and her husband were renting in Sun City, on the western side of the Phoenix metro.
Sun City is the original adults only retirement community. At the time it was a brand new concept. When the first model homes were available for viewing and purchase in 1960, the developers where not sure what to expect but it was an immediate success. It must have been out in the middle of nowhere back then, but now it blends in with the other suburbs of Phoenix.
One of the original Sun City model homes is now a museum and is on the National Register of Historic Places.
The guys played golf while the ladies visited and worked on fiber projects, while sitting outside under an overhang in the shade. The temperature was warm but very comfortable and there were NO BUGS. That is an amazing thing to Minnesotans where the mosquito is sometimes said to be the state bird. It was so pleasant sitting there relaxing, socializing, comparing notes on snowbirding and working on projects. I had not decided for sure what to work on, so I brought my entire stash of supplies that I had in Arizona on this outing. It seemed like a good time to try making the tee shirt yarn.
I had watched some YouTube videos with instructions. As with the diagonal weaving, it is hard to describe with words and still photos. The first step was to cut the shirt body and sleeves off from the bodice, and then cut off the seams. It is possible to use almost all of the fabric for yarn, but the biggest bang for the buck is the body section.
Cutting up a thrift store tee shirt to make yarn
The next photo shows the main body of the shirt turned sideways with the bottom folded up almost all of the way, and then strips cut leaving the very top fold uncut. The instructions suggested cutting the strips about 3/4″ wide, but I did not measure. I just started cutting freeform, so my strips were not even or all exactly the same width.
The body section of the tee shirt folded over with strips cut, leaving the top folded edge connected
It is hard to see what is going on with these photos, but I then unfolded the fabric and repositioned it so the uncut part that had been folded at top was now flat and in the middle. Next I started cutting across diagonally from one strip over to the next strip. When that was done all the way across, the result was one long narrow strip of fabric.
Unfolded and starting to cut across the strips One continuous strip of fabric
The last step is tugging and stretching out the strip of fabric which makes it curl on itself and turn into yarn. The one long strip all stretched out was about 30 feet of “yarn”.
Stretching out the strip of fabric so it is narrower and curls on itself
Later after we were back at our RV I found another video with instructions for horizontal weaving on a potholder loom. This time the clips in the corners were not needed.
First I wound the yarn up and down vertically around each post. The yarn looks too blue in the next three photos.
Wrapping the yarn up and down around the pegs
Using the hook to pull the yarn across horizontally over and under each vertical yarn was similar to pulling one of the stretchy loops across and hooking it on a post.
Pulling the yarn through over and under going across
When I got to the last two rows the vertical loops started to pop off the posts. I had a struggle getting both the vertical and horizontal rows back in place and staying in the right place.
Weaving with tee shirt yarn complete
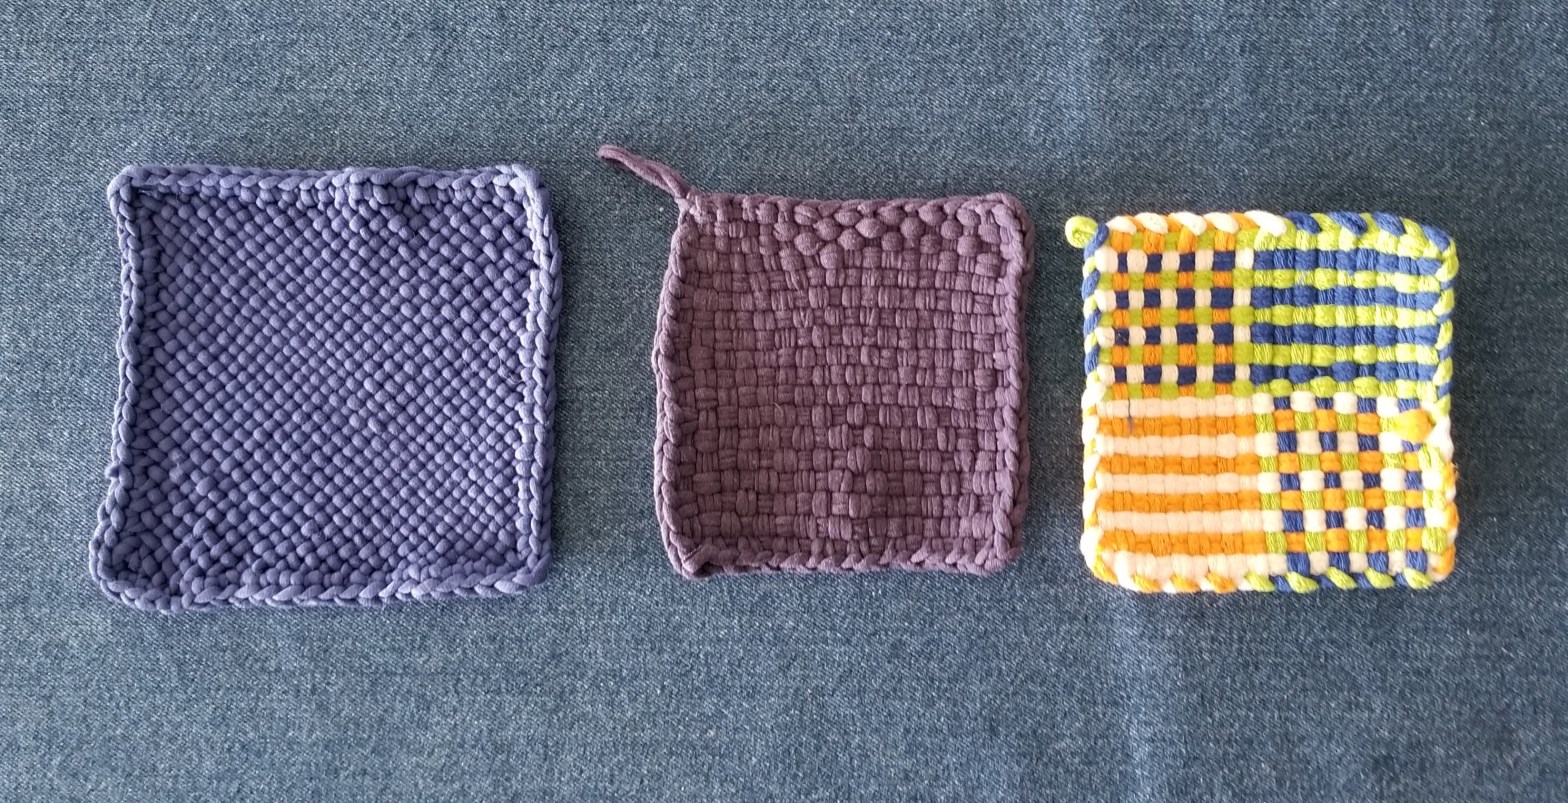
The last photo shows three items made with the potholder loom. First on the left is the washcloth with the stretchy cotton yarn after a crochet border was added. In the middle is the tee shirt yarn potholder. The rows at the top of the tee shirt yarn project where I had a fight to get everything in the right place look different than the other rows. It is very thick and good for a potholder. For comparison on the right is a potholder I had made earlier using the loops that came with the potholder loom.
Cotton yarn washcloth, tee shirt yarn potholder, cotton loop potholder
Potholder loom projects are small, portable, and do not take much time to complete. Weaving washcloths on the Rigid Heddle loom compared to the potholder loom takes a lot more set up time, and it is most efficient to make several at once. It would be possible to make a potholder on the Rigid Heddle loom with thick yarn, but it makes more sense to use the tool and supplies that are designed for it. I haven’t used the Rigid Heddle Loom for awhile since I did not bring it to Arizona, so I am ready to make something with that next.
We have been home now for a few weeks after our snowbirding trip to Arizona in our RV. We did not know what to expect, but after living in the fifth wheel trailer for two months I have some thoughts on how it worked out and what we might do differently in the future.
I have looked at many tiny and small house plans, and fun shed ideas online. I am always interested in reading about people who sold their houses and moved into a tiny home on wheels, are full time RVers, or are living with a smaller carbon footprint. I was never thinking about living in one for my main residence, but they are just so cute and would make a nice guest house or she-shed if one has unlimited funds. My husband says he would be happy living in a very small home permanently. I like the concept, but the problem is where would I put all my yarn and fiber stash and craft supplies? In addition to needing more space for my stuff, I spend more time inside than he does and there is something to be said for having some private space. For us, the RV is a way to live smaller on a part time basis.
In preparation for our winter trip to Arizona I had to think carefully about what clothes would fit in the RV. I packed a basic mix and match wardrobe including a limited number of long and short sleeve tee shirts that could be worn alone, or layered under a hoodie sweatshirt or polar fleece pullover, with navy blue shorts and pants in various lengths for warmer or cooler weather. There were also a couple more pairs of shorts, hiking pants, a quick dry wrap-around skirt, and two swim suits. I brought a few more clothing items and accessories for variety and in case we needed to get “dressed up”. I never wore the tee shirt dress, although the weather was starting to get warmer and I might have if we had stayed longer. I might as well have skipped the linen collared shirt, the cashmere sweater, and the cotton fashion scarves. We never went anywhere that required anything other than the most casual clothing. And it was cool enough in the evening that I needed layers which would have covered up a nicer outfit anyway.
You have to be vigilant about putting things away in the RV. It is easy to slack off and end up with clothes, jackets, and shoes laying around, dirty dishes piling up, and paperwork scattered around. I had places to keep all my clothes, but sometimes Wayne tossed clothes and shoes in the corner behind his recliner chair, which was not a good system. I am not sure if he was being lazy and not putting things away, or whether he did not have any other place to put them.
It hardly takes any time to clean in the RV. We brought a small stick style vacuum cleaner that comes apart into a hand vacuum. Making the bed turned out to be a bit more of a chore than I was expecting. There is space on each side of the queen size mattress, and even my six foot tall husband can stand up at the end of the bed. However the head of the bed is over the truck bed and one cannot stand there, so you have to lean way over in an awkward way to get the corners of the sheets on or to adjust the blanket and bedspread. In addition, there are night stands and cupboards butting up against each side of the mattress which are very useful, but also make it harder to make the bed.
Making the bed is not as easy as I expected
Some bigger RV’s and motor homes have a washing machine and dryer. We used the laundry room at the community building. Sometimes on laundry day I looked like Santa Clause walking a few blocks over to the building carrying a big bag over my shoulder. A few times if there was an especially big load I used the car.
I brought a travel size iron but I only used it once. A couple of times I wore something wrinkly rather than bother with the iron. There are ironing boards and irons at the community building laundry area, so that is an option if I decide not to bring the iron here in the future. However it does not take up much room so I might as well have it available.
When we were looking at RV models and floorplans, one of the features I liked was a fireplace. They are fake electric fireplaces, but still provide ambiance, and throw out some heat. When we found the slightly used RV that met our criteria, it did not have a fireplace. In the spot where the fireplace would have been was a cupboard. I was disappointed, but we found out that you could install one later. Wayne thought a fireplace was unnecessary, but I knew that I would use it and enjoy it. I conceded that we should wait and see how badly we needed that cupboard space before deciding to replace it with a fireplace. While we were preparing for our first time using the RV, Wayne watched many YouTube videos with tips for setting up and using the trailer. One of the suggestions was to have an electric space heater in the RV, since we would be hooked up to electricity at the RV Park, and then we would not use up the propane as quickly for powering the furnace. Both electricity and propane cost money, but when the propane tank is empty it is more of a chore to get it refilled. In this light, the electric fireplace became a practical useful feature rather than a frivolous luxury. We did bring two space heaters that we used regularly. We also used the cupboard space where the fireplace would be if we had one. Maybe Wayne needs that cupboard for some of his clothes.
In the next photo you can see the cupboard under the TV where the fireplace would go if we had one.
There are large and rapid temperature swings in Arizona inside and outside the RV. It can get down in the 30’s and 40’s at night. We turn on the space heaters in the morning to warm the place up and take the chill off (or if we had a fireplace I would turn that on!). Then only a short time later the temperature outside is warming up, and sun shining in the windows starts to heat up the inside of the RV so that we have to open the windows. By mid afternoon on a warm day it is starting to bake inside the RV, especially in the bedroom. After only a few hours of slightly too warm air inside the RV, it starts to cool off rapidly outside and we are closing the windows for the night. There is an air conditioner but we only used it a couple of times near the end of March when the daytime high was 90 degrees.
Wet bath towels, beach towels, swim suits, and dish towels dry very fast in the desert climate, in contrast to more humid summer weather at home when your beach or bath towel is often still damp the next time you want to use it.
When I was outfitting the RV kitchen, I had to imagine what items were most important and useful given the limited cupboard space. We had some obvious things already on hand from our old house such as a toaster, coffeemaker, and kitchen utensils. Other things I was not sure about. I brought my old hand mixer, because what if you want to make a cake? I never used it. I brought two flexible silicone baking pans from my old kitchen. Only one can fit in the oven at a time, and they are kind of too floppy for some things. I may swap one of them out for an aluminum 9×9 pan that could be used for a small cake or bars. I also wished I had a lid for the frying pan, so I will look for one before the next trip.
At home we have two refrigerators, one in the kitchen and one in the basement. The basement fridge has backups of products I don’t want to run out of such as milk, butter, and orange juice, bulky produce that I am not going to use right away, whole wheat flour that is supposed to be refrigerated, and Wayne’s stash of soda and beer. The RV fridge is eight cubic feet which is a decent size but small compared to the cold storage space we have at home. I cannot stock up on anything in the RV. Also, there is not enough room in the refrigerator and cupboards for all the condiments and seasonings I keep on hand at home. The counter space is limited, so it is best to keep the cooking simple. Fortunately there is a nice full service grocery store only one mile away.
At home we usually leave the butter dish out on the counter. On a warm Arizona day in the RV you cannot leave the butter dish on the counter unless you want melted butter for a recipe.
Counter space for cooking in the RV
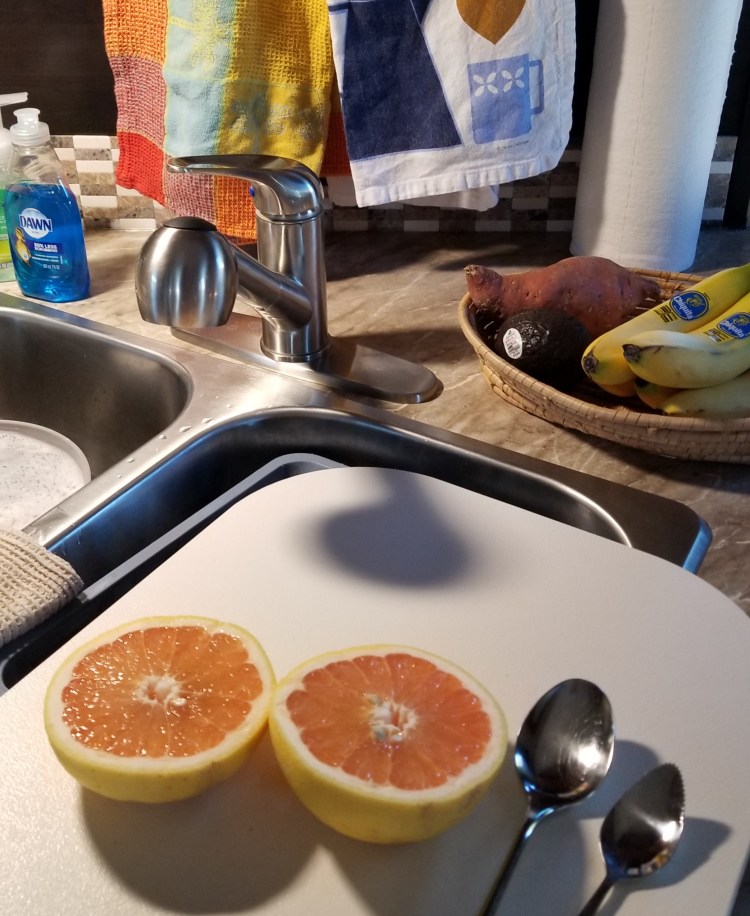
There are orange, lemon and grapefruit trees in the RV park. Sometimes people will pick some fruit off a tree at their site and put them in a box on the side of the road for the taking.
Fresh Arizona grapefruit
The first time we came to Gold Canyon Golf and RV Resort two years ago we drank the water from the tap with no problems. The second year we noticed that everyone was filling plastic gallon milk jugs with purified water from a machine for a quarter, so we started doing that too. It was kind of a hassle to have to keep going over to the main building almost every day and lugging the gallon jugs back to our unit. This year I bought a Brita water filter pitcher which worked great. We filled that from the tap in the RV and always had filtered cold water on hand. I am not sure if there is really a problem with the water directly from the tap, but it makes sense to have the pitcher for future camping trips when we won’t know the status of the water.
Our Canadian neighbors in the RV park had a smaller size Coleman grill that runs on a one pound propane tank, and collapses for storage. They showed it to us while cooking some shrimp which looked delicious. After setting the smoke alarm off in the RV twice, we decided getting a grill was a priority. We bought the same one as the neighbor at Camping World. After Wayne had assembled it, it was clear something was wrong as it was leaning over to one side. It seemed like maybe one of the parts was wrong, which resulted in another trip to Camping World. It turned out to be user error after all. I neglected to get a photo of the grill in use after Wayne got it assembled correctly.
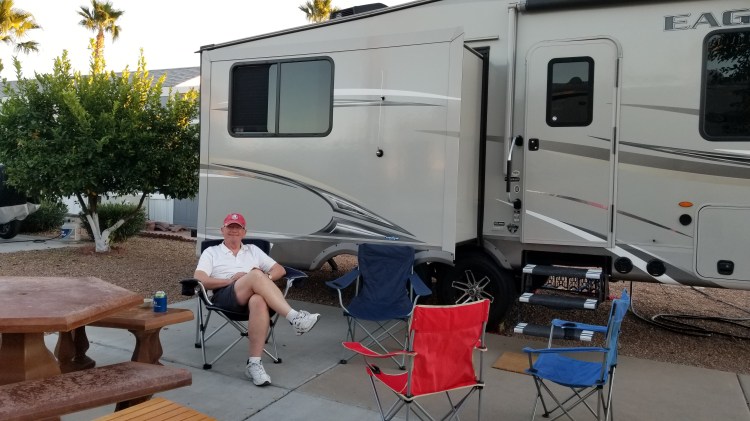
While in the RV it feels OK to spend more time relaxing. I have some regular activities I do on my computer whether at home or in the RV, such as blogging, updating Quickbooks accounts for my yarn sales and the extended family cabin, as well as other duties for the cabin. I also have my knitting and craft projects. At home there are endless other chores and tasks to do inside and outside that I could or should do. It is easier in the RV to not do anything for a few minutes, or just enjoy some time knitting without feeling like I should be doing something else. I brought a deck of cards and a travel size cribbage board. I am not surprised that we never used those either. My husband does not like playing cards, but we had extras at home so I figured they might come in handy for future guests. Wayne enjoyed his morning coffee while sitting outside the RV almost every day.
Wayne relaxing outside the RV
One of the main reasons for going to Arizona in the winter is to be active outside, or just go outside without fear of slipping and falling on the snow and ice. We used our bikes and hiking boots on a regular basis, and on warmer days swam in the pool, and relaxed in the hot tub. Wayne played a lot of golf. I went to a morning water exercise class once at the very end of our stay when it was finally warm enough for me. I liked it and would go again, except that most of the time we were there it was too cold for me at 9:00 or 10:00 am when the classes were held.
One of many hikes in the Phoenix areaBiking in a residential neighborhood near the RV ParkPool time
We were lucky to have a visit from our daughter, and later from our son and his wife.
A visit from our daughterA visit from our son and his wife
I had to plan ahead what knitting and other projects I might want to work on so I would not run out of projects (that would be terrible), and so I would have some variety and choice. For each potential project I also had to bring any necessary supplies or tools. I did not bring my rigid heddle loom which turned out to be a good decision. I brought yarn and patterns for socks and baby sweaters, as well as the potholder loom and stretchy loops. I spent most of the time we were away from home working on one pair of socks I started in the car on the way. I brought more supplies than I needed, but I knew that I would want options.
I worked on this one pair of socks for most of the time we were goneYarn and supplies I brought to Arizona
After we were in Arizona for one month two years ago, we encouraged Wayne’s sister Marlene and her husband to come to Gold Canyon too. Based on our recommendation they came last year for one month. This year they came for six weeks, but only overlapping with us for two weeks of our two month stay. We have both put in our reservation requests for three months for next winter. That is because we do like this experience a lot, because winter in Minnesota was especially severe this year, and because it is hard to get a reservation. If you request three months, you are more likely to get a spot.
So different than at home
The RV refrigerator can run on the battery which charges when you are towing it behind the truck. I had envisioned that we would be able to leave food in the fridge, and also use the RV instead of hotels, on the way to and from Arizona. It turns out there are a couple of problems with that during colder months. For one thing when the two living area slides are retracted, you cannot access the refrigerator. More importantly, the RV water system needs to be winterized when you are not using it if the temperature might go below freezing. Our fifth wheel was winterized when it was sitting at home in the winter before we left for Arizona, during the journey through cold states to get to Arizona, and again before we left Arizona to head for home. Also, campgrounds are only open in the summer in the northern states. At another time of the year we could stop at campgrounds or truck stops while en route to a destination, open the slides and use the water. However some of the camp grounds are almost as expensive as a no frills hotel.
The next morning after we got home Wayne had to drive to Minneapolis to catch a flight for a four day trip. He was planning on dropping the RV off at the dealer on the way, as they had told us we could leave it there for six weeks until a scheduled maintenance appointment. This was a good plan since the spot where we would normally park the RV at the side of our driveway was buried in a big drift of snow. Unfortunately the next morning it was very icy on the road near our house, so instead Wayne left with our other car, leaving me with no transportation. The RV was still attached to the truck in the middle of the driveway. Wayne left me a note on the counter “do not move the truck since the RV stabilizer feet are down”. Um, no way would I try to move or drive the truck with the RV attached. As it turned out, I did not really want to go anywhere since we ended up having three days of mixed precipitation with 30 mph winds. It is nice to be home again, but the weather reminds me why we went to Arizona in the first place.
I can remember recent winters when I hardly ever wore my boots or warmest jacket, but this year was brutal. Last April when we got home there was not any snow left and the lake was open. We helped with the family maple syrup harvest in shirtsleeves. This year the lake is still frozen and the weather is wintery. That can be beautiful too.
The truck and RV blocking the driveway back at homeWinter is pretty tooThe lake is still frozen
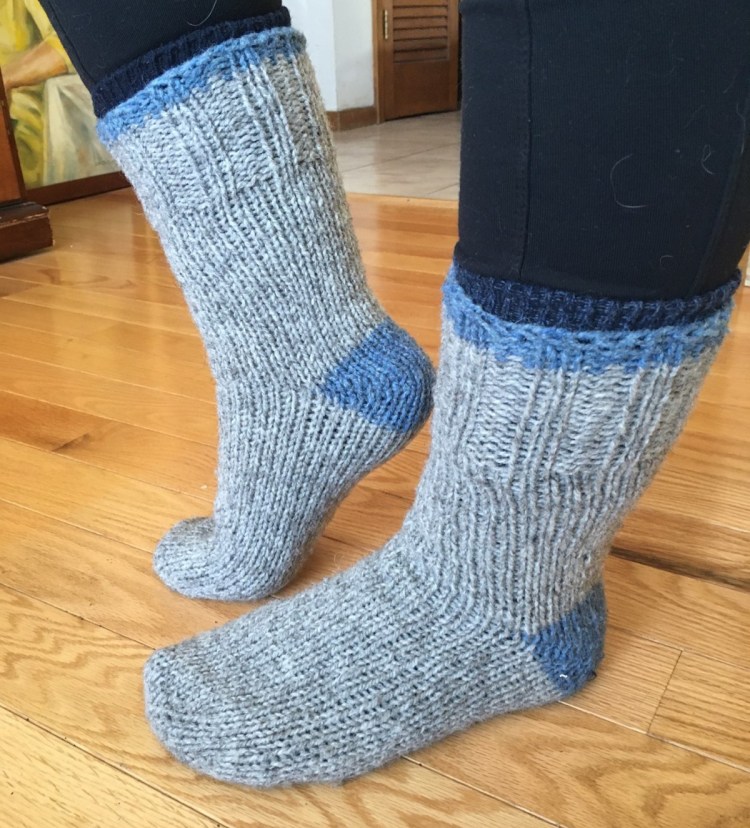
In the fall of 2020 I made several pairs of thick socks for myself and for Christmas gifts. This fall I bought more skeins of the same Briggs and Little Tuffy worsted weight 80% wool / 20% nylon yarn when it was on sale. It is good for practicing sock techniques with fewer stitches than normal sock weight yarn.
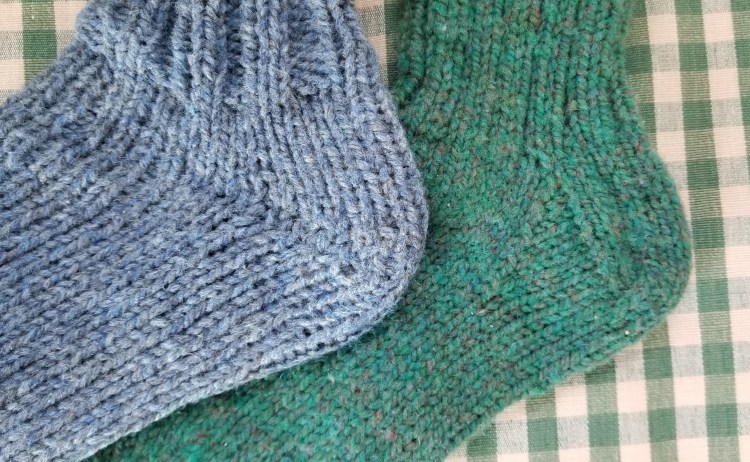
The thick socks I made in 2020 had a heel with a flap pattern beginning at the cuff. For the next round I used the Fish Lips Kiss Heel pattern by Sox Therapist, starting at the toe instead of the cuff, using double pointed needles knitting one sock at a time. I saw an article about knitting two at a time on double pointed needles, but it looked like a nightmare. I used my Denise brand needles with short tips and short connecters that are an alternative to traditional double pointed needles. The Denise needles are flexible and the stitches are less likely to fall off. However that does not stop me from accidentally pulling a needle out of the stitches by mistake.
The following photo shows the two different types of heel on the thick yarn. The blue sock has a fish lips kiss heel, the green sock has a heel flap.
Fish Lips Kiss Heel on the left, heel with flap on the right
The Fish Lips Kiss Heel pattern includes the instructions for the heel, and also step by step directions for the entire sock including a template of your foot on heavy paper, with measurements noted for toe and heel placement. By using the template and starting at the toe, you are supposed to be able to get the sock to fit exactly. The next photo shows materials assembled for a blue pair of thick socks for myself.
Supplies ready to begin a pair of socks
I used Judy’s Magic Cast On for the toe stitches, which gives you a smooth toe and you do not have to graft any stitches together later. Turkish Cast On is similar and I think it is easier, but they are both good. The pattern has you start increasing for the toe, and then stop increasing when you get to the right number of stitches based on your individual foot template. You then knit evenly for the foot until you get to the heel line on your template.
When you start at the cuff you have to decide at the beginning how many stitches to cast on. The pairs I knit for myself before with this yarn had 36 stitches. They are a little loose but they work. For this pair starting at the toe and using the template, I ended up with only 32 stitches around.
Knitting thick socks starting at the toe
The following photo shows the first sock almost completed.
Compared to the socks I knit last winter with the same yarn, this pair has fewer stitches around but they are a little longer, based on the method with the foot template. There is negative ease which means that you make them a bit smaller than your actual measurement because they are going to stretch. The hand made socks always look bigger than store bought socks because they do not have as much elasticity.
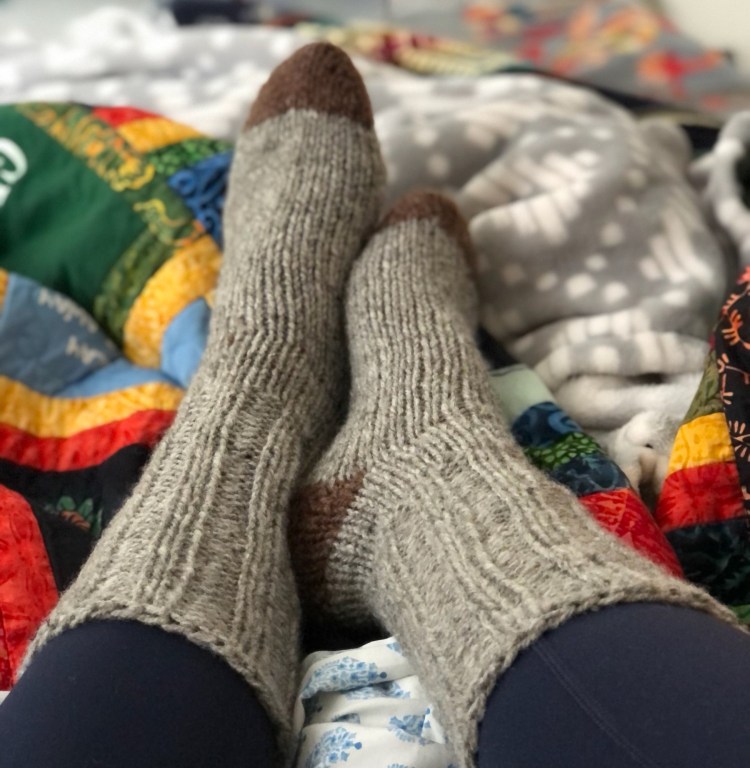
After I finished the blue pair of socks for me, I cast on a gray pair for my daughter, starting at the toe again. We both wear size nine shoes, so sometimes she borrows my shoes or takes my castoffs. After drawing a template of her foot, I realized that her foot is wider. Her sock has 36 stitches around instead of 32. I decided to be more creative and use leftover blue yarn from my sock for the heel on her gray pair.
Gray socks with blue heel for my daughterWorking on the heel of the second gray sock
The thick gray yarn reminds me of a sock monkey. Following are photos of both pairs completed in the middle of December hanging on the clothesline, when we had only a bit of snow.
Photo taken in mid December, 2021
The next photo is my son and his wife modeling socks I knit in this same yarn in 2020. My son said his socks were a little loose. Since then I have made a template for his foot, and it turns out he has narrow feet like me.
Socks I knit lain 2020 for my son and his (now) wife
Just for the record, the following photo was taken just after Christmas following a big snow storm. The clothesline where the socks photo above was taken a few weeks earlier is barely visible behind the fence.
Photo taken in late December, 2021
My daughter was pleased with her thick gray and blue socks.
My daughter modeling her thick socks
I dislike weaving in ends and often select patterns and designs with that in mind. If there are multiple yarns or colors, that means more weaving in of ends. However I recently found a brilliant method of weaving in the ends as you go by HeyBrownBerry that is a game changer for me. I knit another pair of Christmas gift socks for my niece with the same yarn, but not until after Christmas. Following is the finished result.
Thick socks for my nieceMy niece modeling her socks
I ordered more skeins of various types of sock yarn in December with Black Friday sale prices. It seemed like Black Friday lasted all of December, and even into January. Maybe if plan better, I will be able to get my knitted gifts ready in time for NEXT Christmas.
Back in 1988 my mother and I split the cost of a serger sewing machine. It uses four spools of thread, is complicated to thread, and makes special stitches a regular sewing machine cannot do that are stretchy for knit fabric. We both used it for many years, until neither my mom nor I were doing much sewing any more. For years the serger, also known as an overlock machine, sat in the box. It moved with me to our home at the lake, but continued to stay in the box. Over the last couple of years I tried to use it a few times for mending and upcycling projects, but I would always spend hours trying to get it threaded and could never get it to work right. The machine is shown in the next photo on the dining room table.
My Elna serger from 1988
Last winter I met a woman in Arizona who uses a self threading serger. It sounded so nice I went and looked at one at a fabric store in the Phoenix area while we were there. This year when I saw that the Vacuum and Sewing Machine shop in Fergus Falls was having a liquidation sale, I considered trading in my serger for a newer machine that would presumably have new technology and features, work better, and be easier to thread. I am sad to see that this storefront is closing, but I can’t say that I have ever been in there more than once. I am glad that the proprietor is going to maintain a new version of the business out of his home.
In preparation for bringing my serger in to the shop, I took it out of the box to have a look it. It was very dusty and grimy, and had a lot of lint all over the inside workings. It looked good once I got it all wiped down and the lint removed with the little brush that came with it. I decided to attempt threading it one more time, after reviewing the instructions in the manual. The first thing it said was to oil the machine if you had not used it for awhile. I am sure I did not do that the last time. This time I put oil in all the places indicated, and then carefully, step by step, threaded each of the four threads through all the hooks and slots in the correct order. The photo below shows the front panel lowered for threading.
Looking at the hooks and levers for threading with the front opened up
I put a scrap of fabric under the presser foot and slowly pressed the foot pedal. VOILA…it made a perfect stitch!!
I went ahead and brought the machine in to the sewing machine shop to discuss with the owner what features would be different or better on the new sergers, and how much he would give me for a trade in. There was a moderately priced machine that was not much different than what I already had, and another one with the fancy self threading that would have been $900, after the $100 he was offering for my trade in. OK, never mind. I could not justify spending that much when the one I already have works fine after all.
During the fall I had bought yardage of a product called “laminated cotton fabric” from an online vendor (creatively called Laminated Cotton Fabric) to make an RV tablecloth and placemats. I like that you can wipe it down easily because spills happen. People also use this fabric for bibs, diaper covers, lunch bags, and other things you want to be water resistant or easily clean off. Following is a photo of the fabric I bought.
Laminated cotton fabric I bought online
One length of the fabric was just the right size for a tablecloth for the RV kitchen table. All I had to do was hem all the way around the four sides. You can see the serger in the next photo making the overlock stitch and cutting off the edge of the fabric.
Doing the overlock stitch on all four sides of the tablecloth fabric
After serging all the way around, I folded the edge under and top stitched it down with my regular machine.
Corner of completed laminated cotton tablecloth
I also made four placemats that will work on the RV table. They are reversible with more of the same laminated cotton on one side, and some indoor/outdoor cotton on the other side. Photos of the completed product are found later in the post.
Cutting fabric for placematsSewing the two sides of a placemat together
The RV bathroom has a towel bar sized for only one towel. We thought of installing a hook for another bath towel, so I sewed tabs on all the bath towels and hand towels we are using in the RV. I found some grosgrain ribbon in a drawer filled with various ribbons and seam binding purchased and saved by my mom over the last 50 years. Notice this package of 54 inches of grosgrain ribbon for 35 cents, just the right length for a sweater! I actually have a cardigan sweater my mom knit in the 1960’s with grosgrain ribbon for the button band down the front.
Sweater length of grosgrain ribbon from the 1960’s
I used the vintage grosgrain ribbon to sew tabs on all the bath and hand towels, using my regular sewing machine.
After we got to Arizona and had the RV set up, we realized there was not a good way to install a hook anywhere in the small bathroom. We did not want to drill holes or use stick on products. It is working to hang the second bath towel over the shower stall. It is so dry there that towels dry very quickly.
Following are photos of the placemats with the laminated fabric side up, the other side up, and the tablecloth on the RV table. We have been leaving the tablecloth on the table most of the time. Last year my sister-in-law, Marlene, painted the Superstition Mountains desert scene in the frame on the table. We can see the top of the mountains from our RV.
Placemats using laminated cotton fabricIndoor outdoor fabric on the back side of the placemats Tablecloth using the laminated cotton fabric
The next photo is the towel bar behind the RV kitchen sink. For staging purposes I moved my basket with hot pads over from the stove area to be in the photo with the towels.
RV kitchen linens
I did not make either of the towels in the photo, but I love all these colors together and how they look in the RV. The Fika towel was designed and is sold by my friend Cindy Lindgren. You can find her products here.
I meant to bring one of my hand woven towels but somehow it never got in the right place at the right time when I was packing. In the basket is a hot pad I made on my potholder loom. I brought the potholder loom with me to Arizona as it is small and portable. Once I finally finish the socks I am knitting (that are taking forever) I will play with the potholder loom.