In the fall of 2020 I made several pairs of thick socks for myself and for Christmas gifts. This fall I bought more skeins of the same Briggs and Little Tuffy worsted weight 80% wool / 20% nylon yarn when it was on sale. It is good for practicing sock techniques with fewer stitches than normal sock weight yarn.
The thick socks I made in 2020 had a heel with a flap pattern beginning at the cuff. For the next round I used the Fish Lips Kiss Heel pattern by Sox Therapist, starting at the toe instead of the cuff, using double pointed needles knitting one sock at a time. I saw an article about knitting two at a time on double pointed needles, but it looked like a nightmare. I used my Denise brand needles with short tips and short connecters that are an alternative to traditional double pointed needles. The Denise needles are flexible and the stitches are less likely to fall off. However that does not stop me from accidentally pulling a needle out of the stitches by mistake.
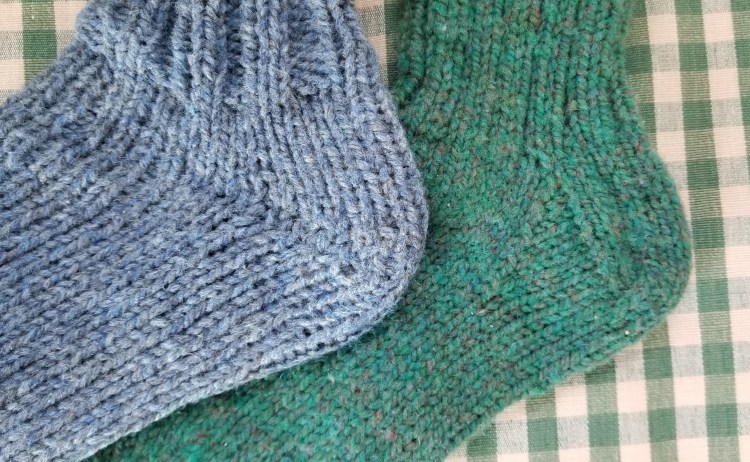
The following photo shows the two different types of heel on the thick yarn. The blue sock has a fish lips kiss heel, the green sock has a heel flap.
Fish Lips Kiss Heel on the left, heel with flap on the right
The Fish Lips Kiss Heel pattern includes the instructions for the heel, and also step by step directions for the entire sock including a template of your foot on heavy paper, with measurements noted for toe and heel placement. By using the template and starting at the toe, you are supposed to be able to get the sock to fit exactly. The next photo shows materials assembled for a blue pair of thick socks for myself.
Supplies ready to begin a pair of socks
I used Judy’s Magic Cast On for the toe stitches, which gives you a smooth toe and you do not have to graft any stitches together later. Turkish Cast On is similar and I think it is easier, but they are both good. The pattern has you start increasing for the toe, and then stop increasing when you get to the right number of stitches based on your individual foot template. You then knit evenly for the foot until you get to the heel line on your template.
When you start at the cuff you have to decide at the beginning how many stitches to cast on. The pairs I knit for myself before with this yarn had 36 stitches. They are a little loose but they work. For this pair starting at the toe and using the template, I ended up with only 32 stitches around.
Knitting thick socks starting at the toe
The following photo shows the first sock almost completed.
Compared to the socks I knit last winter with the same yarn, this pair has fewer stitches around but they are a little longer, based on the method with the foot template. There is negative ease which means that you make them a bit smaller than your actual measurement because they are going to stretch. The hand made socks always look bigger than store bought socks because they do not have as much elasticity.
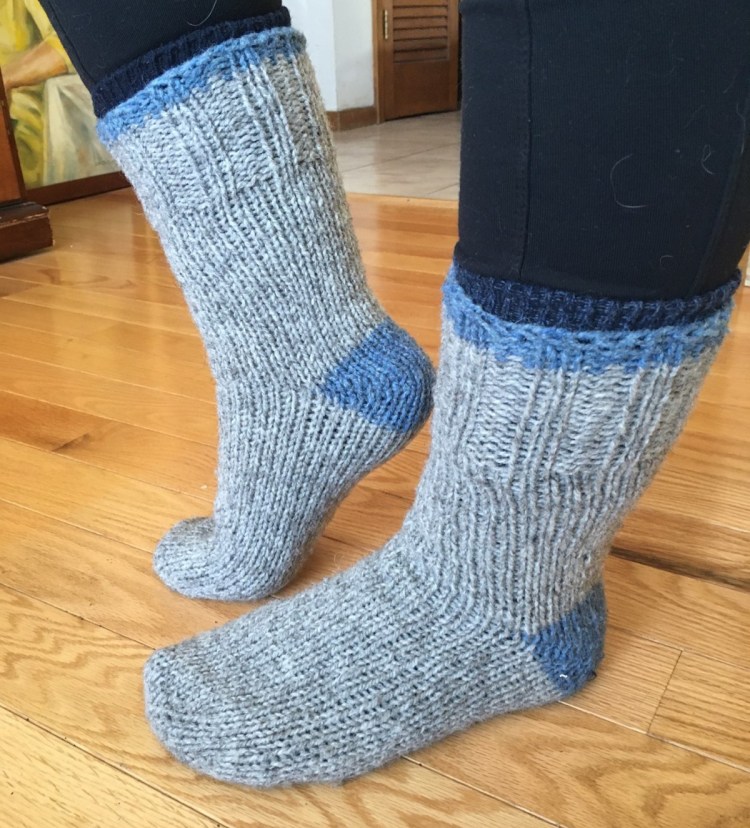
After I finished the blue pair of socks for me, I cast on a gray pair for my daughter, starting at the toe again. We both wear size nine shoes, so sometimes she borrows my shoes or takes my castoffs. After drawing a template of her foot, I realized that her foot is wider. Her sock has 36 stitches around instead of 32. I decided to be more creative and use leftover blue yarn from my sock for the heel on her gray pair.
Gray socks with blue heel for my daughterWorking on the heel of the second gray sock
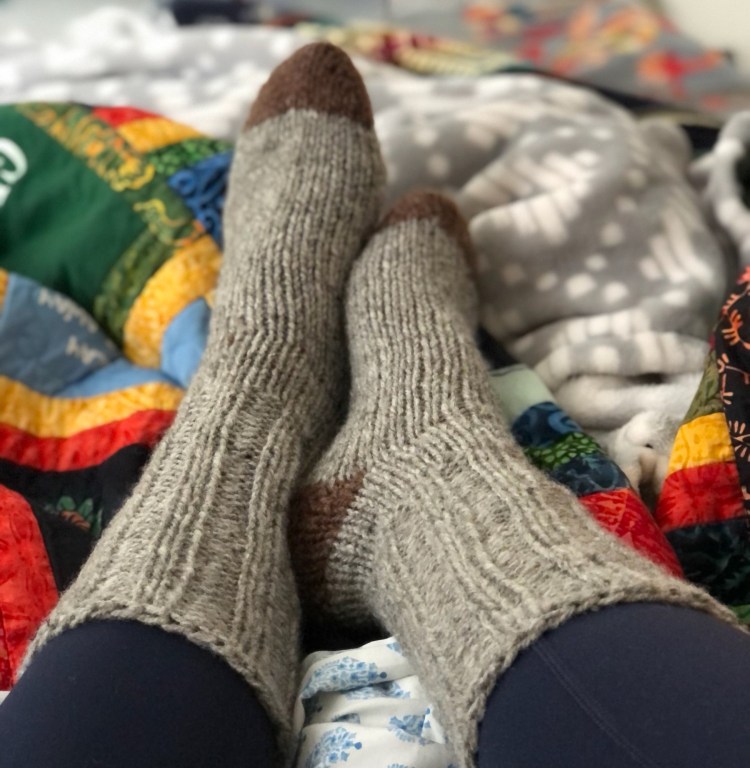
The thick gray yarn reminds me of a sock monkey. Following are photos of both pairs completed in the middle of December hanging on the clothesline, when we had only a bit of snow.
Photo taken in mid December, 2021
The next photo is my son and his wife modeling socks I knit in this same yarn in 2020. My son said his socks were a little loose. Since then I have made a template for his foot, and it turns out he has narrow feet like me.
Socks I knit lain 2020 for my son and his (now) wife
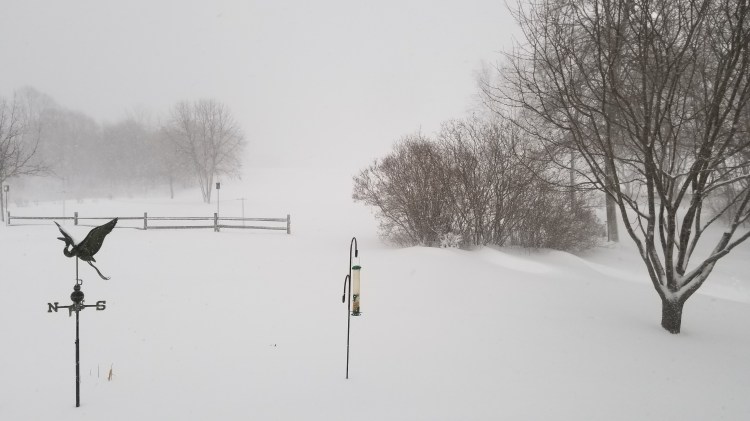
Just for the record, the following photo was taken just after Christmas following a big snow storm. The clothesline where the socks photo above was taken a few weeks earlier is barely visible behind the fence.
Photo taken in late December, 2021
My daughter was pleased with her thick gray and blue socks.
My daughter modeling her thick socks
I dislike weaving in ends and often select patterns and designs with that in mind. If there are multiple yarns or colors, that means more weaving in of ends. However I recently found a brilliant method of weaving in the ends as you go by HeyBrownBerry that is a game changer for me. I knit another pair of Christmas gift socks for my niece with the same yarn, but not until after Christmas. Following is the finished result.
Thick socks for my nieceMy niece modeling her socks
I ordered more skeins of various types of sock yarn in December with Black Friday sale prices. It seemed like Black Friday lasted all of December, and even into January. Maybe if plan better, I will be able to get my knitted gifts ready in time for NEXT Christmas.
Back in 1988 my mother and I split the cost of a serger sewing machine. It uses four spools of thread, is complicated to thread, and makes special stitches a regular sewing machine cannot do that are stretchy for knit fabric. We both used it for many years, until neither my mom nor I were doing much sewing any more. For years the serger, also known as an overlock machine, sat in the box. It moved with me to our home at the lake, but continued to stay in the box. Over the last couple of years I tried to use it a few times for mending and upcycling projects, but I would always spend hours trying to get it threaded and could never get it to work right. The machine is shown in the next photo on the dining room table.
My Elna serger from 1988
Last winter I met a woman in Arizona who uses a self threading serger. It sounded so nice I went and looked at one at a fabric store in the Phoenix area while we were there. This year when I saw that the Vacuum and Sewing Machine shop in Fergus Falls was having a liquidation sale, I considered trading in my serger for a newer machine that would presumably have new technology and features, work better, and be easier to thread. I am sad to see that this storefront is closing, but I can’t say that I have ever been in there more than once. I am glad that the proprietor is going to maintain a new version of the business out of his home.
In preparation for bringing my serger in to the shop, I took it out of the box to have a look it. It was very dusty and grimy, and had a lot of lint all over the inside workings. It looked good once I got it all wiped down and the lint removed with the little brush that came with it. I decided to attempt threading it one more time, after reviewing the instructions in the manual. The first thing it said was to oil the machine if you had not used it for awhile. I am sure I did not do that the last time. This time I put oil in all the places indicated, and then carefully, step by step, threaded each of the four threads through all the hooks and slots in the correct order. The photo below shows the front panel lowered for threading.
Looking at the hooks and levers for threading with the front opened up
I put a scrap of fabric under the presser foot and slowly pressed the foot pedal. VOILA…it made a perfect stitch!!
I went ahead and brought the machine in to the sewing machine shop to discuss with the owner what features would be different or better on the new sergers, and how much he would give me for a trade in. There was a moderately priced machine that was not much different than what I already had, and another one with the fancy self threading that would have been $900, after the $100 he was offering for my trade in. OK, never mind. I could not justify spending that much when the one I already have works fine after all.
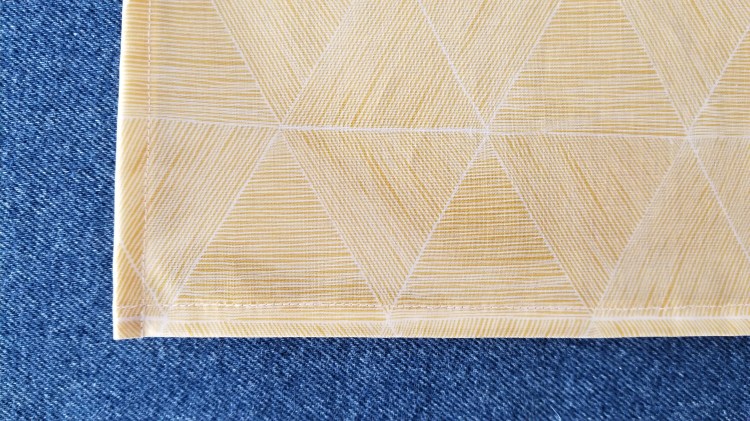
During the fall I had bought yardage of a product called “laminated cotton fabric” from an online vendor (creatively called Laminated Cotton Fabric) to make an RV tablecloth and placemats. I like that you can wipe it down easily because spills happen. People also use this fabric for bibs, diaper covers, lunch bags, and other things you want to be water resistant or easily clean off. Following is a photo of the fabric I bought.
Laminated cotton fabric I bought online
One length of the fabric was just the right size for a tablecloth for the RV kitchen table. All I had to do was hem all the way around the four sides. You can see the serger in the next photo making the overlock stitch and cutting off the edge of the fabric.
Doing the overlock stitch on all four sides of the tablecloth fabric
After serging all the way around, I folded the edge under and top stitched it down with my regular machine.
Corner of completed laminated cotton tablecloth
I also made four placemats that will work on the RV table. They are reversible with more of the same laminated cotton on one side, and some indoor/outdoor cotton on the other side. Photos of the completed product are found later in the post.
Cutting fabric for placematsSewing the two sides of a placemat together
The RV bathroom has a towel bar sized for only one towel. We thought of installing a hook for another bath towel, so I sewed tabs on all the bath towels and hand towels we are using in the RV. I found some grosgrain ribbon in a drawer filled with various ribbons and seam binding purchased and saved by my mom over the last 50 years. Notice this package of 54 inches of grosgrain ribbon for 35 cents, just the right length for a sweater! I actually have a cardigan sweater my mom knit in the 1960’s with grosgrain ribbon for the button band down the front.
Sweater length of grosgrain ribbon from the 1960’s
I used the vintage grosgrain ribbon to sew tabs on all the bath and hand towels, using my regular sewing machine.
After we got to Arizona and had the RV set up, we realized there was not a good way to install a hook anywhere in the small bathroom. We did not want to drill holes or use stick on products. It is working to hang the second bath towel over the shower stall. It is so dry there that towels dry very quickly.
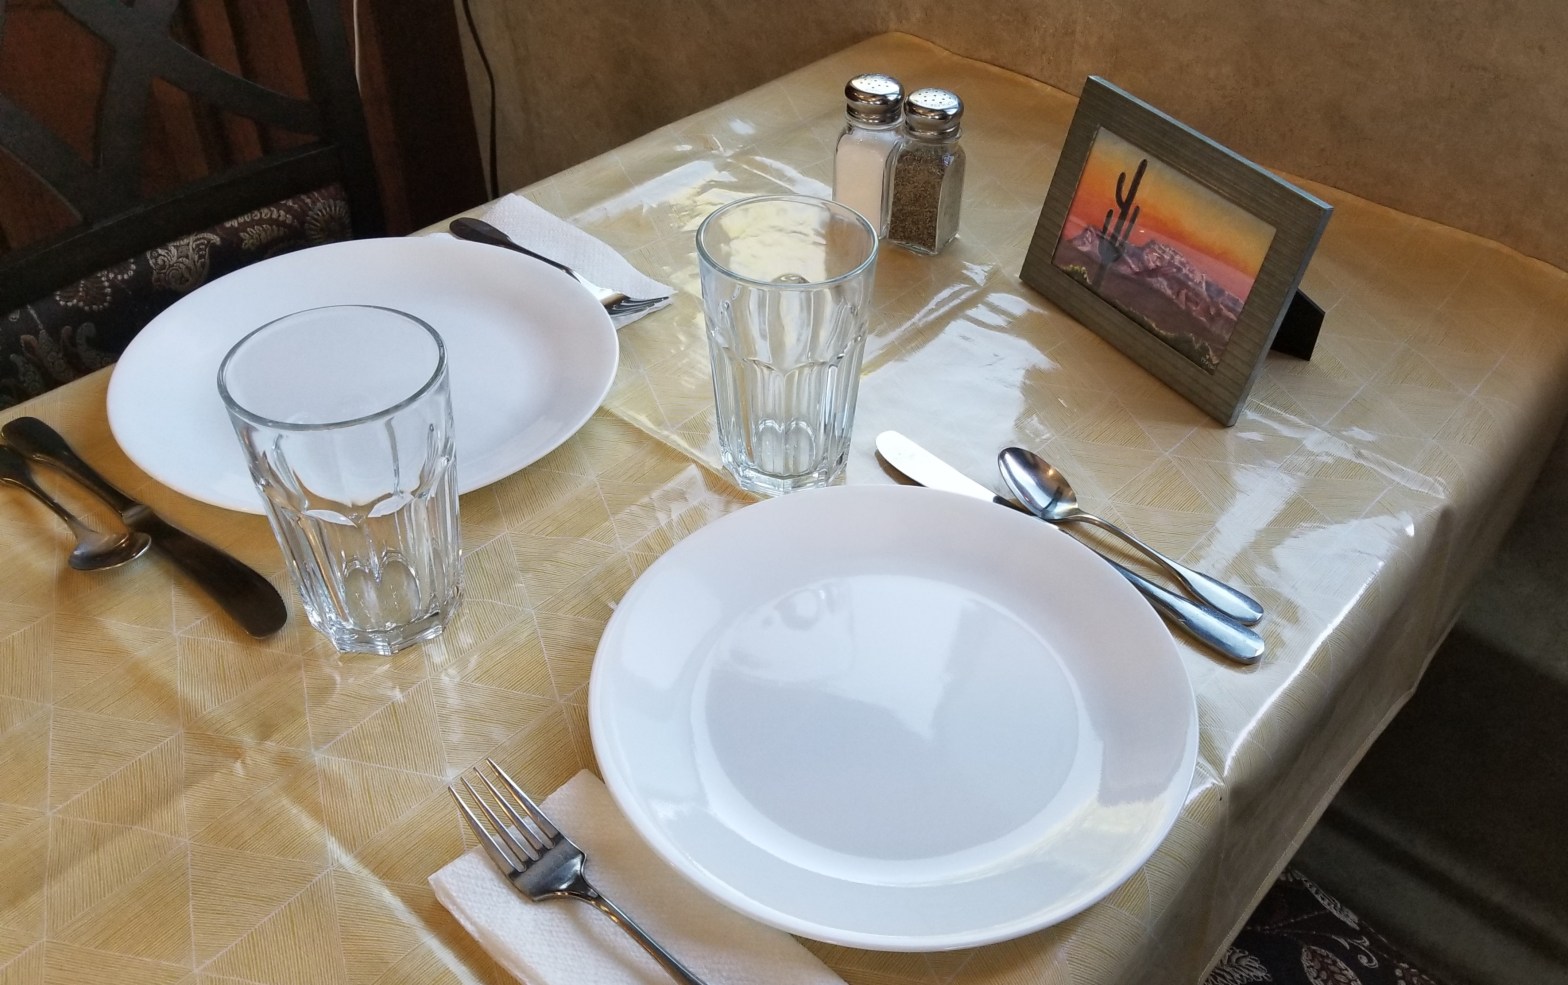
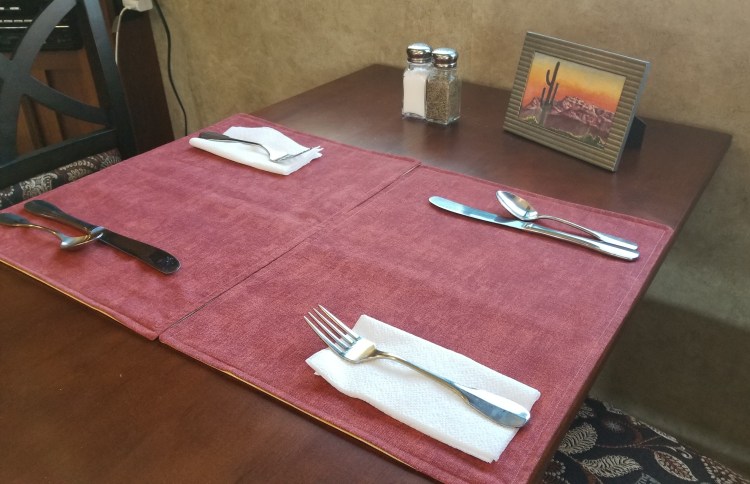
Following are photos of the placemats with the laminated fabric side up, the other side up, and the tablecloth on the RV table. We have been leaving the tablecloth on the table most of the time. Last year my sister-in-law, Marlene, painted the Superstition Mountains desert scene in the frame on the table. We can see the top of the mountains from our RV.
Placemats using laminated cotton fabricIndoor outdoor fabric on the back side of the placemats Tablecloth using the laminated cotton fabric
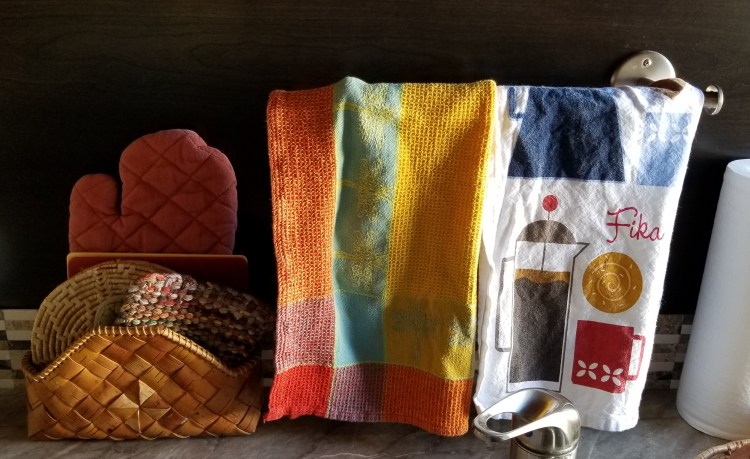
The next photo is the towel bar behind the RV kitchen sink. For staging purposes I moved my basket with hot pads over from the stove area to be in the photo with the towels.
RV kitchen linens
I did not make either of the towels in the photo, but I love all these colors together and how they look in the RV. The Fika towel was designed and is sold by my friend Cindy Lindgren. You can find her products here.
I meant to bring one of my hand woven towels but somehow it never got in the right place at the right time when I was packing. In the basket is a hot pad I made on my potholder loom. I brought the potholder loom with me to Arizona as it is small and portable. Once I finally finish the socks I am knitting (that are taking forever) I will play with the potholder loom.
My last weaving project before our snowbird trip with the RV was making some dishcloths on my Rigid Heddle Loom. I have mixed feelings about leaving the loom behind at home. There is probably enough room in the pass-through storage area under the RV to transport and store the loom plus needed accessories and yarn, but I decided I would be able to keep busy instead with knitting and potholder loom projects.
I would have started the dishcloth project earlier, but I got side tracked with other tasks that needed to be completed before the trip. I had been preparing for months with several long checklists of items we would need to have in the RV. Many things were already assembled and staged in the basement, but of course some preparation has to be more last minute, things always come up that you did not think of.
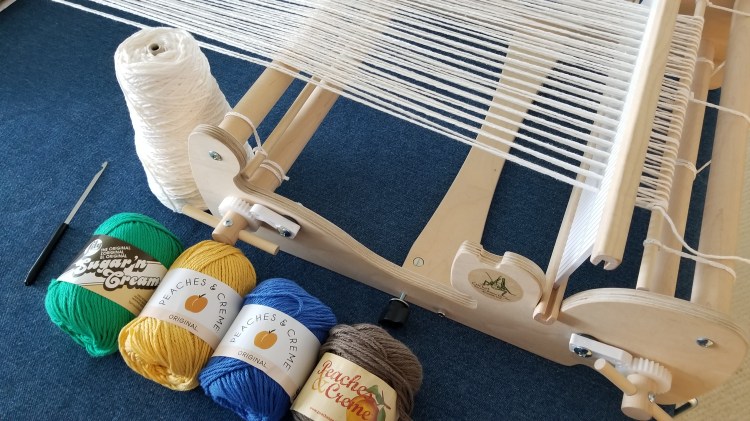
Six days before our departure date I warped the loom with some worsted weight off white Peaches & Creme 100% cotton yarn, the length of the dining room table with two leaves. I was winging it and did not know how many dishcloths that would make. Almost a week sounds like plenty of time, but I knew it would fly by and my time would be sucked up with things I did not have on my radar.
I used a pattern called Thick Textured Dishcloths by Cherie Wheeler that is available for purchase on ETSY. It is similar to the waffle weave and windowpane patterns I have used for towels using a pickup stick, but there are only four rows in one repeat. It was about nine inches wide on the loom, and each dishcloth was about nine or 10 inches long, so they wove up very quickly.
Dishcloth on the loom
The pattern includes instructions for weaving an inch at the beginning and end of each cloth using crochet cotton thread for the weft yarn, which makes it thinner for folded over hems. I did not have any crochet cotton thread on hand and did not have the time nor desire to buy any. I might have been able to find something else similar in the house, but instead I finished the ends with hem stitch and fringe. Being that I was short on time, that was the quickest method.
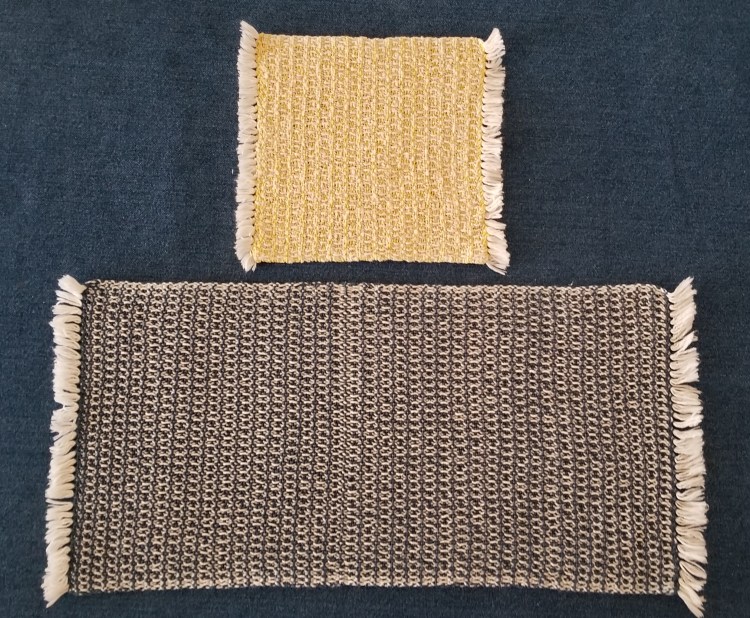
I wanted to use a couple of the dishcloths for a wedding shower gift. Unfortunately, I was in Arizona at the time of the shower, but I got to say Hi to the people in attendance and watch some of the gift opening via zoom. That is one good thing that has come out of the pandemic. The following photos show the end of a yellow dishcloth, and the beginning of the next green dishcloth, with some plain weave between that will end up as the fringe.
Hem stitching at the end of one dishcloth and the beginning of the second oneWeaving the second dishcloth in green
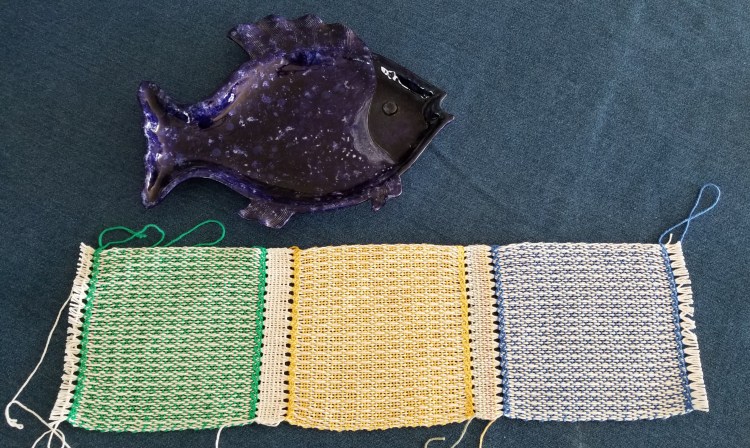
I was able to weave seven dishcloths with the dining room table length of warp yarn. Three of them are shown below after I removed the weaving from the loom, next to one of my mom’s ceramic fish platters.
Three dishcloths after removing from the loom
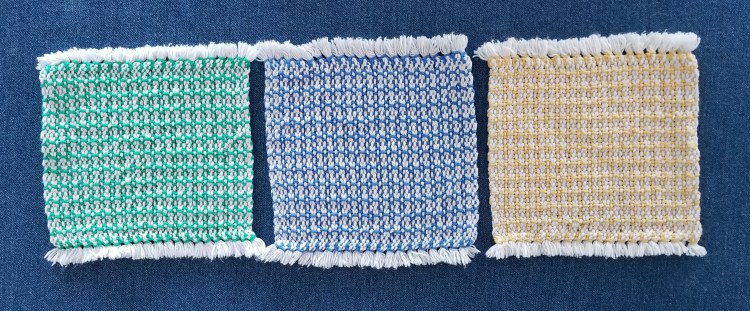
After completing the project, I even had a few days to spare before leaving on the trip, which was needed for final packing and a trip to town for last minute errands and mailing the shower gift. The bride’s gift registry included some linens in similar colors, so I gave her a green, yellow and blue dishcloth, along with a butter dish I ordered online from Anthropologie.
Shower gift butter dish from Anthropologie
Three dishcloths for the shower gift, after weaving in ends and washing
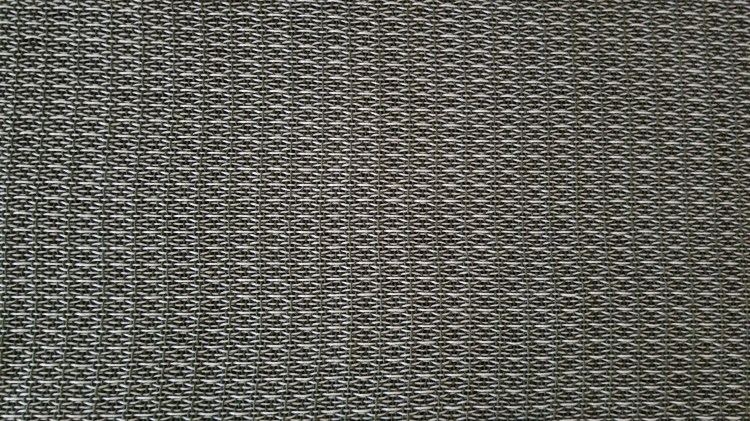
Last time I was at IKEA I bought some waffle weave dish cloths that are a bit bigger with thinner yarn, but have a similar weave to the ones I made. At one time I worked in the office at the Twin Cities IKEA store for a couple of years. I hardly ever go there any more due, especially since we moved three hours away. But occasionally when it is works out it is fun to walk around the store. If you have been to an IKEA store, you know that you pretty much HAVE to walk through the entire store in order to get out, which I know some people find annoying. I always buy a couple of jars of Lingonberry jam that I like on a peanut butter and jelly sandwich, and I usually find some other linens or kitchen accessories that are a good deal. Following is a photo of the IKEA dishcloth next to one of mine.
A dishcloth I bought at Ikea next to one I just made
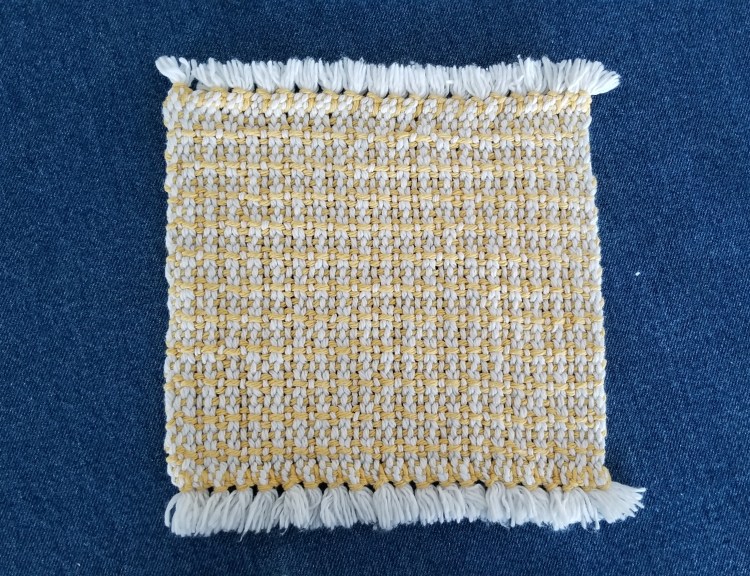
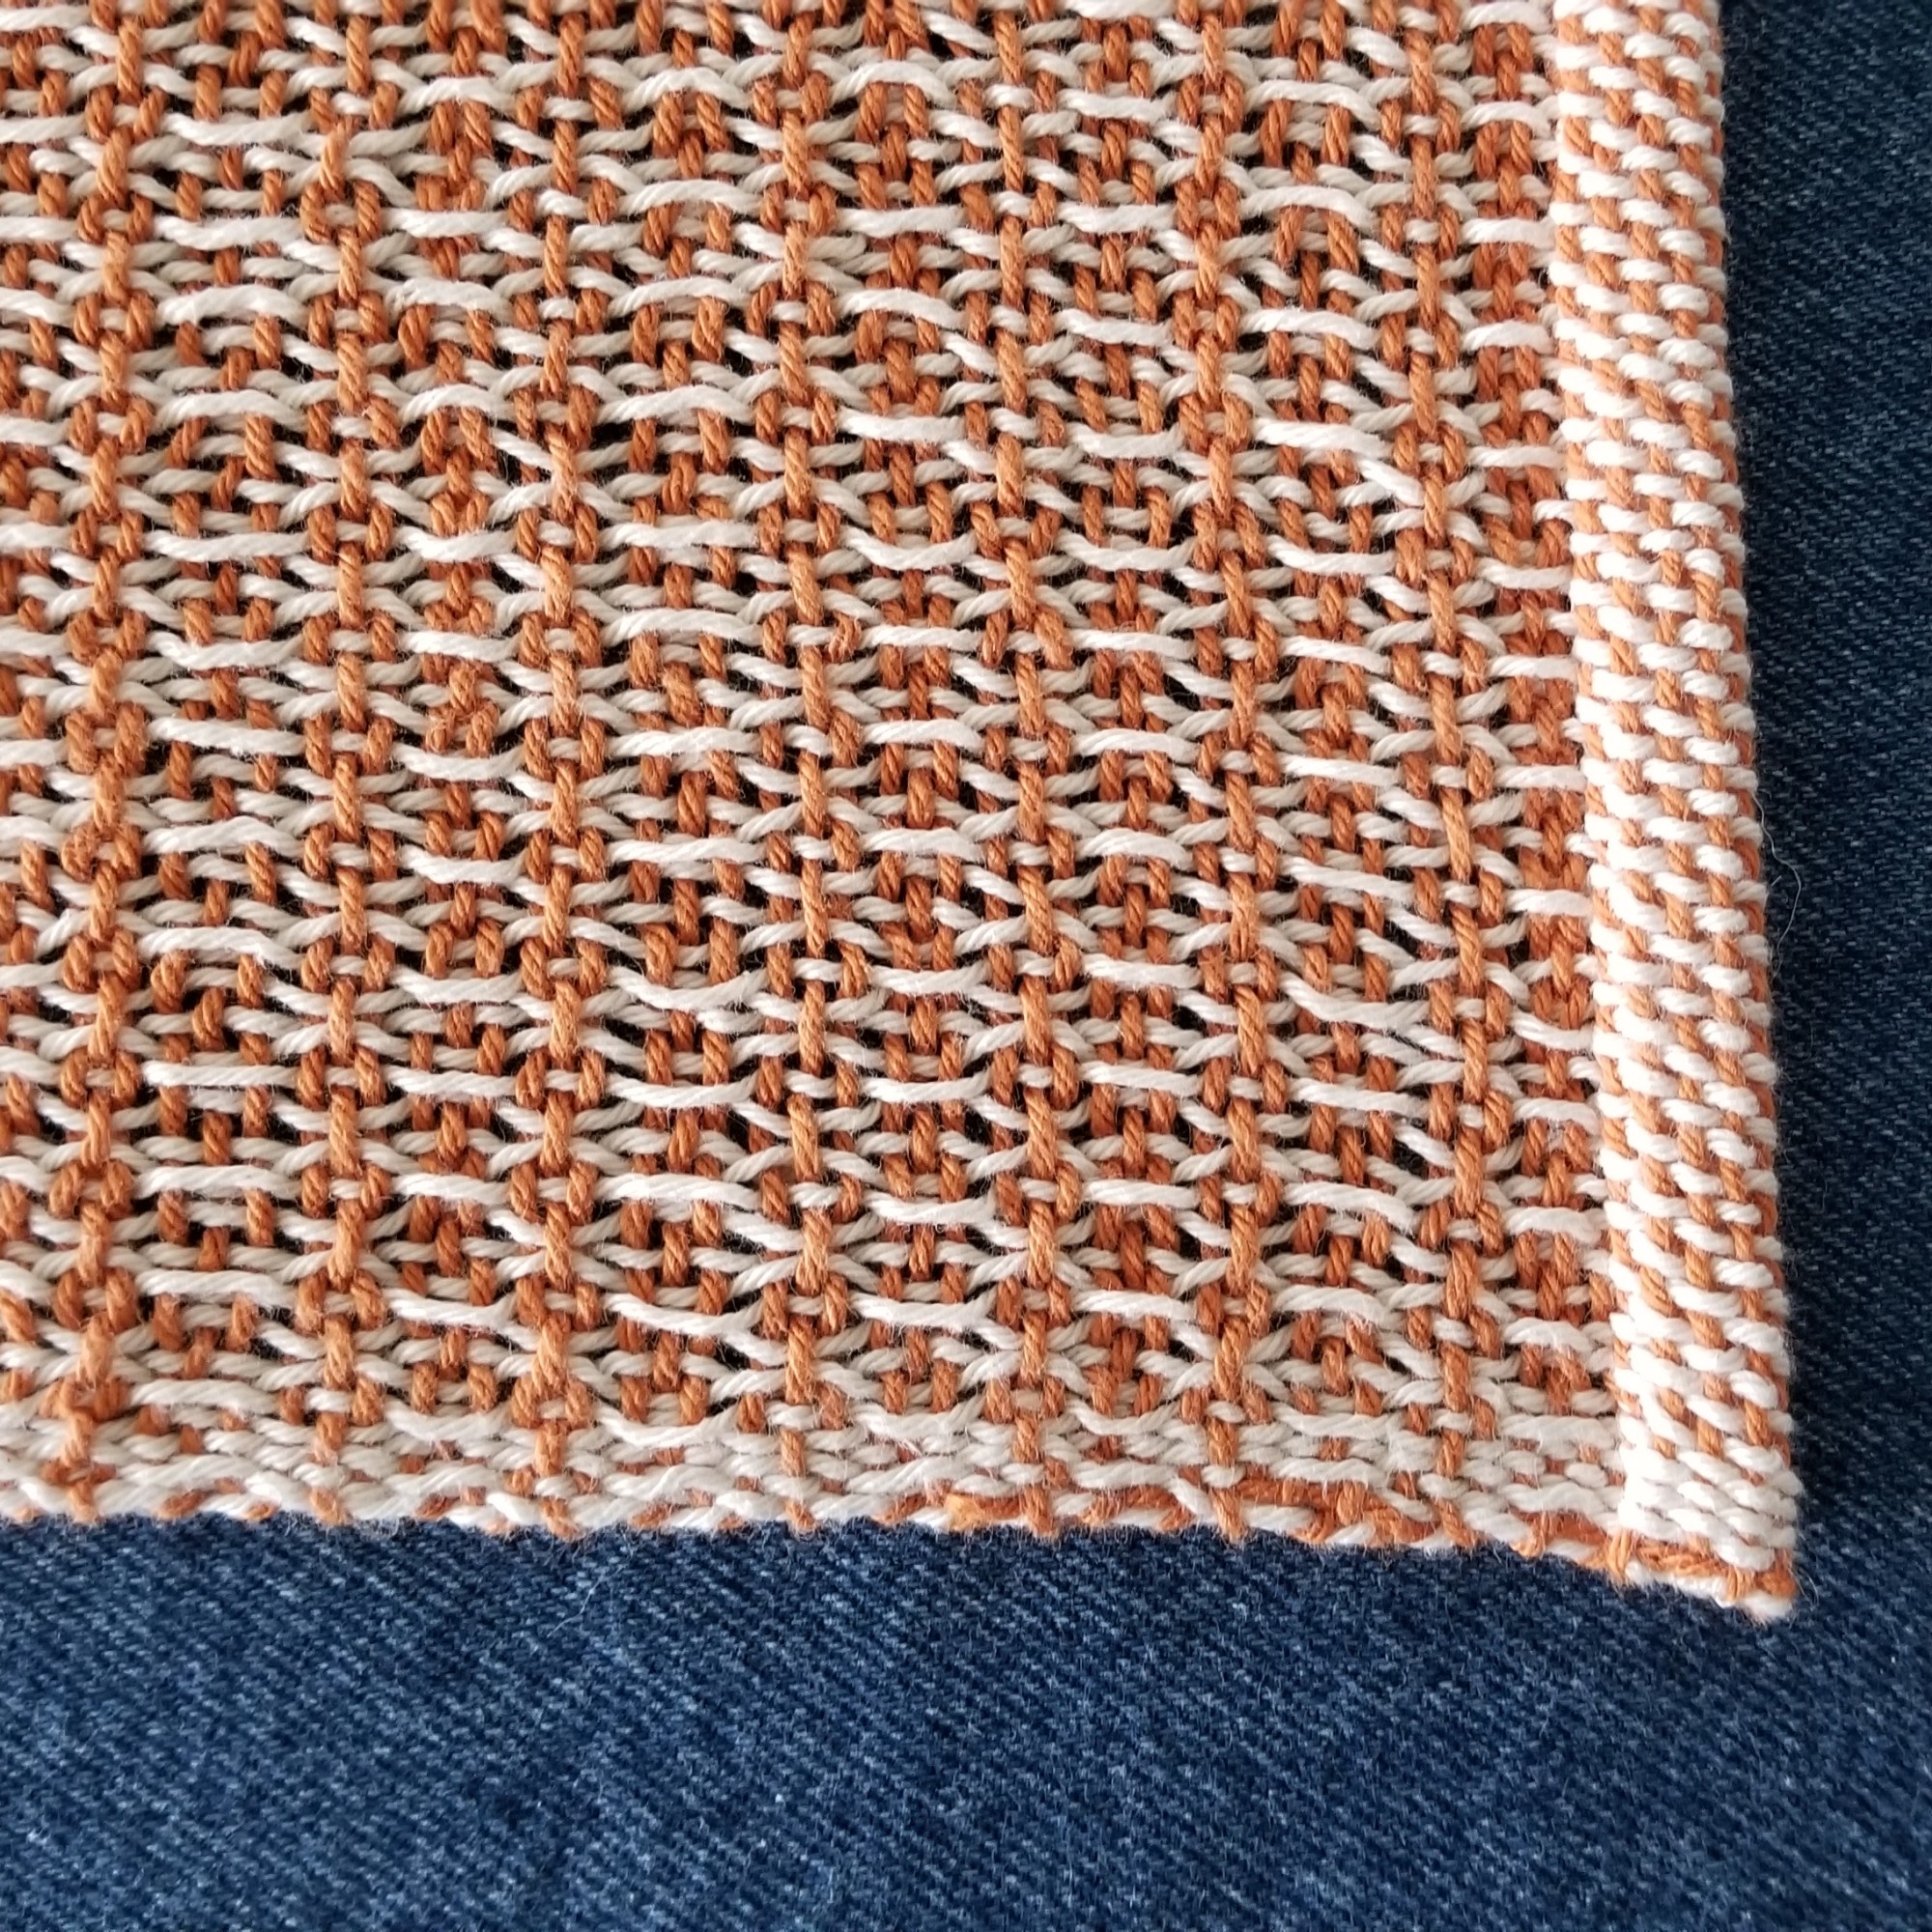
The next photo of the yellow dishcloth shows the pattern up close.
Closeup of the yellow dishcloth
I am pleased with how quick these were to make and how nice they turned out. I expect to make more for myself and for gifts.
Our newish fifth wheel RV trailer sat in the driveway for several months waiting for its maiden voyage. We had hoped to go on a camping trip in the fall before towing it from Minnesota to Arizona at the end of January, but that did not work out. Two years ago we rented a small 400 sq. ft. park model unit in Gold Canyon, Arizona, for one month. Last year we rented for two months. This year for our third winter of snowbirding, we rented an RV site for two months at the same RV and Golf resort.
We had planned on getting everything loaded and attaching the truck to the RV the night before leaving on the journey. However that night the low temperature was minus 17, so it seemed better to leave the trailer battery and truck in the garage. That meant hooking up the fifth wheel to the truck in the morning. Being the first time we had done this, it took almost an hour standing outside with a temperature of zero degrees. We also had to drain the water in the house and put anti-freeze in the toilets as a precaution against burst pipes. Once we finally got on the road, the conditions were good for driving, unlike last year when the beginning of the journey involved fog and blowing snow. You can see in the next photo the view from the passenger side mirror as we left Otter Tail County, Minnesota.
View out my side mirror as we left Otter Tail County, Minnesota
On this trip there were no spontaneous stops at interesting sights on side roads. We stuck to the interstate highway as much as possible. I brought sandwiches and fruit for the first two lunches, as we would not be going through any fast food drive throughs. We also had to find hotels that had big parking areas for the truck and trailer, that also were pet friendly, and where there was a place to eat dinner within walking distance. We lucked out all three nights on the road, with some very delicious meals at local one of a kind restaurants.
Everything went well, but we did learn that just because a gas station has “truck stop” in the name does not mean it is set up for a big rig. We stopped for gas at one place that had barely enough room to get in and out, and then the bathrooms were under construction so we had to use porta potties in the back. Ugg. Later in the trip there was another gas stop that involved some swearing when there was not enough room to turn into the lane with the gas pumps, and a car was in the way so we could not back out. The car finally moved and we were able to get out. After that we noticed that there was another area for RV’s and big trucks, but we were not in the right position to get there. We had to exit on to the street, drive down a block, turn around, drive back and enter the gas station at a different place.
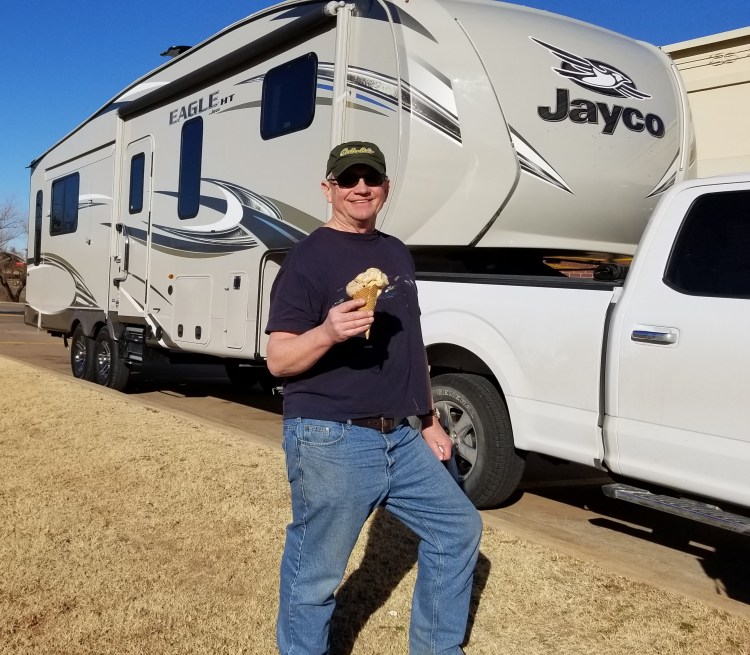
On the second day we stopped for ice cream in Oklahoma where it was 69 degrees. That is 86 degrees warmer than the night before we left home.
Wayne enjoying an ice cream cone in Oklahoma
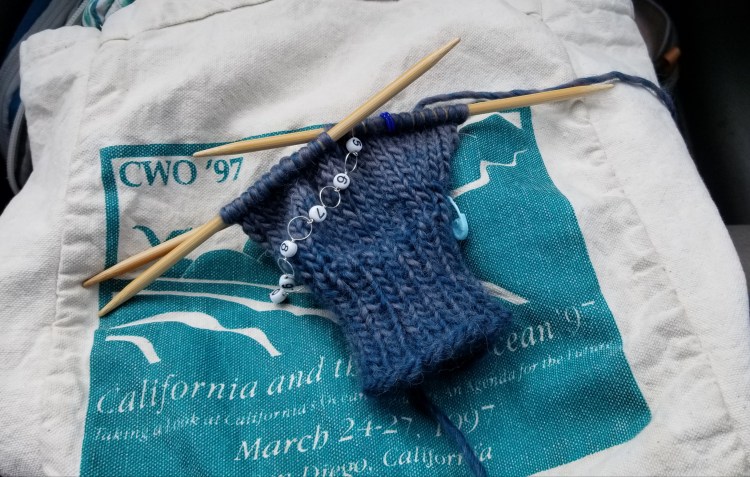
Usually I do some of the driving on long road trips, but this time towing the fifth wheel Wayne did all the driving. Maybe I will try it on the way home. Our dog sat on my lap for the entire trip. I got some knitting done.
Knitting a pair of socks with Lyla on my lap
We had allowed extra time for the trip in case of bad weather for driving. As it turned out the conditions were excellent and we arrived after 3.5 days on the road at Gold Canyon RV and Golf Resort around 1:00 pm on January 31, one day early.
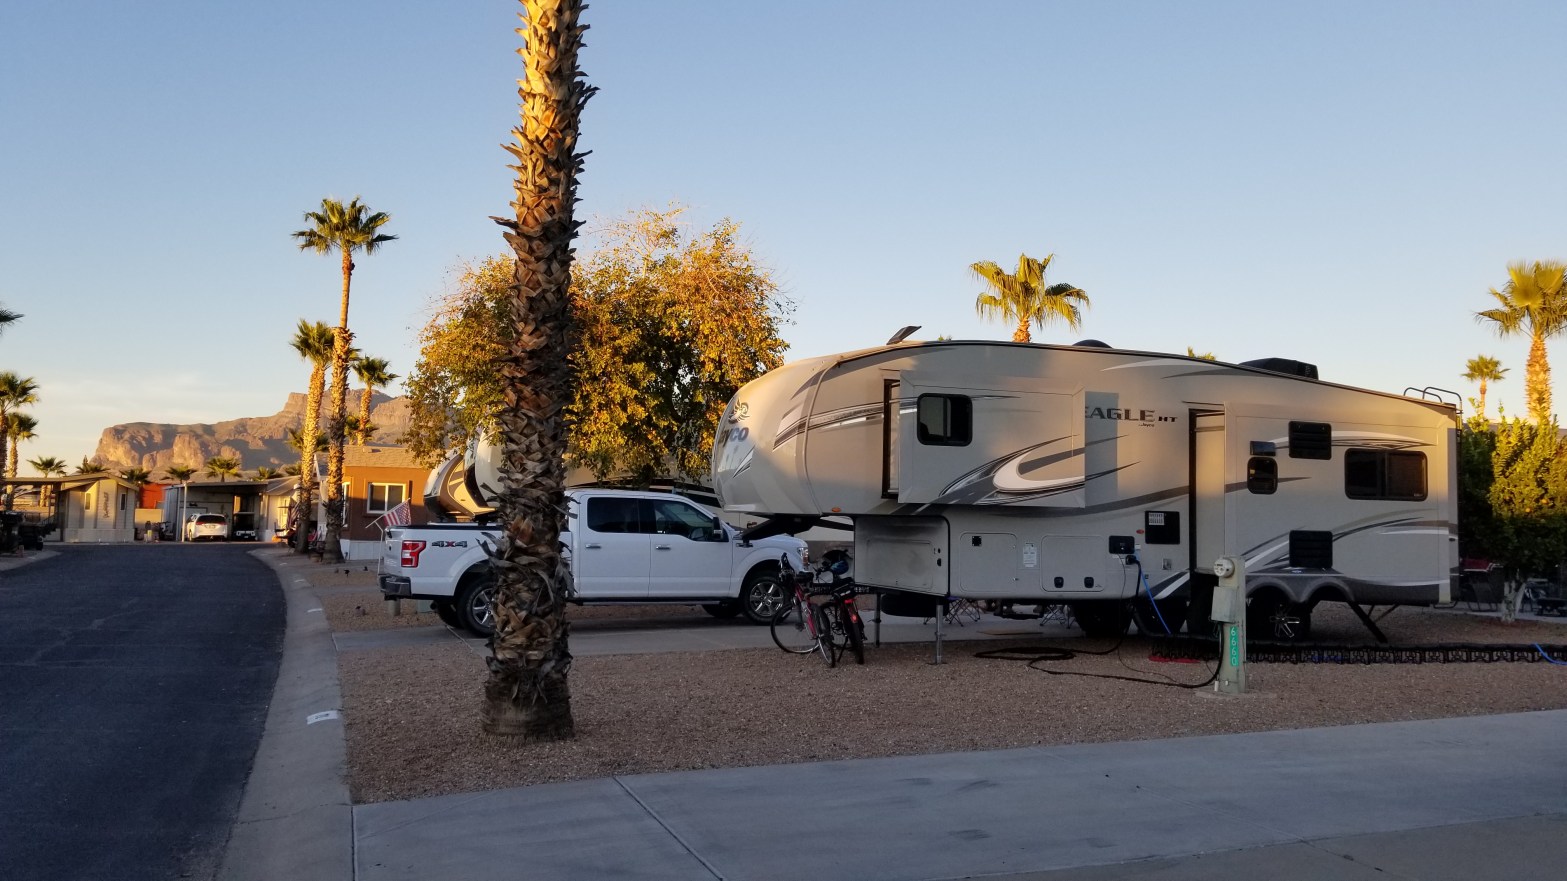
The following photo was taken from the driveway near the main office and community building at the resort. That little hill with the trees on it is one of the golf course holes. You can see the Superstition Mountains in the background.
Gold Canyon Golf and RV Resort
Our site was empty, so we were allowed to check in. The employees there helped us get backed in to our spot which was very helpful. That is standard at this place, not just because we are newbies. I guess they want to make sure no one hits a tree or knocks out the utility connections. Being the first time we had actually used the RV, it took all afternoon to get the trailer leveled, connected to the utilities, water hoses flushed out, put the slide outs out, etc. Our brother-in-law (who does not have an RV) came by to “help”, and two more experienced RVer neighbors came over with advice. I had a very detailed checklist for setting up, but we found a few things to add to it as we went through the process.
Our neighbors include a single man with a big camper van on one side (it looks very nice, although I did not think that type of RV was allowed in this park), and behind us a nice couple from Edmonton, Alberta, Canada, with a large class A motorhome, eh? They leave their RV in storage in Arizona when they go back to Canada. They had driven home to Canada in March of 2020 at the beginning of the pandemic before the borders closed, and were not able to come back until this snowbird season. We have not met the people on the other side. They have a fifth wheel bigger than ours, with only one window on our side which is nice for them and for us. The next photos show our site with the RV set up, and a close up of our bikes.
Our fifth wheel trailer set up at the RV ParkBikes ready for a ride
There are many lemon, orange and grapefruit trees in the park. One day when I was out walking there was a box of grapefruits with a sign saying to help yourself. I did and it was delicious. The following photo shows Wayne relaxing next to the RV where we have a patio area with a table and chairs, and a lemon tree right in the back!
Wayne relaxing on our patio area
There were a couple of potentially bad glitches involving water when we were first setting up, but in both cases they were resolved without a disaster. Another unfortunate thing happened at home, but that also got taken care of. We have a thermostat for the furnace in the house that can be controlled remotely, and allows us to monitor the temperature in the house. One night the temperature in the house was dropping fast, and got almost all the way down to freezing, so clearly the furnace was not working. Good thing we had drained the water. My uncle who lives nearby went over and scoped out the situation. There was a problem with the furnace, so we were able to contact the repair people and get it fixed.
Our first couple of days were spent getting everything set up and put away inside the RV. Right after that was a busy stretch with company. Wayne’s sister and her husband were already here renting a park model. Their young adult daughter arrived for a visit a few days after we arrived. Soon Wayne’s other sister and husband arrived for a five day visit, along with their young adult daughter, lodging at a nearby hotel. Our daughter came too. She stayed in the RV with us, sleeping on the love seat sized sofa bed. One of Wayne’s cousins and her husband also came for a few days, overlapping with the other visitors and staying at the same hotel. There were activities every day including hiking, biking, golf, pickle ball, swimming, hot tubbing, happy hours, and scenic drives. One thing I did not do much of was knitting. It was fun but after they all left I was ready for some down time.
One day we locked ourselves out of our trailer. Neither of us had locked the RV door, but when we returned from a day trip, the door was locked and both of our keys were inside. We are not sure what happened, but I may have bumped something on the lock mechanism as I was leaving. After googling and considering options, we noticed that the screen on the “emergency” window exit in the bedroom had clips for easy removal. Luckily it was a warm day and the window was open with access to the screen. That window is high off the ground, so we borrowed a ladder from the well equipped Canadian neighbor and were able to pop the screen off. I was nominated to climb up the ladder and crawl in through the window on to the bed. No, there is not a photo. Add a ladder and hida key to our supply list.
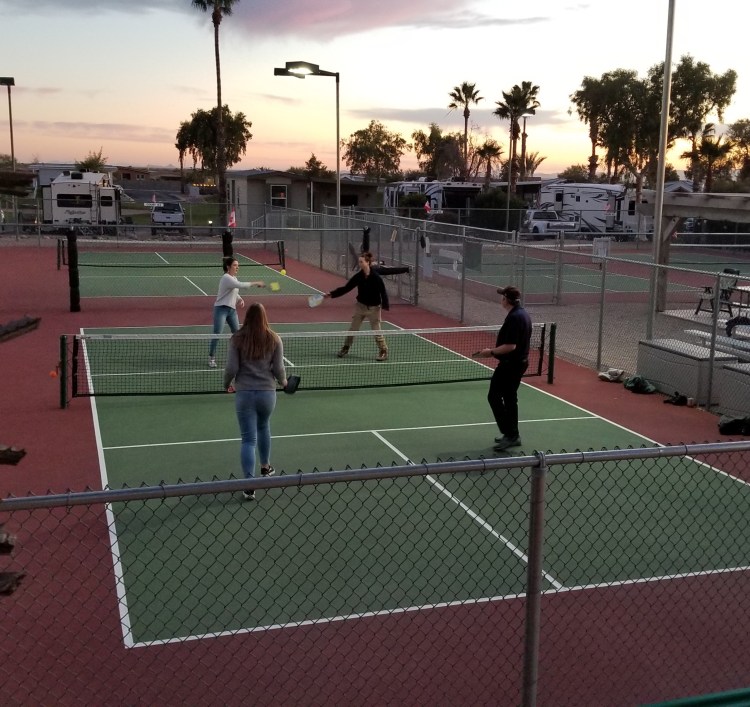
Our daughter and her two cousins are all athletic and gave my brother-in-law a workout during a pickle ball match.
The cousins playing pickleball with their uncle
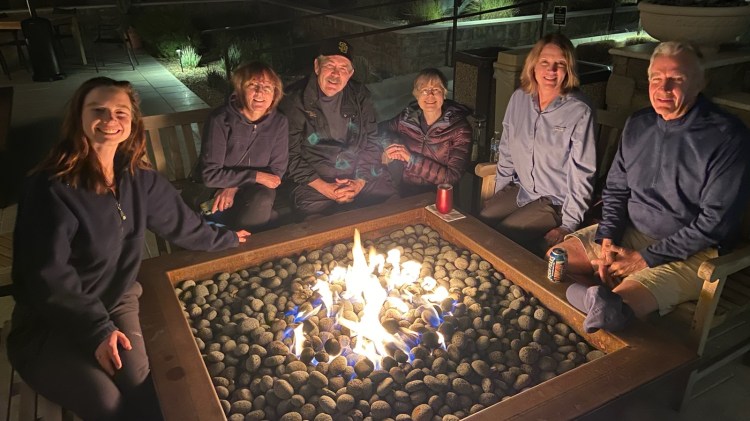
There is a common area in the RV park with nice firepits for enjoying happy hour.
There are some neighborhoods with nice houses and beautiful landscaping across the highway. So far I have been on several bike rides over there, plus another bike ride on a trail south and west in Queen Creek, and also several hikes.
Bike ride in a nearby neighborhoodHiking in the Superstition Mountains
There have been more than the average number of brutally cold and windy days at home in Minnesota, with temperatures in the twenties below zero and with 30 to 50 mile per hour winds. I saw on the news the other day that the interstate highway near our home was closed for a few hours due to whiteout conditions causing accidents. I have avoided sharing photos and news of how nice it is here. When we first arrived it was on the cooler side and even got down in the 30’s at night. The last few days have been up to 80 degrees in the afternoon. However even on the warmest days, it cools off a lot starting in the late afternoon.
Wayne’s sister and husband who have been renting here are leaving tomorrow. We will have some time alone until the beginning of March when our son and his wife are coming for a long weekend. Being that our son is 6′ 4 1/2 ” tall, they will NOT fit on the RV love seat sofa bed. They have reserved an airbnb instead. With a quieter stretch ahead, I look forward to catching up on my knitting.
I am always worried about whether people will like the Christmas gifts I give them. In recent years we have reduced gift giving to only a few people, and we are only supposed to give one gift per person. It is hard to find one thing I know is going to be a hit, so often I end up with a couple of smaller items, or one main gift and another smaller bonus gift.
I could not figure out what to get our adult son James this year. I had ordered a “Life is Good” tee shirt in two sizes, but after they came in the mail it did not seem like enough, and also I was not sure either of the sizes would fit. I ordered another size, and then kind of late in the game decided to knit him a pair of self striping socks. When we saw James at Thanksgiving I had drawn a diagram of his foot on heavy paper, so I had a good chance of ending up with the right size. In the past he has been known for wearing fun socks, but at his recent wedding he wore low socks that were not visible with his expensive custom shoes. I verified that he does sometimes wear dress socks with work shoes, and then got organized to knit a pair. The photo below was taken at the wedding.
The expensive custom made wedding shoes with socks you cannot see
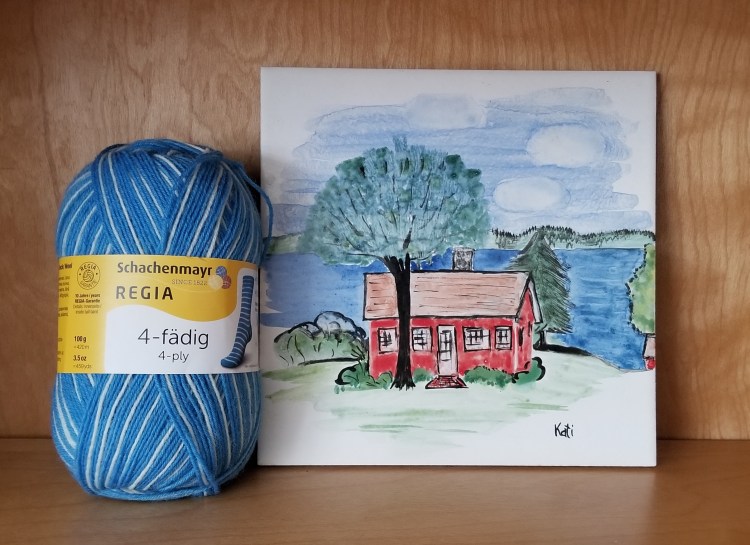
I used Regia 4-ply sock yarn I had ordered in early December with Black Friday sale pricing. In the photo below the yarn is staged next to a tile my mom’s sister painted many years ago of our family cabin.
Yarn for socks next to a tile hand painted by my aunt
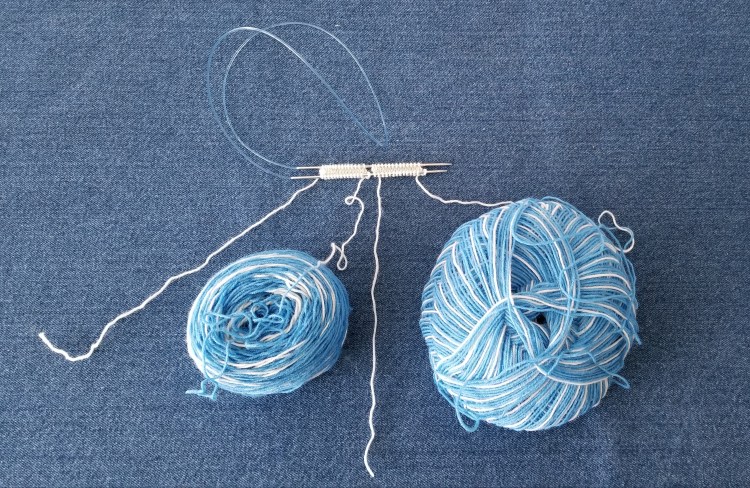
I used my ball winder to divide the original skein of yarn into two center pull balls, one for each sock. They were supposed to be the same size, but one turned out bigger in volume. The two balls of yarn looked very different but were actually the same amount by weight. To get the self striping pattern on each sock to match, I started at the beginning of a white section from each ball.
I have been reading about various methods for knitting socks. I saw another way to cast on toe up socks called the “Turkish Cast On” so I decided to try that. There are quite a few good youtube videos if you want to check that out, including this one from The Chilly Dog. Following are photos of the turkish cast on with two socks at a time using the magic loop method.
Turkish Cast On two at a timeClose up of tip of toe for both socks, ready to begin toe increases
I also saw a method for the toe increases creating a rounded toe, rather than the pointier style used in most sock patterns. You can find that pattern here on Ravelry. The Seam Free Rounded toe has increases more often to make rounded toe, as seen in the photo below. There are increases in two out of every three rows, rather than every other row in the more common type of toe pattern.
Looking like sock toes, with rounded shape
The original center pull ball was starting to fall apart, so I rewound it into an old fashioned ball by hand. They looked even more different from each other, but were still the same weight. It was fun to see the pattern come alive as I knit the foot of the sock.
Sock feet in progress
I used the Fish Lips Kiss Heel pattern for the heel, which you can see in the next photo.
Done with the heel, ready to start the foot
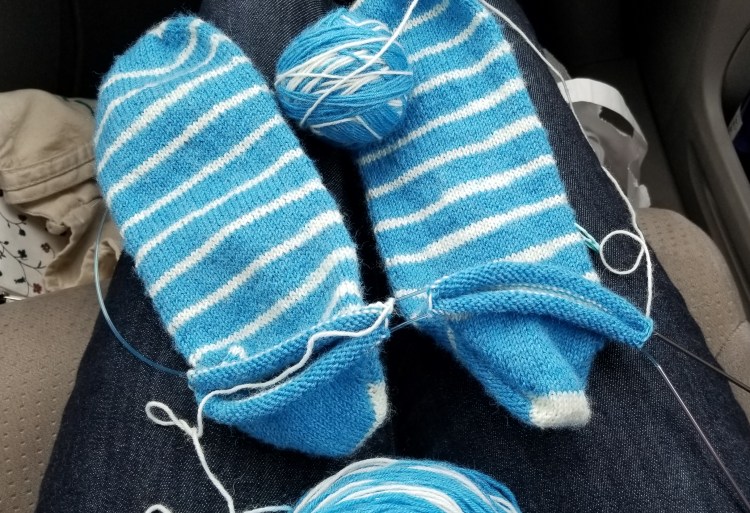
The stripes on the two socks matched up almost perfectly for the entire foot section. When I got a couple of inches into the cuff, there was a knot in one of the balls of yarn. I hate that. I undid the knot and overlapped the two ends, knitting with both ends together for an inch or so. That caused an irregular section in the sock and for the stripes to not match up after that. I don’t think my son will care, but it is annoying when I was excited about making matching striped socks. You can see the place where the yarn is joined in the sock on the right in the photo below. And also that I rewound the other ball of yarn into a regular ball by hand. There are five inches of cuff at this point, so it was time to start the ribbing.
The stripes did not match after the knot in one ball of yarn
I was not sure if there would be enough yarn for three inches of ribbing, in addition to the five inches of plain cuff. I like the look of ribbing for the entire cuff, but that takes longer and maybe does not look best with the self striping yarn. One advantage of starting at the toe is that you can knit the cuff as tall you want, or until you run out of yarn. As it turned out, I was able to knit eight inches of cuff with a small bit of yarn leftover. I switched to double pointed needles for binding off the cuffs one sock at a time.
Following is a photo from the label of the yarn, showing what they are supposed to look like.
What the sock is supposed to look like with this yarn
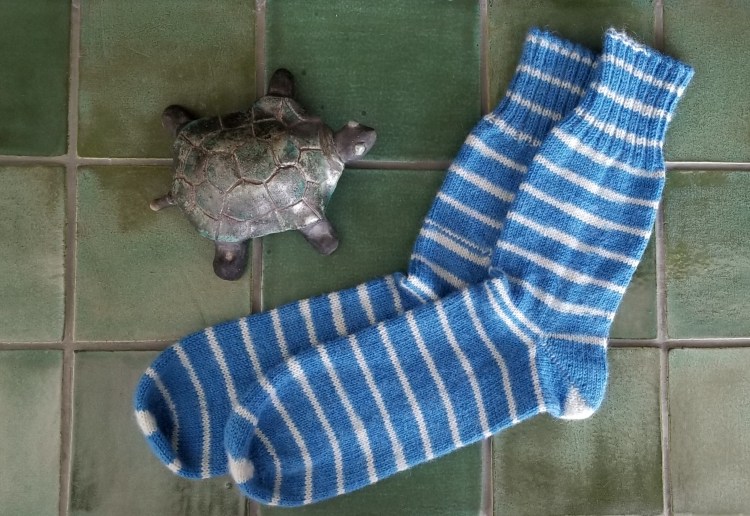
I was happy with how the socks turned out, except for the way the break in the yarn caused a jog in the pattern.
Completed socks
I mailed the socks and tee shirt to my son in January, well after Christmas. Upon my request for photos of the socks on his feet, he sent the following. Um, this reminds me of the Wizard of Oz. LOL.
The Wicked Witch of the West
The next two photos are better, with shoes off, and then while wearing the infamous custom made wedding shoes.
Self striping socks with the wedding shoes
Meanwhile I learned another way to join yarn ends in the middle of a row from HeyBrownBerry. It looks better than having double yarn for a couple of inches, but would still result in the stripes of the two socks no longer matching. All in all I think this project was a success.
My college age nephew, Daniel, likes to look fashionable with thrifted clothes. He sees the social media posts of things I have knitted and woven, and had told my sister that he would wear “anything” I made. It is hard to know what gifts to get the young people, but I figured he would like a pair of hand knit socks or a hand woven scarf for Christmas. I gave him a card to open with an IOU for a hand made item. I had a box of yarn options ready so he could pick out the yarns and colors he liked.
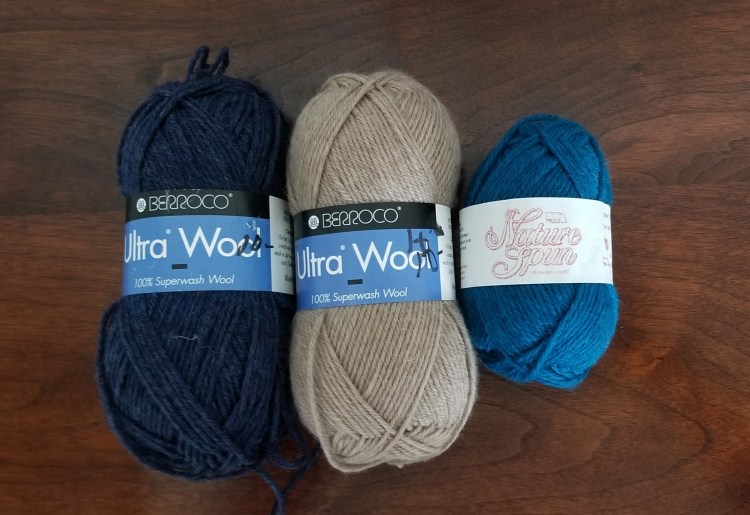
Daniel picked the scarf option with three different wool yarns. He started out with some navy and turquoise, but there was not enough of the turquoise, so he picked some tan also.
Yarn for a scarf
I warped the loom with the navy yarn, and then started playing around with how to use the tan and turquoise for the weft yarn. First I tried every other row, but the tan completely took over and you could barely see the turquoise. I undid that and tried switching colors every two rows, but I did not like that either. Finally I tried every four rows. That was not doing it for me either.
Trying out the tan and turquoise weft yarn with navy warp yarn
Sometimes you don’t know how something is going to look until you try it. The three skeins of yarn looked nice sitting next to each other on the table, but somehow they were not right together on the loom. It might have worked if I had included one of the other colors in the warp yarn with the navy, and then it could have been more of a plaid pattern with alternating weft colors. However by this time it was too late for that. I texted Daniel to share some options for what I could do. He did not know what to say, so I went with an executive decision to ditch the turquoise and have only the navy warp yarn with the tan weft yarn. Following is the beginning with about four inches of weaving.
Beginning of weaving with only tan weft yarn
I think it looks very nice. The colors are somewhat neutral, so it will work with many different looks. The blue and tan yarns are different colors of Berroco Ultra Wool. They are soft and can be machine washed using the delicate cycle, and dried in the dryer on low. The turquoise yarn is nice too, but not quite as soft and not machine washable. If I had included the turquoise yarn in the scarf it would have meant the final product would not be washable.
As usual, I did the hem stitch at the beginning and end of the scarf while it was still on the loom. I completed all the weaving in a couple of days. It was New Years Eve and New Years Day, so I gave myself permission to not do my usual chores. It was also a good time to stay inside due to temperatures as low as minus 20.
When I started to remove the project from the loom I realized that there were two problems at the very beginning. I had done the hem stitch backwards, and the first row of weaving after the hem stitch was the opposite pattern from what it should have been. Oops. I was able to easily undo the hem stitch and re-do it, and then add another row with a scrap of yarn on a needle in between the two identical rows at the beginning. Problems solved.
During the weaving I had to join a new length of weft yarn in two places, by doubling back the loose end in the same row as the new yarn. Sometimes that is not noticeable but in this case it really stood out. I decided to undo those ends and weave up the side instead. You can see the extra thick doubled rows in the photo below, before I fixed them.
Weaving removed from the loom with woven in ends very obvious
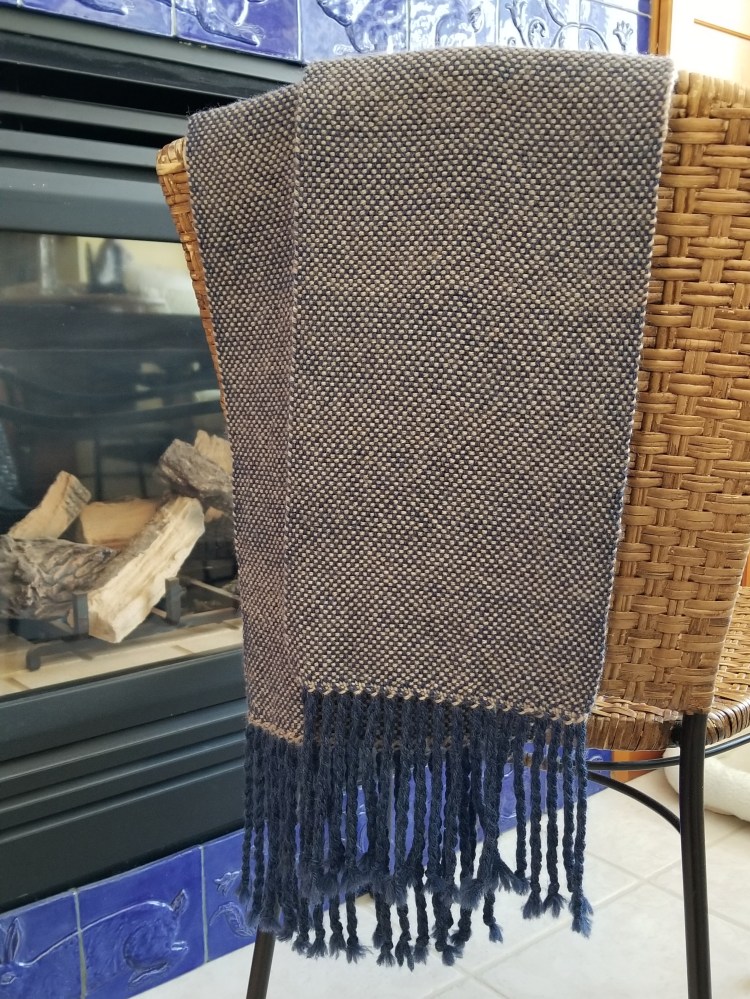
The following photo shows the completed scarf after all the ends were woven in correctly, the fringe was twisted, and it had been gently washed.
Scarf washed and complete!
Lastly are photos of my nephew looking dapper modeling the scarf.
Daniel is taking some acting classes at college. Some day in the future if he becomes a famous actor, these photos might be worth something!
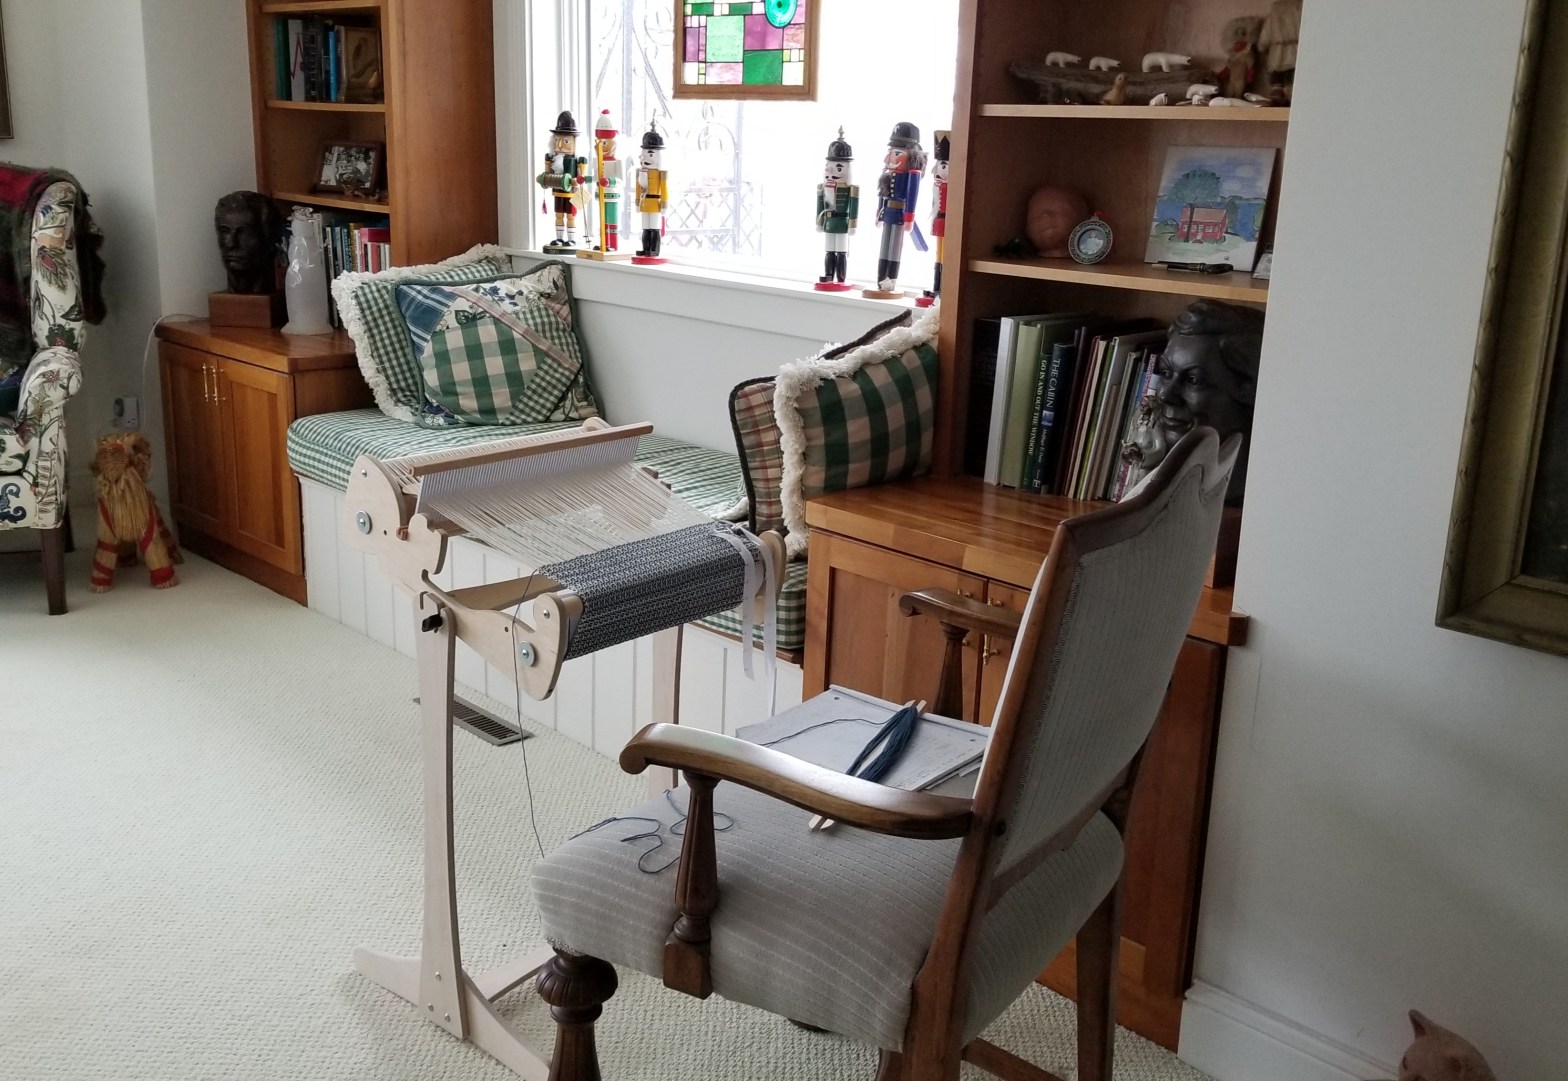
I bought a stand for my Schacht Cricket rigid heddle loom. I had been using it on the dining room table or the kitchen island. However if I am sitting at the dining room table the loom is too high, and if I am standing there it is too low, requiring me to bend over. Standing at the kitchen island works better but not if I want to sit down. The loom stand is the right height for weaving while sitting, but I also have the option of taking the loom off the stand for working on the table or island.
The loom stand came unassembled. I was a bit intimidated about putting it together after hearing that there was a lot of swearing while my uncle assembled the same stand for my aunt. I did not have any trouble at all, so maybe my uncle did not look at the instructions.
I started my first weaving project right away after putting the stand together and attaching the loom. The warping peg was 11 feet away on the dining room table. When I got about 2/3 of the way through with putting the warp threads through the heddle slots and wrapping them around the warping peg, I realized the threads at the beginning were sagging too much. I don’t know if the loom stand moved while I was working, or if I had not pulled the yarns evenly or what. I tried to fix the sagging threads which was challenging because the warp yarn is all one long string. Part of the way through I gave up on that, and decided it was not worth it. There would be a time later in the process to even out the warp yarn lengths.
My loom on a new stand with a mess of warp yarn
The next step in the project was winding the 11 feet of warp yarn on to the back beam, with paper between the rounds to keep the tension even. My paper was not quite wide enough. Then I realized that I had missed threading one of the slots in the middle. It was time for a break.
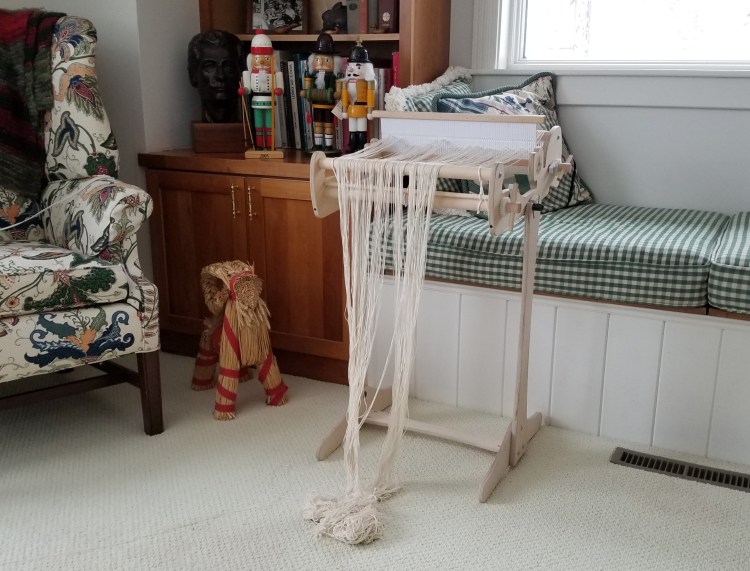
Later I noticed our dog Lyla near the loom, batting at the long warp yarns hanging on the floor. It turns out she had put a nugget of her food under the loom stand. And on a related note, she also kept dragging the Christmas tree skirt across the floor and trying to bury her food under it. I gave up and put tree skirt back in the basement.
Lyla trying to bury her foot under the Christmas tree skirt
This is the first time I have had so many problems trying to warp the loom for a weaving project. I reminded myself that making mistakes is normal, and always a learning process whether you are knitting, spinning, weaving, sewing, or doing any other craft, whether you are just learning or more experienced. At that point it was late in the evening, so I abandoned the project for the day.
I was mentally ready and had a chunk of time to work on the weaving again on a cold, snowy, windy Sunday afternoon while my husband watched football on TV. I decided to have a positive attitude as I took the loom off the stand and moved it back to the dining room table to fix the warping problems. The next photo shows the loom back on the table with the tangled warp yarns stretched out and ready to be tamed.
A mess of warp yarns
Untangling the warp threads was a very slow process. I used masking tape to hold them in place as I went along two threads at a time.
Untangling the warp yarns
With some time and patience, I was able to get the warp yarns separated and evened out, wound on to the back beam, and ready for weaving with the loom back on the new stand.
The first of three towels was blue waffle weave to replace the first one I had made earlier and given away.
Weaving using the new loom stand
For the second towel, I decided to try weaving a row of trees using a pickup stick, from a pattern I found online. Click here if you want to see the video, which also has a link with written instructions. The written pattern was helpful, but also confusing as it was using a different number of warp yarns for the tree pattern, and some other things did not seem to jive with what the video was saying. I figured it out which is good for keeping my brain active, but it took awhile and I was trying to finish this project before leaving for Minneapolis in a few days. After I completed one pattern repeat of the trees, I continued with periodic dotted lines, like the row before and after the trees, in order to get the towel done faster.
Tree pattern using the pick up stick
By the time I got to the third towel I was running out of time. I had found another pattern called “Windowpane” which is similar to waffle weave, but with eight rows in the pattern instead of six. I ended up doing a sampler towel with a section of yellow plain weave using a textured linen and cotton blend yarn, a section of blue windowpane, and a section of green waffle weave, with plain off white in between. There was some warp yarn left, so I make a narrower washcloth using the yellow textured yarn with waffle weave. The following photo shows the blue waffle weave towel after removing the weaving from the loom. Can you spot the mistake?
Blue waffle weave towel with an obvious mistake
After careful examination, I realized I had woven one row with plain weave instead of a pick up stick row. I was able to fix it by weaving in a piece of yarn with the correct pattern using a needle, and then pulling the incorrect row out. It was only the one row that was incorrect within the six row pattern. It could have been a lot worse if I had woven a few rows of the pattern, and then started over with another repeat, in which case I would not have been able to fix it at all.
The next photos show all three towels, after fixing the mistake in the blue towel and then weaving in ends and washing, followed by a close up photo of the row of trees on the second towel. I can tell where I fixed the mistake in the blue towel, due to the difference in the spacing. I hope it will gradually become less obvious over time as towel is used and washed. I am keeping this one, so probably no one will ever know.
Three towels after weaving in ends and washingClose up of tree pattern using pickup stick
The washcloth using up the end of the warp yarn turned out well. I had to remove some of the warp yarns to make it narrower for a square shape. Following are photos of the washcloth next to the blue waffle weave towel to show the scale, and then closer up.
Yellow waffle weave washcloth, next to blue towel for scaleCloseup of yellow waffle weave washcloth
I look forward to weaving more towels and washcloths, while experimenting with patterns and yarns. However time is running out before we leave on our snowbird trip to Arizona with the new fifth wheel trailer. Due to limited space in the RV, I don’t think I will be bringing the loom. 😦
We had a Norwegian foreign exchange student for the school year when our daughter was a sophomore in high school. It was not something we had planned on doing. At the time our neighbor was involved in running the program and they were desperate for someone to house a student temporarily until a host family could be found for the whole year. We already had a very full life, but after seeing the profile of the student we agreed to a temporary placement. My husband’s heritage is 100% Norwegian which influenced our decision to go for it. After doing a DNA test since then, he was dismayed to find out he also has some Swedish!
Long story short but Ingrid was wonderful and we agreed to have her with us for the entire school year. It was a very positive experience and in fact she stayed with us for 11 months, and then returned a year later to see us as well as close friends she had made at school in Minnesota. We hope to visit her in Norway some time.
One of the fall outings we went on with Ingrid was a trip to Ingebretsen’s, a Scandinavian shop in Minneapolis selling gifts, food, books and craft supplies. Unbeknownst to me, she did some holiday shopping while we were there. On Christmas morning I was excited to unwrap a book called “55 Christmas Balls to Knit” by Arne & Carlos. It turns out that Arne and Carlos live near where she is from in Norway. Knitters out there have probably heard of these textile artist partners who have a blog and youtube channel, knitting and crochet patterns, a relationship with Rowan yarn and other ventures. You can see what is going on in their world on their website arnecarlos.com.
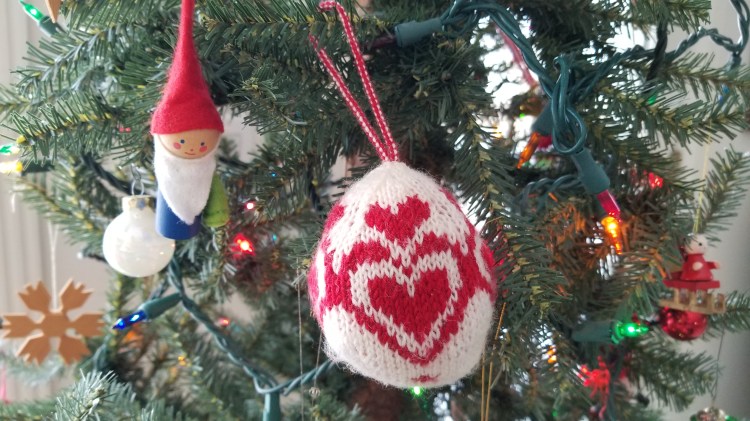
Ingrid’s aunt is a knitter, so another Christmas gift for me that year was one of the Arne and Carlos Christmas balls knitted from a pattern in the book. Following is a photo of that ornament hanging on our tree now.
Arne and Carlos knitted ball from Ingrid’s aunt
Arne and Carlos came to Minneapolis several years ago. A friend and I attended an event where they gave a talk and slide show about their textile projects, were available to autograph books, and handed out gift bags that included a ball of Rowan yarn and a pattern. I brought my copy of the Christmas Balls book for them to sign.
My book autographed by Arne and Carlos
Another Christmas ball on our tree this year was hand knit by my elderly distant cousin in Sweden, Sif. She is the daughter of my Great Grandfather Leonard Eriksson’s youngest sister. Leonard traveled to America from Sweden by himself in 1889 at age 14 with only $10, which was stolen while he was sleeping on a park bench during the journey. He eventually became a lawyer and in 1923 built our beloved family cabin from Swedish plans. The story of Leonard and the cabin is part of my mom’s self published memoir “The Red Cottage“. Our family has kept in touch with this branch of the family all these years. My husband and I visited Sif in 1988 at her home in Vasteras, Sweden, and more recently she and her daughter visited Jewett Lake several times during our annual Eriksson family reunion at the cabin.
Christmas Ball knit by my elderly cousin in Sweden
In the years since I have knit many of the Christmas Balls myself. A few of them are hanging on our Christmas tree, but most I have given away as gifts.
The following photo was taken while we still lived in the Twin Cities, and I still had that many Christmas Balls. They are displayed in a basket next to a ceramic turtle vessel adorned with a frog that my mom made. The entire back of the turtle is a lid that can be removed. I have always loved this turtle but at the moment it is packed in a box under the basement stairs from when we moved two and a half years ago.
Looking at the Christmas balls inspires me to knit more of them. I hope everyone had a good holiday and that 2022 brings new adventures and blessings.
My sister-in-law, Yvonne, spent over two hours on a zoom call helping me with some clean up in the family cabin bookkeeping. I was grateful for her time and expertise. I know she did not expect anything in return, but I decided to weave some towels for her.
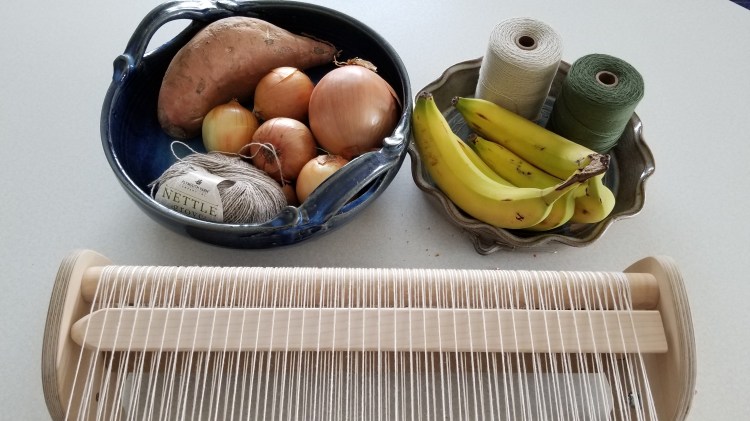
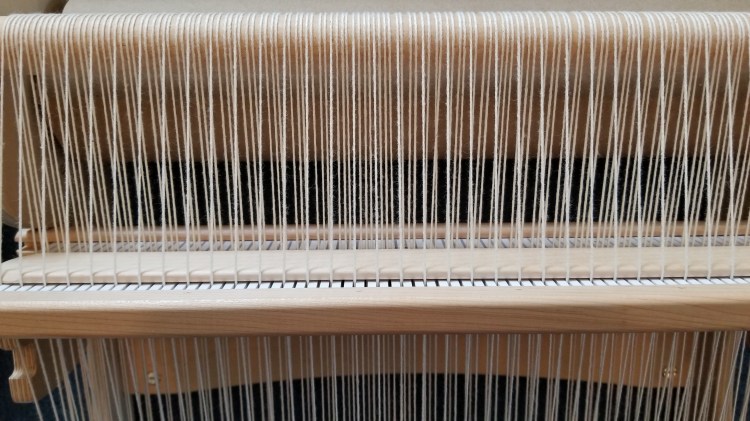
I had been thinking about attempting towels with a waffle weave pattern. Ideally that requires a 4 shaft loom which is much bigger and more complicated than what I have. However, I found instructions for waffle weave using a pick up stick with a rigid heddle loom like mine. A pick up stick is a narrow piece of wood shaped like a ruler that is used by weaving it in and out of the warp yarns at the back of the loom, as in the following photo. The pick us stick allows for more combinations of which warp yarns are up or down to create more complicated patterns.
The pick up stick ready to make waffle weave
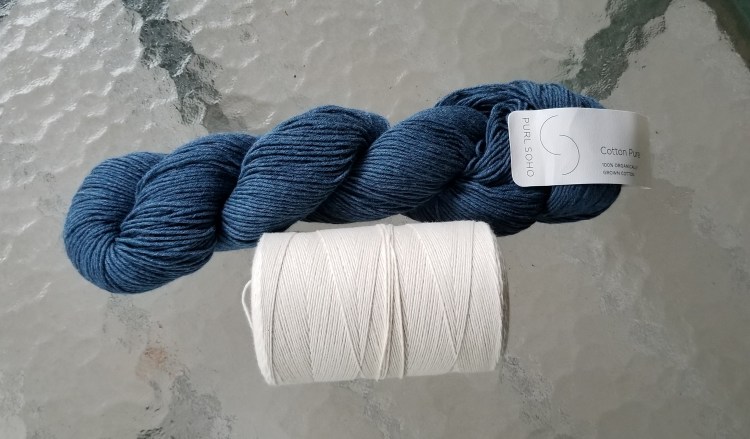
I warped the loom using enough off white 8/4 cotton weaving yarn for four towels. The weft yarn for the first towel was blue Cotton Pure from Purl Soho.
Yarn for the first waffle weave towel
Waffle weave consists of a pattern of six rows. It took me many repeats of the pattern, along with some tips from Torri, to really feel comfortable with it, understand what was happening, and be able to remember the pattern without looking at my notes. The six rows are combinations of having the reed in the up, down, or neutral position, and having the pick up stick forward in a flat or standing-on-end position, or back out of the way. Following are the six rows of the pattern:
Row 1 reed down; pick up stick back
Row 2 reed up; pick up stick forward and flat
Row 3 reed down; pick up stick back
Row 4 reed up; pick up stick back
Row 5 reed neutral; pick up stick forward and on end
Row 6 reed up; pick up stick back
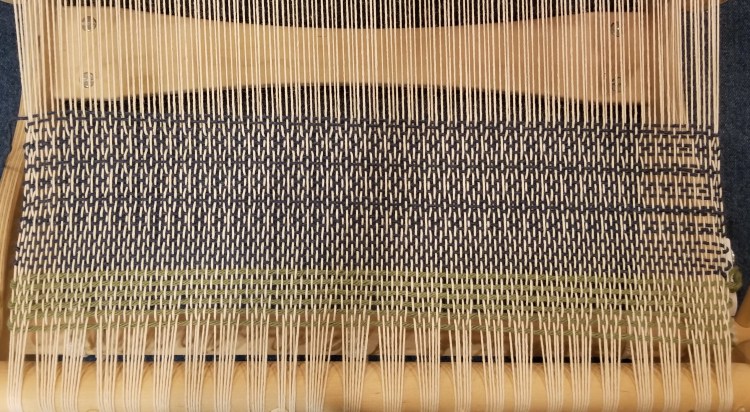
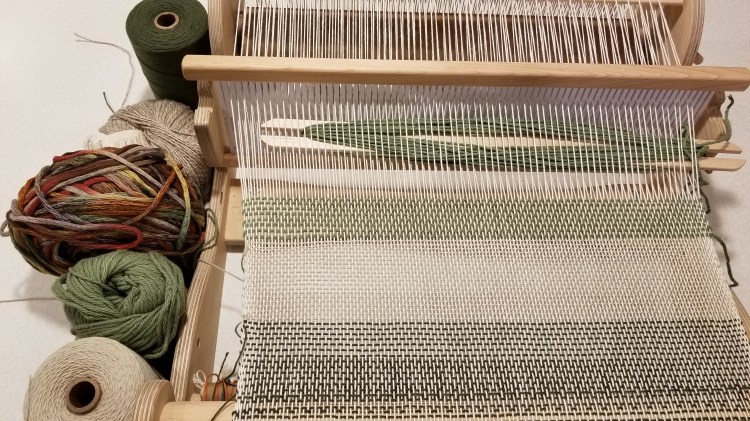
You can see three repeats of the blue waffle weave pattern in the photo below, after the blue plain weave rows for the hem, and green header rows which will be removed.
The next photo is a close up of two repeats of the six waffle weave rows. The shuttle of blue yarn is making the first row of the next repeat, which is every other yarn.
Shuttle going through every other yarn
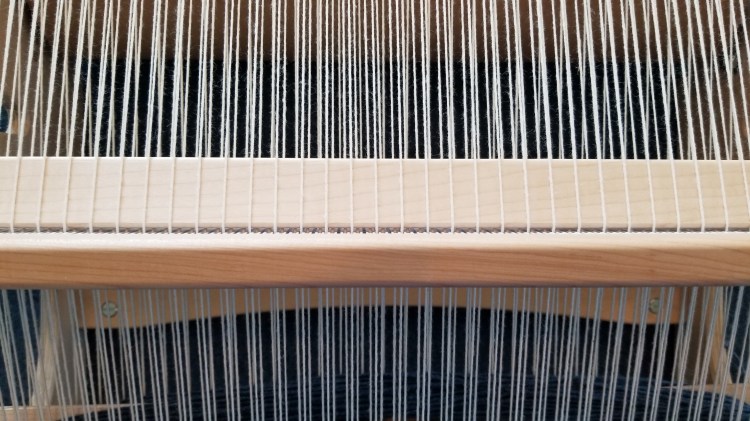
The following photo shows the position of the reed and pick up stick for row two of the pattern, with the pick up stick pushed forward and flat just behind the heddle. Every forth yarn warp yarn is down, the next three yarns are up in front of the reed.
Pick up stick causing every 4th yarn to be down
The next photo shows the same row but in front of the reed with three yarns up, one yarn down.
Every forth yarn is down, three are up
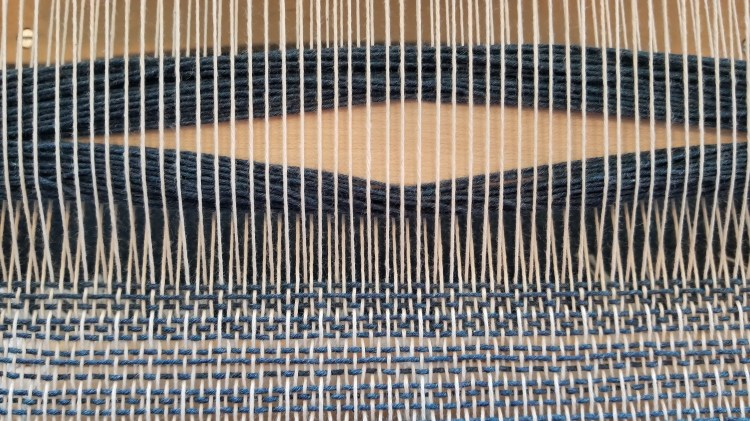
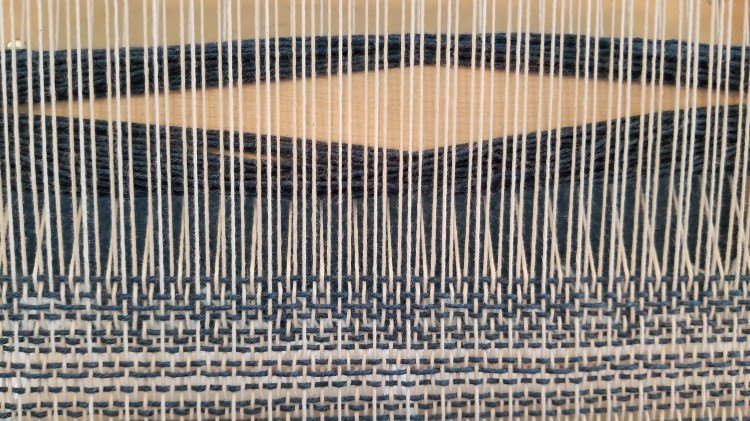
The next two photos show row five of the pattern behind and in front of the reed. The pick up stick is pushed up behind the reed and standing on end with the reed in the neutral position, causing the opposite pattern of one yarn up and three yarns down.
The pick up stick forward and on end just behind the reedOne yarn up and three yarns down in front of the reed
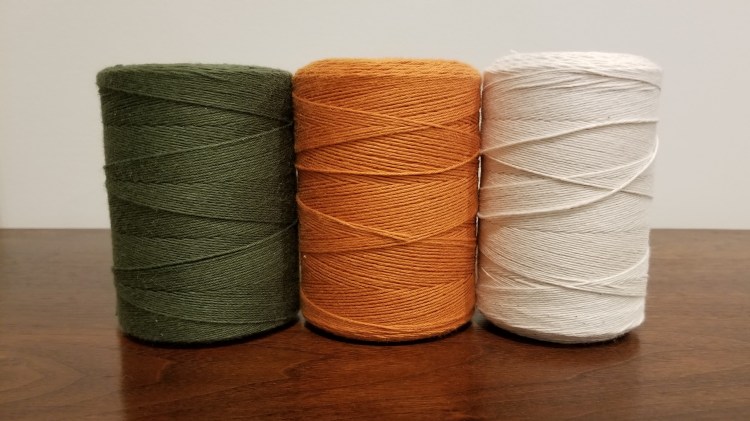
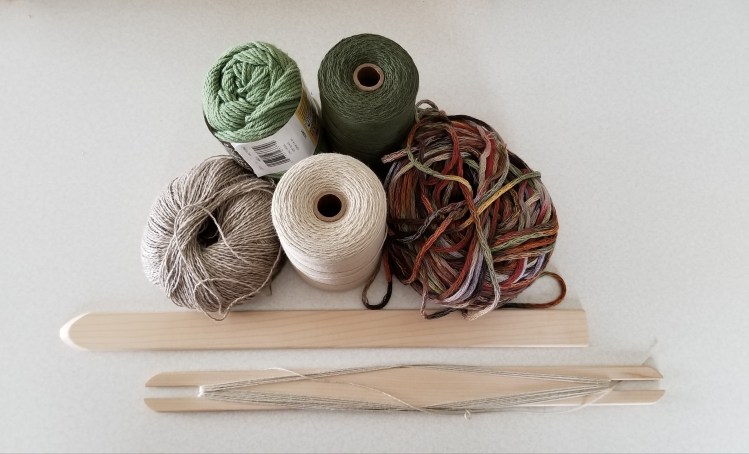
After finishing the blue towel successfully I went ahead with towel number two and three for Yvonne. She picked pumpkin orange and olive green cotton weft yarn for her towels, with the off white warp yarn.
Yarn for gift towels
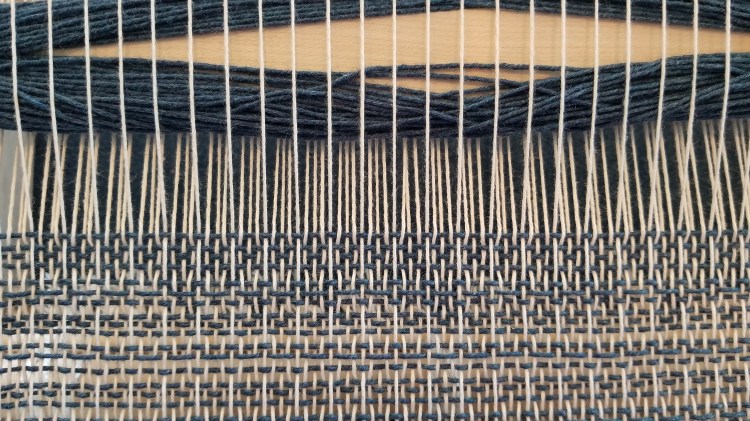
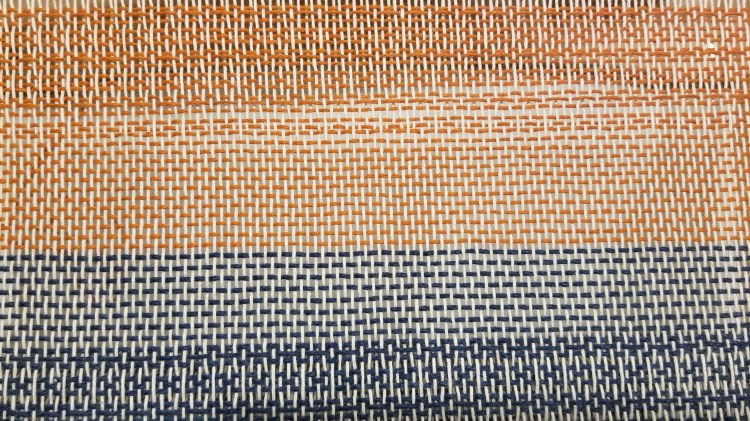
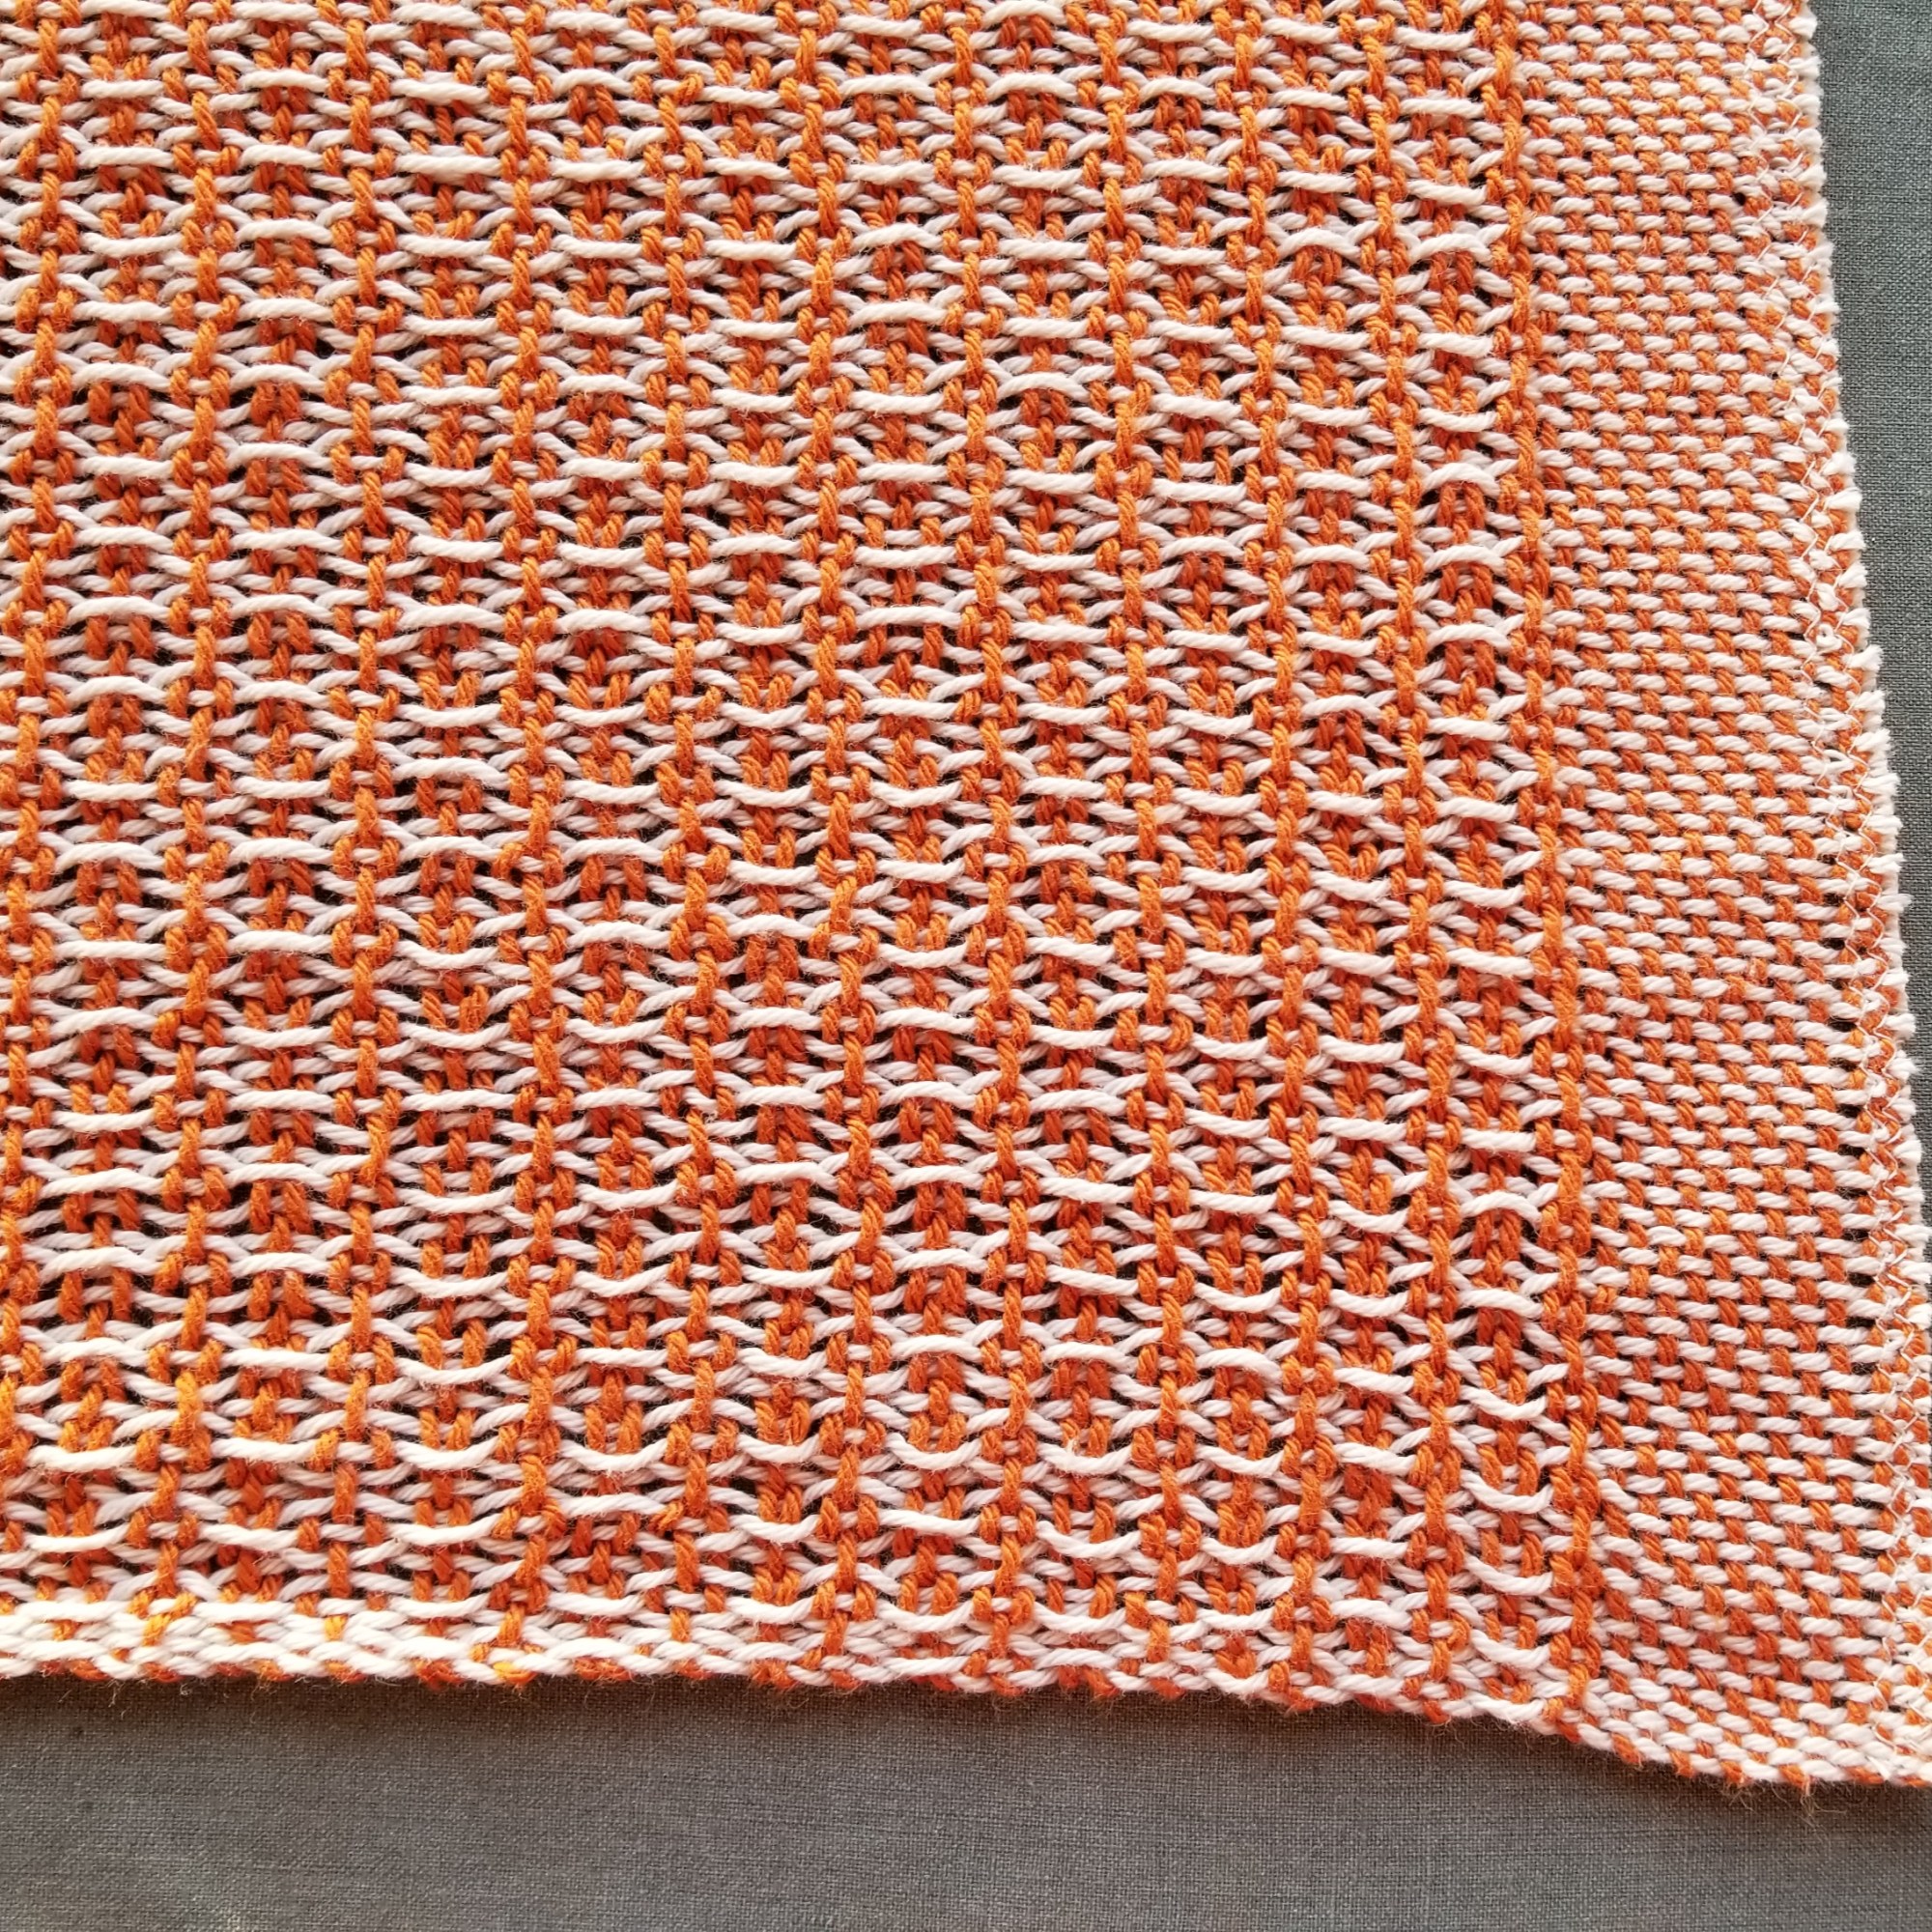
I wove some plain weave rows at the beginning and end of each towel that would become part of the hem. The following photo shows the end of the first blue towel and the beginning of the second orange towel. After removing from the loom and washing the weave will become more dense due to the yarn not being under tension and shrinking in the washing machine and dryer.
End of the first towel, beginning of the second towel
Following is a close up photo of the third towel in green waffle weave.
Close up of waffle weave pattern in green
For the forth towel I decided to use multiple yarns and colors to go with the decor in our new RV. The next photo shows the five yarns for the last towel in shades of green, off white and brick red. The multicolor yarn is Berroco Espresso which is thicker and is 50% cotton and 50% acrylic, so not as ideal for towels but there will only be one section of it and the colors really add to the look.
Weft yarns for forth towel
I wove random amounts of each of the various weft yarns using plain weave in most cases, but waffle weave for the green 8/4 cotton.
Last sampler towel in progress
The 8/4 cotton weaving yarn is thin enough to make a rolled hem without being too bulky. I prefer the look of the rolled hem for towels, although it is more work than doing hem stitch with fringe. To make the rolled hem after removing the weaving from the loom and washing, I used my sewing machine to zig zag stitch at both ends of each towel. Then I cut them apart, folded over the ends twice, ironed them flat, and hand stitched them down.
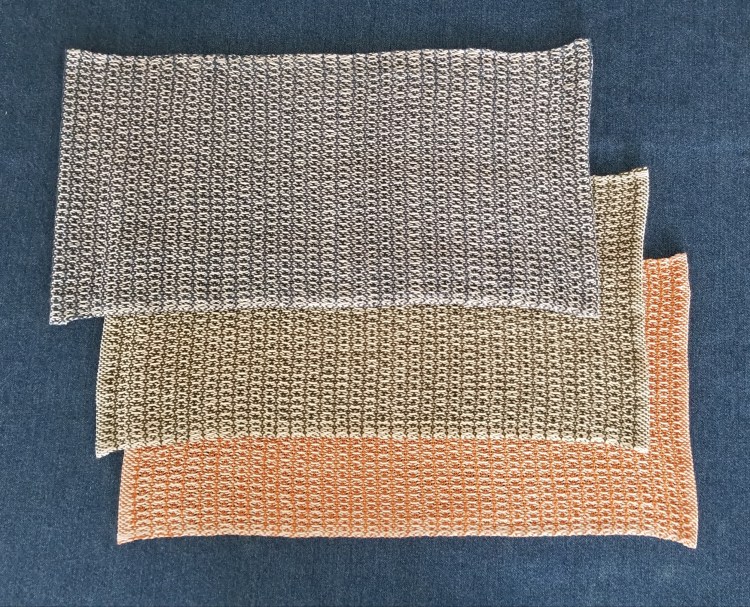
The three washed and hemmed waffle weave towels are shown below.
Three waffle weave towels
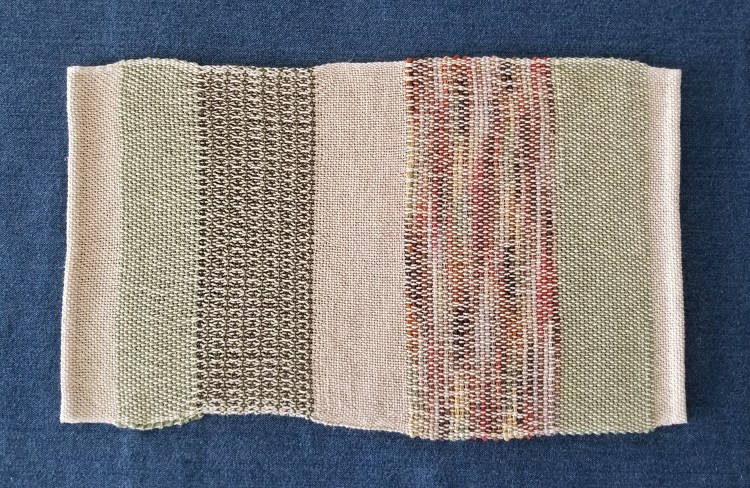
The sampler towel is not even on the sides due to the different thickness of the various weft yarns. The multi color Berroco yarn is much thicker than the 8/4 cotton yarn. The waffle weave pattern also causes the width to be narrower in that section.
Sampler towel
All in all I like the results and feel this project was a success. I expect to make more waffle weave towels in the coming months.
I had a friend from elementary school, Elissa, who I had lost track of and reconnected with several times throughout our lives. I changed schools when my family moved to a different community during junior high, later she lived away from Minnesota. Elissa looked me up after she had moved back to Minneapolis and was expecting her first child. In one of those small world things, it turned out her husband was from my high school class. During that period we enjoyed get togethers with our young children and occasionally as couples.
Later after our kids were grown and we had both moved again, we crossed paths when her son, Jesse LaVercombe, was in a holiday season play called “The Wickhams: Christmas at Pemberley” at the Jungle Theater in Minneapolis. Elissa happened to be at the play the night I attended. At the same performance, I also ran into my theater loving cousin and her mother, Erika and Tina. They both write reviews for a blog called “Aisle Say Twin Cities” which results in them getting free tickets to shows. Here is the link for Erika’s review of the play.
The next winter Jesse was in another Jane Austen theme play at the Jungle Theatre, “Miss Bennet: Christmas at Pemberley“. This time we planned ahead and met Elissa for dinner before the performance, and this time we got to meet Jesse at the dinner. Tina wrote a review of that play.
This spring Elissa was interested in scheduling hour long phone conversations with me. I don’t really like talking on the phone, much less for a whole hour, but it seemed to fill a need for her so I went along with it. We had some good conversations and found many things to talk about. She ended up coming for an in person visit of several days at our house during the summer.
The end of Elissa’s visit at our house happened to overlap with the beginning of a family cabin reservation by cousins Erika and Tina, so they were excited to meet and visit with Elissa after having enjoyed both of the plays that Jesse was in. We talked about other work that Jesse has done including some screen writing and a role on a Canadian TV show called Murdoch Mysteries. Another topic that came up is that Elissa’s ex mother-in-law, Jesse’s grandmother, is Judith Guest, the author of Ordinary People. The book was published in 1976 when I was in high school. Later it was made into the movie with Mary Tyler Moore and directed by Robert Redford. At the time there were rumors about Robert Redford visiting their home in the suburbs of Minneapolis
While Elissa was here visiting, she asked me to knit her a pair of mittens. Due to severe arthritis that was diagnosed in childhood, she had trouble getting traditional gloves or mittens on her hand. We went to Tangles to Treasures to pick out some yarn for the mittens, which would be stretchy and easier to get on than a stiff leather or fabric pair. She decided on some extremely soft Cascade Yarns Color Duo dark blue and gray variegated bulky yarn in a blend of alpaca and merino wool.
Cascade Yarns Color Duo for the mittens
I started knitting the cuff using three double pointed Denise brand needles with short flexible connectors, and using my Twice Sheared Sheep row counter.
The cuff of the mitten
After knitting the cuff, I switched to a larger size of traditional bamboo double pointed needles. After a couple of rows it was time to start increasing for the thumb.
Increases for the thumb
The thumb stitches went on a holder while I continued knitting up the hand.
Stitches for the thumb on a holder, starting to look like a mitten
When I was in the middle of the project, I got an email from Jesse, Elissa’s son, to a large group of people, informing us that she had been diagnosed with advanced terminal cancer, and she was in the hospital for pain management. This was quite a shock as Elissa seemed healthy when she was visiting me a few months earlier. It did not sound very good. I was not sure if she would get to ever use the mittens. I decided to keep knitting, and as I did I kept her in my thoughts.
Finishing the thumb
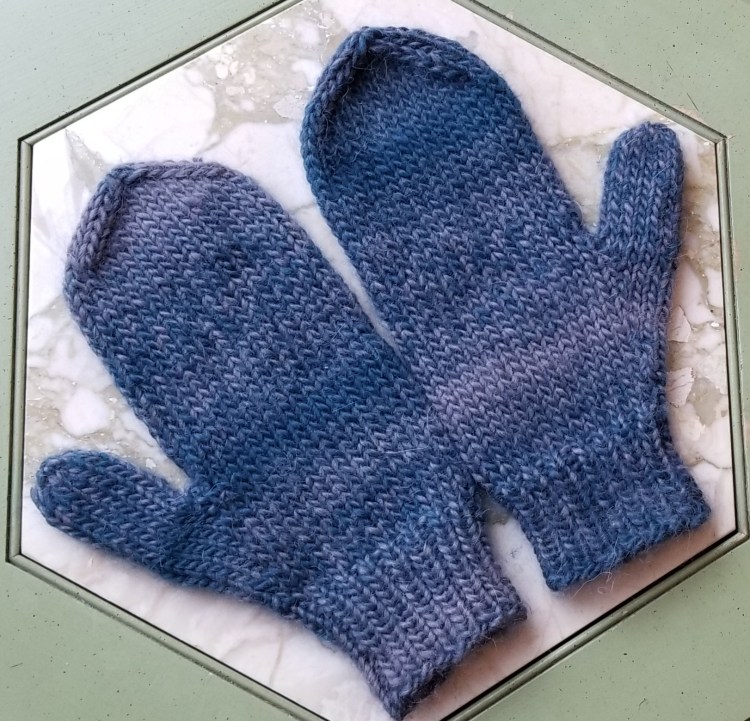
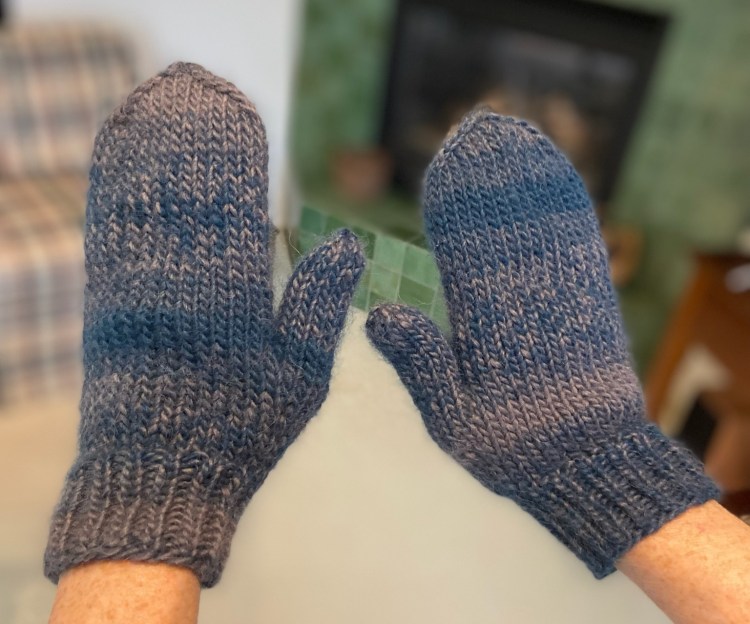
It did not take very long to finish the mittens, especially once I made it a priority to get them done. Following are photos of the completed mittens laying flat and on my hands.
Mittens completed
As soon as they were done, I mailed the mittens to Elissa, not knowing what her condition was by then. She texted me a photo of herself modeling them with a big smile on her face, from the hospital. A couple of weeks later I got an email blast from Jesse with information about her memorial service. I am sad to lose another friend too young. But I am also glad that I rose to the occasion of participating in those long phone calls, that we had some quality time together this summer, and that maybe I added a bit of joy to her last months.