100 Years of the Cabin

It has been longer than normal since I published a blog post as I have had a lot going on over the last couple of months. I kept thinking that I would be able finish one of several drafts with only a little bit of effort. I finally realized that it was OK to take a break until things settled down and I could give it the attention it needed.

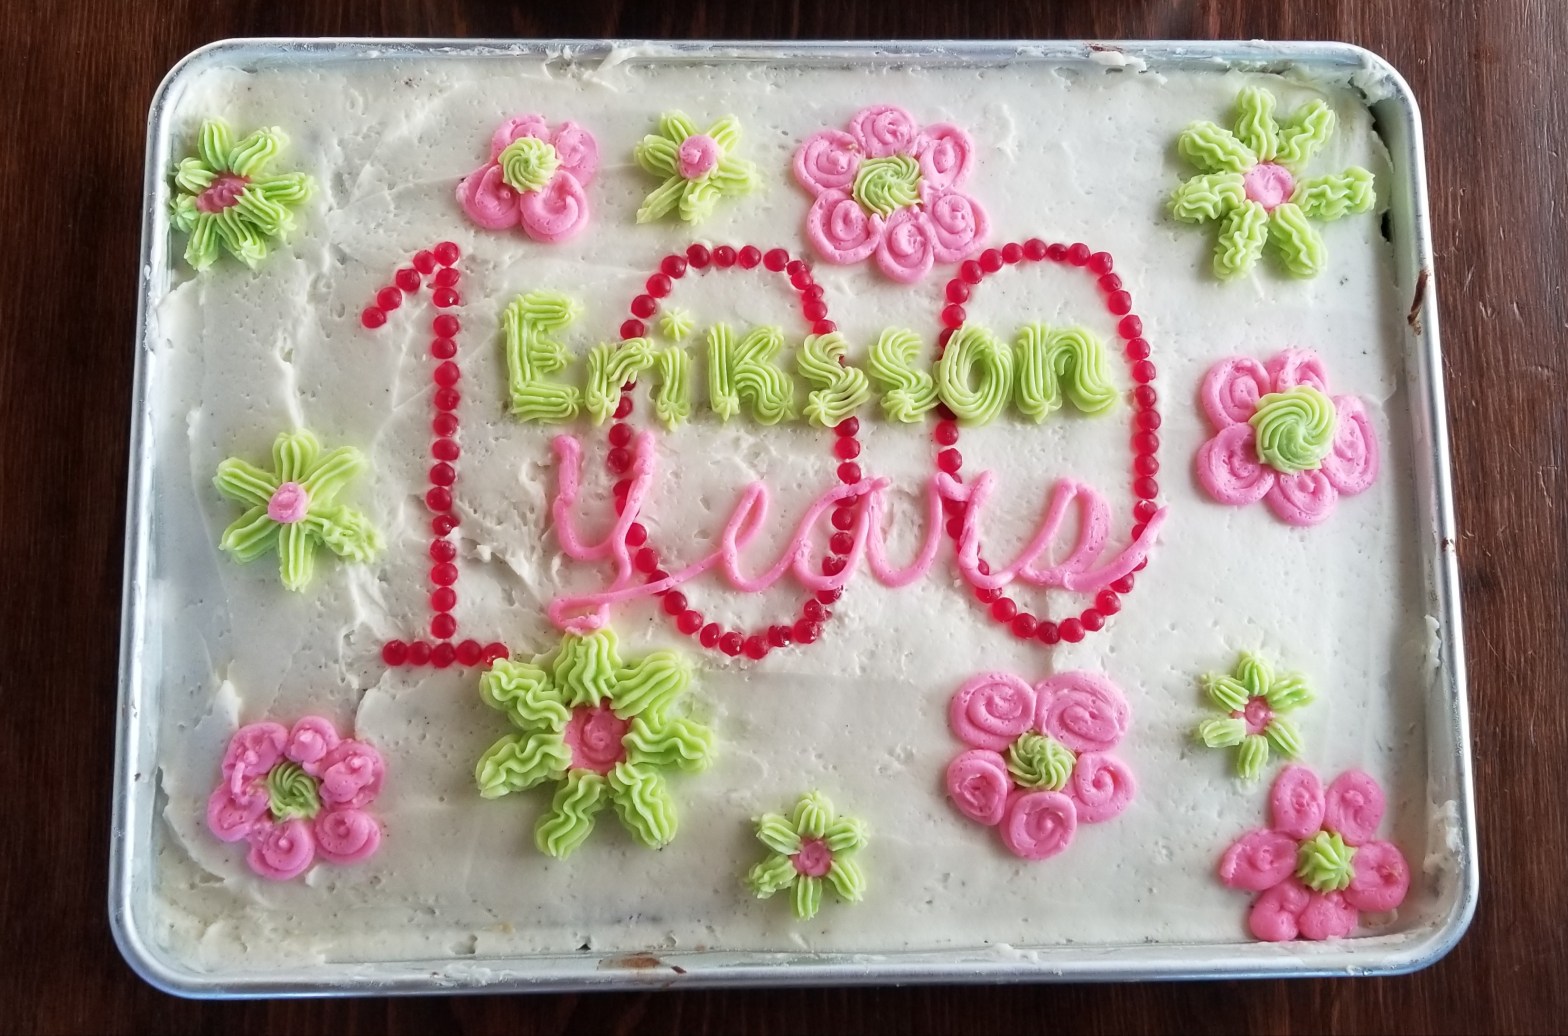
We had our annual family reunion at the lake last week. This year we celebrated the 100 year anniversary of the Eriksson “Red Cabin”, which was built in 1923 by my mother’s paternal grandfather. My mom spent entire summers at the “cottage”, as she called it, and I have spent time there almost every year of my life. The cabin has always been a happy place for me, my sister, and many cousins.

Wayne and I were very busy for weeks with preparations for the event, in addition to other unrelated things that were happening. Because of my skill set and because we live near the cabin, and because I am retired and have time, many planning and preparation tasks fell on me. Wayne was doing his share also, including going over to the cabin multiple times a day moving sprinklers around due to new grass planted during a very dry period. Other people contributed a lot too.

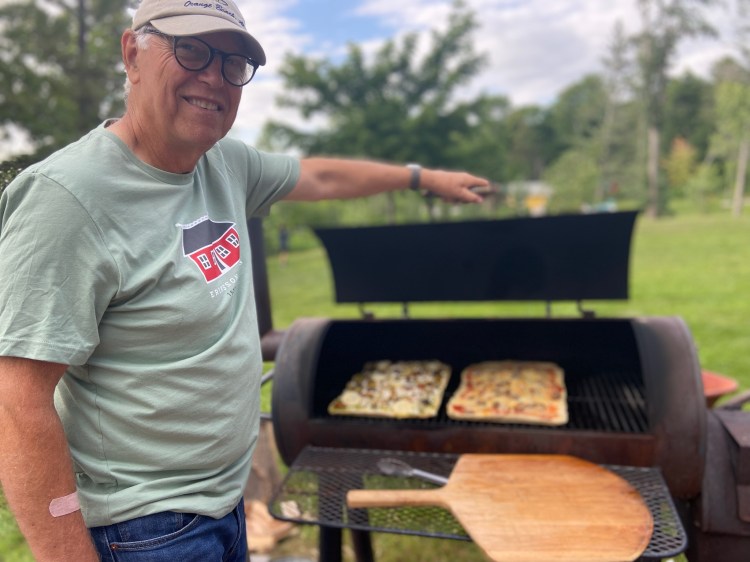
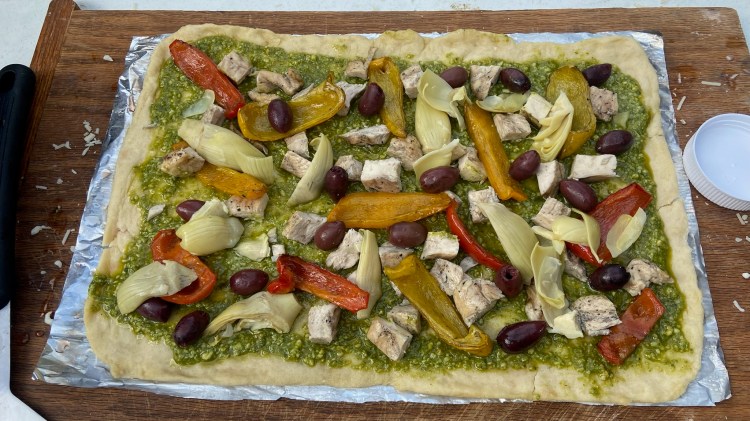
The culmination was about 50 people for dinner in the yard at the cabin on Saturday, July 15, with a live band playing in the background. My uncle, with some younger assistants, made his usual pizza on the grill while all the attendees mingled, caught up on family news, ate, and listened to the band. There was another large group dinner outside on Sunday with almost 40 people, followed by a multigenerational kickball game. On Monday morning we had the regular 15 mile bike ride to a Phelps Mill park for pancakes with family made maple syrup.

Pizza master

Some people traveled three hours from Minneapolis for a short day trip to see all the extended family in one place and participate in the celebration. Others stayed for an entire week. We had 11 people and 5 dogs in our house over the first weekend. Aunts and uncles and cousins stayed in the cabin and other lodging nearby. A few people who were only there for one or two nights stayed in a hotel 12 miles away.

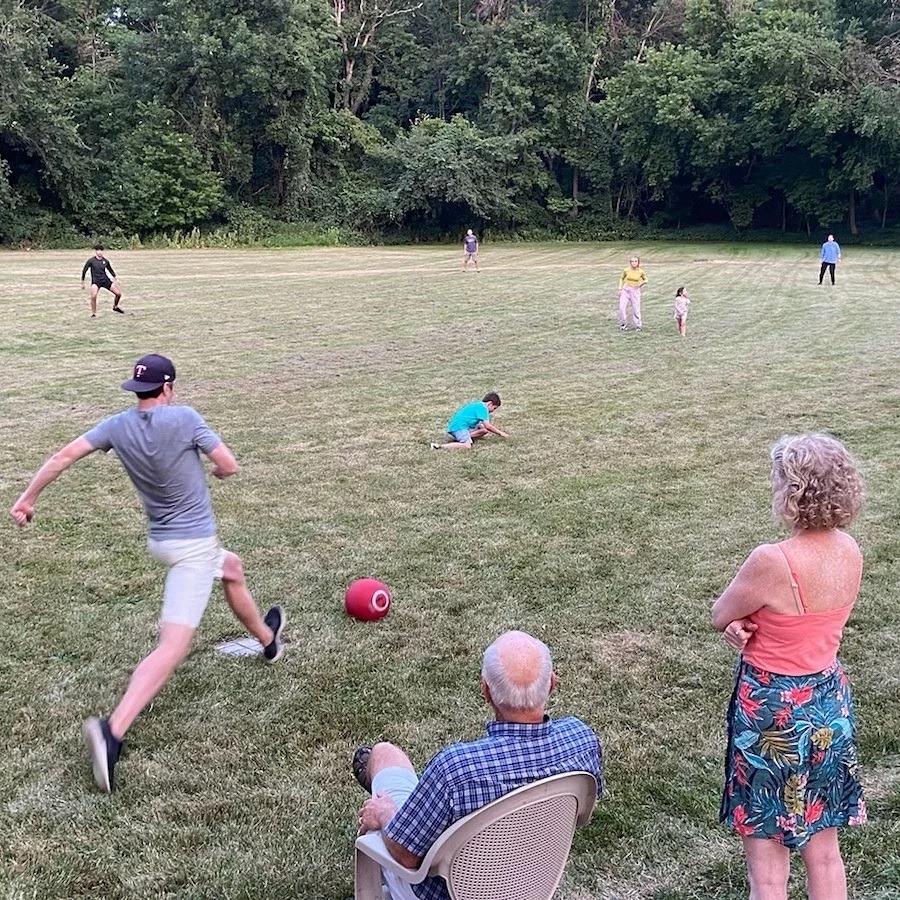
We have this reunion every summer, although most of the time it is smaller. The pizza dinner happens every year, there are always additional large group meals, everyone looks forward to watching or playing kickball and the bike ride with pancake breakfast. The next photo is from an earlier year, with my son about the kick the ball.

Kickball game after dinner

People always contribute food to the group meals, but it has usually been a bit disorganized and last minute, and then when the meals are over there are only a few people who step up to help with cleanup. This year my sister and I created a google spreadsheet and assigned people ahead of time to bring salads, side dishes, and dessert, or to help with prep and clean up. A few people, younger and older, who have not helped in the past were surprised to have an assignment.

I am good at doing the planning, but once everyone was there and things were happening it felt out of control fast. Several people commented on how relaxing the group meals were. That is wonderful, but I have to say it was not relaxing for me. By Monday afternoon I hit a wall and could not make one more decision or accomplish anything. Fortunately everyone staying at my house understood and gave me a break.

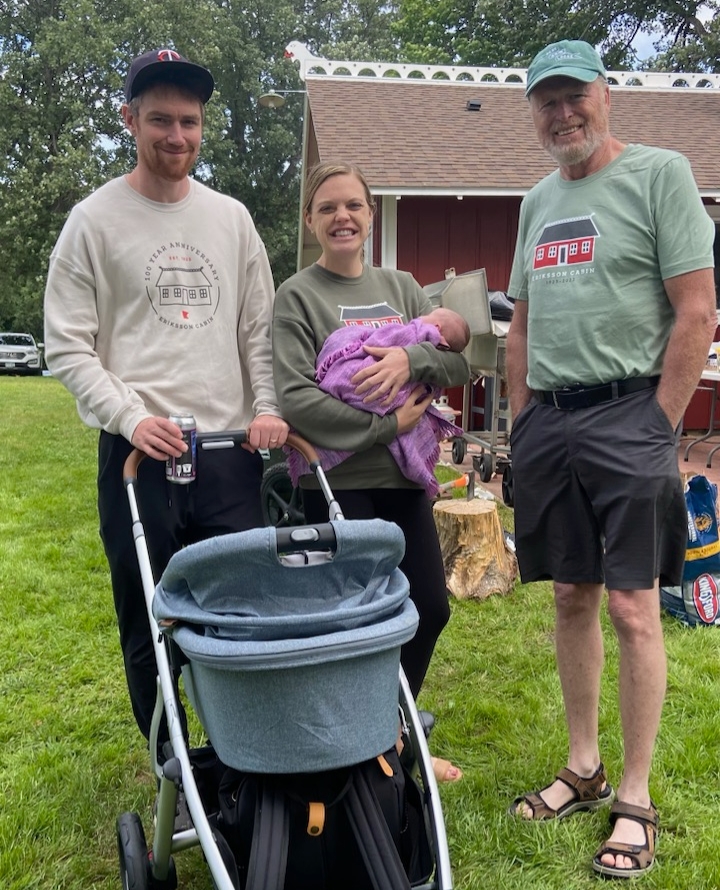
We had a selection of 100 year anniversary tee shirts and sweatshirts with two different designs created by our graphic designer cousin. My sister and I, with input from a few others, narrowed down the apparel and color options. It turned out to be complicated as there were different colors available for each of the apparel options and the same colors did not work for the two different designs. A local company built an online store so family and friends could place orders before the reunion. Following are photos of a couple of people wearing their shirts with the two different logos and some of the colors offered.

My niece and her husband
My son, his wife, the baby, and my brother-in-law. Notice the blanket wrapped around the baby. I made that.

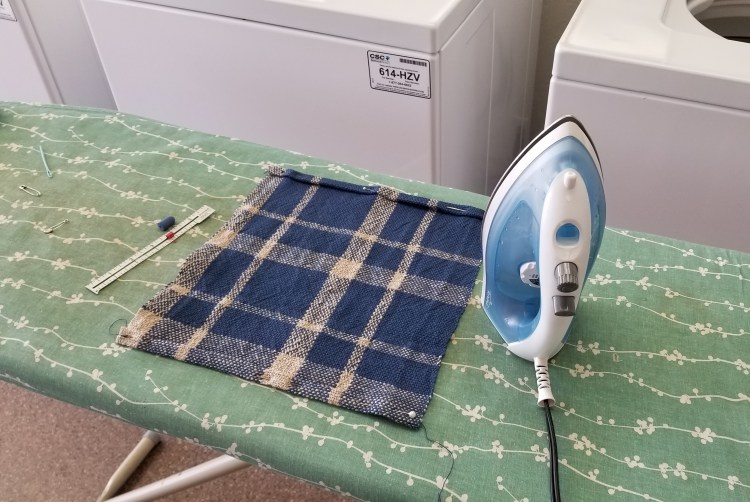
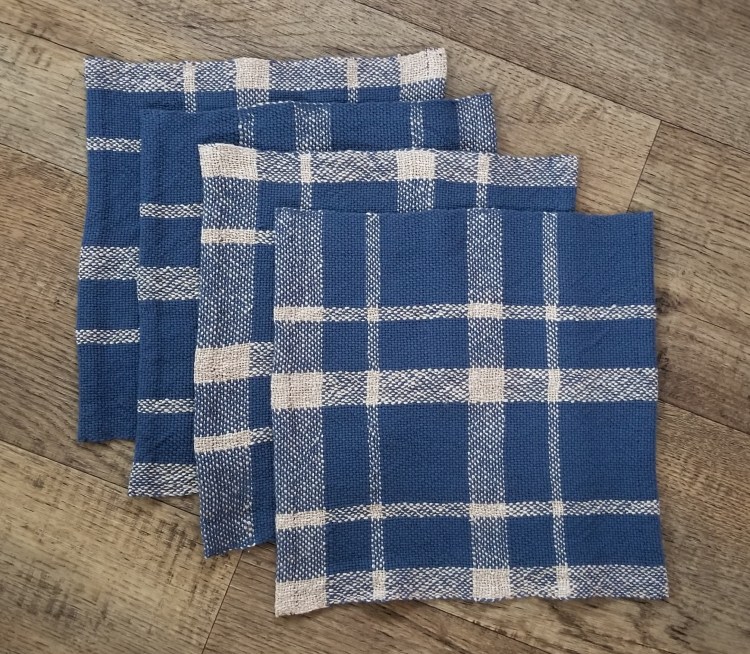
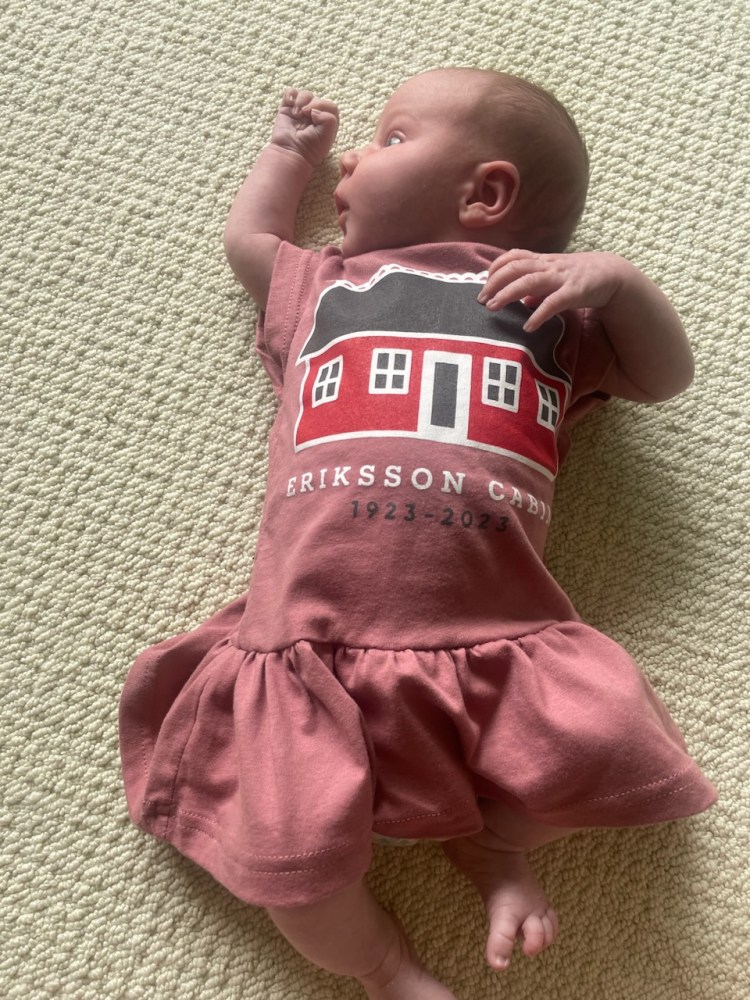
I upcycled a youth tee into a baby size dress for our new granddaughter with help from my sister. The following photo on the left is my concept drawing. I did not have much time and was trying to make it easy, so I envisioned the fabric extending out to make a mock sleeve. We had to make a quick trip to Minneapolis before the reunion, so I had cut the shape and got it started, and was able to try it on the baby before too far into the process. I got the width right, but the “sleeves” did not look good. My sister helped me change the design to actual sleeves which made a big difference in the final product. It was not that hard, but she knew what shape to cut the sleeve pieces.

The new baby modeling her upcycled tee shirt dress

I made a giant family tree for the reunion that I was able to display on one large poster board. Included were 125 people from 8 generations down to the youngest family member, our granddaughter born less than a month ago. I tried using some actual family tree software but there did not seem to be a way to print off a paper copy in a format that worked for my purposes. Instead I entered all the names and information in a spreadsheet program, formatted boxes around each person, printed it off in sections, manually drew the lines, and pasted the sections together. My husband described it as a 5th grade project with a grade of B+, but my sister gave me an A+. Personally I was pleased with the result. It was too windy during both of the large group dinners over the weekend to display outside on the easel my sister had loaned us, and instead was propped up inside the cabin against a window so it was visible from outside. I don’t think very many people looked at it or appreciated it.

My sister made a photo memory book using an app called Mixbook that she has used before. I spent quite a bit of time on this project also. Included were vintage photos from 1923, and photos representing all the generations and years until now. It was a ton of work to find and upload appropriate pictures, remove duplicates, narrow down photos to the right number so the book was not too big, add years and captions, and try to represent a century of people and activities. Only one copy was printed because we knew that as everyone looked at it during the reunion, people would find mistakes in identification of people and years. A group photo was taken on Saturday just before the kickoff pizza dinner, but a few people were not there until Sunday. My cousin-in-law, a professional photographer, took a separate photo of the missing people later and will attempt to photoshop them in. It may end up being a “funny” version if she cannot get it to look right. Either way will be great! The draft of the photo book is waiting for corrections and addition of photos from this year, then we will print another copy to keep in the cabin and for whoever wants their own copy.

Unfortunately, we had to put down our 15 1/2 year old 10 pound yorkie-poo dog during the reunion week. She had been declining for months and we were not sure she would make it this long. Lyla was still going on short walks even a week ago. One day shortly before all the guests came she wanted to walk the entire 1/3 of a mile from our house to the cabin. I think the cabin was her happy place too. On a day when we were preparing fresh fish taco dinner at our house for 15 people, Lyla had reached the point when it was time and I took her to the vet that afternoon. It was hard and not ideal timing, but we were grateful that she had a long happy life, and that our daughter visiting from California was able to spend some time with her. We had a small group of family present for a short memorial service in the yard, and then we all went in the house to finish getting ready for the dinner party. It was good to be busy and with people.

On a happier note, we had been thinking about getting a pontoon boat for awhile. My parents never used the lakeshore at their house where we live, so it needs some work before we can safely get people down there and put up a dock. There is currently a very old rickety wooden stairway down a steep wooded bank to get to the undeveloped shoreline. Wayne has contacted several contractors with requests to come and look at it but they all seem to be booked up and not in a hurry for our business. In the meantime, Wayne was watching listings for a used boat that met his criteria for both the boat and the motor. We almost bought one before the reunion. The boat was perfect, but the motor was sketchy. Another one came up for sale later that was the same model boat that had been refurbished, had a good motor, and came as a package with the trailer and boat lift. Meanwhile, my uncle had offered for us to keep it on his shore for the rest of this summer. Wayne bought that boat, after most of the people attending the reunion had already gone home. He put in a make shift dock on my uncles property, using a couple of extra sections the cabin owns.

Our new / used pontoon boat

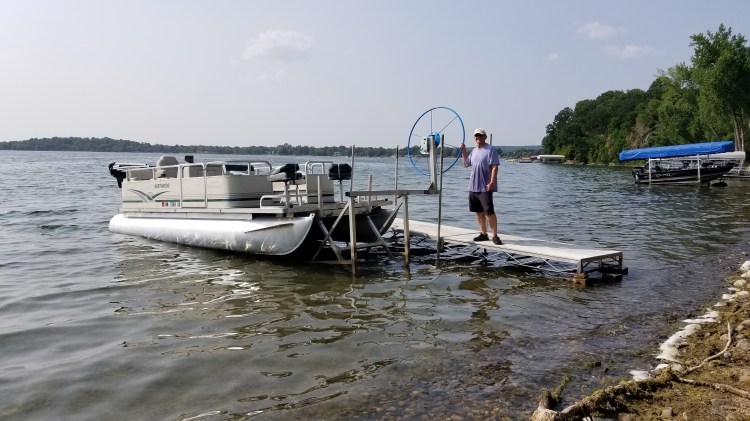
After the photo was taken, Wayne added another section of wood to bridge the gap between the shore and the beginning of the dock.

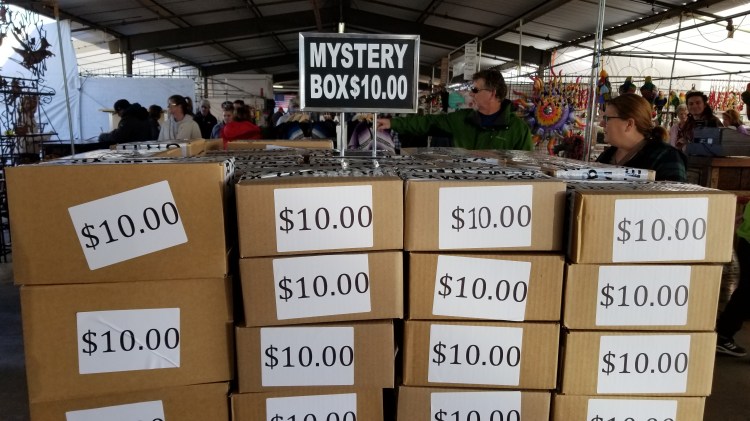
Our lake association scheduled a rummage sale day for the Saturday at the end of our family reunion. Families around the lake were encouraged to set up a yard sale and notices were sent out in the area. We decided to participate. There was already a lot going on, but my sister and her daughter and son-in-law were able to help select and move things into the garage before they left. Many things that no one wanted had already been set aside in the basement. Wayne found more things in the garage my dad had bought that had never or barely been used. On the morning of the sale, we put everything out on tables or propped up near the road. We sold a few items and met some neighbors, but more importantly, we got it all out of the house. After the sale was over we packed everything up for either donation or consignment at a shop in Minneapolis.

On Saturday evening, after all close and extended family had left and the rummage sale items were cleared away, Wayne and I had our maiden voyage on the pontoon boat. We enjoyed a leisurely cruise around the perimeter of the lake. I was finally able to relax. We have more company coming in upcoming weeks, so we look forward to taking guests out on the lake. For now I am enjoying the quiet, although I keep looking around for Lyla.

Wonky Towels

Before Christmas I completed a weaving project of jar cover cloths for my daughter’s fermenting projects. I was in a hurry so I could get them in the mail. There was a bit of extra warp yarn left that I might have woven into something, or it could have been considered as waste yarn. It seemed like a lot to throw away, but I was too busy getting ready for the holidays to weave anything with it. I left the extra warp yarn on the loom and secured the loose ends so they would not accidentally get pulled out of the heddles and reed before I could decide what to do with it. It sat there like that until we got back from Arizona in April.

Warp yarn waste from the my last project in December

After we were back home for a few weeks in the spring, I decided to try adding more off white 8/4 cotton warp yarn to the leftover ends from the last project that were still on the loom. The jar covers were narrower than I wanted for a set of kitchen towels, so first I added some warp ends on each side the same length as the leftover warp yarns. I cut 12 lengths of yarn for each side, tied them on the back and threaded them through the reed and heddles. The next thing was to measure out warp yarn for a set of three towels, 206 ends for each yarn end already on the loom, including the 24 ends I had just added. I tried a new place to hang the warping board, in the basement where we have a row of hooks on the wall. Above the hooks are some photos my sister, Betsy, took years ago of a particular spot in the yard during each season.

The warping board in a new spot
Photos taken from the same spot in each season

It was hard to get the warp yarn off the warping board. I must have wound it on too tight, although it did not feel like it at the time. Wrapping too tight probably caused the rounds on the outside edge to be shorter than the rounds on the inside end. There was another mistake I made that was not a disaster, but next time I will remember and do it correctly.

After my warp yarn was measured and ready to go, I started tying on each end to one of the waste ends already on the loom using a weaver’s knot. It was the first time I had tried this process, and my first time making weaver’s knots. It was a slow process.

Tying new warp ends on to the existing waste yarn using a weavers knot
Close up of the ends getting tied together

After all the ends were tied on it looked like a very big mess.

All the new ends tied on

I carefully pulled each knot through the reed and heddles to the back, and then straightened it out. The following photo taken from the back looks much less scary.

I wove the first towel with the same zig zag pattern as the red jar cover I made in December, using the same cotton/linen blend yarn in yellow (Duet cotton/linen blend from Gist). I used a T pin to keep track of the beginning of a pattern repeat.

The warp on the left side was quite a bit tighter than on the right side. There are reasons why this can happen, but I was not sure what caused the problem in this case. After completing the hem stitch at the end of the yellow towel I cut off the ends and re-tied the warp yarns on the front for the second towel, so I could attempt to fix the tension.

For the second towel I used blue 8/4 cotton for the weft yarn, with a pattern from the book “The Handweaver’s Pattern Directory” by Anne Dixon. It turned out to be the same pattern I tried for one of the jar covers I made earlier, in the same color. The other time I missed one row of the pattern so it did not turn out right.

Blue towel using pattern correctly from the book

The following photos show the incorrect version of the pattern on the left, and the correct version on the right.

The same thing happened with the tension on the blue towel. The left side got tighter than the right side. One thing that can cause this is if the loom itself is crooked or unlevel. I checked and did not find any evidence of these problems. I decided to finish off the second towel earlier than I had planned so I could try and fix the tension problem again, before the third towel.

After completing the hem stitch, I rolled the weaving forward as far as I could until the knots in the warp yarns got to the heddles in the back. Then I re-wound it back on to the back beam, hoping the tension would be more even between the left and right side. It wasn’t.

Back of the loom with the warp yarns rolled forward until the knots got to the heddles.

The tension was still tighter on the left, but I did not know what else to do, so I went ahead with the third and last towel for this unfortunate warp. I reminded myself again that these are just towels. They still work if they are crooked or wonky.

For the third towel I found another pattern in the pattern directory book and started weaving in green 8/4 cotton. It has the appearance of stripes, but only uses one color in the warp.

Green towels using a pattern from my pattern book

Following is a photo of the end of the second blue towel and the beginning of the third green towel, with some spacing rows in white. There is a dumb mistake on the hem stitching at the beginning of the green towel.

I made a dumb mistake doing the hem stitch on the green towel

At the beginning of the green towel I did the hem stitch backwards! AAHHHHH! I have had trouble with hem stitch in the past but now I KNOW how to do it. I just spaced out and did it backwards. I did not notice until I removed the towels from the loom. I picked out the stitches of the hem stitch and redid it. The next photo shows the corrected version.


End of blue towel, beginning of green towel, with hem stitch redone

After I removed the towels from the loom I also noticed a couple of spots near the end of the green towel, in the same row, where a weft row skipped some warp yarns that it was supposed to go under. At the time I was weaving those rows the knots in the warp yarn were in between the heddles and the reed (see the next photo). While weaving this last couple of inches I had to fiddle with the warp yarns to make sure the knots were not catching on to each other so that all the right warp yarns were in the UP or DOWN position. I am surprised this only happened on that one row. After the fact I used a piece of scrap green yarn and wove it through by hand the correct way, but also going over the big loop sticking up to make sure it stayed down. It looks bad but I wanted to make sure those big loops did not catch on anything later, when using the towel. The next photo shows the knots in between the heddles and the reed, where they kept catching on each other. Ideally my warp yarn would have been longer so that the knots would have stayed on the back of the heddles. It would have been longer except that I cut the warp yarns and retied them on after the first towel.

Knots where I added on to the warp yarn advanced to the front, between the heddles and reed

Following is a photo showing the bad row with the two big loops that should have been under some white warp yarns.

One row of weaving where the weft yarn did not go under all the correct warp yarns

The problem with the warp yarn tension with one side tighter than the other caused each towel to be longer on one side, ranging from 1/2 inch to one inch. I will be the only one using them, and so probably no one else will notice.

This project had multiple problems. Adding more warp yarns on each side, and then adding on to the leftover warp yarns from before contributed to or directly caused my tension problems, and made it hard to weave the last few inches where the knots were catching on each other. The fact that I had a bit less waste yarn at the end of this set of towels was not worth the extra hassle and problems that resulted. Not sure if I would do that again, certainly not when using this relatively inexpensive yarn. I am not complaining. Everything is a learning experience and I got some functional towels out of it that did not look too bad.

Despite the wonky shape, I love this yellow zig zag pattern towel. The cotton/linen yarn gives a really nice feel and weight.

The yellow towel with cotton/linen weft yarn is my favorite

The blue towel is fine but not my favorite.

The blue towel is fine but not my favorite

Something happened with the green towel where the last third of the rows look different. You can see in the photo below how there is more white showing on the left side of the photo, which is the bottom or end of the towel. I swear I followed the pattern exactly the same. Possibly I was not packing the rows as tight to compensate for the warps yarns on one side being too tight.

The green towel looks different on one end

I can use these crooked towels and they provided me with some learning experiences, but it was a relief to be done with them. I hope my next project does not have as many learning experiences!

Three crooked towels

Refurbishing my Floor Loom

I have put some time and money into refurbishing the used floor loom I bought last summer at Tangles to Treasures in Fergus Falls. I knew that it was made by Harrisville Designs in New Hampshire, and that it had four harnesses and a 36″ wide weaving width. The only other information I had was that I know the previous owner from the fiber community around here, and she had only used it a few times. It was a very reasonable price, and I am happy I decided to go for it.

After examining the loom at home I could see that it was more used than I had thought. One of the harnesses was warped, one of the original leather harness cables had been replaced with nylon cord, some of the heddles were missing, and the straps used to hold the apron bars were pretty worn out looking. None of these things affected the functionality of the loom, but were factors in the low price which made it a good deal for me.

While I was in the middle of weaving my second project on the loom last fall, one of the leather harness cords broke apart. There are four harnesses (a wooden frame) that hold the heddles (wires with holes to thread yarn through). Cords hold and connect the harnesses to the pedals, so they can move up and down to create patterns. One of the other original leather cords had already been replaced by some Texsolv, a special type of nylon cord made in Sweden, so it must have broken before I got the loom.

In the next photos you can see three of the four harnesses (the fourth one dropped out of view when the cable broke) plus a close up of the broken cable. There are two intact leather harness cables, one nylon harness cable, and the broken leather cable.

Harnesses and cables
Close up of the broken leather cable

I tried to tie on some heavy string to connect the broken ends of the harness cable, but the leather was very stiff and broke apart in another place when I bent it. Plan B was to remove the leather entirely and replace the entire harness cable with string I had on hand. That solved the immediate problem allowing me to finish the project I was working on, but was not a long term solution. Following is a photo showing the cables holding the harnesses after I replaced the broken leather cable with string.

Harnesses held up with various materials

While researching options online for fixing a broken harness cable and generally refurbishing the loom, I found out that Harrisville Designs could determine when one of their looms was made based on characters stamped on the side. I contacted them to see what I could find out, and got a response within one day.

The identifying characters stamped on my loom

If I had known the code, I would not have needed to contact them. My loom is the 436th “T” model made in 1976. I had no idea it was that old! The other two 47 year old leather harness cables are almost sure to break sooner or later, so I decided that after I finished the project in process I would put new harness cables on all four harnesses.

There are options for replacing the harness cables including heavy string, or Texsolv. Harrisville Designs sells a set of replacement cables that are what they use on new looms. I decided to order the nice Harrisville Design cables, which are nylon coated wire.

New harness cables from Harrisville Designs

Textiles has been a part of Harrisville, New Hampshire, for over 200 years. It was a mill town from 1794 until 1970. After the mill closed in 1971, Harrisville Designs began producing quality wool yarn and weaving looms there. It sounds like a good road trip stop to me, if we ever go in that direction.

My loom was also missing some of the heddles, the wires attached to the harnesses that warp yarns are threaded through to make patterns. A new loom like mine comes with 600 heddles, or 150 for each of the four harnesses. My loom had 370 total heddles which were not distributed evenly across the harnesses. When we were on vacation in Tennessee last fall I bought a hand woven towel that I want to reproduce at home. I would need 400 heddles to make a towel of the same density, with 100 on each harness. In talking to Torri at Tangles to Treasures about options for buying additional heddles, she remembered that she had some stashed away in a storage area. It turned out she had the actual missing heddles from my loom that a previous owner had removed. They were in a compact bundle that did not look like enough, but it turned out there were exactly the right number to end up with a total of 600, plus four extra.

The four extra heddles. Reflecting light is making them look blue.

It was a process to count, sort and arrange the heddles so they would be ready to put back on the loom harnesses. I should have taken a photo of the slippery heddles while I was in the process of organizing them. I did not figure out right away that they have a top and bottom. The “eye” where you put the yarn through has an angle so they catch on each other but which also allows them to be lined up perfectly if you can get and keep them in order. After some frustration and bad words, I came up with a system to string up the correct number of heddles in the right direction so that each harness would have a total of 150. I laid them out on a tray until I was ready to add them to the harnesses.

One of the harnesses with heddles, and more heddles waiting to be added
Heddles organized and ready to add to the harnesses

One of the harnesses was warped. It works fine but I researched methods for trying to flatten it out. Wayne attempted to accomplish this by applying steam with an iron, and then clamping it down while we were out of town for a week at Thanksgiving.

The warped harness
Attempting to flatten out the warped harness cable

When we got back home the harness was a little flatter, but still warped. I wanted to use it, so gave up on the idea. It looks pretty warped again now with the humid summer air. It is probably a lost cause.

In the following photo you can see some gold cord which is connecting the back ratchet brake to the foot pedal that controls it. That was clearly not the original cord so I wanted to replace it with something white to match the other cords used on the loom.

Notice the yellow cord that connects the back beam to the break pedal

The cords that connect the foot pedals to the harnesses were in good condition, but dirty. I took them off two at a time and soaked them in hot water with Oxy Clean. They were better but were still not pristine. They also apparently shrunk in the washing process. You can see in the photo below that there is a tail leftover where they are tied on to the pedals. After washing, they were too short! I had debated replacing those cords with the nylon product Texsolv, so now I would have to. I was able to order the right amount of Texsolv by the yard to replace the cords attached to the pedals, and also for the brake pedal.

Cords that attach the pedals to the harnesses before I washed them

The next photo shows the shrunken and yellow cords replaced with new white Texsolv nylon cord.

Dirty and shrunken and yellow cords replaced with new Texsolv nylon cord

We had some Murphy’s Oil Soap in the laundry room that might have worked to clean, refurbish and preserve the wood pieces of the loom. However the container was almost empty and it is likely very very old. I regularly find food and cleaning products in the house left from my parents that is 5 or more years old. Instead of using that I bought some Lemon Oil Polish and wiped down every piece of the loom. It looked nice and clean after that.

Products to clean and refurbish the wood parts of the loom

One of the main parts of the loom is a “reed”, a long narrow piece with slots that keeps the warp yarns in order. They come with different densities of slots for different thicknesses of yarn. My loom came with the original “12 dent” reed for projects with 12 warp yarns per inch. I could tell it had seen better days, although it worked. Since I was trying to spiff up my loom, I went ahead and ordered a new 12 dent reed. After finishing a recent project I took the original reed off and found it was pretty beat up. The new one is much nicer and also wider at 36″. The old one was 32″ wide. Following is a photo of the new and old 12 dent reeds. You can see how much nicer the new one is.

The new 36″ 12 dent reed and the old 32″ 12 dent reed.

The last thing I did to update up my loom was replace the cord connecting the front apron bar to the front apron fabric. It was functional but slid around a lot and I didn’t like it. I had some leftover Texsolv so I cut five pieces, put fray check on the ends to keep them from raveling, and put them on at even intervals instead of the continuous piece of cord that had been used. There is a trick to putting the end through one of the regularly spaced slots in the Texsolv, or bending a piece of it through a slot in the cord to attach it instead of tying a knot. The next three photos show the way I got the loom, the Texsolv pieces cut and ready, and the new Texsolv on the loom.

The loom the way I got it with a continuous cord connecting the front apron bar to the front apron fabric
Nylon Texsolv cut in pieces to replace the continuous cord
Pieces of Texsolv connecting the front apron bar to the front apron fabric

Following are photos showing the front and back of the loom after all my repairs and upgrades. People who are not weavers will have skipped over most of this post by now. And probably no one will be able to tell the difference from these photos, but I can tell.

The front of the refurbished loom
The back of the refurbished loom

Having to fix problems and replace parts has helped me understand my loom better, but I still have a lot to learn. The most recent project I worked on had some tension problems that I will write about in another post. I hope that my next project goes perfectly, now that I have my loom all fixed up. That is like thinking that if you get new golf clubs your golf game will be perfect. I know better, but I still think the effort I put in fixing up the loom has been worth it.

Baby Blanket

I have known for months that we are going to be Grandparents in June, but we were asked not to tell anyone until after the holidays, and then not to post on social media until spring. It may have been OK to tell a few people like my sister, but I decided that it would be stressful to remember who I told, and make sure not to say anything on a group text with people that were not supposed to know. It was easier to not tell anyone until the appropriate time.

One of the wonderful things about having a grandchild is that there is a new world of knitting and weaving possibilities. Last fall I had knit some socks that I thought were going to be for me. There was some yarn left, and my daughter-in-law, Kelsey, has almost exactly the same size foot as me. I decided to knit baby socks out of the leftover yarn and then give the matching adult and baby socks to her for Christmas. They were a hit, but unfortunately Wayne and I ended up getting covid right before Christmas and were not able to see them in person. I thought I took a photo of the two pairs of socks together, but I can’t find it.

I found a knitting pattern for a blanket that I wanted to try called To the Point Blanket. I originally saw it in the Webs magazine from fall 2019, and it kept popping up in other places where I see knitting ideas. When we were on our fall road trip, I saw that my aunt was knitting this blanket for one of her granddaughters. It is like a granny square afghan with individual knitted squares that are connected into a blanket.

The squares in the To the Point Blanket are very simple to make, but look interesting. The pattern is shown using variegated self striping yarn, so there are multiple colors randomly changing through the blanket. The suggested yarn is wool which is not good for a baby blanket. I found some washable self striping cotton yarn that I thought would end up with the same look but be better for the purpose.

Before ordering the yarn online, I emailed Kelsey to tell her I wanted to do this, ask her if she liked the pattern or would prefer something different, and let her pick out the colorway. She wrote back that she liked the pattern, and picked out a color option with shades of blue, purple and raspberry.

Yarn for a baby blanket

This yarn is thinner than the yarn used in the pattern, so I had to decide what to do about that. I could have tried knitting two strands together and maybe that would be about the same gauge as the pattern. For a baby blanket it would be better to be less bulky so I decided to try knitting with a single strand using the same number of stitches and see how it came out.

63 stitches cast on for the first square

The squares are made by casting on 63 stitches, and then decreasing two stitches in middle of every other row. That results in a square with a diagonal “line” where you have decreased away stitches. Very clever.

The first square almost done!

First square complete! I like it!

First square complete!

You could make individual squares and sew them together like a granny square afghan. Instead the pattern has you pick up stitches across the top of the square you just finished, which becomes the bottom of the next square, and then you cast on stitches for the side. This pattern is repeated until you have a column of six squares.

Second square connected to the first square

The color changes do not happen as often with this yarn as with the yarn used in the pattern. I was hoping the violet color would show up in the first square. It came up in the second square…with a knot connecting it to the blue. ARGGG I hate that! I untied the knot and overlapped the yarn ends. The change from blue to violet is more abrupt than I thought it would be.

I really like the way the knitted fabric feels and drapes. It is very soft and flexible for wrapping or tucking around the baby. The photo below shows two squares completed and the third one started. The pattern has you make five columns of six squares, and then sew the columns together.

Starting the third square
Three squares complete

I do not like sewing knitted pieces together. I decided to try picking up stitches for the first square of the second column, so it would be already attached. First I cast on stitches for the bottom of the square, then I picked up stitches from the side of the first column. It worked perfectly. When I got to the second square of the second column, I was able to pick up all 63 stitches. That method worked for all the rest of the squares in the second column. I knitted the remaining columns the same as the second one, so that when I was done knitting there was no assembling or sewing. The disadvantage of this method is that it is a little cumbersome to work with once it is close to finished. If you make five separate columns and sew them together at the end according to the pattern, there is less bulk while you are working on it.

Working on the second square of the second column

The color changes were not as often or regular as the yarn used for the pattern, so it came out with a different look. Some of the blocks of color are bigger and the transitions are more random. Some blocks have several colors, a few blocks have all one color. There were knots in the middle of most of the balls of yarn, which sometimes caused an abrupt rather than more gradual change of color.

Making progress
Almost done!

Once all 30 squares were complete, I crocheted a border around the edge. I worked on this project almost the whole three months we were in Arizona over the winter. I was ready to work on something else by the time it was finished.

Adding the single crochet border

One day when I was shopping at TJ Maxx I looked at some baby blankets for sale. They were all about 30″ x 40″. The finished size came out just right at a little bigger than 30″ x 40″ which was luck on my part. I had started knitting the pattern and hoped it would come out about right, or figured I could knit a different number of columns or rows if it was too small or too big.

Blanket completed

I gave Kelsey the blanket at a baby shower this weekend. I also gave her a baby size sweater I knitted that will be featured in another blog post. Watch for more hand made baby items in future blog posts!

Giving Kelsey the blanket at the shower

Etsy Shop Last Call

My Etsy shop has been an adventure and a learning experience. I thought it would be a good way to post things for sale that I made, or that were store samples from my purchase of yarn shop inventory in 2018. I have sold a few items, but not a single thing in 2022. I have made zero effort to get traffic on my site, so this is not surprising. While it is fun being able to say “I have an Etsy shop”, I am not sure it is right for me any more. After thinking about it for a long time, I have made the difficult decision to close my Etsy shop.

It is a kick when something sells, but it is not making any difference in my financial life. When there is a sale I think “now I can buy a fancy coffee” or “I can buy more yarn” but I am able do those things whether I sell something on Etsy or not.

There are listing fees of .20 per item for three months. That is not a huge expense and by itself is not much of a factor for me. The listing fees are on autopay, but twice now the debit card on file had expired, so the payment failed. I tried unsuccessfully to update the information on the card. Another card on file did not work either. I was able to pay the listing fees using my paypal account, and then I tried to transfer the amount from my business checking account to our personal account so the expense was in the right place. The amount was $4.80, but the minimum amount to transfer was $5.00. I transferred $5.00, but that does not match the amount of the Etsy fee for my bookkeeping purposes. ARGGGG. Too much hassle!

I have never wanted to be a production machine with dozens of similar items for sale. I like to try new things, and not be pressured to finish them on a schedule. Most of the things I make are for the purpose of trying things or for myself or to give away.

When we have been in Arizona in previous years, I brought all the items listed for sale with me in a plastic box, with materials for shipping in case I got an order. The second year in Arizona I tried selling the items at a weekly outdoor craft fair at the RV Park. I sold one hat. Wool items are not big sellers in Arizona. Sitting at a table for several hours every week prevented me from doing other things. This year I put the Etsy shop in “vacation mode” while we were in Arizona for three months. I think my minimal traffic was about the same as when the shop has been active.

I have always had a problem with conflicting priorities and goals. It takes a certain amount of energy and attention to keep the Etsy shop going, even when there is no activity. The only effort I have put in to generate sales is having a page on my blog about it, and handing out a few business cards. There are things I could do to direct traffic to my shop, but I would rather do other things. When we have gone on short trips of a few days or a couple of weeks, I have just hoped there would not be any orders while we were gone or not even thought about it at all. Based on my experience over the last year, that was not a problem.

There is another reason I am making the decision to close the Etsy shop that is the tipping point between keeping it going and letting it go. There is a change coming that will have a big effect on my time and energy. We are going to grandparents in June!! We are super excited about this new development. Our son and daughter-in-law have also just relocated from Chicago to St. Paul, MN, so it will much easier for us to see them. I expect more trips back and forth from our home in West Central Minnesota to the Twin Cities. There will be time spent being grandparents. Closing the Etsy shop will be one less thing to manage so that I can focus my energy on things that are more important to me.

Following are photos of several items I have listed for sale. Some of the things I knit myself, some are store samples from when I purchased the entire inventory from The Yarn Shop in Glen Arbor, Michigan, when it was liquidated. I wrote about that adventure in an earlier post.

I will still have a few things to sell, but I will figure out another way to offer them up that is more flexible. My Etsy shop will be open until the end of May, but I may not be able to fulfill an order immediately due trips back and forth to Minneapolis this spring. Click on the link if you want to see what is there or make a purchase on my Etsy shop while you can. Stay tuned for future posts about things that I have already knit for the new grandbaby!

Snowbirding Recap 2023

We are back home in Minnesota now after three months of snowbirding in our Fifth Wheel Trailer at Gold Canyon RV and Golf Resort. This winter in Arizona was colder, wetter and windier than recent years. Most days high temperatures were in the 60’s, with only a handful of days above 75 degrees. The cooler weather was fine for hiking and bike riding, but not for the pool. Wayne played golf whether it was cool or warm, as long as it was dry.

Our first time here in February 2020, just before the pandemic lockdown, we rented a Park Model home for one month. That time we brought everything we needed except for food. I did not feel comfortable venturing out much on my own. The second year we rented for two months, but it was the height of the pandemic in 2021, so we kept to ourselves, avoiding stores and restaurants. Our third winter in Arizona, 2022, was the first in our new RV. That year we stayed for two months. This winter of 2023 we stayed in our RV for three months. It felt more like we were living there, rather than being on vacation. I got to know my way around the area, and felt more comfortable going out and about with the help of the GPS lady on my phone.

I worked on two weaving projects in Arizona this year (worsted weight hand towels, and cloth napkins). There is not a good set up for warping the loom in the RV, so I had to use a common room in the resort community building. After the warping part, while working on these projects in the RV, I had to keep shuffling the loom and box all around. I brought yarn for a third project that I did not use, because I would have felt rushed trying to finish it before we had to leave. I completed a couple of small knitting projects, and a larger knitting project that I worked on most of the time we were in AZ. I will be posting about them later. Maybe I will bring more knitting projects next year instead of the loom, since they do not take up as much room and are more portable.

With the cooler, wetter, weather this year it was more green and there were many wild flowers on the hiking trails and everywhere including highway ditches. I saw my first rattlesnake right next to a hiking trail. Someone coming the other way on the trail gave us a heads up about the snake, so we were watching for it. The snake was under a bush, but poked its head out, so we hung back and waited while it crossed the trail. After that I was a little apprehensive about going hiking!!

A rattlesnake crossed the trail right in front of us!
Our last hike before leaving Gold Canyon
Flowering cactus on a hiking trail

Last year we left Arizona a few days before our reservation ended because Wayne had tickets for the Master’s Golf Tournament in Augusta, GA. This year we stayed as long as we could. It was cooler than normal here, but at home in Minnesota the winter was ridiculous. The night of March 28 it got down to -16 Fahrenheit in Otter Tail County. That is normal for January, but not late March. There was a lot of snow at home including two snowstorms with blizzard conditions in April.

Meanwhile I have read that there was hardly any snow in New England. In the summer of 2020 we had 25 inches of rain and our lake was the highest it has ever been, with water lapping up over the top of the dock. Last year and the year before it was as low as it has been in recent years. Our daughter and her boyfriend were in Lake Tahoe in March. I had seen photos on social media of all the snow there, but was not sure if they were photoshopped or real. They were real. All over it is one extreme or another.

Our daughter’s boyfriend in an Airbnb rental at Lake Tahoe in March

Wayne did not want to go home to the wintery conditions, but we had some things going on there starting the second week of April. Following is a look at our street at the RV resort, with our site and RV in the lower right of the photo as we prepared to leave. You can see the Superstition Mountains where we do a lot of hiking in the background.

The view down our street in Gold Canyon
Getting ready to leave Gold Canyon RV and Golf Resort

Our little dog, Lyla, was getting very anxious when she saw us packing up to go. I found a good solution, carrying her around in the doggy backpack I made for her a few years go. She was very content there.

Lyla was content riding around in her doggy backpack while we packed to go

Wayne checked lights and turn signals while I used the restroom in the community building one last time before we left at noon on April 1.

Ready to leave Gold Canyon RV and Golf Resort

After leaving Gold Canyon we drove south instead of north, taking the long way home. It was the first time we had packed up the RV, driven three hours, and set it up again at a different RV park.

We arrived that afternoon at Butterfield RV Resort and Observatory in Benson, AZ, about 45 miles east of Tucson. This RV park was quite a bit smaller, but pleasant and attractive. After checking in, we found our RV site and Wayne managed to back in without too much trouble, avoiding a light post on one side and a picnic table on the other side. We started in on our detailed RV set up checklist of things to do when we get to a campsite, such as leveling the RV both side to side and front to back, disconnecting the truck, connecting the utilities, putting the slides out, etc. It is a slow process for us as we have only done this a few times and are worried about messing something up.

While we were working on setting up, I noticed another very large fifth wheel trailer arrive at the empty site next to us. The wife stood outside spotting while the husband backed right in easily. I am not sure how much time went by, but it seemed like about 10 minutes later I looked over again and they were sitting in lawn chairs drinking a beverage, seemingly all done with their setup process. WHAT?? We still had a long ways to go. It turned out they left first thing the next morning, so I think they did not do all the normal set up stuff.

At one point during set up I took Lyla for a short walk, leaving Wayne on his own. This turned out to be a mistake. When I got back I looked in the RV door to see water pouring over the side of the kitchen counter. I shouted to Wayne to turn the water off quickly, then he came around to survey the situation. We were able to mop up a lot of water on the floor and counter with beach towels. Apparently the faucet was in the ON position when Wayne connected the water and turned it on, and there was also a bowl in the sink covering up the drain. The sink filled up and the water started overflowing. I was not there to catch this situation before there was water all over. Lessons learned. It takes two people to do the setup. Make sure the faucet is in the off position before turning on the water. Lyla was stressing out, so I put her on the bed where she looked worried but finally settled down for a nap. I felt stressed out too, but I did not get a nap.

Lyla out of sorts during RV setup

After the setting up was complete, there seemed to be a problem with the electric power caused by the water running down the side of the kitchen counter. The electrical outlets all worked for charging phones, running the coffee maker, toaster and microwave, etc, but the LED lighting was dim, and worse, the refrigerator was not working.

Earlier in the day I had told Wayne that we should eat the leftovers we had with us for dinner, but by now it was 6:30 and our new plan was to go out to eat instead. After a nice meal at a nearby Mexican restaurant we went to a local ice cream place. Back at the RV we ended up putting food from the refrigerator in coolers with ice for the night. As long as we had water and could use the electrical outlets, I could deal with using coolers instead of the fridge for another three or four nights of RV use until we got back home. A few blocks away a train went by regularly but it was white noise to me. I actually slept fairly well, but Wayne tossed and turned all night thinking about what might have happened with the electricity, making an appointment for service when we got back home, how much this was going to cost to fix, etc.

Early the next morning while I was still half asleep in bed I heard sounds that sounded to me like train clanking noises. Later when I got up Wayne announced that whatever electrical problem had happened, everything was now working including the refrigerator! It was very mysterious. However that sound I heard earlier had actually been a large motor home crashing into a tree not too far away from us. Wayne thinks possibly they were leaving the RV park and the owner stepped out of the motorhome to check the lights or something while it was running. There was a slight incline, so the motorhome started rolling away down the street, stopping when the front driver side hit the tree. It was very lucky that the breakaway RV did not hit any other vehicles or people. A large tow truck came and got the rig pulled back onto the street and up onto a trailer.

A runaway motorhome crashed into a tree
Crashed motorhome on the trailer heading for repair

When we got back from an outing later that day, the refrigerator was not working again. Later we realized that the hot water heater was not working either. After witnessing the other RV being towed away, I did not want to complain about using coolers for keeping food cold and taking a shower in the community building for a couple of days.

We signed up for an evening session at the RV Park’s Observatory, but it ended up being cancelled due to the windy conditions. We had some fun daytime activities while in the Benson, AZ, area, including a day trip to the town of Bisbee near the Mexican border, a couple of hours in the old west town of Tombstone, a cave tour at Kartchner Caverns State Park, and hiking at Chiricahua National Monument. Both Bisbee and Tombstone have multiple blocks of original old west buildings that are on the National Historic Register.

Bisbee, Arizona

Tombstone is the location of the infamous O.K. Corral gunfight. It was pretty quiet the afternoon we were there.

Tombstone, Arizona

Kartchner Cavern State Park has a huge multi room cave discovered by two college students in 1974. They did not tell anyone else about it for several years for fear of it getting damaged. Eventually they told the owners of the land, James and Lois Kartchner, and working together they were able to make it into a state park with the support of The Nature Conservancy and Governor Bruce Babbitt, who was a Geologist. The cave was very carefully developed for public access while preserving it as much as possible in the original condition. I do not have any photos as that was not allowed during the cave tour.

Chiricahua National Monument is a cool area described as “a wonderland of rocks” with a scenic drive, camping, and hiking trails. We did a two hour hike through amazing scenery, barely finishing before it started getting dark out.

Rock formations at Chiricahua National Monument
Scene while hiking at Chiricahua National Monument

After four nights at Butterfield RV Resort we closed up the RV and began the drive home, with plans to stay in hotels for three nights until we got back to Minnesota. There was one more adventure on the agenda. After leaving Benson we drove east through the rest of Arizona and into New Mexico, arriving at White Sands National Park in the late afternoon. The visitor center was closed for the day, but we headed out on the eight mile scenic drive. It looked like Otter Tail County, MN, in the winter but instead of snow the landscape is composed of pure white sand. We got out of the car a few times and took photos. We stayed in a hotel in nearby that night.

Wayne at White Sands National Park, with our truck and RV in the background
The sun going down at White Sands National Park

We have a security camera at our house to keep an eye on things while we are gone. The main thing Wayne watches is how much snow is in the driveway. Following is the view a few days before we arrived home. Wayne put a call in to the snowplow guy so we could at least get a path to the garage.

Our driveway in Minnesota on April 5

There were two more nights in hotels before we arrived in Fargo, ND, to drop off the RV for repair. After stopping in Fergus Falls, MN, to get a few groceries we arrived at our home by dinnertime on Saturday, April 8.

The amount of snow was very discouraging, but at least were were welcomed home with a pretty sunset.

The weather warmed up quickly after we got home. A lot of snow has melted now leaving our driveway wet and muddy. We had to drive to Minneapolis for a couple of days where the high today was an unusually warm 86 degrees. It never got that warm the whole time we were in Arizona!!

Cloth Napkins in Arizona

We had a nice afternoon in Sun City, on the west side of Phoenix, with two couples we know from Minnesota. Somehow we have spent more time with these people in Arizona than back home. The men went golfing while the ladies worked on fiber projects. I had brought a knitting project, but given that I had a chunk of dedicated time and enough space to spread out, it seemed like a great time to get a weaving project warped on my portable Rigid Heddle loom. I planned to make a set of four cloth napkins The other gals worked on knitting projects.

Last winter when we got together with this group at the same rental house, it was a beautiful day and the ladies sat outside all afternoon while the guys golfed. This year it was cold (for Arizona) and the weather forecast threatened rain. Fortunately for the men it never rained. The ladies worked on projects inside the house.

I wanted to try something new for the cloth napkins, taking into account what I can do with the Rigid Heddle loom and what yarn I had brought to Arizona. After considering various options for yarns and patterns, I decided to go with plaid using blue 8/4 100% cotton yarn for the main color, and some natural color Gist Duet cotton/linen blend yarn for the contrast color. The cotton/linen yarn is a bit thinner and behaves differently, but I was pretty sure it would work out OK and make it more interesting. I used a free pattern called “Soft Plaid” by Brittany Seaborg that I found on Pinterest. It looked like what I had in mind , so I would not have to guess at how many warp threads and rows for each color to make it look right.

Warping the loom for a set of cloth napkins

As I was winding the eight feet of warp yarn on to the back beam, it was clear that the tension for the cotton/linen yarn was different. It was sagging a bit when the 100% cotton yarn was tight. I had known this might happen, but I decided to go for it and hope it would be OK in the end. I was able to finish warping the loom that day in Sun City. The rest of the project I completed over the next weeks back in our RV.

I came home from that outing with a bag of grapefruit and oranges from trees in the yard of the rental home. Yum!

Fresh oranges and grapefruit from our friend’s tree in Sun City
Fresh fruit in front of my RV kitchen towels, including the one I just made recently

I wanted to do rolled hems instead of hem stitch and fringe like I usually do for towels. It is more work but looks nicer. The hem could be sewed by hand, but I had to figure out how to keep the weaving from coming undone after cutting the napkins apart and before I could get the hems ironed and stitched, without having my sewing machine. If I was at home, I would do a zig zag stitch on the sewing machine at the beginning and end of each napkin before cutting them apart. Instead, I used some thread and did a hem stitch at the beginning, but I did not pull it tight like I would do for making fringe. The thread I used was very thin and hard to see while I was working, and in the following photos. The second photo is zoomed in.

Loose hem stitch to keep the ends from coming undone
Close up of the hem stitch

The pattern has blocks of the two colors repeating twice. The pattern starts with blue and ends with the natural cotton/linen yarn on the other side. I realized that the different tension and thickness of the cotton/linen was causing the side with the cotton/linen yarn to pack down differently. If I had thought about that at the beginning, I would have added some blue warp yarn on the side after the natural, so that the tension on each side would match. Since it was too late for that, I had to pay attention and adjust as needed while weaving the rows. These are only napkins guys, it is OK if they are not perfect. You can see in the next photo it looks uneven on the right side, but I figured it would even out some in the wash.

The weft rows were not packing evenly due to the different yarns

We had quite a few guests coming and going for the entire second half of February. They did not all stay with us in the RV, but in any case my routine was messed up and I did not get as much weaving done as I thought I would. My sister Betsy visited, and she slept on our RV love seat pullout bed for almost a week. I thought that I was going to be done with this project before she came, so that the loom would be put away in the storage area under the RV during her stay. It did not happen that way. Instead, the weaving was still on the loom when Betsy arrived. I did not do any weaving at all while she was staying with us. Multiple times a day I moved the loom and it’s box around from the loveseat, to the floor, to the table, to the bed, depending on the time of day and where people needed to sit or sleep or eat.

After Betsy went back home I committed to finishing the napkins project before our son and his wife arrived a week later. They stayed in a hotel nearby (no way would they fit on the love seat together), but I knew we would be hanging out some in the RV so I did not want to have to keep moving the loom and box around while they were visiting. The following photo shows the plaid pattern taking shape.

Plaid pattern taking shape

One challenge with stripes in the weft is what to do with the cut off ends when changing colors. There are many options and suggestions. You can just cut the yarn and leave it hanging until the project is off the loom, and then weave the loose ends in, either across or down the side. You can cut the yarn, and fold it across into the weaving as you go, so it is in the same shed as the next row of the next color. You can carry the yarn up the side, so when you get back to that color again it is still attached. I did a little bit of everything as I kept changing my mind about what was easiest or best.

I had some tension problems that caused the completed weaving to wind on crookedly. It probably had to do with the cotton/linen warp yarn on the side, or maybe not. In the photo below you can see that the line at the bottom where the natural color switches to blue is crooked. That is actually the opposite problem I had at the beginning where the rows were packing down tighter on the right side. I don’t really know what was going on and I did not try to figure it out. I just kept going and tried to adjust as I went along.

Winding on crookedly

I started getting worried about whether the loose hem stitch I had done at the beginning of the first napkin would hold together after cutting. I considered asking someone in the sewing craft room at the RV resort if I could use their sewing machine to zig zag the other napkin ends before cutting them apart. I went ahead with the rest of the weaving while thinking about the best way to secure the remaining napkin ends. I wove two rows of an off white cotton yarn in between each napkin in order to have a clear separation and place to cut them apart.

I finished weaving the day before out son and daughter-in-law arrived and took it off the loom. Once the weaving was unwound and stretched across the floor, it seemed like the uneven places straightened themselves out for the most part. At that point I was able to put the loom back in the box with the accessories and put it away in storage under the RV.

Weaving off the loom

I had to weave in all the ends that I had not already taken care of, and tie some knots in the warp yarn ends so they would not come undone or be a big mess or after washing. The next photo shows one end of the weaving with all tails taken care of and warp ends knotted.

Weaving ready to go in the laundry

After taking care of all the tails, I ran the weaving through the wash with a load of laundry, where it shrank and became more dense as expected. I decided not to put it in the dryer because I did not want it to end up in a tight wrinkly wad inside a fitted sheet corner. Meanwhile I had an inspiration to try doing hem stitch on the rest of the napkin ends with only two warp yarns and two weft rows, so it would be more secure than the four by three hem stitch I did at the beginning. After trying this on the other end of the first napkin, I went ahead and did two by two hem stitch on each end of the other three napkins. It took some time, but looked very neat and tidy. In the next photo you can see the end of one napkin and the beginning of the next one with the hem stitch (hard to see with thin blue thread) and the off white rows between each napkin.

Two by two hem stitch to secure the ends of each napkin before cutting

After the hem stitching was complete I cut the napkins apart between the two rows of off white cotton yarn separating each napkin, and then removed the off white cotton yarn. The next photo shows two napkins cut apart and ready for folding over and hemming.

Napkins cut apart

I have a travel iron in the RV, but not an ironing board. I have used the travel iron a couple of times with several layers of towel on the carpeted part of the floor. For ironing the hems of the napkins, I used the iron and ironing board at the RV resort laundromat.

Using the iron and ironing board in the RV park laundromat

I had an odd assortment of straight pins, safety pins, needles, and clips to hold the hems in place until I could do the hand sewing.

Hems ironed and pinned

After ironing and pinning the hems, I sewed them by hand with a needle and blue thread. The hems are about 1/2″ wide.

Rolled and hand stitched hem

As I was weaving I tried to make the napkins matching in size and the right length so they would be square after hemming. They are a little smaller than ideal, but they are about as big as I can do using the 15″ wide loom, due to the cotton yarn shrinking. The finished size of the napkins after hemming is about 11″ by 11″. The linen/cotton yarn did not shrink as much, so they are a little wonky.

Voila Cloth napkins finished

It will be hard to get myself to actually use these cloth napkins. The hand towels I have made before get dirty when used in the kitchen to dry CLEAN hands and dishes. In this case, we will be wiping DIRTY hands on them. It seems good to get away from using paper napkins, but cloth napkins will have to washed regularly, using water and detergent which is also a concern.

When I was growing up, my dad always saved the used paper napkins after a meal. He stashed them in a drawer or under the sink to be used later for wiping up greasy pans when doing the dishes. We were discouraged from using paper towel. I follow my dad’s lead and use lightly soiled paper napkins for wiping food and grease off of plates and pans, but I also use too many paper towels for drying fruit after rinsing it off and for other things where I could use a towel or cloth rag. I have seen cloths that are supposed to be a replacement for paper towels, but again, they would need to be washed. It is hard to know how much of a difference these little efforts will make to the environment in the long run. That is a topic for another day.

Boyce Thompson Arboretum

For the last two and a half years I have been publishing a blog post every two weeks, give or take a day. Two weeks after my last post about a dish towel weaving project, I did not have any posts remotely ready. I have a bunch of rough drafts going, but none of them were complete or right for publication. I was a bit distressed, but concluded it did not matter.

The weather here in Gold Canyon, AZ, has not been the greatest with cooler than normal temperatures and more rain the usual, and some very windy days where you have to put your portable chairs away or you might find them a block away. It is still a lot better than Minnesota so I am not complaining. On one of the nicer days I went on an outing with my sister-in-law and her husband to Boyce Thompson Arboretum. This is an amazing place about 20 miles east of Gold Canyon, near Superior, far away from any developed areas of the Phoenix Metro.

I had been there the week before that too, when my other sister-in-law and her husband were visiting. I took many photos on that visit, so this time when we got there I figured I would not take any more photos. However as soon as we started walking around I saw pops of color that were not there or I did not notice the week before that needed to have their photo taken, different from anything at home in the Midwest. I realized that here was my next blog post.

Mr. Boyce Thompson owned a copper mine near Superior in the early 1900’s. He built a home on land near the mine, and started the arboretum in 1924. You can see the house high on a bluff from the walking trail, but it is not accessible or open to the public.

Mr. Boyce Thompson’s house

Also along the trail is a poster with some history about Mr. Thompson and the arboretum. He was interested in plants and helping to solve world food problems, and he felt bad about the damage caused to the local area from mining, timbering and overgrazing (after he apparently made lots of money from the mine).

There is nice gift shop at the arboretum with the usual southwest tourist apparel, prickly pear cactus products, books, etc, and also plants for sale. I thought a cactus for sale that drooped way over was funny.

Cactus plants for sale at the gift shop
More small plants for sale at the gift shop

The arboretum offers yoga and other wellness classes, as well as classes on master gardening, watercolor painting and photography.

There is a small greenhouse, followed by walking paths featuring labeled desert plants. The landscaped area then turns into an easy hike with beautiful scenery. You can do a guided tour or walk around on your own.

Following are photos I took of plants I found especially interesting or different or colorful, plus a few points of interest along the one and a half mile loop trail. The photos are not necessarily in the order in which you would find them on your walk through the arboretum. I don’t remember what all the plants are called. Enjoy the variety nature has to offer as you scroll through my pictures.

This is called Old Man Cactus LOL
This plant looks like Rhubarb, but it isn’t

Prickly Pear Cactus

Part of a very big Eucalyptus tree

There are areas of the arboretum with plants and displays from all the major desert areas around the world. The next two photos are from a recreation of an Australian wool drovers shed.

Australian Wool Drover’s Shed
Sculpture at the Wool Drover’s Shed
A family of five lived in this two bedroom cabin before Boyce Thompson owned the land
A cool horse sculpture
Who spray painted these rocks blue? No one, they are Azurite-Malachite

Following are a few photos of the hiking trail that loops back around to the landscaped area.

On the walking trail with my husband, brother-in-law, and nephew
My sister-in-law, niece, and daughter
Sisters-in-law, daughter, and nieces

If you are ever in the area, this is an excellent outing that includes some history, learning about desert plants, beautiful vistas, and an easy hike. We will be going again soon when our son and daughter-in-law visit next week.

Weaving in Arizona

I am enjoying my time in Arizona, where I don’t have to worry about slipping and falling every time I go outside. In addition to activities we do here such as hiking and bike riding, I do many of the same things I would be doing at home, like knitting and weaving. I brought my 15″ rigid heddle loom with me.

There is not a good place to warp the loom in the RV, so when I was ready to start a project I reserved a multipurpose room in the community building at the resort where we are staying, in order to have a bigger space to spread out. My sister-in-law Marlene, and our friend Jane, used the room at the same time to work on drawing and painting projects.

My sister-in-law and our friend painting and drawing while I worked on weaving

I had brought yarn for thick cotton hand towels, thinner cotton yarn for cloth napkins, and yarn for a wool scarf. For my first weaving project in Arizona I used Sugar & Cream yarn for a set of hand towels. This is the worsted weight 100% cotton people often use for knitting dish cloths. I had made a set of hand towels with this yarn when I first got the rigid heddle loom. I liked the weight of the towels for drying hands, but the white main color I had used before got very grungy looking after awhile, and the weave seemed a bit too loose. This time I started out warping the loom with darker colors and more ends (yarns) per inch for a denser weave using the 10 dent reed (10 ends/yarns per inch).

I was disappointed that the room I reserved had only wobbly card tables. The room is more commonly used for playing cards or games. The card table worked OK but was not ideal. I clamped the warping peg on a counter about nine feet away. I did not have much of a plan for a pattern, other than using multiple colors in the warp (the long way). The yarn I had was in bold colors of blue, yellow, green and brown. I went ahead and started warping, deciding as I went when to switch colors.

Warping the loom

Following is a photo of Marlene painting, using a portable easel she received as a gift recently.

Marlene painting using her new portable easel

We could see the Superstition Mountains out the window of the room.

The view out the window of the room we were in

While I was warping the loom I had to struggle to get the reed hook with yarn through the holes in the reed and it seemed like the yarn was not sliding through the slots in the reed very well. Once it was all warped, I decided that the 10 dent reed was too dense after all. I should have used the 8 dent reed (fewer yarns per inch). I also did not like the brown yarn with the other colors.

At the top of the next photo is the 10 dent reed, compared with the 8 dent reed below it. You can see the slots and holes are closer together in the 10 dent reed. After that is a picture of the loom warped using the 10 dent more dense reed with blue, yellow, green and brown yarn.

10 dent reed compared to the 8 dent reed
Loom warped with 10 ends per inch and including brown yarn

I could have continued on with the project as is, but I would not have been happy with the results. As much as I did not want to, I removed the 10 dent reed and rethreaded the ends through the 8 dent reed, which required fewer ends (yarns) across the same width. While I was at it, I replaced the brown yarn with green. I was left with a tangled pile of yarn from the extra 32 ends that I removed, but I was happier with the result.

Following are photos of the rethreading in process on the 8 dent reed, with the yarn on the right waiting to get rethreaded, and then a photo after I got that all done.

Rethreading the warp ends using the 8 dent reed
Rethreaded with 8 ends per inch and no brown yarn

I started weaving the first towel with blue weft yarn.

Hem stitch and first few rows woven on the first towel with blue weft yarn
Blue weft yarn

I used green for the weft yarn on the second towel. After the time consuming process of re-warping the loom with fewer ends per inch, the actual weaving went very fast. I made sure to pack the weft yarn rows tight enough so the fabric would not be too loose.

Green yarn for the second towel

In between weaving sessions I also worked on a knitting project that will be featured in a future blog post, and I did some other activities. There is a residential neighborhood across the highway from the RV resort with wide streets, nice houses, and minimal traffic that is great for bike riding. No, the next photo is not in front of our place. haha.

Following are a couple of hiking photos.

Gold Mine Trail, one of my favorite hiking spots
Possibly Picket Post trail, many trails are similar

I am not much of a shopper, but we had to check out the Mesa Swap Meet. This is a set of four very long connected metal buildings, covered but somewhat open to the elements, with hundreds of vendors selling everything under the sun on weekends. The name of the place sounds like it would be a flea market of used or vintage items, but the products are all new. There is clothing, yard art, kitchen stuff, windows, hot tubs, golf carts (not only used for golfing), golf clubs and accessories, tech accessories, sports team spirit gear, and you name it. I bought a small bottle of Mexican Vanilla.

Yard art at the Mesa Swap Meet

If your money is really burning a hole in your pocket but you cannot decide what to buy, there is an option.

For when you want to buy something but cannot decide

Back to my weaving, I used blue again as the main weft color for the third towel. I tried two different versions of horizontal stripes at the beginning using yellow and green, but I did not like the way either one looked. It was also time consuming figuring out how to manage all the extra tails or carrying of the yarn with the color changes, and I needed to get the project done. Our daughter Britta was coming soon and would be sleeping on the love seat pullout bed for a few days. I had been setting the loom on the loveseat when not working on my project, so I needed to get the loom packed up and out of the way under the RV before Britta arrived. I ended up undoing the stripes and weaving the weft rows with all blue like the first towel. Another time when I am not on a deadline, I will plan better and try again weaving a plaid towel with both vertical and horizontal stripes .

There was a rare weather forecast for rain one day. That would have been a good time for weaving, but instead we decided to reserve tickets to see a matinee viewing of the new Avatar movie in 3D. I have not been inside a movie theater for ages, sometime before 2019. When we used to live in the Twin Cities we only went to movies at a nearby theater that had second run movies for $3.00. It did not rain after all, and instead was a beautiful day while we sat inside the dark theater all afternoon. “Avatar: The Way of Water” is 3 hours and 12 minutes long with no intermission. It was scheduled to start at 2:30 pm, but the actual movie did not start until after 3:00 following more than a half hour of previews. It was past 6:00 when the movie was over. I really really had to use the restroom by then. The beverages and snacks were overpriced and I should have reviewed the characters and plot of the first movie beforehand, but the production was amazing and I recommend it.

My niece Kara, Marlene’s daughter, came to visit for a cousins weekend with Britta. She watched and learned while I wove the last few rows, sewed the hem stitch on the end of the last towel, and took the project off the loom.

Weaving demonstration for my niece
Off the loom!

Since I had done hemstitching on both ends of each towel while it was still on the loom, all I had left to do was cut them apart and wash them with a load of laundry. At home I would have taken them out of the dryer before they were completely dry and then ironed them. At the RV park laundromat, I don’t know if you can open the dryer and take something out before the cycle is finished. I left them in with the other laundry until it was done. When I opened the dryer, everything was very hot and very dry. The hand woven towels were wadded up in the corners of the fitted sheet, and very wrinkly. I tried to iron them but they were still wrinkly. The density of the weave was perfect and the color patterns were pleasing.

Towels all done but very wrinkly from the dryer

I got the towels wet and let them dry some, and then ironed them again. It did not take long here where it is very dry. They were still a bit wrinkly, but not a big deal for hand towels. I got the project all done and the loom put away just in time to go pick Britta up at the airport. I will make more of these towels sometime with horizontal stripes.

Less wrinkly after getting wet and ironing again

Woven Fermenting Jar Covers

Our daughter Britta has been making fermented foods and beverages, including kombucha, sour kraut, fermented hot sauce, and lacto-fermented vegetables. This involves putting ingredients in a jar and letting it sit for weeks. Her current project is “mead”, otherwise known as honey wine.

Mead is the oldest known alcoholic beverage, possibly as old as 20,000 to 40,000 years old. The only two ingredients needed for mead are raw honey and water. The yeast and bacteria found in the honey will consume the sugars which creates the fermentation process. A cloth cover provides a layer of protection against bugs or other particles getting into the mead.

Britta wrote a paragraph with more details about making mead, for those interested:  I stir the honey water mixture 1-3 times a day to promote the fermentation and activate the yeast and bacteria. A cloth is used to cover the jar providing a layer of protection against bugs or other particles getting into the mead. The warmer the room is, the faster fermentation happens. My house is on the colder side this winter so this first stage lasts around 1-2 weeks. As the days pass and I stir it more and more, bubbles begin to form and that is how I know the fermentation process is working. Once it is sufficiently bubbly I transfer it to a bottle-necked container and seal it so that no oxygen gets in. If you do not seal off access to oxygen, the bacteria will eventually transform the honey water mixture into vinegar instead of alcohol. This is how apple cider vinegar is made with apple juice. I want wine, so I seal off access to oxygen. Carbon dioxide is a byproduct of the yeast and bacteria feeding on the sugars, so if sealed shut completely my vessel would eventually explode from the pressure built up by the CO2. There are some devices out there that you can use to keep oxygen out while still letting the CO2 escape the bottle, the simplest being by attaching a balloon over the mouth of the bottle and letting it inflate. This stage can last 1-4 months. Once this stage is over, you can bottle it and let it age as long as you like. 

Back to me and weaving: When I asked Britta if there was something I could weave for her, she said she could use some pieces of fabric for jar covers for her fermenting projects. That was perfect for me to experiment with patterns and yarns, as the jar covers would be smaller than my last dish towel project. They would not take very long (famous last words), and I would be able to finish them in time to mail to her in California for Christmas.

The jar covers were the first project I warped on the floor loom at home by myself without any help, using 8/4 100% cotton natural color yarn. Not surprisingly, I made a couple of mistakes.

I haven’t found a good place to use my warping board yet where it is at the right height and will stay in place. I had to tape it on to the kitchen window to keep it from slipping around as I measured out the warp yarn for the jar covers.

Measuring yarn for jar covers using the warping board
Warp yarn all measured and ready to go

When I was warping the loom (threading the warp yarn ends through the reed and heddles) there was a problem at the very beginning of the process when the first group of 20 ends (out of 182 total) got out of order from the bundle. After stressing out for awhile, I figured out that it didn’t really matter what order they were in. I went ahead and threaded them through, and later confirmed with Torri (my weaving mentor in Fergus Falls) that it was going to be OK. Then I noticed I had missed threading one slot near the beginning, so I rethreaded a bunch of ends over one to the correct position. When I got about half way through, I decided to count the remaining threads to make sure it was going to come out right based on the number of ends and the pattern, which needed to be divisible by four. There were two extra warp ends. Oops, I must have wound on two extra by mistake when measuring the yarn with the warping board. When I got to the end of threading the yarns through the reed, I ignored the extra two ends, which I was then able to remove in a later step. The next photo shows the process of threading the yarn ends through the reed at the front.

Threading the yarn ends through the reed at the front

I made a bigger mistake in the next step of threading the yarn ends through the heddles at the back of the loom and tying them to the apron bar. Even though I read and reread my notes on how to do this, I missed one important step. I must have had information overload. Something did not seem right, but I didn’t figure out what was wrong until I was all finished. At that point I was discouraged, but figured out how to solve the problem. In fixing the mistake I lost an inch or two of the warp length and some time, but neither was a huge problem in the end. The next photo shows the warp yarn ends coming through the heddles and tied on to the back apron bar correctly.

Yarn ends threaded through the heddles and tied on to the back apron bar

The last part of the warping process was winding the warp yarn around the back beam and tying the other ends of the yarn on to the front apron bar. It is important to keep the tension even during the wrapping part which seems tricky to me, but I accomplished that part with no trouble. The entire warping process took longer than I expected, but I should have known better.

Once I got going on the actual weaving the project went quickly. The 3 1/2 yards of warp yarn was enough for four jar covers, at about 15″ x 15″ on the loom, with the goal of ending up at about 12″ by 12″ after “take up” and shrinkage. In addition to the 15″ length for each cloth, there was enough for fringe, plus normal loom waste at the beginning and end. My plan was to use four different warp yarns with four different weave patterns. Each jar cover would be unique, and in the process I would be learning.

I have a book called “the Handweaver’s Pattern Directory” by Anne Dixon with over 600 patterns that are possible to weave on a four harness loom. I picked out four not too hard patterns that could all be woven using the same basic twill pattern for threading the heddles.

For the first cloth I used red Duet yarn from Gist for the weft. This is a 55% linen / 45% cotton yarn. It is a little thinner than the 8/4 cotton yarn used for the warp. I like this yarn a lot, and I wanted to see how it worked with the slightly thicker warp yarn. I used a pattern called “horizontal herringbone”. I copied the pattern from the book and pasted it in below.

Horizontal herringbone pattern from the book

Following is the beginning of the weaving with the red cotton/linen weft yarn using the horizontal herringbone pattern.

Beginning of the first jar cover using red cotton/linen yarn

I tried to do another pattern from the book for the second towel, using green 8/4 cotton (same as the warp yarn but a different color). After I got a few repeats of the pattern completed it did not look anything like the picture in the book. I consulted with Torri, and she advised a different treadling pattern to use instead. I undid the rows I had woven and started over with Torri’s pattern. You have to squint to see what the pattern is going to look like when the project is complete. It relaxes after removing from the loom, and shrinks in the washing machine and dryer, making it more dense and easier to see the pattern.

The second jar cover using green with a pattern from Torri

I used another pattern from the book for the third cloth, using blue 8/4 cotton. I pasted in the pattern below, which is shown in orange.

Pattern from the book for the third jar cover, which I made in blue

The fourth jar cover was plain weave in orange. The following photo shows the end of the third blue cloth using the pattern from the book (shown above in orange in the book…confusing), and the beginning of the forth orange cloth in plain weave (no pattern needed).

Blue cloth using pattern from the book, orange cloth with plain weave

The following photo shows all four jar covers after removed from the loom, cut apart and having tails woven in. They are relaxed some since they are no longer under tension, but will shrink in the washing machine and dryer and become more dense.

Removed from the loom, before washing

The next photos show the red and orange cloths, followed by the blue and green cloths, after washing and drying with a load of laundry.

Red herringbone pattern cloth, orange plain weave cloth
Blue and green cloths with variations of twill patterns

One row appears to be incorrect on the blue cloth. I showed the completed cloths to Torri to discuss my mistakes and challenges, and what I could have done better. It turns out I missed one row in the pattern for the blue towel. There should have been eight rows in the pattern repeat, but I only had 7. After she pointed that out, I could see where my mistake was on the post it note I was using with the treadle pattern.

The backs of the blue and green cloths look quite different from the front, whereas the plain weave and zig zag pattern are the same on both sides. The next photo shows the backs of the blue and green. These two patterns both have weft threads going over one and under three warp yarns, which means that on the back it is over three and under one warp yarn, which makes the front and back look different.

The back sides of the blue and green cloths look different from the front

Following is a close up photo of all four cloths together.

Close up of all four cloths together

Generally speaking, I am pleased with the jar covers. There was some warp yarn left that was not enough for another project, but I did not want to waste it. I tied some loose overhand knots to keep the extra yarn from getting pulled through the reed and heddles for the time being. There is a way to tie new lengths of yarn on, but that will have to wait for now. The next photo shows the loom with the extra warp yarn waiting for another project.

Warp yarn leftover from the jar cover project

I will not able to do another project on the floor loom until spring. After completing the jar covers I was busy getting ready for the holidays, traveling to the Twin Cities for a few days, and getting ready to leave for Arizona. Thinking back many years ago, when I was working full time and raising a family, somehow I managed to make batches of hand made gifts, staying up late to finish them in time and causing myself stress. I don’t know how I did it.

Following are photos of the cloths in use on jars in Oakland, California, after I mailed them to Britta. The first photo Britta sent me of the green and white cloth has the back showing on the outside, although I guess it does not matter.

The green jar cover in use

The red one with the herringbone pattern and cotton/linen yarn is my favorite, shown over a jar of mead in the making.

Cotton/linen cloth covering a jar of mead in process

Next is a photo showing the bubbles formed in the mead making a honeycomb pattern.

Bubbles in the mead

I look forward to making more towels or cloth napkins in the spring using the cotton/linen yarn while experimenting with more patterns.