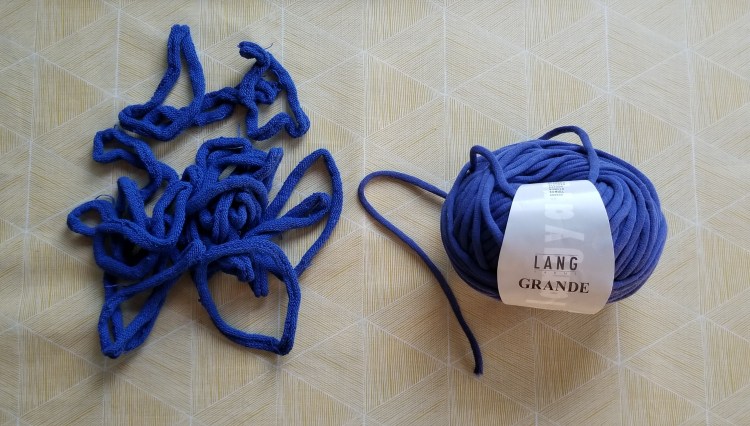
After finally completing a pair of socks I worked on for most of our two months in Arizona, it was time to dig into the supplies I had in the RV and decide what to work on next. To mix things up a bit, I decided to experiment with weaving on my potholder loom. The next photo shows some of the cotton loops that came with the potholder loom, next to some 100% cotton yarn I had brought that is like a stretchy tube.
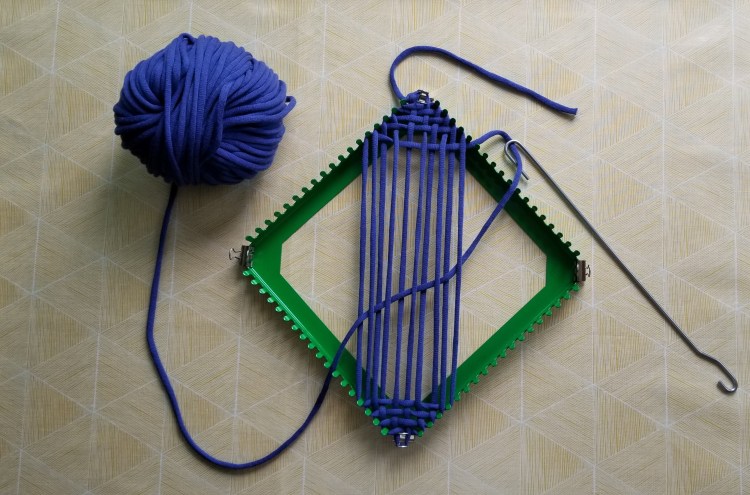
I found some YouTube videos with instructions for diagonal continuous weaving on a pin loom or potholder loom. A pin loom is a basic small loom with nails or posts on all sides for wrapping the yarn around. The potholder loom does not have posts in the corners which is necessary for diagonal weaving, so I had to improvise with office clips which can be seen in the photo below. It is hard to communicate the process with words and photos. I had to watch several different videos, but once I figured out how diagonal weaving works it was easy. Starting in the upper corner, you alternate between weaving the yarn across over and under the vertical rows, and then wrapping the yarn vertically around the next set of pegs on each side.
As you get closer to the middle, it is hard to get the metal hook through the open space, so I started using a crochet hook. That was easier, but the hook part was not really deep enough to hold on to the yarn. For the very last row I used a darning needle to pull the yarn through.

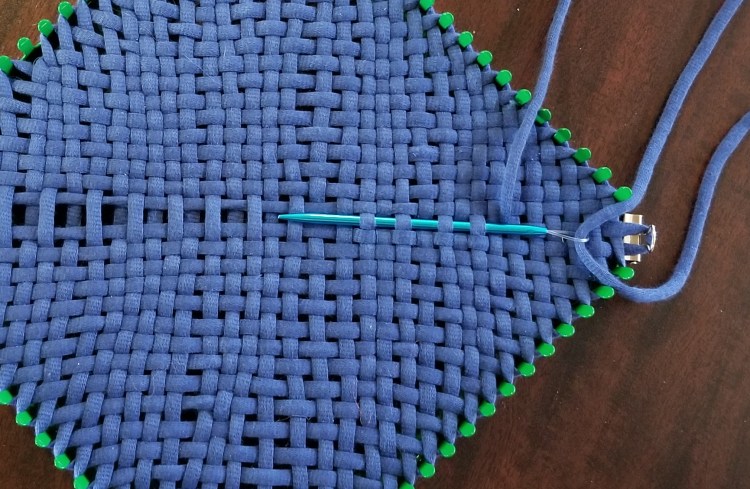
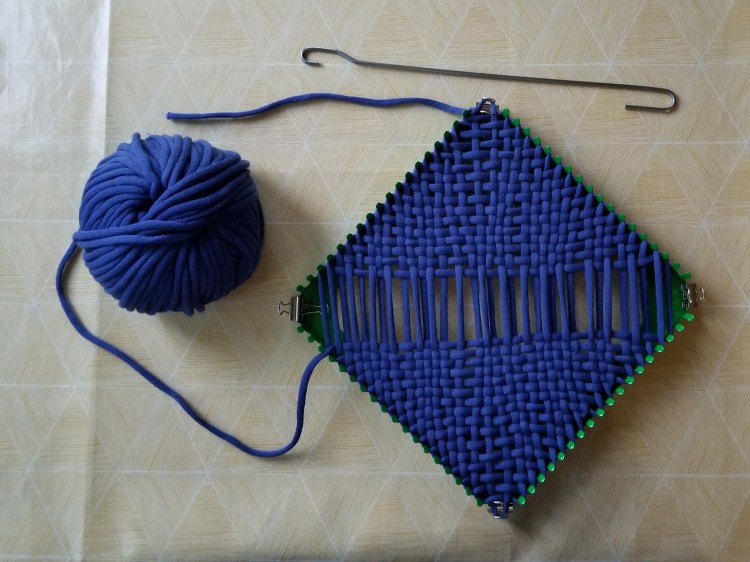
The weaving looks very uneven, but once removed from the loom it naturally evens itself out.

The next photo shows the weaving off the potholder loom. It is not thick enough for a potholder, but would make a very nice washcloth. It could be used with the sides left as is, after weaving in the ends.

Later I crocheted around the sides to give it a firmer border, but in the meantime I had another idea. I had read about making tee shirt yarn, which would be similar to the stretchy cotton yarn in the project above and suitable for weaving on the potholder loom. When I told my husband I wanted to go to the thrift store to buy a tee shirt to make yarn, he could not wrap his head around it and made a comment about how that did not make any sense. Soon after that I did make a trip to Goodwill and bought a plain purple tee shirt for $2.29. I had to browse through quite a few racks to find a plain tee shirt that was appropriate with no side seams. I wanted a solid color, although you could end up with an interesting effect with some graphics on the fabric.
One of the fun outings we had in Arizona was getting together with two couples we know from Minnesota who were also snowbirding there. Deb is a former coworker from the Twin Cities who is a knitter. Deb’s husband and Lauri’s husband were coworkers. Lauri is a knitter and lives with her husband in Ottertail County 30 miles from our home. Deb connected me with Lauri after we moved to the lake. Even though we all live in Minnesota, it seemed easier to get together in Arizona. The three couples met at the house Lauri and her husband were renting in Sun City, on the western side of the Phoenix metro.
Sun City is the original adults only retirement community. At the time it was a brand new concept. When the first model homes were available for viewing and purchase in 1960, the developers where not sure what to expect but it was an immediate success. It must have been out in the middle of nowhere back then, but now it blends in with the other suburbs of Phoenix.
One of the original Sun City model homes is now a museum and is on the National Register of Historic Places.

The guys played golf while the ladies visited and worked on fiber projects, while sitting outside under an overhang in the shade. The temperature was warm but very comfortable and there were NO BUGS. That is an amazing thing to Minnesotans where the mosquito is sometimes said to be the state bird. It was so pleasant sitting there relaxing, socializing, comparing notes on snowbirding and working on projects. I had not decided for sure what to work on, so I brought my entire stash of supplies that I had in Arizona on this outing. It seemed like a good time to try making the tee shirt yarn.
I had watched some YouTube videos with instructions. As with the diagonal weaving, it is hard to describe with words and still photos. The first step was to cut the shirt body and sleeves off from the bodice, and then cut off the seams. It is possible to use almost all of the fabric for yarn, but the biggest bang for the buck is the body section.

The next photo shows the main body of the shirt turned sideways with the bottom folded up almost all of the way, and then strips cut leaving the very top fold uncut. The instructions suggested cutting the strips about 3/4″ wide, but I did not measure. I just started cutting freeform, so my strips were not even or all exactly the same width.

It is hard to see what is going on with these photos, but I then unfolded the fabric and repositioned it so the uncut part that had been folded at top was now flat and in the middle. Next I started cutting across diagonally from one strip over to the next strip. When that was done all the way across, the result was one long narrow strip of fabric.


The last step is tugging and stretching out the strip of fabric which makes it curl on itself and turn into yarn. The one long strip all stretched out was about 30 feet of “yarn”.

Later after we were back at our RV I found another video with instructions for horizontal weaving on a potholder loom. This time the clips in the corners were not needed.
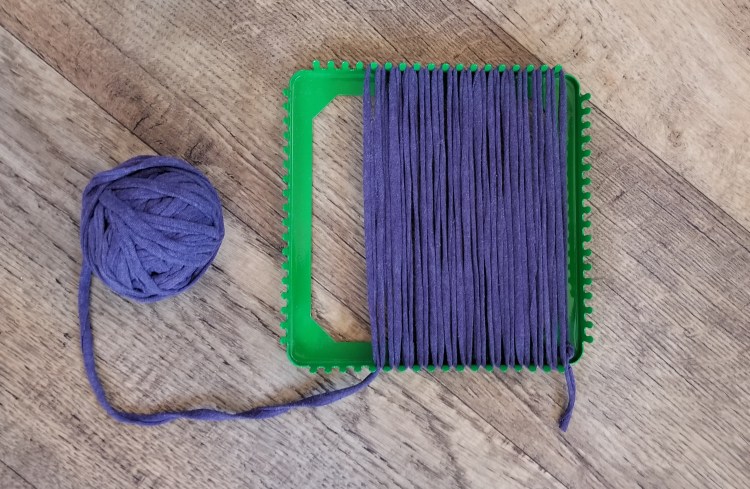
First I wound the yarn up and down vertically around each post. The yarn looks too blue in the next three photos.
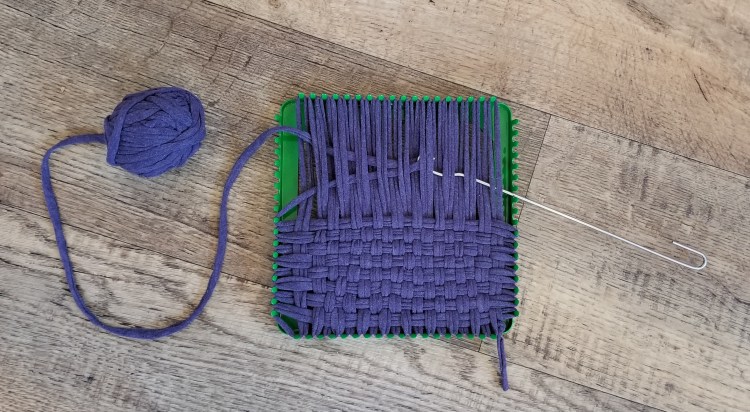
Using the hook to pull the yarn across horizontally over and under each vertical yarn was similar to pulling one of the stretchy loops across and hooking it on a post.
When I got to the last two rows the vertical loops started to pop off the posts. I had a struggle getting both the vertical and horizontal rows back in place and staying in the right place.

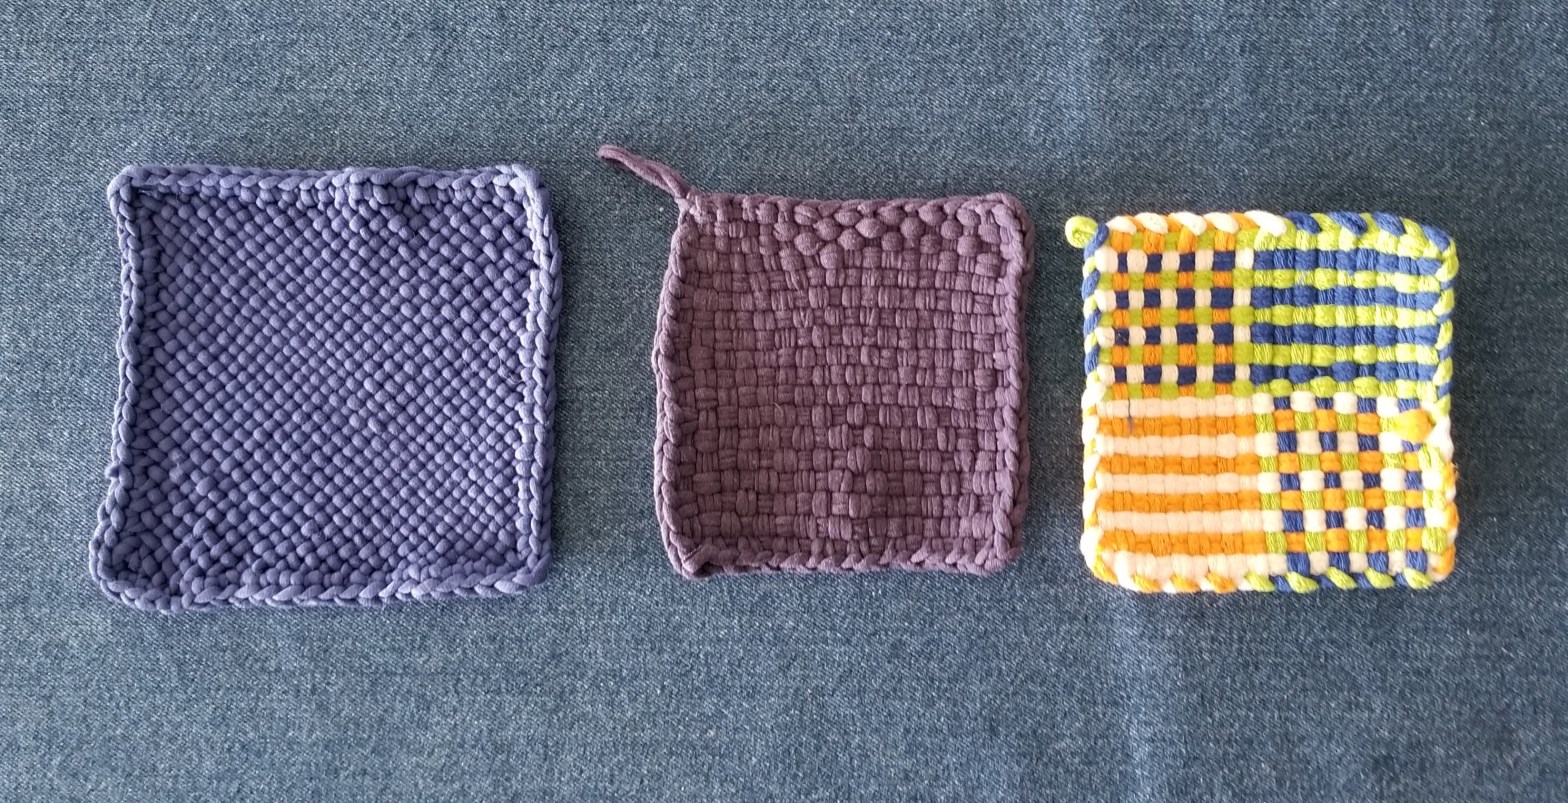
The last photo shows three items made with the potholder loom. First on the left is the washcloth with the stretchy cotton yarn after a crochet border was added. In the middle is the tee shirt yarn potholder. The rows at the top of the tee shirt yarn project where I had a fight to get everything in the right place look different than the other rows. It is very thick and good for a potholder. For comparison on the right is a potholder I had made earlier using the loops that came with the potholder loom.

Potholder loom projects are small, portable, and do not take much time to complete. Weaving washcloths on the Rigid Heddle loom compared to the potholder loom takes a lot more set up time, and it is most efficient to make several at once. It would be possible to make a potholder on the Rigid Heddle loom with thick yarn, but it makes more sense to use the tool and supplies that are designed for it. I haven’t used the Rigid Heddle Loom for awhile since I did not bring it to Arizona, so I am ready to make something with that next.

It is interesting that the Tshirt yarn creation is thick enough to use as a potholder. Very resourceful! I also did not know about Sun City. How times have changed since 1960!
LikeLiked by 1 person
I think a product made out of the tee shirt yarn could be denser or less dense depending on how you used it. Like if you were knitting, you thick were the needles. Yes, it is amazing to think about how much has changed since 1960. I was born in 1959!
LikeLiked by 1 person
Great idea cutting up a t-shirt. I saw that for knitting and I know a few weavers use it on RHL. I used to have a potholder maker when I was a child. I thought it was great fun. There is a pin loom weaving group on FB you might like as there are some very creative people out there making nice patterns that could possibly be transferred to your potholder loom.
LikeLiked by 1 person
Thanks for the suggestions…and for reading! Have a great weekend.
LikeLiked by 1 person
You said the tshirt made one long strip of 30 yards. But, looking at the photo and doing some math, it looks more like 30 feet, not yards. Did you mean to say feet?
LikeLiked by 1 person
Gosh, I think you must be right!! Thanks for reading and for catching that. I will fix the post.
LikeLike