
My flatbed knitting machine was packed away in the box from the end of December until June. It is way too big to use in our fifth wheel trailer during the winter in Arizona, and I was busy with other projects and activities for several months after we got back home to Minnesota in the spring.
There are several things I want to make on the flat knitting machine, including some sweaters. I had to reacquaint myself with the machine first, so I made a hat using instructions and a pattern from the School of Sweet Georgia.
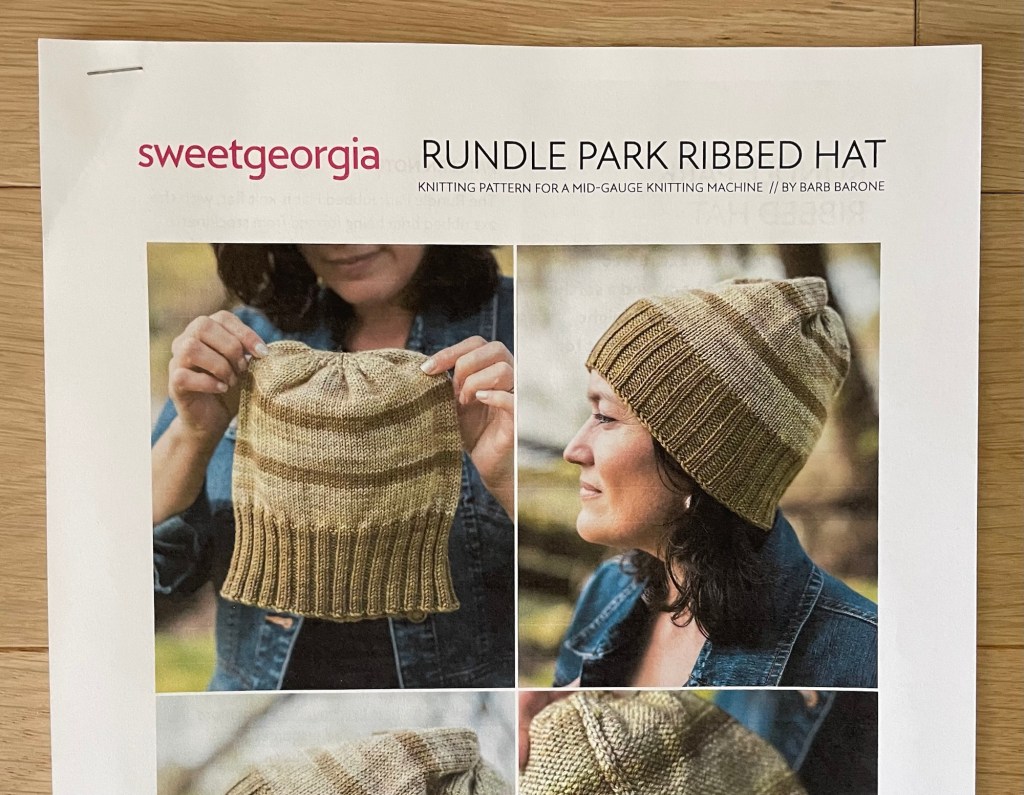
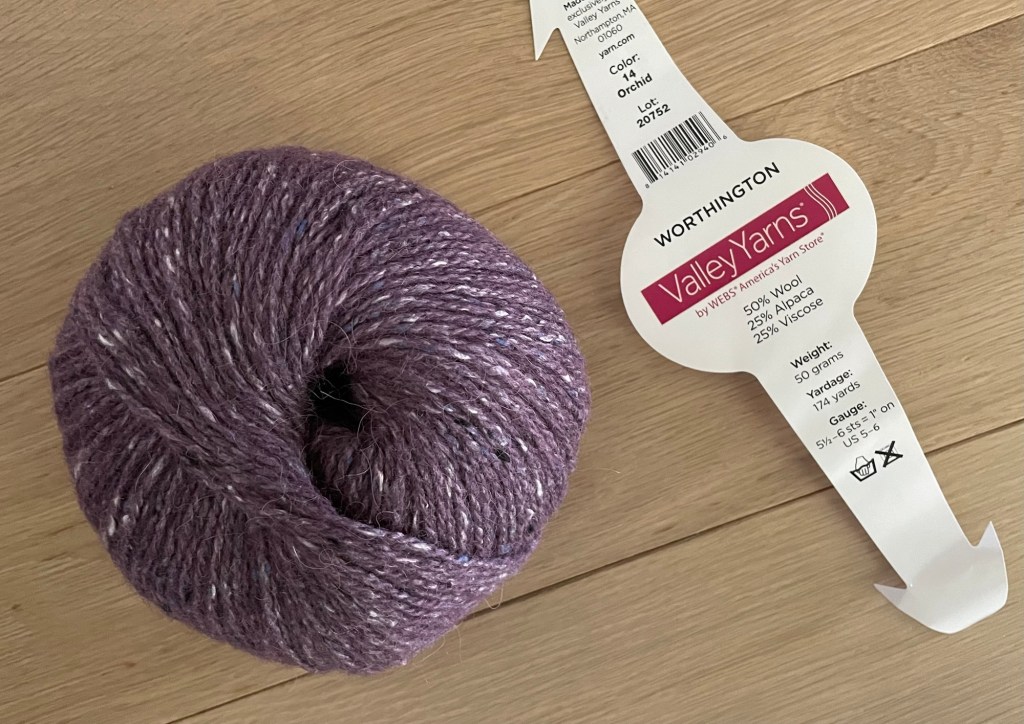
The hat is knitted flat and then seamed on one side. It involved learning some new machine knitting skills, including reforming stitches for ribbing, and decreasing every other stitch across an entire row. I used leftover yarn from the combination machine/hand knit colorwork sweater I knit in the winter.
I thought I would be able to jump right in and start making the hat, but I ended up having to review some instructions on how to get started with the knitting machine. It did not take long to get comfortable again. I was not concerned about the hat fitting anyone in particular, I just wanted to practice and learn the new skills, so I skipped the swatching part and made the smallest size.
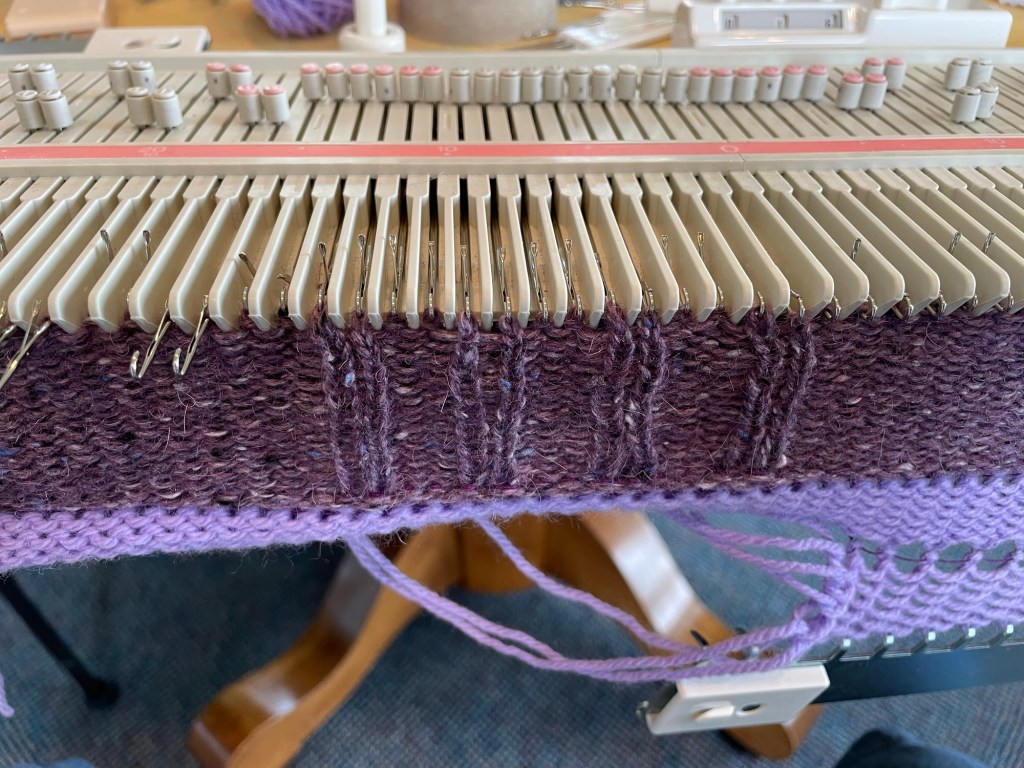
The LK-150 knitting machine does not make purl stitches. More expensive flat knitting machines do have ways to make purl stitches. In order to get purl stitches on the LK-150, you have to knit them first and then undo them and redo them as purl stitches. For the hat, I started by knitting the right number of rows for the ribbed band. To get ready to form purl stitches manually I pulled two needles out of work, alternating with two needles left in place, all the way across.
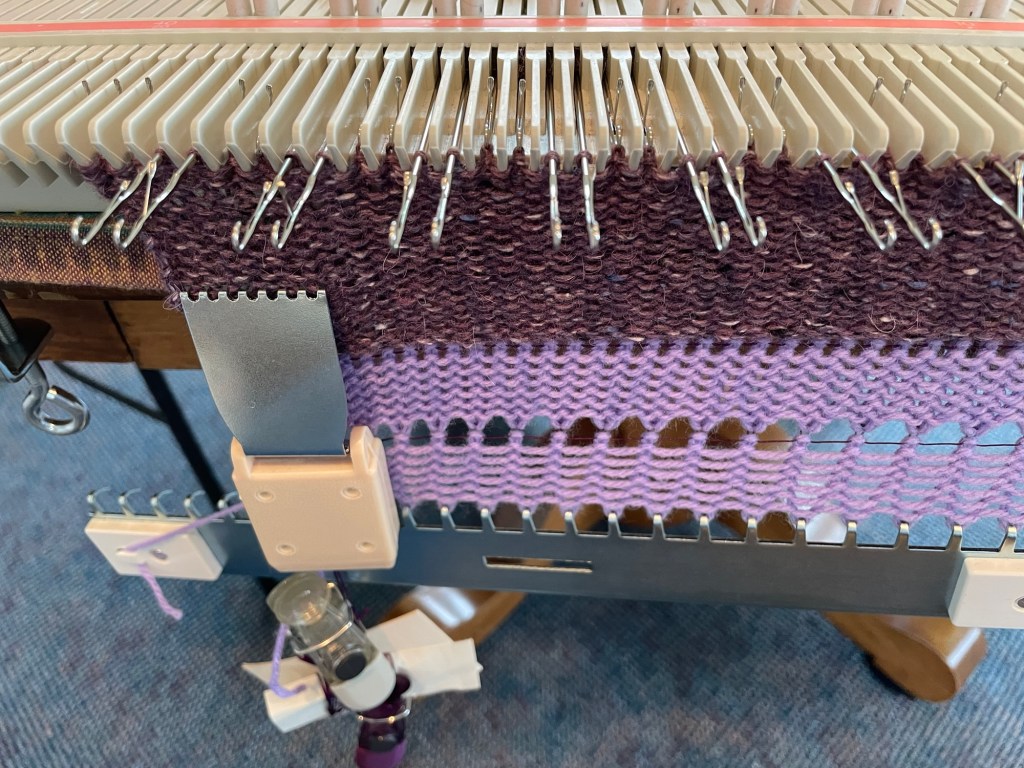
The light purple in the photos is waste yarn used at the beginning, before adding the darker purple project yarn. Normally the waste yarn rows would not have a row of holes. I messed up casting on with the waste yarn and ended up with only every other stitch on the machine, so I added another section of waste yarn on every needle. The following photo has all the needles with stitches that will be changed from knit to purl stitches pulled out.
To reform a stitch from knit to purl, the stitch is removed from the needle and unraveled down to the beginning row. Then using a latch hook tool each stitch is reformed into a purl stitch. There is a similar latch hook tool for the circular knitting machine.
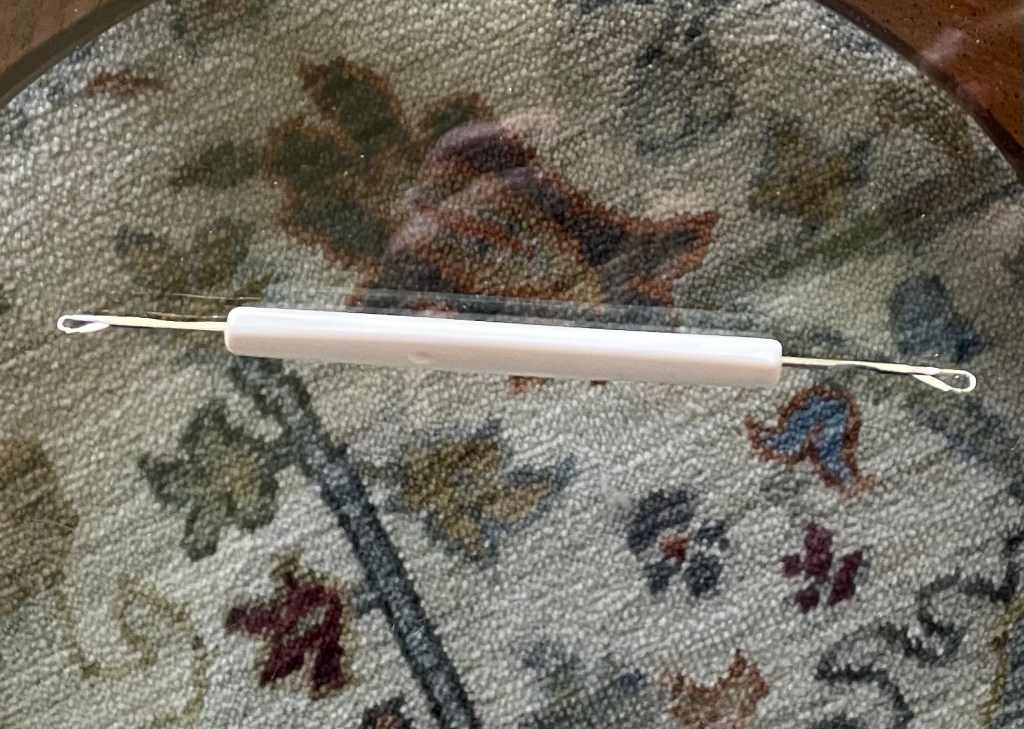
Reforming stitches could also be done with a crochet hook, the same way stitches that are accidentally dropped while hand knitting are recreated. Once I got in a rhythm it went pretty fast.
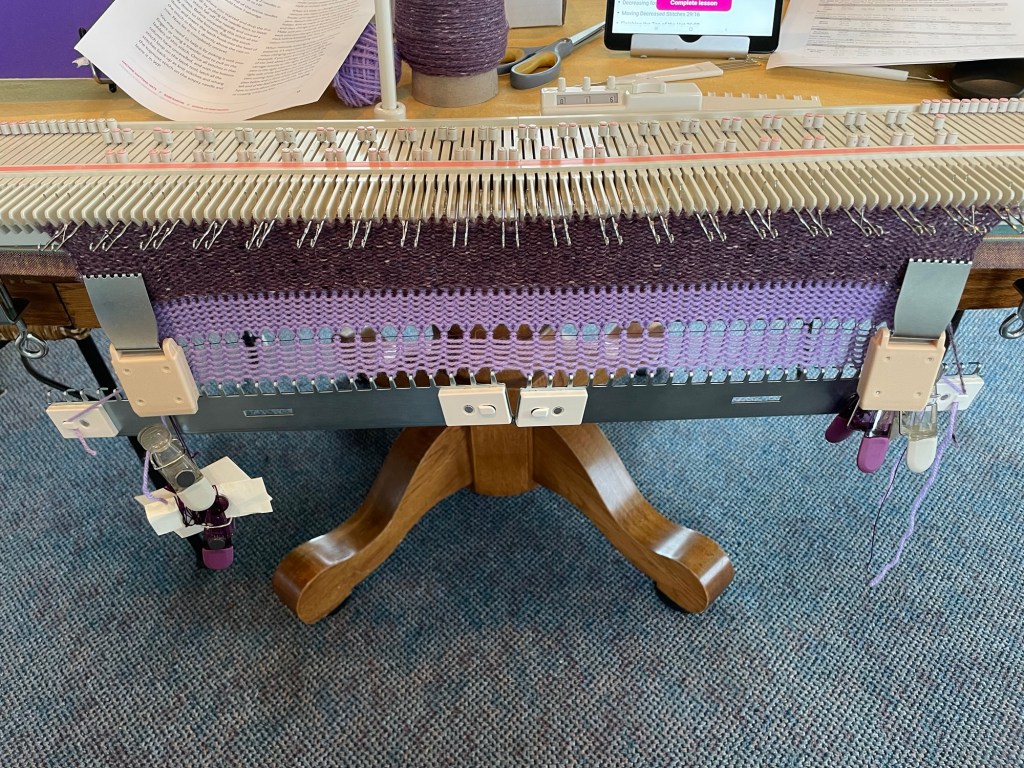
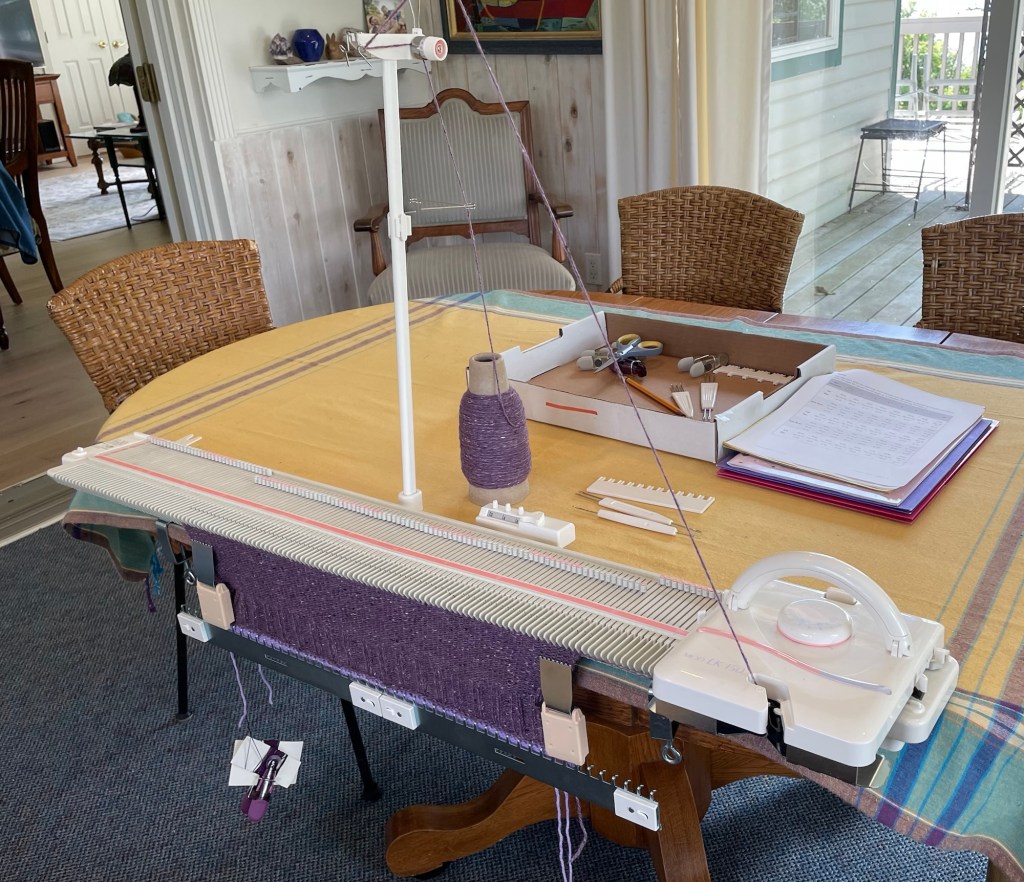
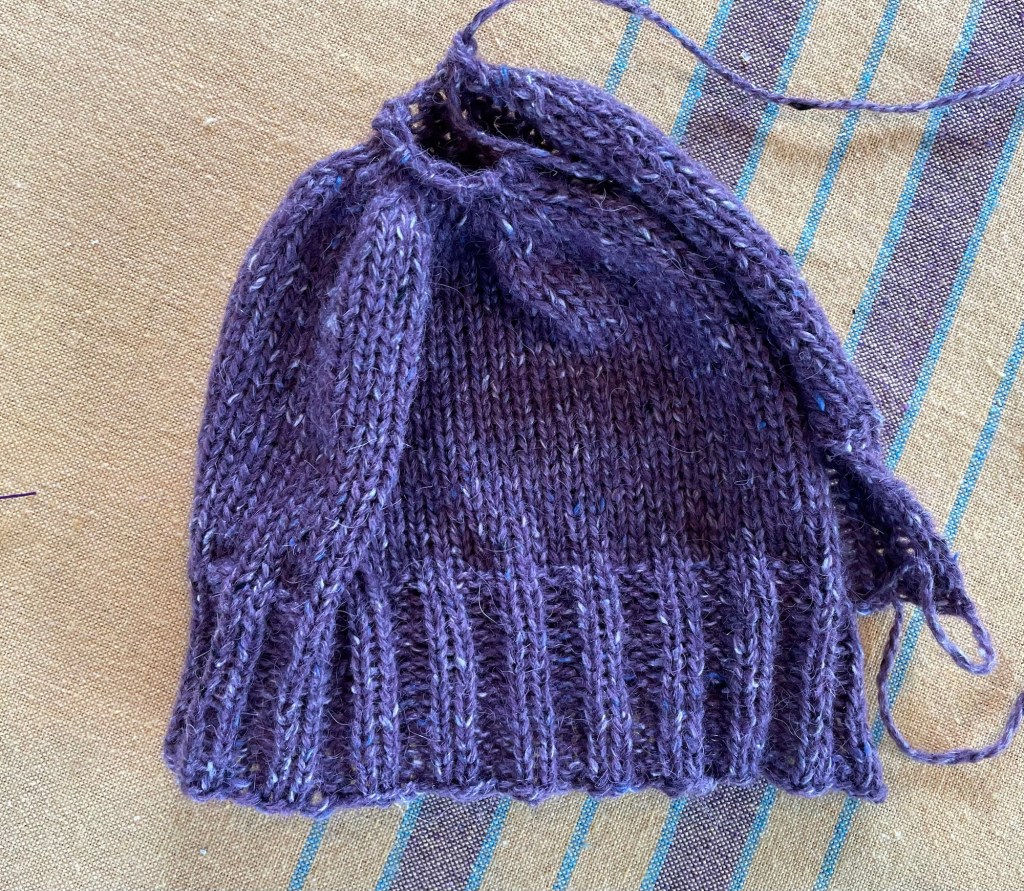
The ribbing and main body rows are complete in the following photo, where you can see the entire machine set up in our nice three season porch. It looks much wider than it ended up as a finished hat.
This hat has a closed cast on at the beginning, right after a row of rip cord row. When the project is removed from the machine at the end and the waste yarn removed, the edge is finished. Alternatively, there could be live stitches at the beginning which could be put on knitting needles in order to knit ribbing by hand. That is what I did on the sweater project last winter. Honestly I do not know which is faster, but maybe speed is not always the goal.
After completing the ribbing and all the rows for the main body of the hat, there are some decrease rows. Most hats I have knit by hand in the round have gradual decreases for a rounded shape. For the smaller sizes this hat has only three decrease rows with every other stitch knit two together. The larger sizes have four decrease rows. The result is that the crown is bunched up rather than smooth. It is just a different look. Alternatively, a more gradual pattern of decreases would also work using the machine..
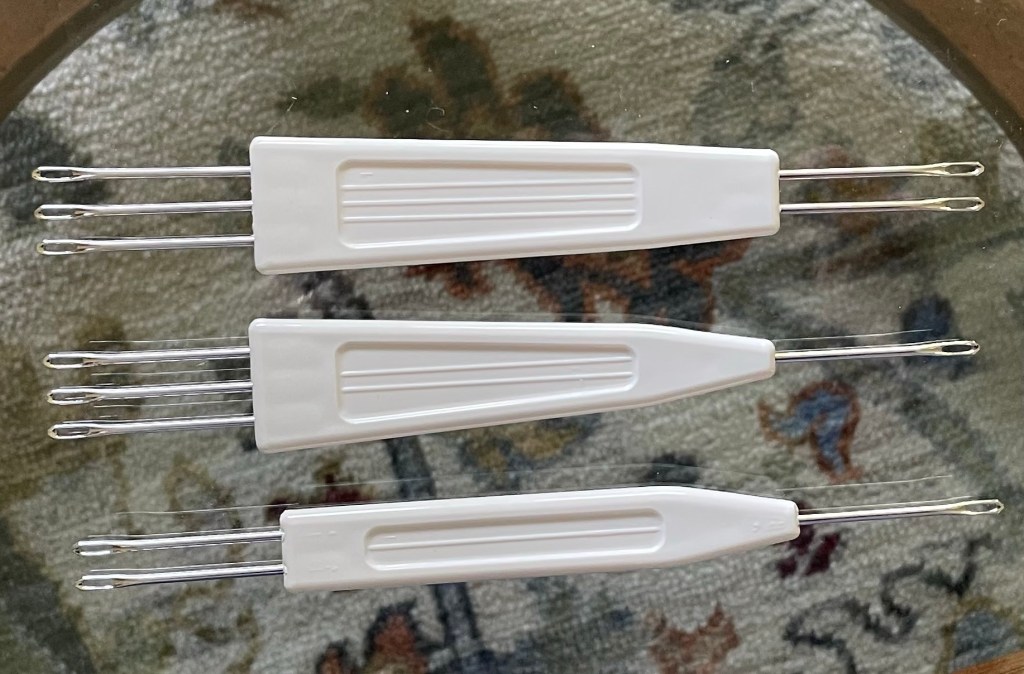
To knit two stitches together on the knitting machine, one stitch is moved over to the next needle with a dedicated “transfer” tool, so there are two stitches on one needle, which then leaves a needle with no stitch on it. In this case every other needle is either empty or has two stitches. I did not get a photo with the stitches transferred and every other needle empty. Following are three different transfer tools that can move one, two, or three stitches at a time.
Before knitting the next row, all the stitches need to get moved towards the center so there are not any empty needles. This is a bit tedious using the transfer tools, and more so the bigger the hat size. The stitches can only be moved over one position at a time, so the same stitch gets moved multiple times until there are no longer any empty needles.
There is another way to move the stitches to the center needles involving knitting a couple of rows of waste yarn, taking the hat off the machine, and rehanging the hat stitches back on the needles without any empty needles. I tried this for the first decrease row and it worked well. This method has the most benefit when there are a lot of stitches. For the second and third decrease rows, there were only half the number of stitches, and then half of that, so I moved them using the transfer tool.
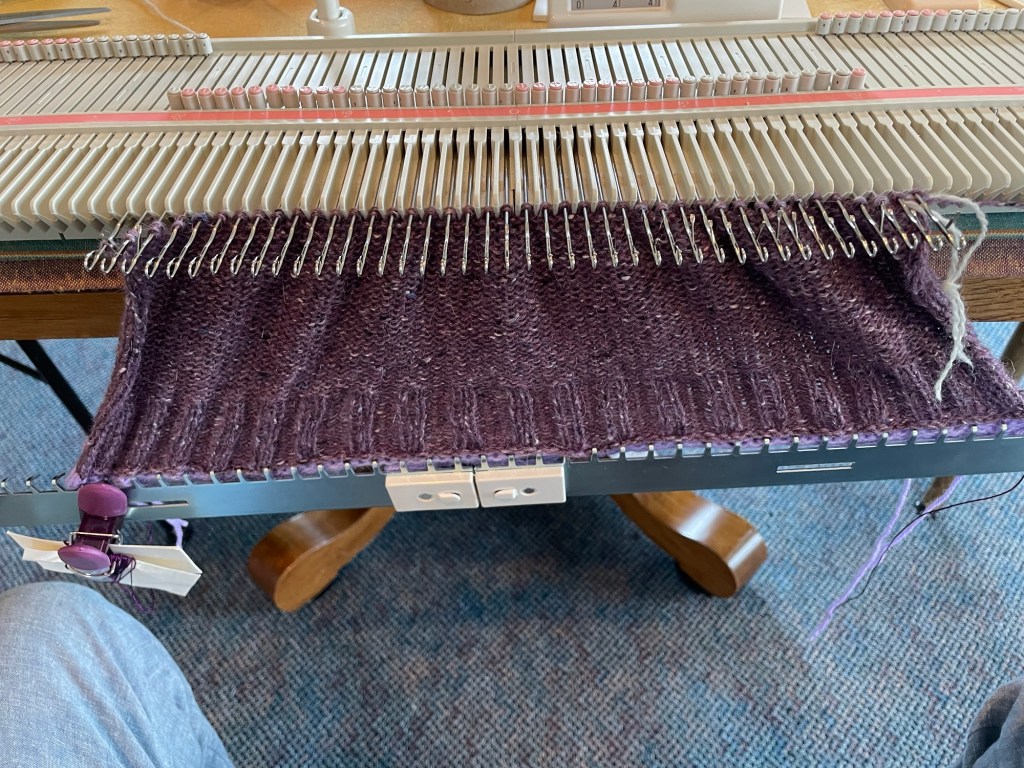
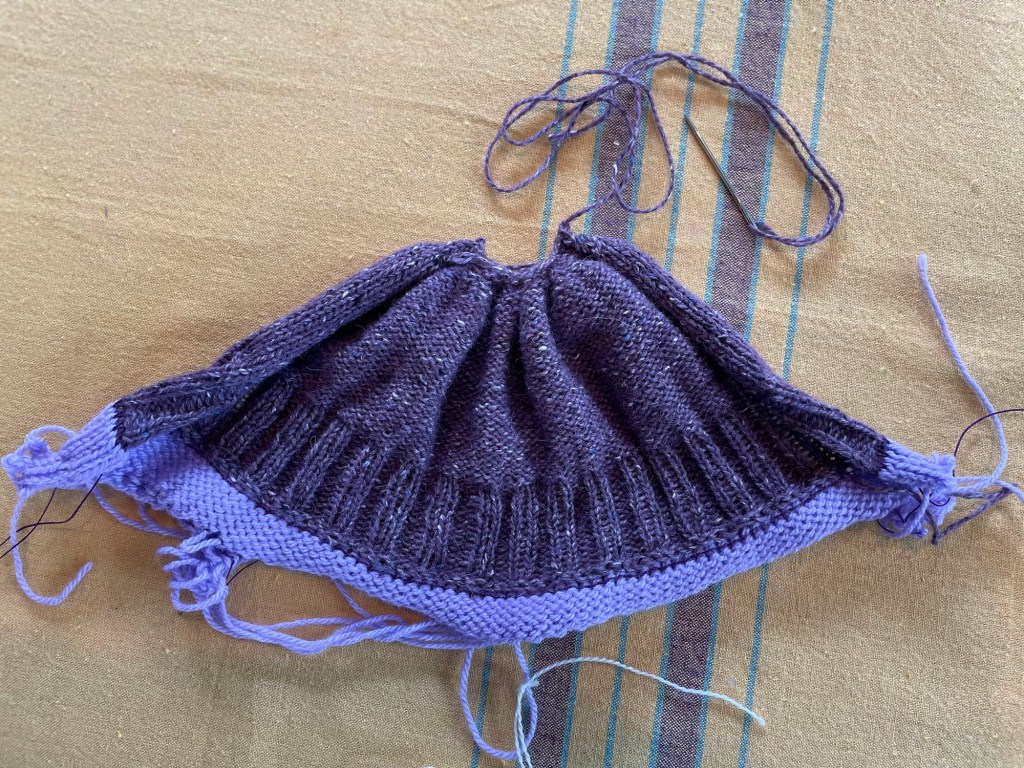
After the last decrease row there were only 12 stitches left, as shown in the photo below. At this point, the working yarn is cut with a tail long enough to pull through the live stitches and seam the side. After using a darning needle to pull the tail through the live stitches, the project is removed from the machine.

The color in the photo below is not accurate, but it shows the hat removed from the machine and ready to cinch up the top and graft the side seam using mattress stitch. The row of rip cord that was knitted in between the waste yarn and project yarn can be easily removed which separates the waste yarn off.
The following photo shows the completed hat, before blocking. The color is more accurate than the more blueish photos above.
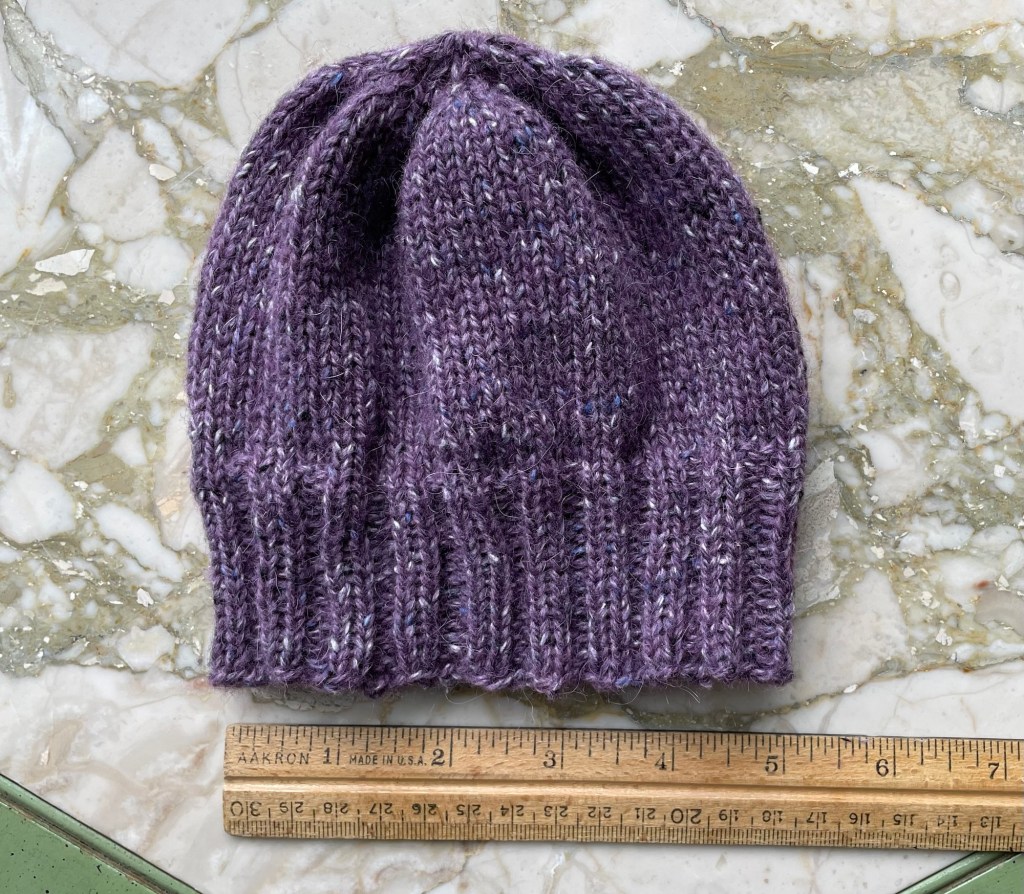
Flat on the machine, the 82 total stitches stretched out to 20 1/2 inches wide. The final hat ended up being 13 inches in diameter. That is close to the finished circumference according to the pattern, but a little shorter.
I am not sure how much time it took to complete this hat, versus how much time it might have taken to knit it by hand (or if it will fit anyone). I think if I had knit a bigger size, the time savings would be greater. Time is not the only factor and I like knitting hats by hand. I learned new machine knitting skills with this project and got practice with the machine, but probably in the future I would not use the knitting machine for a hat.
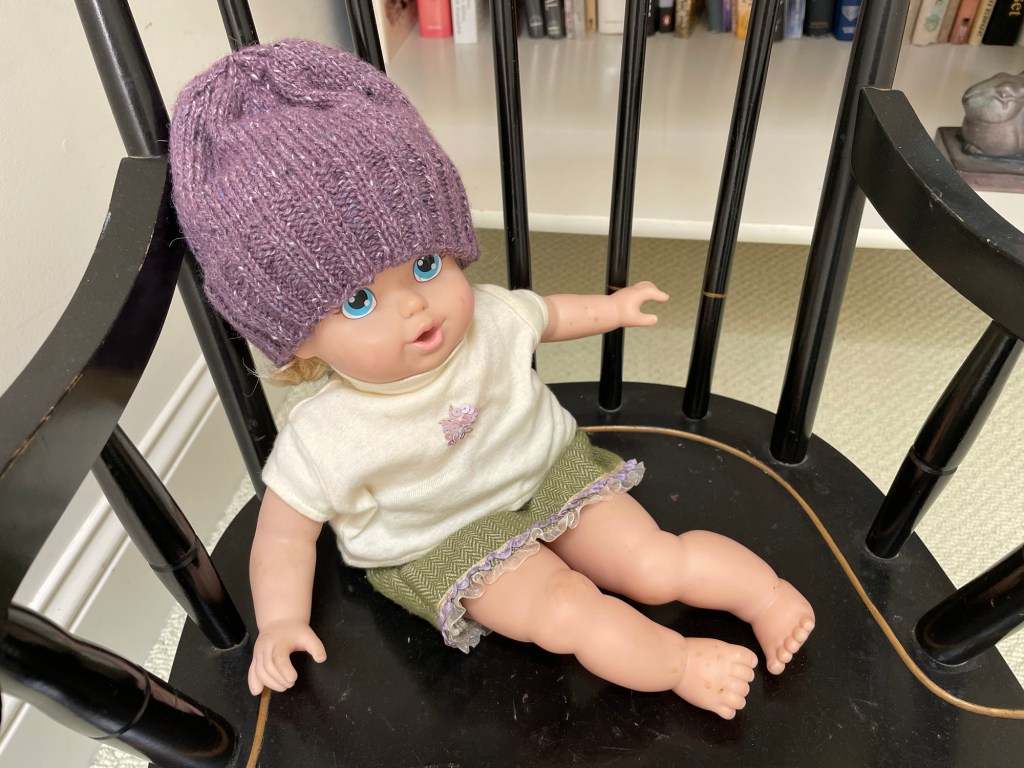
The hat is a little big for this doll I bought for my granddaughters at a garage sale, but it matches her outfit. She did not come with any clothes on, but I found the skirt and top in a box of doll clothes I had saved from when my daughter was young. She is sitting in a child size rocking chair from my childhood.
I aspire to knit sweaters completely or partially on the knitting machine. Last winter when I showed my son and daughter-in-law the combination hand and machine knit sweater I made, they were impressed and said they would prefer to have me make them a sweater, rather than socks on the circular sock machine. They are not “makers” or crafters and have no idea how much time and effort is involved. The difference between a pair of socks on the circular sock machine and a sweater is huge.
One sock can be cranked on the CSM in about 20 minutes, assuming everything goes well. A finished ready to wear pair of socks including grafting the toe closed, weaving in ends takes less than an hour and a half. A sweater takes many, many hours, I don’t even know how many, including planning, figuring out what size to make, knitting hand and machine swatches, getting started and then stopping to check fit, making adjustments, probably redoing sections, hand finishing, weaving in ends, etc. Doing part or most of the knitting on the machine reduces the total amount of time, but does not eliminate many of the necessary steps. I do hope to knit sweaters for close family members eventually when I am more comfortable with the machine, but I am not there yet.
My head is full of all the yarn I want to spin, all the things I want to weave on my looms and knit by hand and on the sock machine and knitting machine. There are not enough hours in the day.

So cute! I love the color!
LikeLiked by 1 person
Thanks. I guess if I had made it the right size, I could have worn the hat myself with the sweater I made out of the same yarn.
LikeLike
Cute hat!
LikeLiked by 1 person
Thank you! I hope someone can wear it besides the doll, but worth my time in any case.
LikeLiked by 1 person
You are amazing! So, since your son and daughter-in-law want sweaters rather than socks, what will you make? What I really love is how your head is full of all the things you want to do and make. I love your enthusiasm and passion for your craft. While I’m not creative in that way, it does inspire me to follow my own passions. I always look forward to reading about your projects!
LikeLiked by 1 person
Thank you! I will keep on doing everything, just not at the same time. I have a pattern for a machine knit sweater I want to try for myself next, that does not involve any hand knitting, other than joining seams. Then I want to make another colorwork sweater for myself. We will see how comfortable I feel after that about making someone else a sweater! My son and DIL will have to be patient!
LikeLiked by 1 person