
I finished knitting a shrug to wear for my son’s wedding welcome dinner in September. My dress is sleeveless and I am always cold during an evening event, indoors or outdoors. If it is comfortable outside in the afternoon for a sleeveless dress, it usually cools down in the evening, or the air conditioning is blasting inside. I found the pattern Sea and Sky Shrug by Laura Bryant on Ravelry that was a little more fitted than some shrugs, but not too complicated and the gauge for the yarn was close to the yarn I wanted to use.
I had some off white Plymouth Cashmere Passion 80% Merino Wool / 20% Cashmere yarn from my Yarn Shop inventory purchase. It is very soft and comfortable against bare skin.

I actually knit a swatch for this project, as the gauge is important if I want the shrug to fit. The yarn and pattern both said to use a size eight needle, but that seemed big so I decided to go with a seven. I figured out that I needed to follow the pattern for a bigger size in order for the shrug to fit me, because my stitches per inch were more than the yarn used in the pattern.

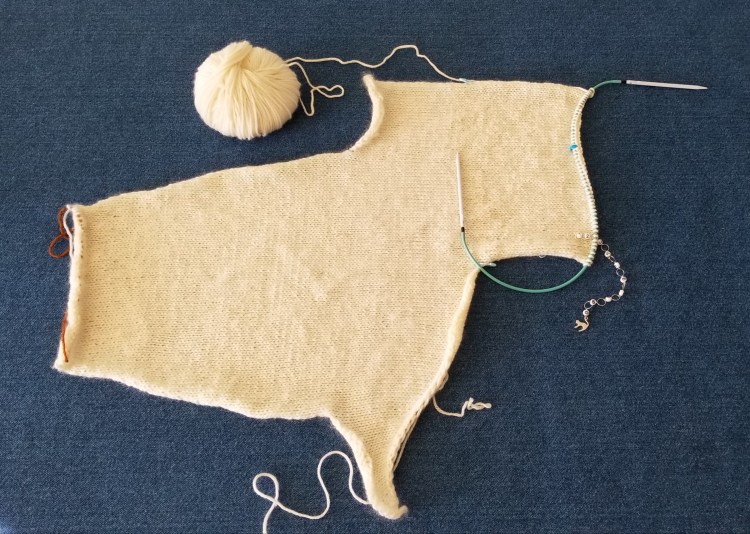
This pattern is knit side to side, starting at one sleeve cuff, and then knitting up the sleeve, across the middle and down the other sleeve. I really wanted the sleeve a bit longer than the pattern showed, but I was not sure if I had enough yarn. I decided to use a provisional cast on using a method with a second circular needle. This leaves live stitches at the beginning, rather than a bound off edge. This seemed brilliant, because after knitting the sleeve I could figure out where it fit on my arm. I would be able to knit more rows at the end of the sleeve depending on how it came out and how much yarn was left. Following is a photo showing the live stitches at the bottom, with several inches of the sleeve knitted, and with my new stitch marker used for counting rows.

The second circular needle is hanging off the bottom of the sleeve where I cast on. It was getting in the way, so I replaced it with a piece of waste yarn. Later I put the needle back on when I needed to work with those stitches.
I used my Twice Sheared Sheep row counter for the first time since I bought it quite awhile ago. This is the first project where I needed to count rows since then. At first I could not figure out how to use it. It made sense to me that you would put the row counter on at the end of the row after you knit it, but that does not work because it falls off, and is also on the wrong end of the next row. Instead you have to put it in the middle of the row. If you were knitting in the round you could have the marker at the end of the row. I like it a lot. You cannot forget to change to the next row number, which is what I regularly do if using tick marks on a paper or another kind of clicker type counter. The Twice Sheared Sheep chain style counter has rings and counter numbers going up to 10, and another little marker to keep track of the 10’s place. My current row count as shown below is row number 34. The 10’s marker is on the three ring, and the four ring is on the needle.

There are many ways knitters follow a pattern and keep track of rows. What works for me is to have a paper copy of the pattern, so that I can write notes on it as I go and mark the sections that are done. After knitting several more inches, I penciled in a chart on the back of the pattern to keep track of the row numbers with increases every third row, and the number of stitches that should be on the needle after each increase row. This would be a cross check against the row counter to make sure I knew where I was and hadn’t dropped any stitches or forgotten to increase.
The pattern indicated the number of increase rows that would be needed to get to a certain number of stitches, before continuing up the sleeve evenly. I could see that my chart showed way too many rows before getting to the maximum number of stitches for the sleeve. Oops. After reviewing the pattern again, I realized that it said to increase on EACH END of the increase rows, not only at one end. ARGHHHHHHH.
I ripped out all the rows back to row number two, just before the first increase row, and started again from there, with an increase at EACH end of every third row. ARGHHHHHH.
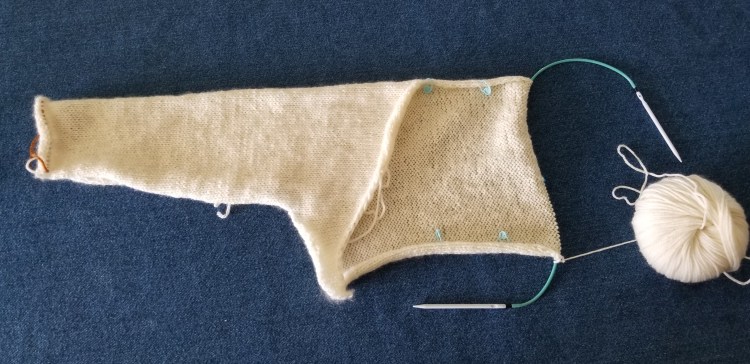
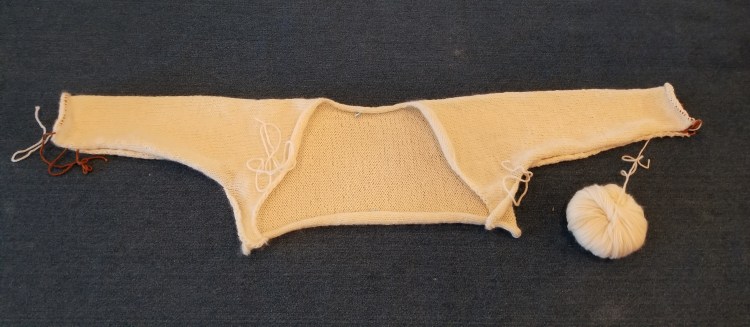
After re-knitting about 1/2 the sleeve over again, I realized that now it was increasing in width too fast because I forgot to account for the difference in the row count gauge. ARGGHHHH. I ripped it out again and refigured out how often to do the increases so the sleeve got wider at the correct rate. I made a new chart to keep track, so I would be able to reverse the pattern on the other sleeve, when I was starting at the top of the sleeve and decreasing to the end. Remember, you have to enjoy the process!! The following photos were taken with 1/2 of the knitting complete, first flat, and then folded over. Laying out flat it looks crazy, but when you fold it you can see how it works.
Finally after all the ripping out and starting over and reknitting other sections, I finished the main knitting part. See photos below laid out flat, and then folded over with knitting complete.

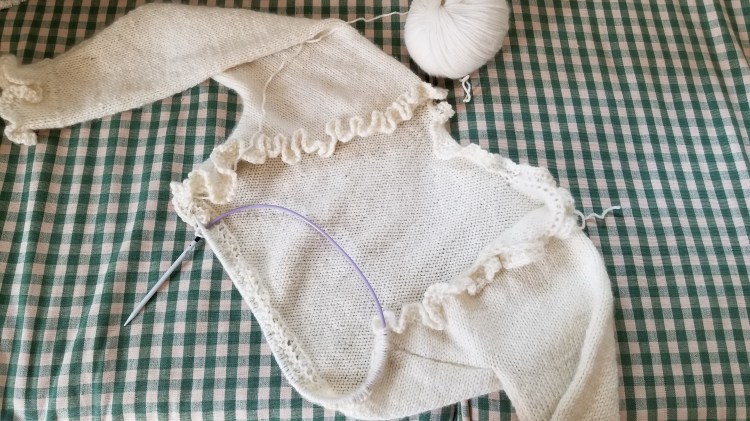
I dislike having to sew seams in knitting projects, so generally pick patterns based on the lack of seams. This pattern required a seam up each side and sleeve. Torri, my knitting mentor, gave me some suggestions on ways to sew the seams and I forged ahead. The first side seam came out fine, but the sleeve part did not look good at all. I went ahead with the other side anyway. I tried a different method on the second sleeve and it looked better, but the side seam on that side looked bad. I ended up ripping out and redoing the second side seam and the first sleeve seam. They look acceptable now. After that, the last part of making the shrug was picking up stitches around the fronts, neck and back, and knitting on a ruffle edge.
You are always supposed to block your hand knits, so it “remembers” its’ new state and looks more professional. It is like washing hand spun yarn to “set the twist”. After the ruffle edge was complete, I decided to knit another swatch (I don’t know what happened to the one I knit at the beginning) and block it, to see what would happen. When I was a new spinner, I spun enough of some bronzish color yarn to knit a sweater. It was a huge effort. I knit the sweater using a top down pattern with a boat neck, and then I attempted to block it. I soaked the sweater in some water with mild soap, carefully rinsed it out, and spread it out to dry on a towel. Unfortunately, it had stretched out in the process, large enough to fit a gorilla. I tried to push it and pat it back into the right size and shape, but it was never right again. I got it mostly back to the right size, but it looked sort of smashed. I was sooo disappointed. I wore the sweater anyway and I still have it, although it has gotten many pills in the meantime. I have always been very leery of blocking anything since then. Following are photos of my shrug swatch before and after blocking. It turned out OK, so I felt better about blocking the shrug.


Before blocking my shrug, I laid it out on a bath towel on the floor, and put a few large pins in strategic places so that when I took it out of the water, I could get it back to the same size and shape to dry. The next two photos are the shrug with the pins on the towel before blocking , and after removing it from the wash water.


I was not happy about what happened in the water. According to Torri, the yarn “relaxed” a lot. I had visions of that sweater that never looked right again, but I was able to gently push and pat and nudge the sweater back into the right size and shape inside the pin markings on the towel. After it was dry I also used the iron with steam, with a flour sack towel over it and without pressing down, to make a few adjustments.
If I make this pattern again, I would start in the middle of the back with a provisional cast on, rather than at one side. I would knit from the middle of the back out to the end of one sleeve, then go back to the cast on stitches in the middle, and knit out to the end of the other sleeve. With this method, I would be decreasing stitches for the sleeve on both sides, instead of decreasing on one side and increasing on the other side. More importantly, it would be easy to join the sleeve stitches and knit in the round so I would not have have a seam on the sleeves.
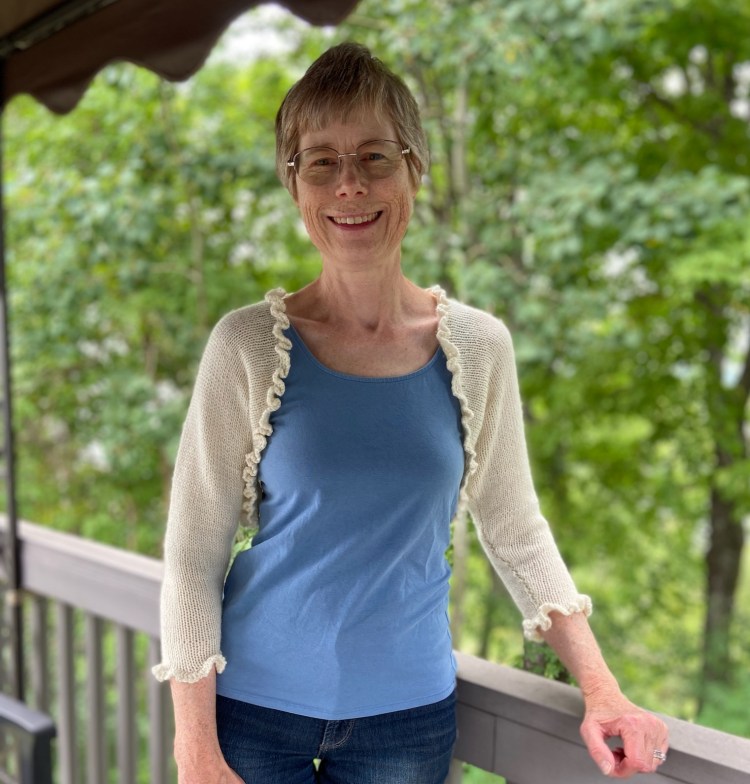
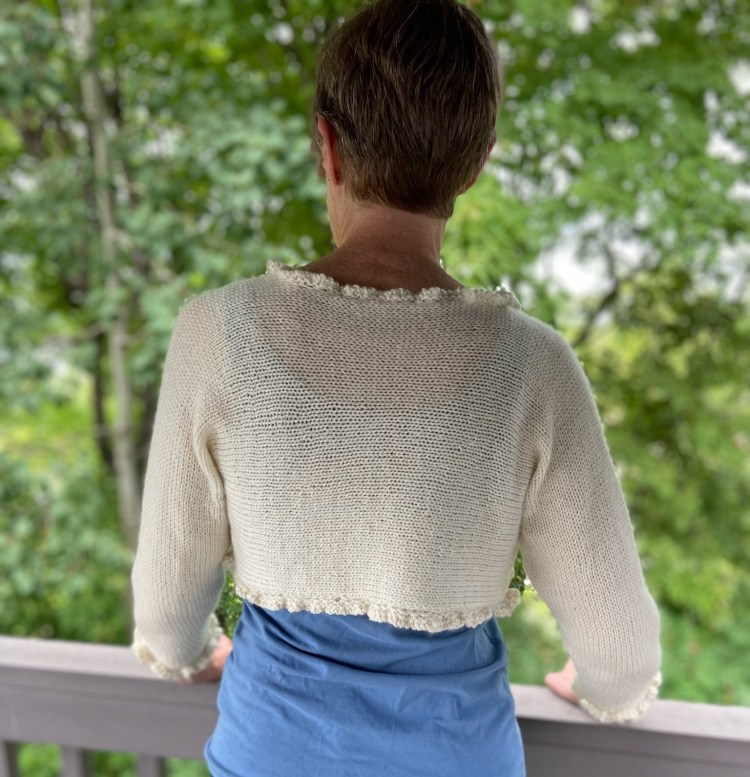
Following are photos of the final product, front and back. I am pleased with how it turned out.

That is adorable, Meg. I am just not knitting anymore these days, but if I was, you would be my guru-ess! And each post is a literary story. XO
LikeLiked by 1 person
Thank you!
LikeLike
I love this story so much! It lets less experienced knitters know that every one starts over, miscounts, has blocking issues and needs a good mentor.
The shrug is lovely!
LikeLiked by 1 person
So true! Thank you.
LikeLike
The shrug looks beautiful! And you should be given an award for your persistence. It will be very special to wear to your son’s wedding. Great, great job!
LikeLiked by 1 person
Thank you!
LikeLiked by 1 person
You do such amazing work! It is interesting to hear struggles to get a piece right. I love learning from someone else’s experiments.
LikeLiked by 1 person
Thank you!
LikeLiked by 1 person