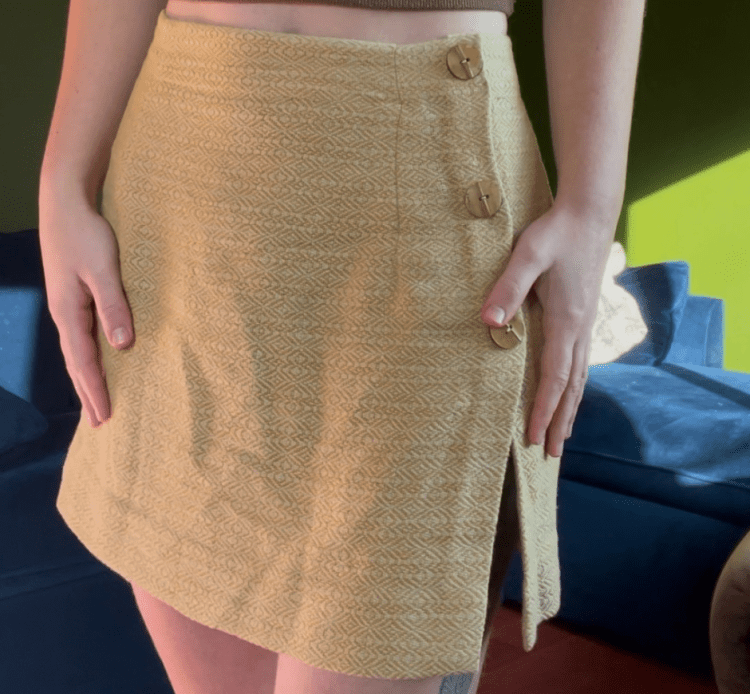
In the summer and fall of 2024 I sewed a skirt for my daughter, using fabric I wove on my four harness floor loom. I wrote about it here.
The skirt out of handwoven fabric
There was enough fabric left to make a matching top. I started the top project this summer when Britta was visiting, but it took me until fall to finish it.
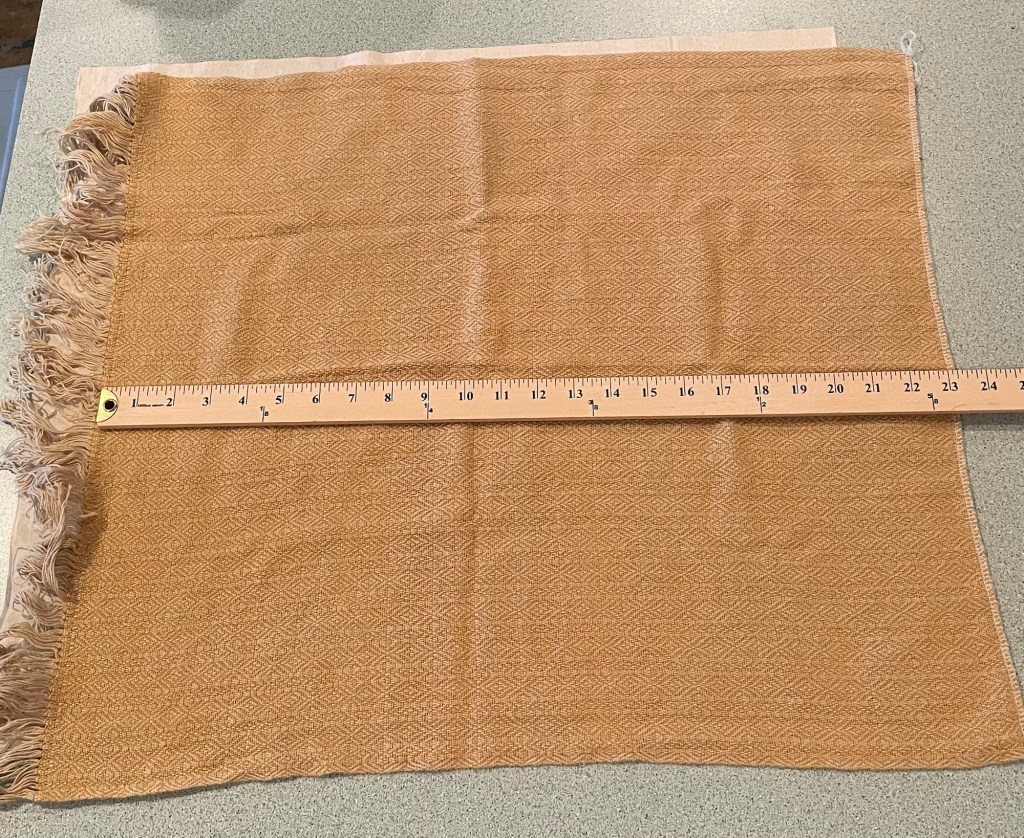
The leftover fabric included a big rectangle, plus a strip that we had cut off the bottom of the skirt to make it shorter.
Leftover fabric after making the skirtStrips of fabric cut off the bottom of the skirt
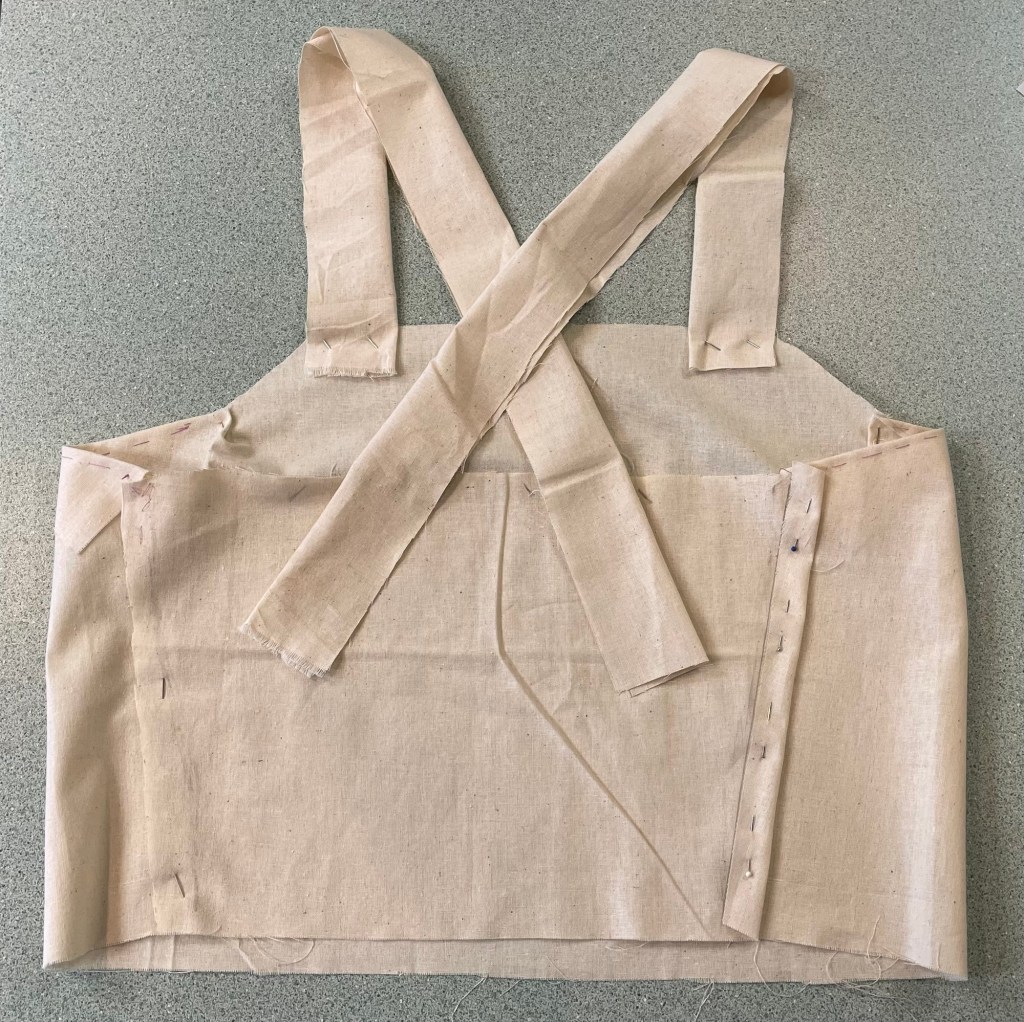
I envisioned a very simple camisole style top with the fabric wrapped around her bodice, and with an opening at the side or back. I found some plain muslin fabric in my stash to use for a mock up. The next photo shows the first version of how the top could work.
Top mockup version one
The project turned out to be more of a challenge than it might have been for a couple of reasons. Britta wanted the top to be very fitted, and we only had a short amount of time to work on it together when she was visiting over the summer. I did not want to make button holes in the hand woven fabric. I was not sure what type of closure would work best, that could be adjusted later if I did not get the fit perfect. We decided that the closure should be in the center back.
There were only the three pieces to cut out of the actual fabric (not including the straps), using the mock up pieces as patterns. I sewed them together at the sides, which actually wrapped around to the back. After Britta went back to her home in Oakland, California, I continued working on the top.
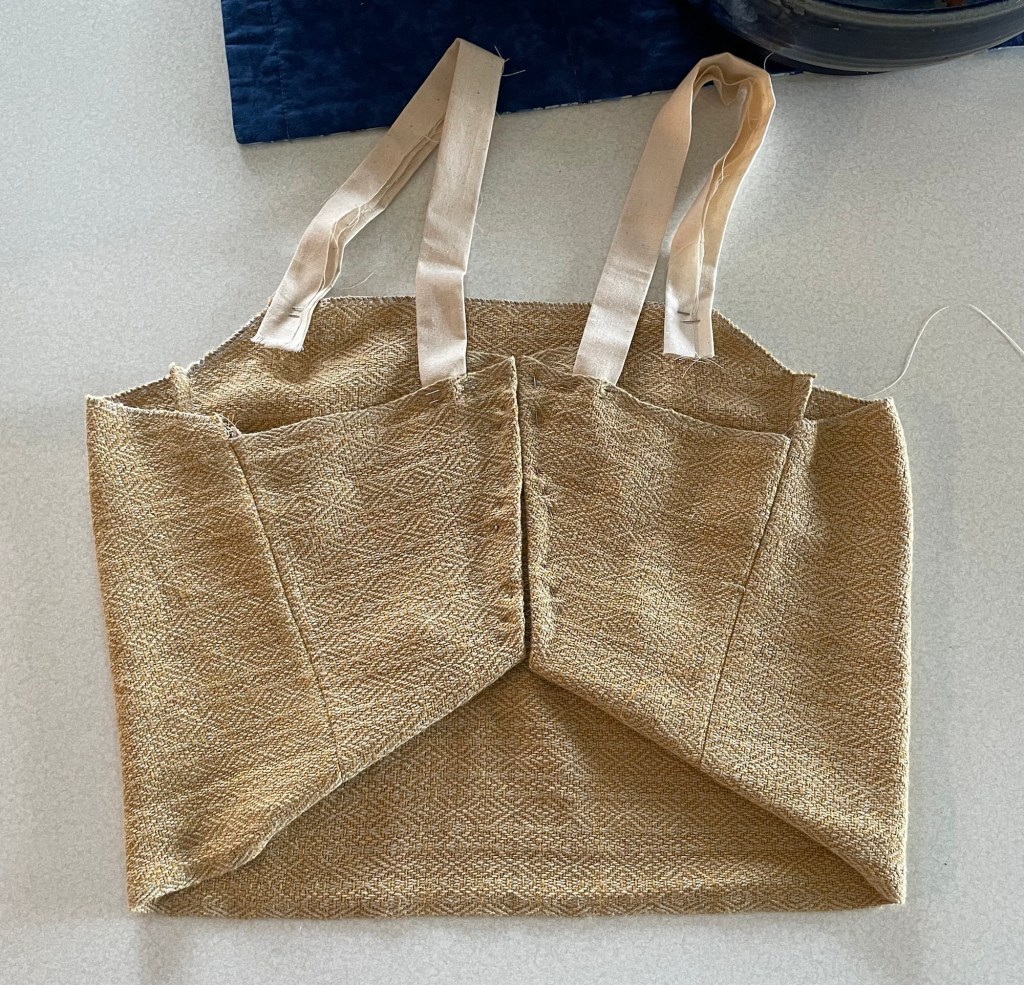
Britta’s waist measurement is quite a bit smaller than her upper body measurement, so there was extra fabric at the lower back. Darts would have worked. However I thought that folding some of the fabric up at an angle looked nice, would work well for a fitted look, and there would be less fabric to join at the center back.
In progress
I used my serger to finish the edges of the fabric where there was not a selvedge, and then folded it over for a very narrow hem that I hand sewed down.
In progress from the front
I was able to get the project to this point without too much trouble. My sister-in-law Yvonne, who lives close to Britta, was visiting a few weeks later. I sent the in progress top home with her, along with a padded envelope so she could mail it back to me after Britta tried it on. Yvonne and Britta facetimed with me for a fitting session. I had a bunch of safety pins holding down the places in the back that were folder over, which allowed them to make adjustments. As it turned out, it was pretty close based on measurements I had taken when Britta was at my house.
It seemed like the most effective type of back closure was corset style lacing. That would allow it to be as tight as desired, and also adjustable if I did not get the measurements perfectly. I found some YouTube videos showing how to make corset style lacing, which involved sewing loops on to a secure base. I also had to find something to use for the laces.
The town of 14,000 near my home does not have any good options for fabric and sewing supplies. Even in the Twin Cities, the options are limited now that Joann Fabrics is gone. On one of our trips to the Cities I looked at Michaels, and at a small upscale fabric store in St Paul, near where my son lives. I bought a couple of ribbon options for ties that could have worked, but I was not thrilled with them.
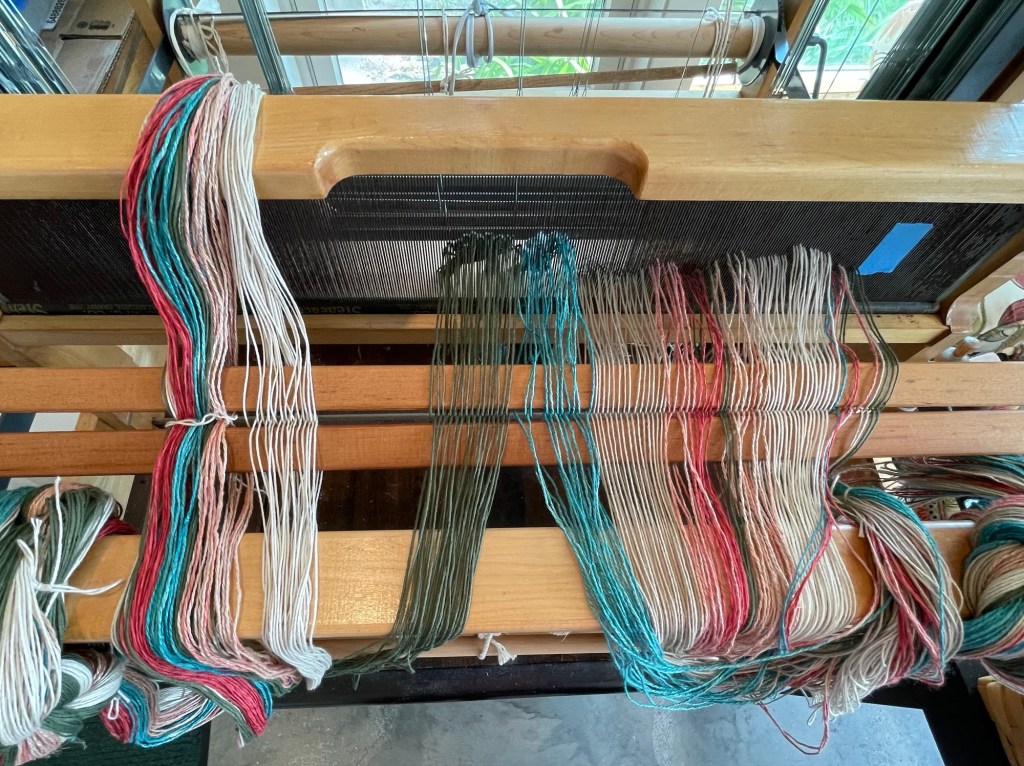
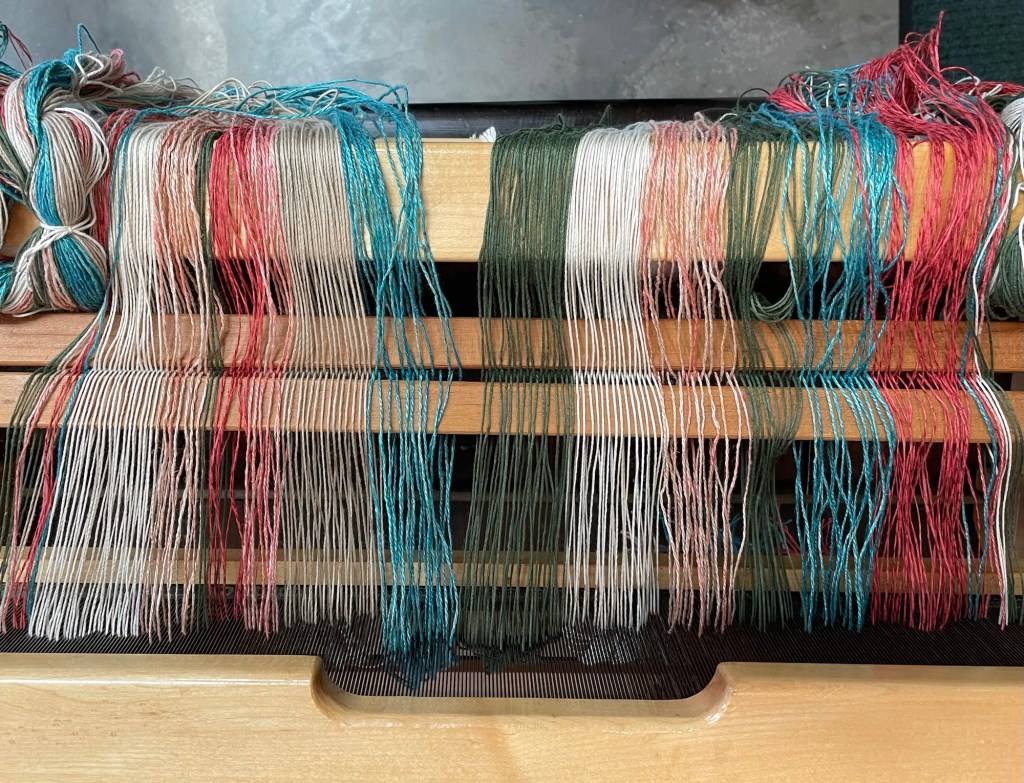
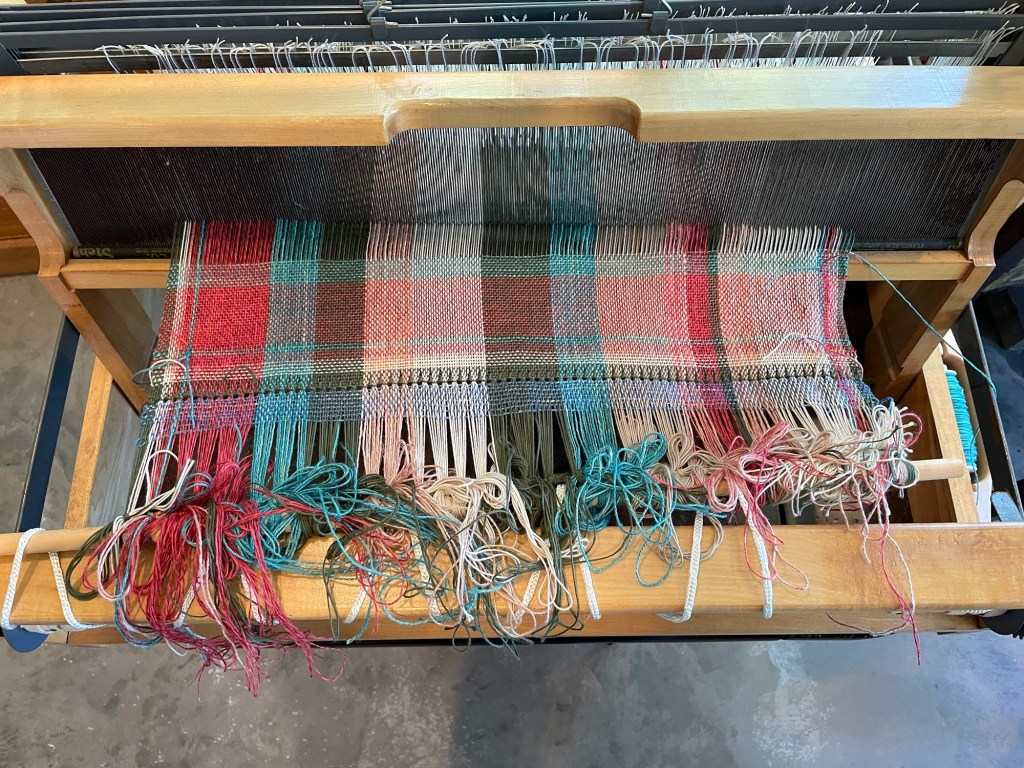
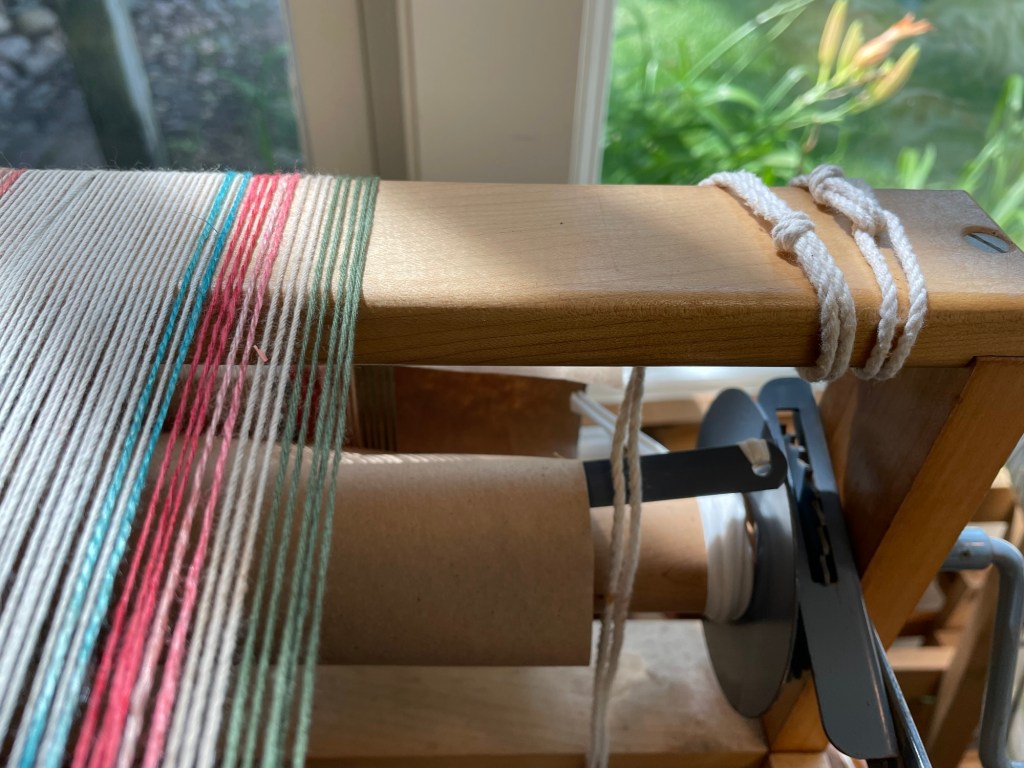
While all this was happening, I had been experimenting with band weaving on a narrow rigid heddle style loom. I wove a narrow band using the same cottolin yarn that I had used for the woven fabric. I was not sure exactly what I was going to use it for. It could be used for either the loops or the ties, if I did not find something better.
Hand weaving a band using the same yarn as the fabric
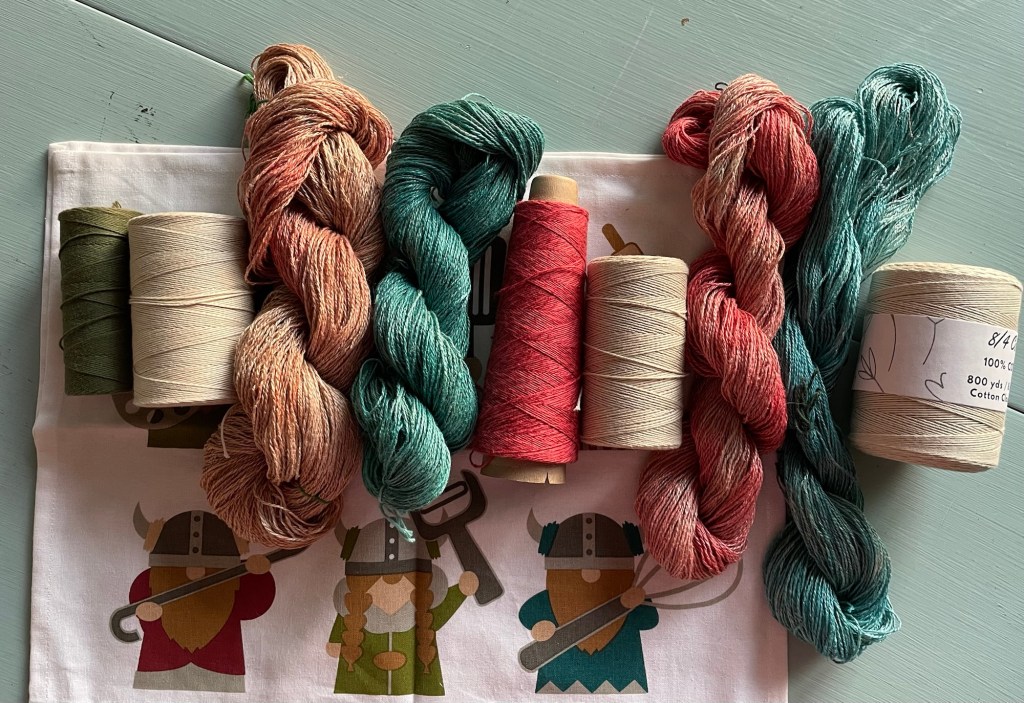
The videos on making a corset style closure suggested using something called “rigilene boning”, a flat plastic style of boning that you can sew fabric loops on to. It was supposedly available at Hobby Lobby. I had never shopped there before, but checked it out on another trip to the Cities. It turns out that Hobby Lobby has a decent fabric department, but they did not have the rigilene style of boning. I did find some ribbon options that were the right color, and some cotton fabric for lining the back of the top. I was not sure if Britta would have picked this fabric out, but the colors looked really good with the hand woven fabric, and I liked it a lot.
Supplies for the top in the right colors
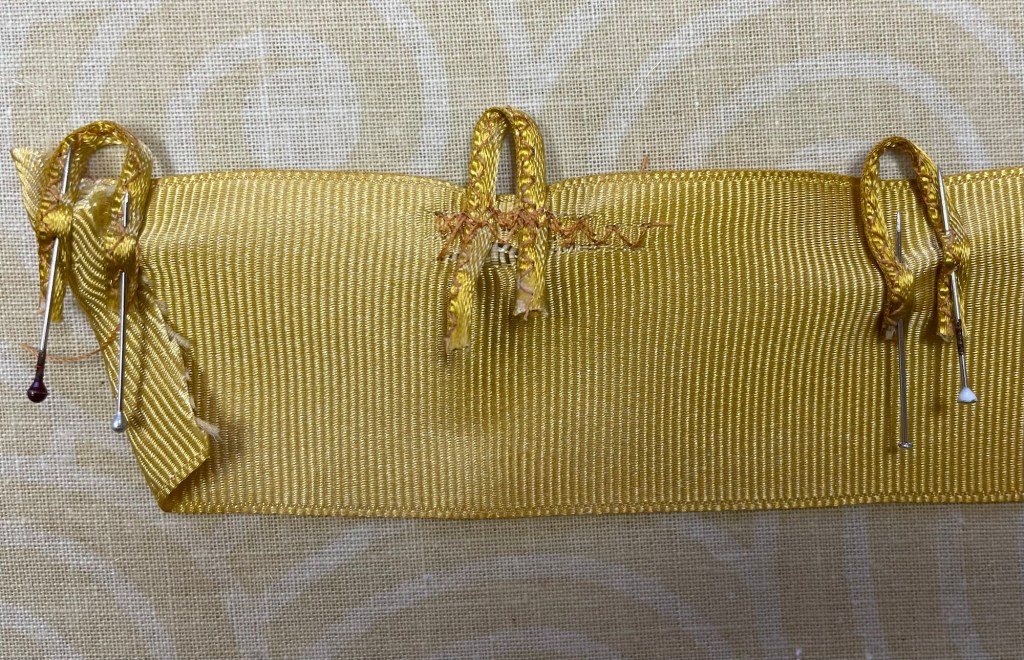
I was just winging it at this point trying different things to make the corset back. The videos suggested sewing loops using bias cut strips of satin fabric. I did not want to do that. Instead I made loops by folding 1/4″ yellow ribbon in half and zig zagging it. I thought it would work to sew the loops on to wide grosgrain ribbon, and then sew that on to the lining fabric. The loops wanted to wiggle all over, and when I finally got one loop attached, the ribbon started to rip. That was not going to work.
Not going to work for corset loops
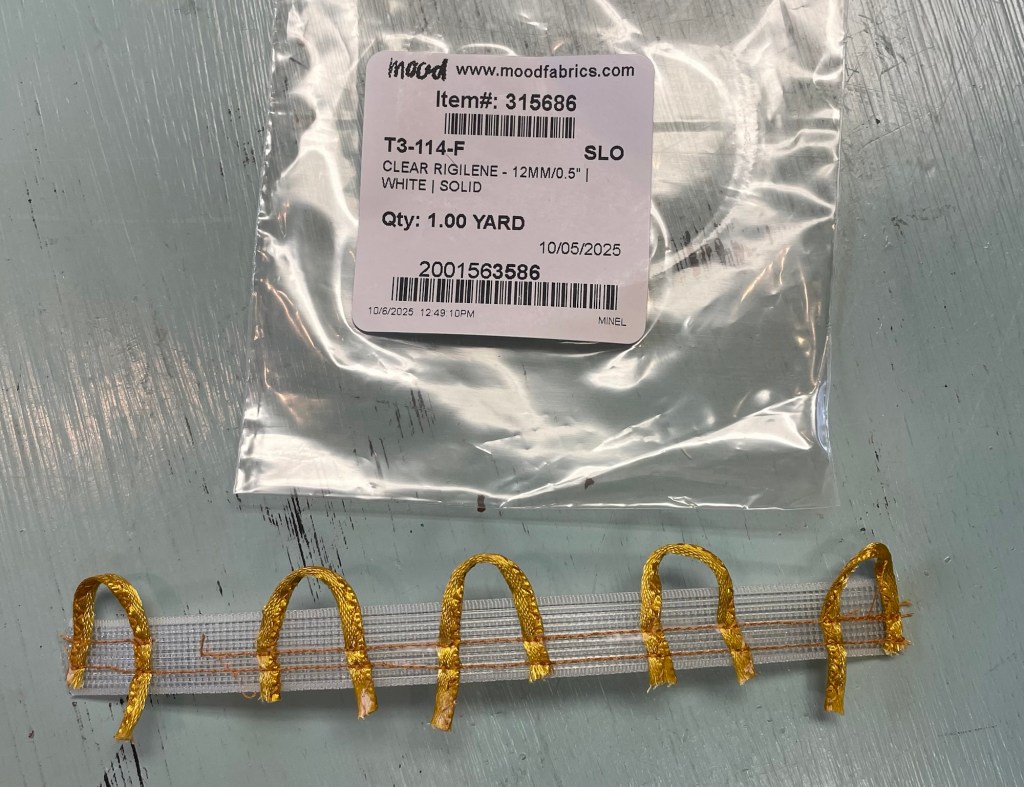
At this point, I went ahead and ordered the rigilene boning online. The project was delayed again while I waited for that to arrive, and was side tracked by other activities. Once it came and I was mentally ready to tackle this challenge again, I was able to sew the loops on to the very stiff rigiline boning, holding them in place with scotch tape.
Loops sewed on to rigilene boning
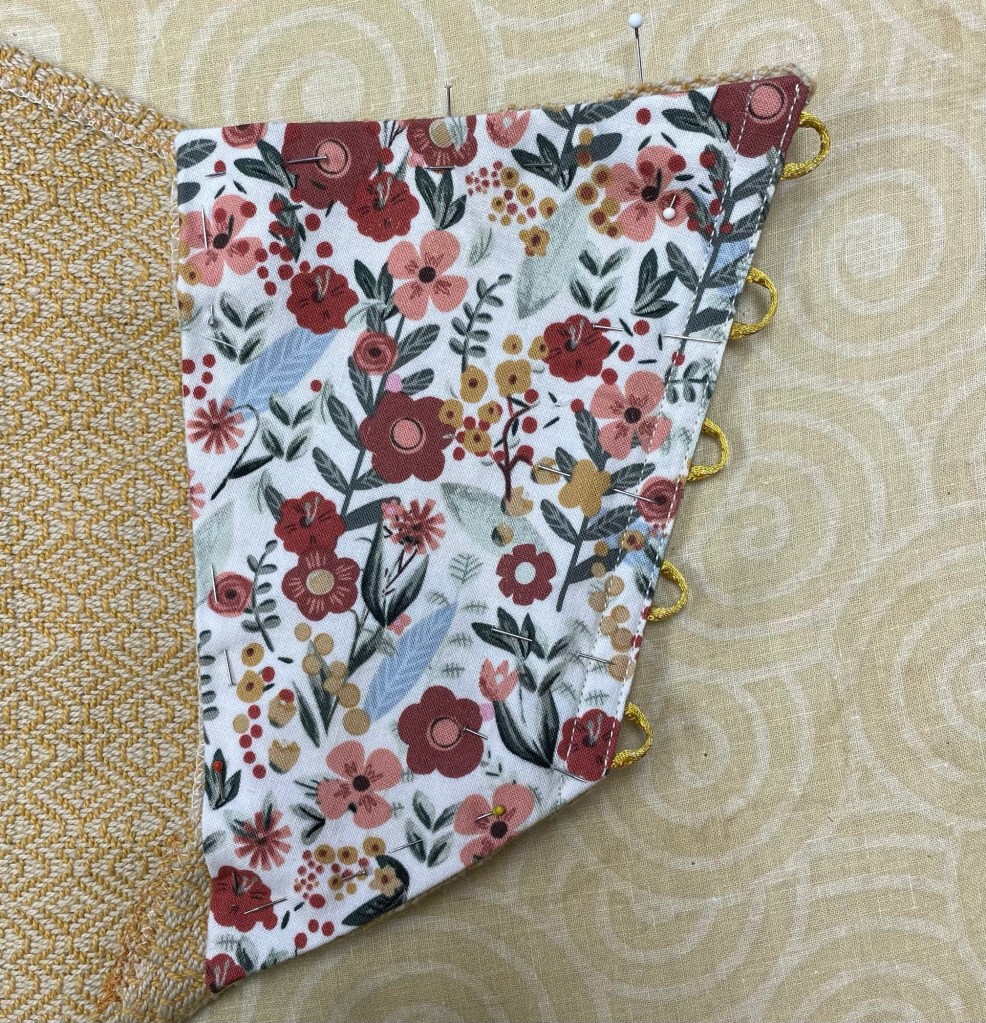
I cut the lining fabric to match the shape of the back sections, and ironed on some interfacing that I had from sewing projects many years ago.
Cutting out the lining pieces
The next steps were sewing the strips of boning with the loops attached on to the lining pieces with two rows of straight stitch on the sewing machine, and then sewing the lining pieces on to the actual top.
Adding interfacing and boning to the liningSewing the lining on to the back of the top
I sewed the lining edge with the boning on it to the top with one row of zig zag stitch on the sewing machine. I sewed the other three sides down by hand, leaving an opening on the top edge for the straps. Earlier I had sewed the straps on to the front by hand. Now I inserted the straps in between the woven fabric and lining on the back and hand stitched it in place. I did not want to sew it on the machine in case it needed to be adjusted later.
Following are photos of the completed project from the back and front, using the hand woven band for the ties. I am not sure if the bow is supposed to be at the top or the bottom. I have seen it both ways.
Completed top from the backCompleted top from the front
I mailed the top to Britta, praying it would not get lost in the USPS along the way. I included some other options for ties that could be used for a different look.
Options for ties
The next photo shows the only scraps that were left of the original woven fabric.
All the fabric that was left after making the skirt and top
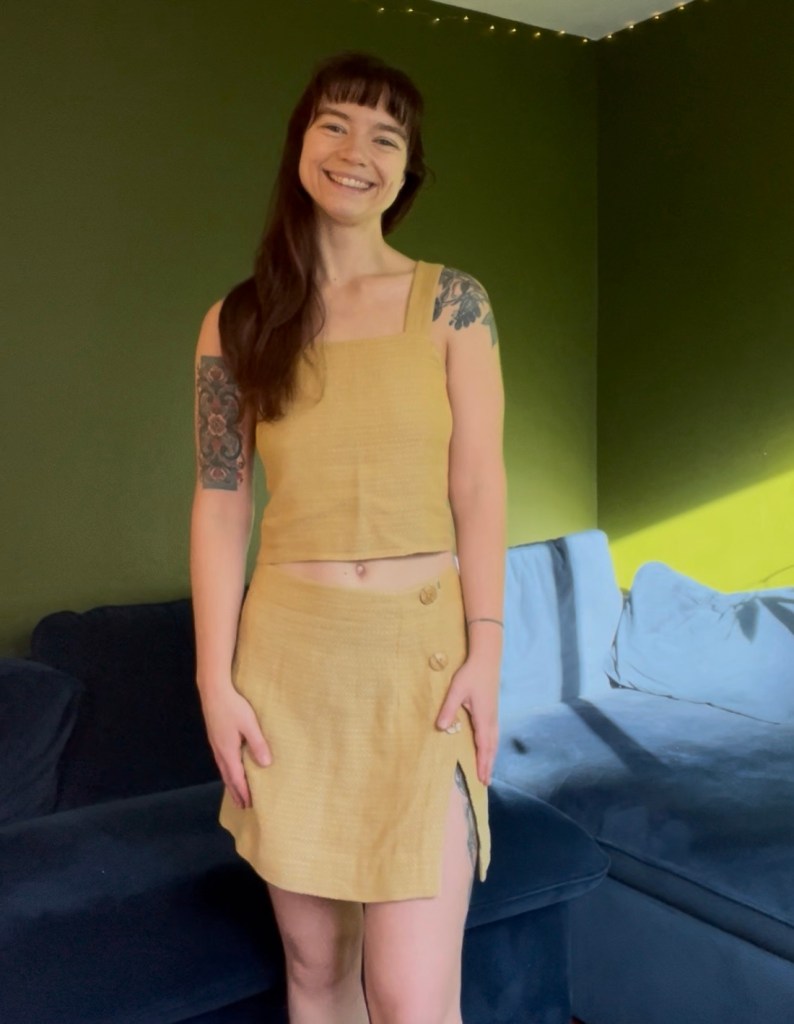
Britta sent photos of herself modeling the outfit. Yea, it fits. It is a little wrinkly, but that is the nature of the cotton/linen blend fabric. I think it is a losing battle trying to keep it ironed.
After Britta got the rosemaling tattoo, she was surprised that more people comment on her fish tattoo.
This project turned out to be more of a hassle and take way longer than I expected. I like the way it turned out, and more importantly, and Britta likes it. There is another project I have in the works for some knitted felted slippers where I am having to figure out how to make my idea work. For the foreseeable future, I plan on sticking to projects where I can follow a pattern, and not have to figure something out from scratch. We’ll see how that works out.
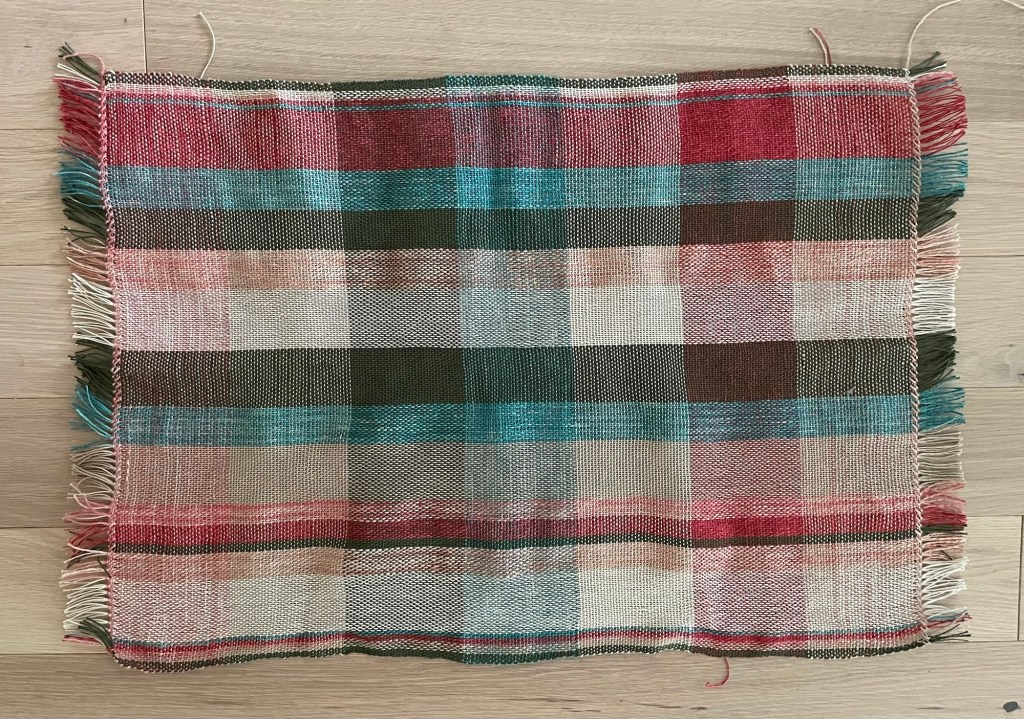
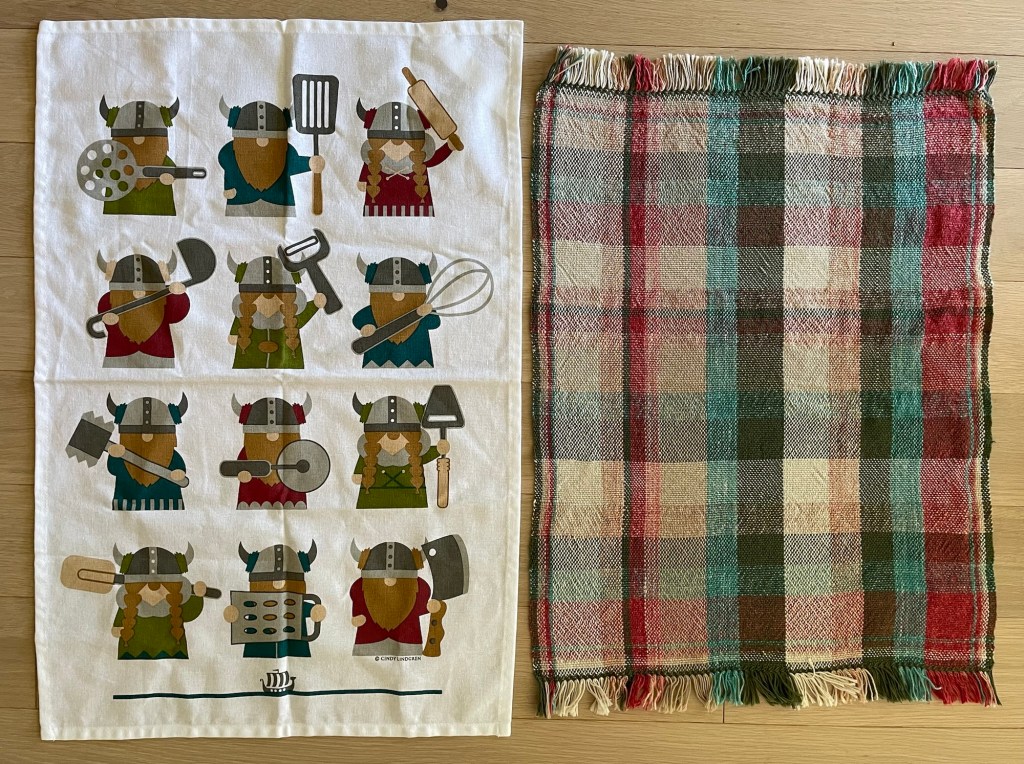
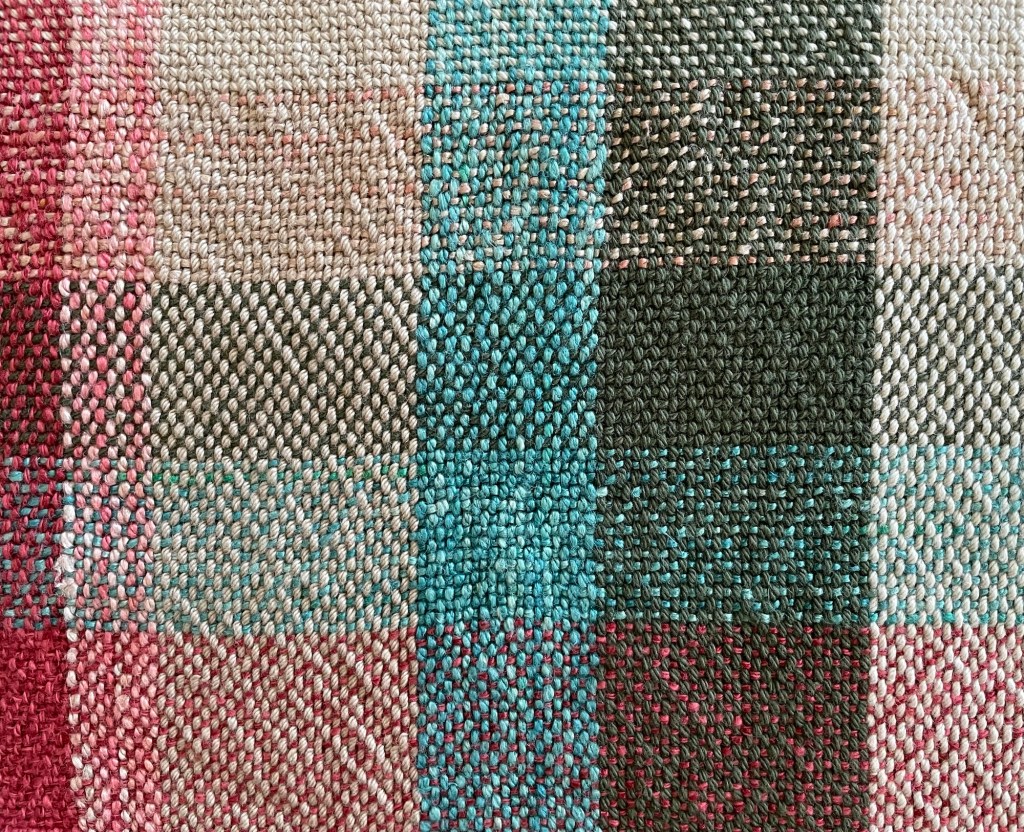
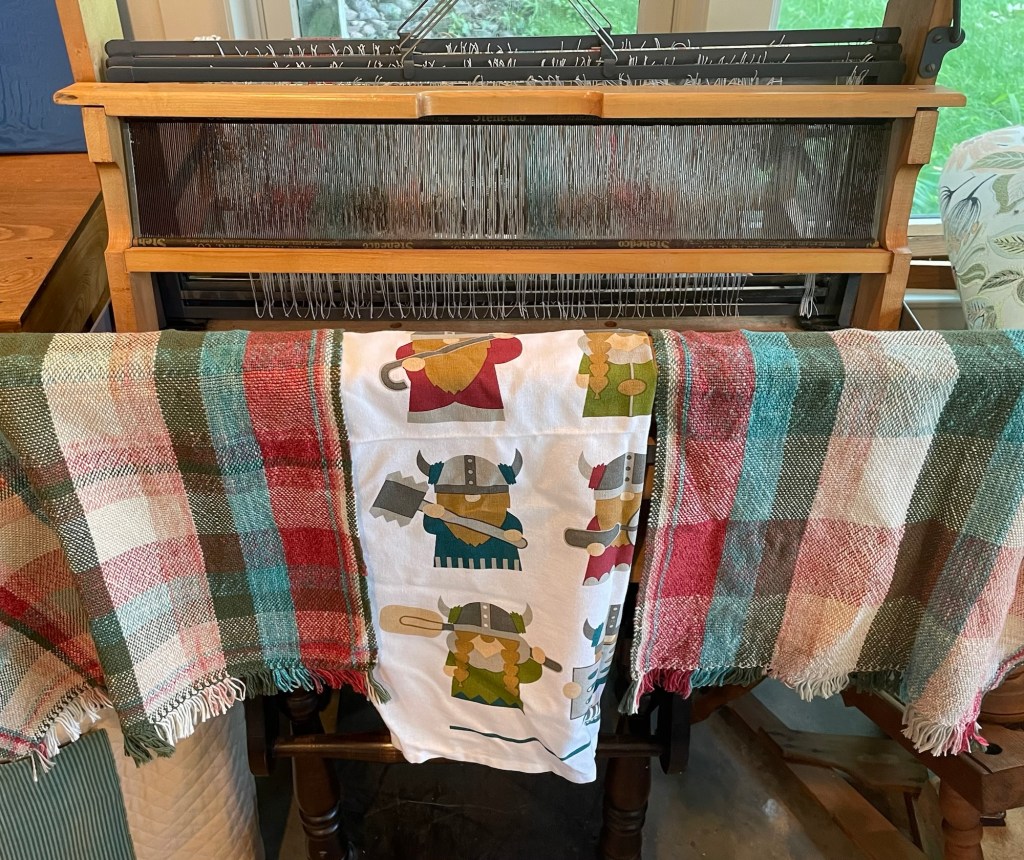
After weaving towels on my Structo Artcraft table loom, I concluded I did not want to keep it. The vintage loom takes up a lot of room, and anything I could make on it can be made on my floor loom. It was in pretty good shape and functional for its age, but had a few minor challenges associated with being old and no longer in production.
I have been enjoying membership in the School of Sweet Georgia, and their online community of “multi craftual makers” who, like the founder Felicia Lo, like to “make all the things”. A recent class offering is Machine Knitting 101, using a basic flatbed knitting machine. I had never been interested in flatbed machine knitting before, but I watched the beginning of the class. The instructor, Barb Barone of Yarniversity by River City Yarns is the Bob Ross of knitting instructors, with a very calm and gentle approach. Suddenly machine knitting became intriguing. One of the reasons people like flat machine knitting is that it takes so darn long to knit a sweater or anything larger than a hat or scarf. I liked the idea of combining hand knitting with machine knitting the tedious parts of a sweater.
In August I had talked to Torri, my friend and weaving mentor in Fergus Falls, about the Structo Artcraft table loom. It turned out that she had two flatbed knitting machines that she was never going to use. She offered to trade me the knitting machines for the loom. They were in boxes and buried behind other stuff in her shop, so she was not sure exactly what models they were. I agreed to the trade without really knowing what I was going to get.
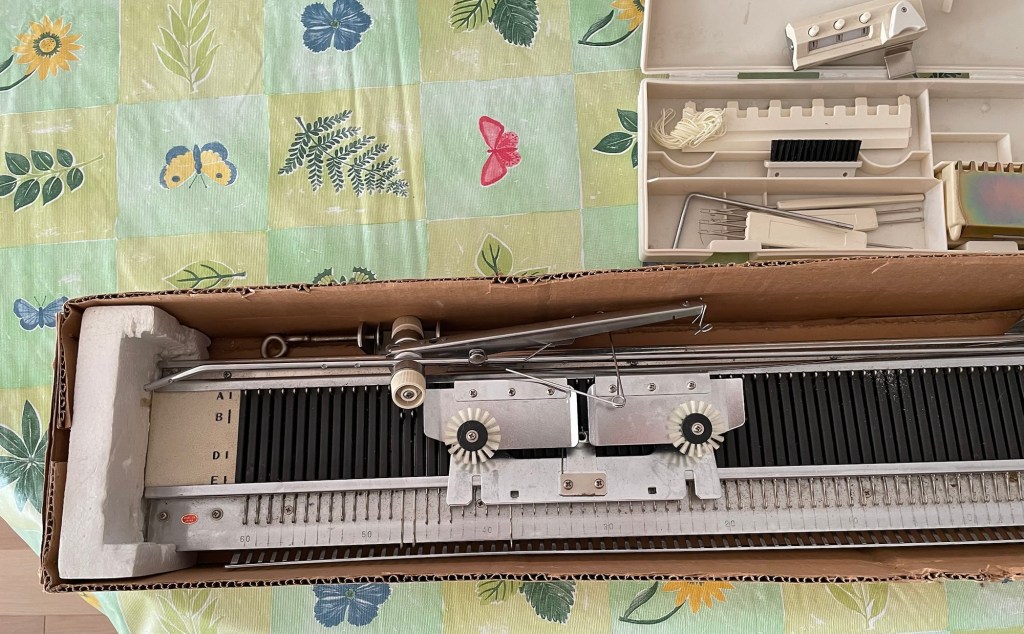
After we got back from our August RV trip out west and I had gotten settled back at home, I went to Torri’s shop to exchange equipment. The loom took up the entire trunk of our Honda CRV with the back seats down. Torri moved things around to make a space for the loom and dug out the knitting machine boxes. They were both four feet long, bigger and heavier than I expected.
My husband was not excited about more things coming into the house. I assured him that if I decided not to keep either of the knitting machines, I would pass them on to someone else. I was able to move the smaller box into the house by myself and put it on the dining room table, but needed Wayne’s help to carry the larger one inside to another table in our three season porch.
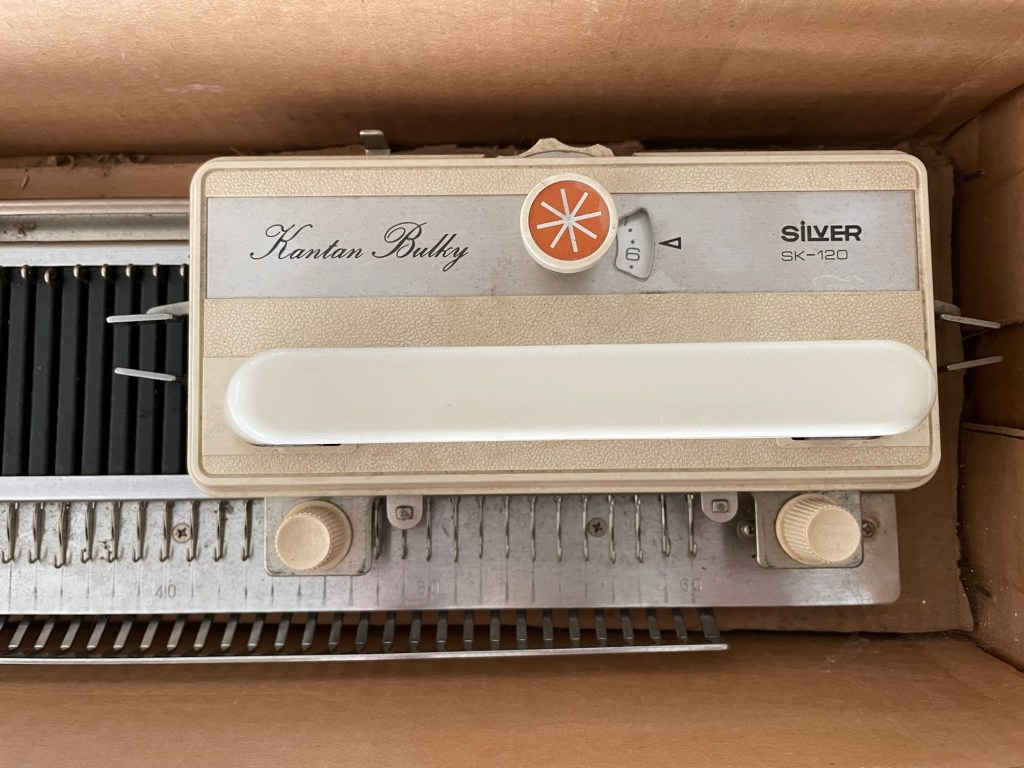
I was excited to open the boxes, to find out what I now owned. The smaller box contained a vintage metal Silver SK-120 Kantan Bulky flatbed knitting machine. The machine was a little dusty but it appeared that all the parts were there. I was able to find a user manual online.
The second very large box contained a double bed White Technique Brevets Mondiaux, made in France, also metal. I found out later it was manufactured under several names, and is also known as a “Supurba”. The “double” means that it can do ribbing and more complicated patterns. It has more needles closer together for thin yarn. It looks very intimidating. This also seemed to have all the parts, including the user manual and some cassette tapes. Hmm, I do not think we have a cassette tape player.
There is an electric attachment used for making fancy patterns.
I was able to assemble the simpler SK-120 machine by referring to the user manual. With my experience using a circular sock machine, and watching the beginning of the School of Sweet Georgia class, I understood the basics of how it worked.
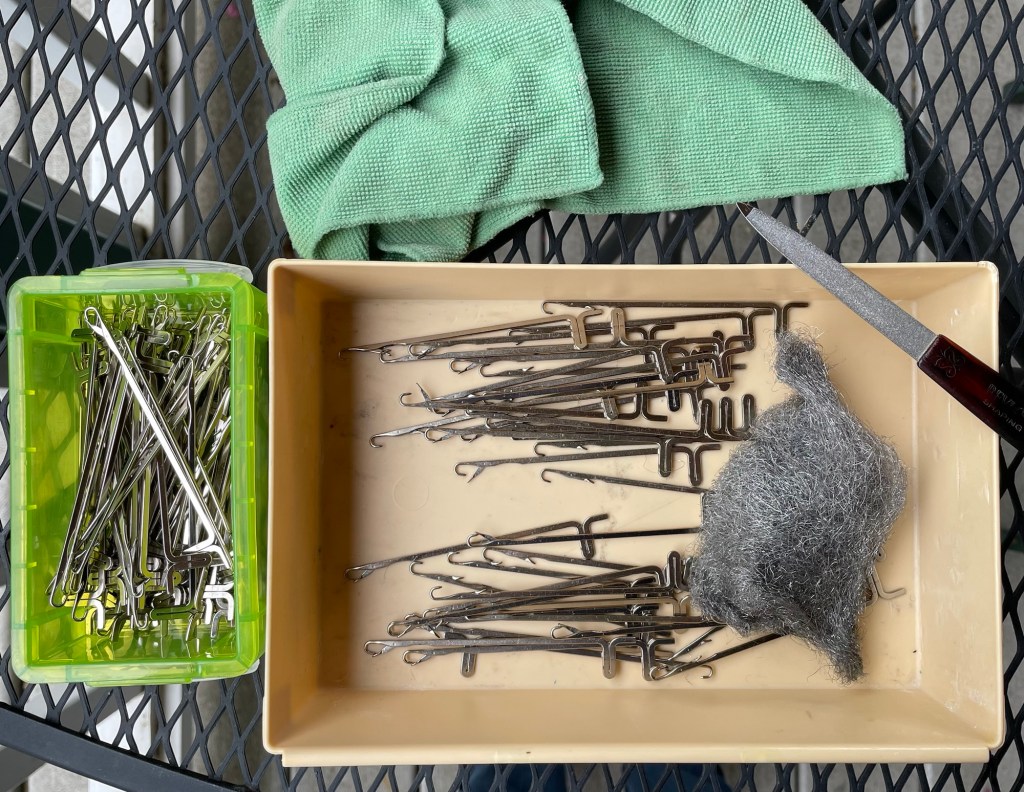
Some of the needles were rusty, or maybe just had gunk accumulated on them. Internet tips for cleaning the needles included steel wool and soaking them in Marvel Mystery Oil.
Getting bits or rust off the knitting machine needlesCleaning the knitting machine needles
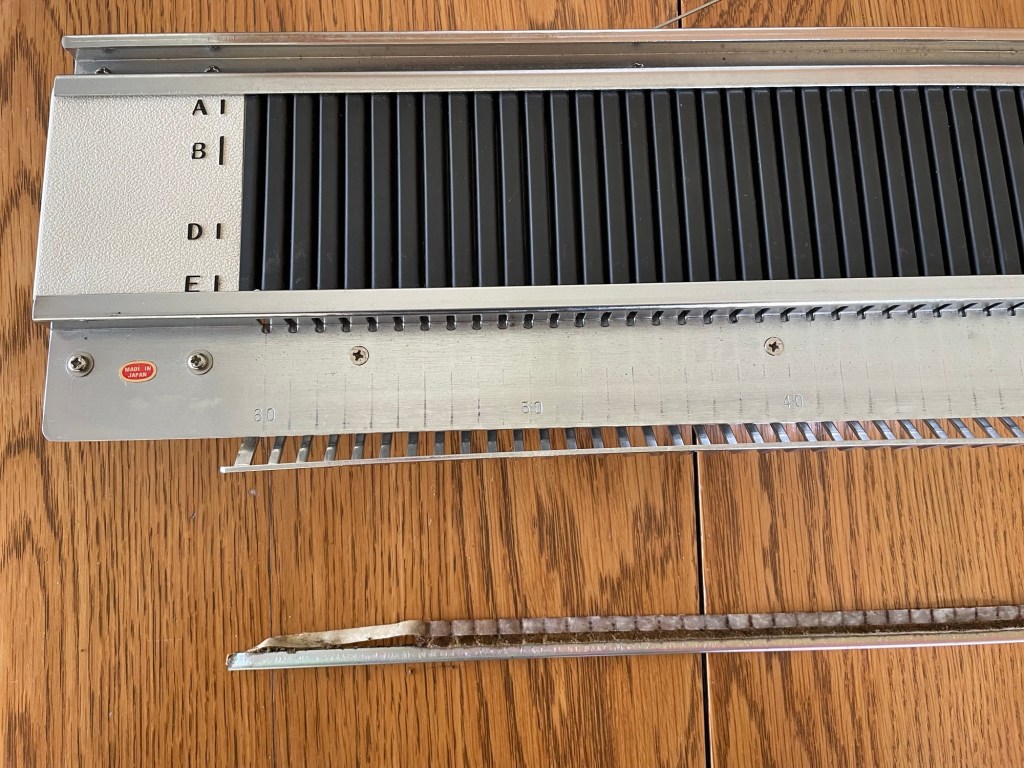
More importantly, the “spongebar”, a metal channel with some kind of sponge or felt in it that is needed for the machine to work, was completely disintegrated. It is normal for this part to wear out and need to be replaced. I found out that this particular model of machine has a unique shape of spongebar that is not compatible with other brands and models currently in production. Darn. After a lot of searching online unsuccessfully for replacement options, I was getting frustrated. I finally found one site that offered a product, but they were out of stock. I called the number and they did have one after all, so I was in luck.
I was able to get the original sponge bar out of the SK-120 pretty easily.
The “sponge bar” removed from the machineThe “sponge” part of the sponge bar was completely disintegrated
I spent an entire afternoon cleaning out the track of the SK-120 sponge bar. I used a narrow screwdriver to dig out the gunk from inside the narrow metal track, and then I used toothpicks and goo-gone to get out as much of any remaining stuff still stuck on the bottom and sides.
The replacement piece of felt for the sponge bar came in the mail, and Wayne helped me figure out how to get it inside the narrow track.
Strip of felt to be inserted inside the metal track
We had to pry the opening in the track a little wider. After trying different methods of getting the felt into the track, I found that it worked to just push it in from the top once the opening was wide enough.
Most of the felt inside the track
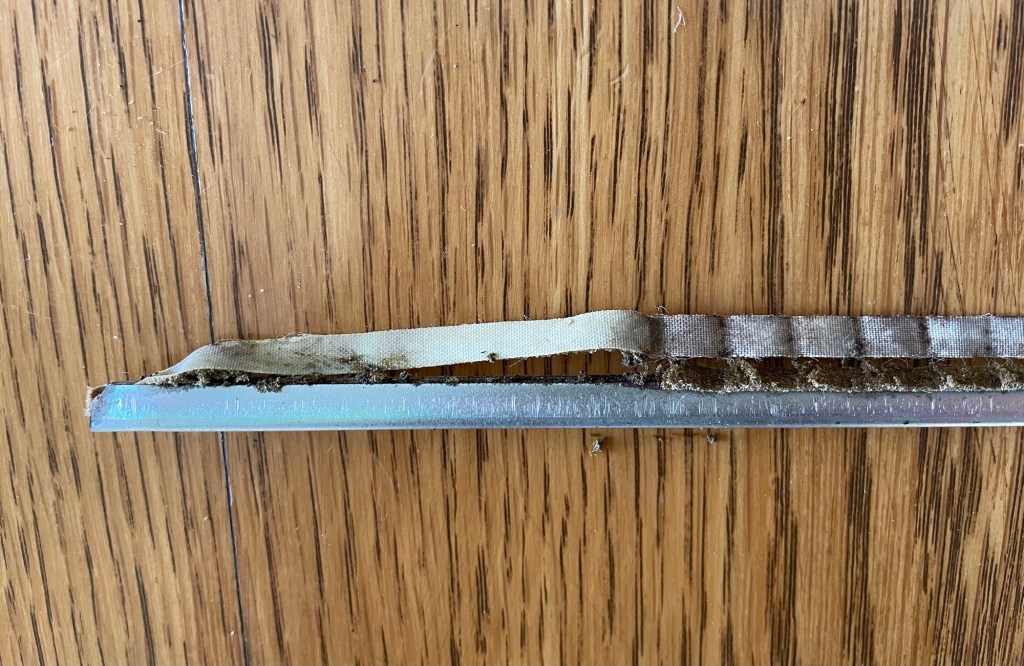
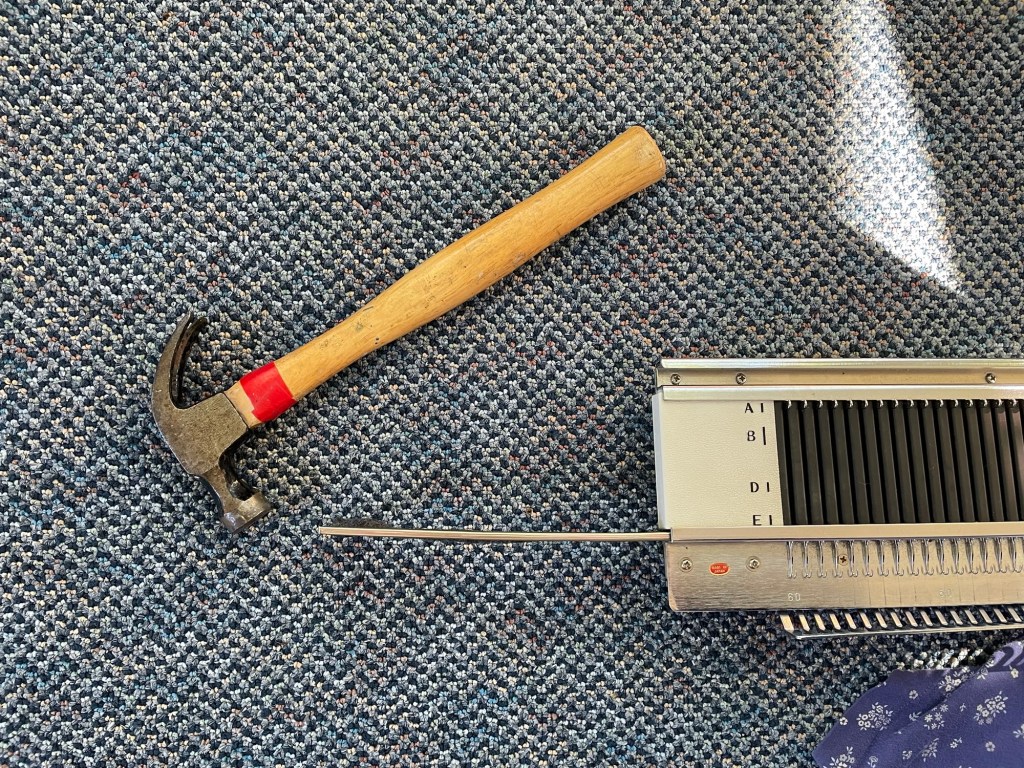
Once the felt was in the track, the track had to be inserted back into the machine, over the needles. First I had to pound the metal track with a hammer to get it to the original width, and then it was kind of banged up. It did not want to go back in the opening.
Trying to get the sponge bar back in the machine
I got it in a few inches and then it was just stuck. I was able to inch it forward into the space by hitting it with the hammer repeatedly.
Tap tap tap to get the sponge bar all the way in
I got the sponge bar completely back inside the machine, but I do not think anyone will ever get it out of there again. This is a problem. I think that if you need to replace a needle, you have to remove the sponge bar in order to get the needles out. The next photo is the SK-120 knitting machine ready to go with clean needles and the sponge bar replaced.
SK-120 Bulky Knitting Machine
I was able to get the machine to knit a couple of small samples.
Swatch knit on the SK-120
Weights are used to keep the knitting down while making stitches, like the circular sock machine.
More samples shown with weights used when knitting
Some of the needles did not slide in and out easily to form stitches. I felt like I was fighting with the machine. That is not what I had in mind.
There is a shop about two hours from me, The Knitshop at Rocking Horse Farm, that specializes in machine knitting, both flatbed and circular. I have been there a number of times for sock machine crank-in’s and a fiber festival. I have seen flatbed knitting machines in use there, but again, was not interested at the time. I talked to them about both of these vintage machines, and found out a couple of things that were discouraging. First, they have several of the SK-120 machines in their back room that no one wants because it is too hard to get a replacement sponge bar. I had been thinking maybe I could trade this vintage machine for a newer used model, but they do not want another one of these. Secondly, they said that the more complicated machine has a different cast on method than most other machines and they they could not help me.
I did a lot of research online for any information on either of the machines. I found an online group of machine knitters based in the Twin Cities, and reached out to them to see if anyone knew anything about either of these machines. Someone responded right away. She said that the cast on for the White/Superba machine is not different. She directed me to some instructional videos for that machine and invited me to their monthly zoom get together. As in other things, once you get interested, you find other people doing whatever the thing is.
While concluding that I did not want the bulky machine after all, I was online looking at information from the Knitshop at Rocking Horse Farm. They sell LK-150 knitting machines, which is the basic knitting machine used in the School of Sweet Georgia class. I also found some other sites online with instruction on this particular machine.
After discussing with Torri, she said she would take the SK-120 machine back. She was not planning on knitting garments, but was interested in using it for art projects, possibly trying to knit with wire.
While this was all going on, I was needed for some grandparenting in St. Paul. My son was in his last week of paternity leave in the middle of October. His wife had to go on another business trip, and Blair was not feeling well. I was happy to help out. After a few days in St Paul, I stopped at Rocking Horse Farm on the way back home.
Wayne was a little rattled when I got home with a brand new Silver Reed LK-150 machine, and now there were three knitting machines in the house. I assured him that one of them was going back to Torri. I plan on keeping the complicated double bed machine for now, until a future time when I am ready to figure it out. After that I can get rid of it, or not.
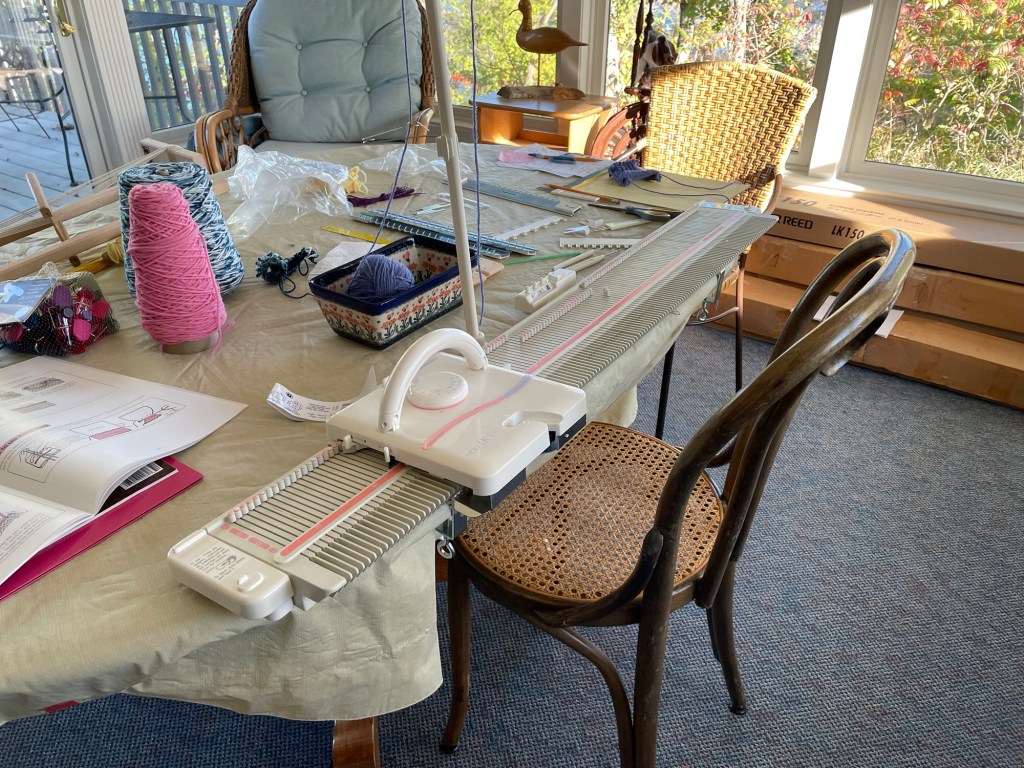
The next photo shows the new LK-150 machine. It is plastic, which contributes to the reasonable price and lighter weight. It is also not as durable, but still gets very good reviews, and is recommended for a beginner machine. It is designed for medium weight yarn, but can also knit bulky yarn on every other needle. This type of machine, as with the SK-120, does not do ribbing. You can do a band of ribbing by undoing knit stitches and redoing them into purl stitches by hand, or you can add rows of ribbing by hand to live stitches after taking the knitting off the machine.
The new LK-150 knitting machine
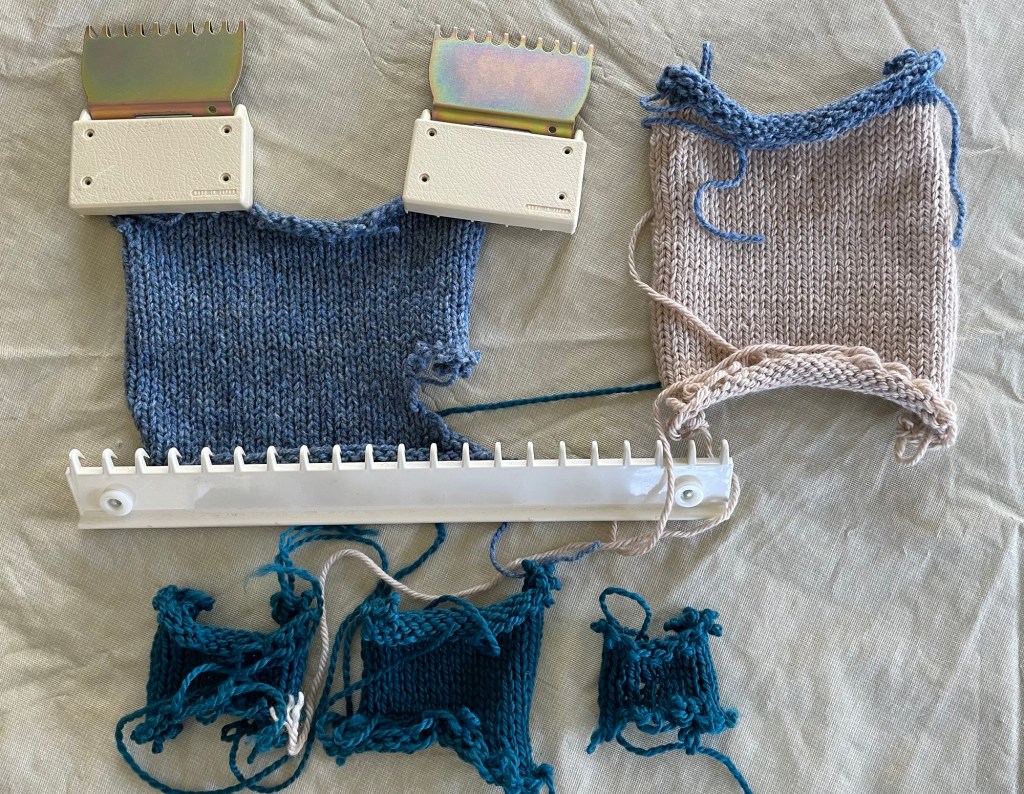
I knit the following sample to practice casting on and off, increases and decreases, and making eyelets, using some yucky acrylic practice yarn. It is hard to see what is going on in the self striping yarn.
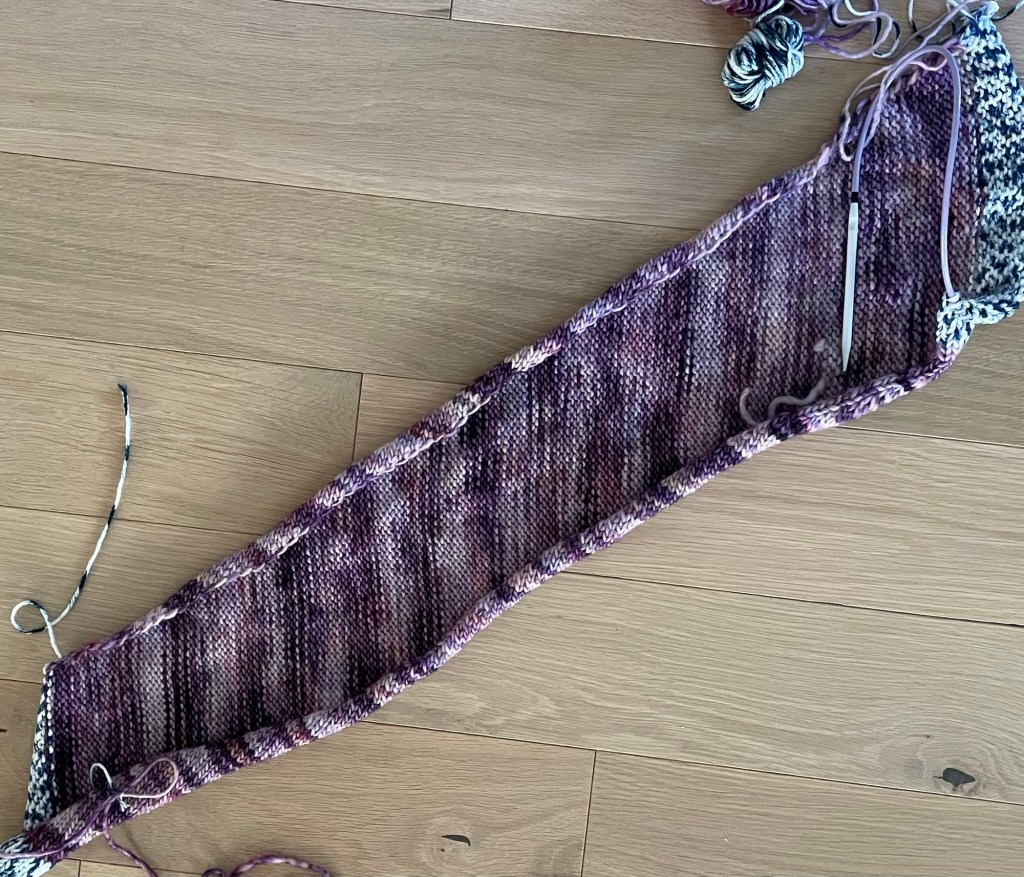
One of the beginning patterns included with the School of Sweet Georgia class is a bias scarf, where you knit an increase on one end and a decrease at the other end of every other row. I had one ball of some 100% wool that I bought at Joann Fabrics last winter. It was pretty and soft, but also inexpensive and good for practicing. I tried the bias pattern with fewer stitches across since I only had one ball. The easiest increase method makes a loop down that side of the scarf, which can be a design feature or maybe not the best depending on what you are making.
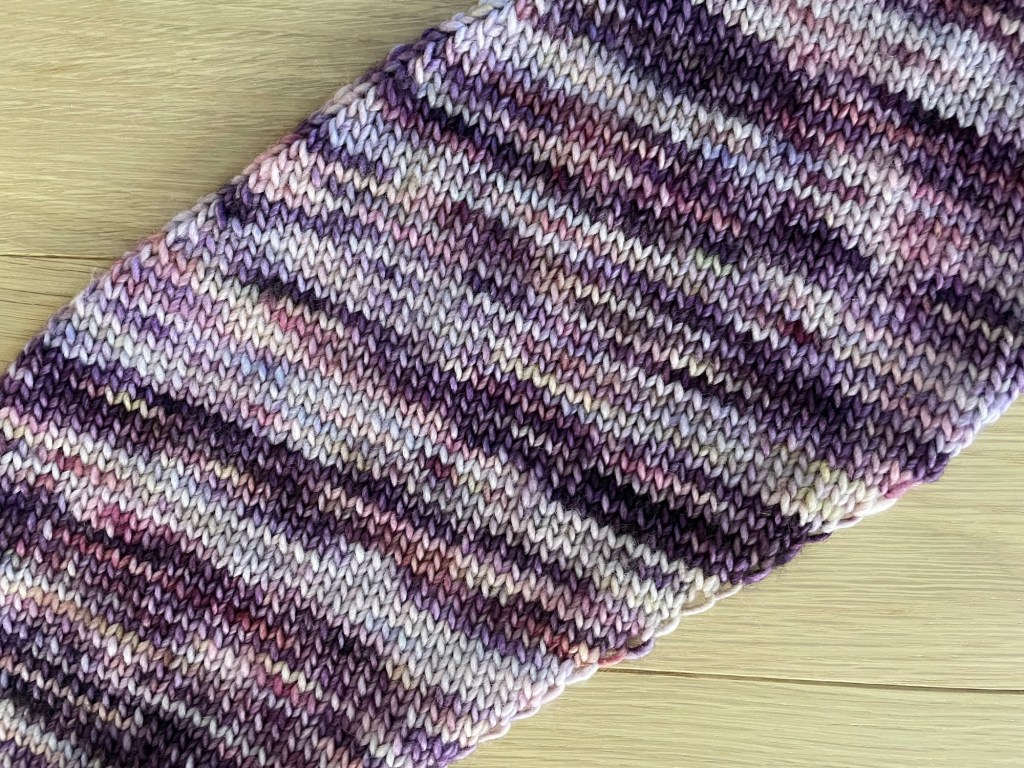
The fabric made with all stockinette stitches curls a little at the sides, which you can see on the back of the scarf.
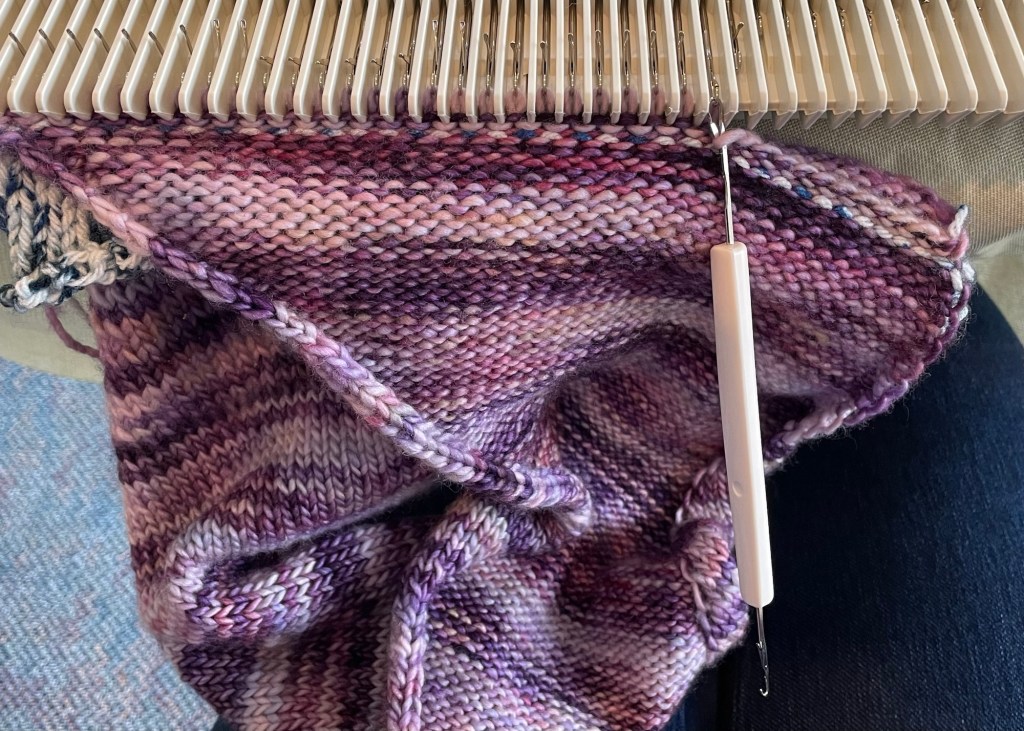
I made it into a cowl by joining the live ends on the machine, using instructions from a different pattern.
The join looks nice and flat on the knit side of the fabric. The back has a small ridge, that can be seen in the photo above. I probably won’t wear this scarf, but it was good practice.
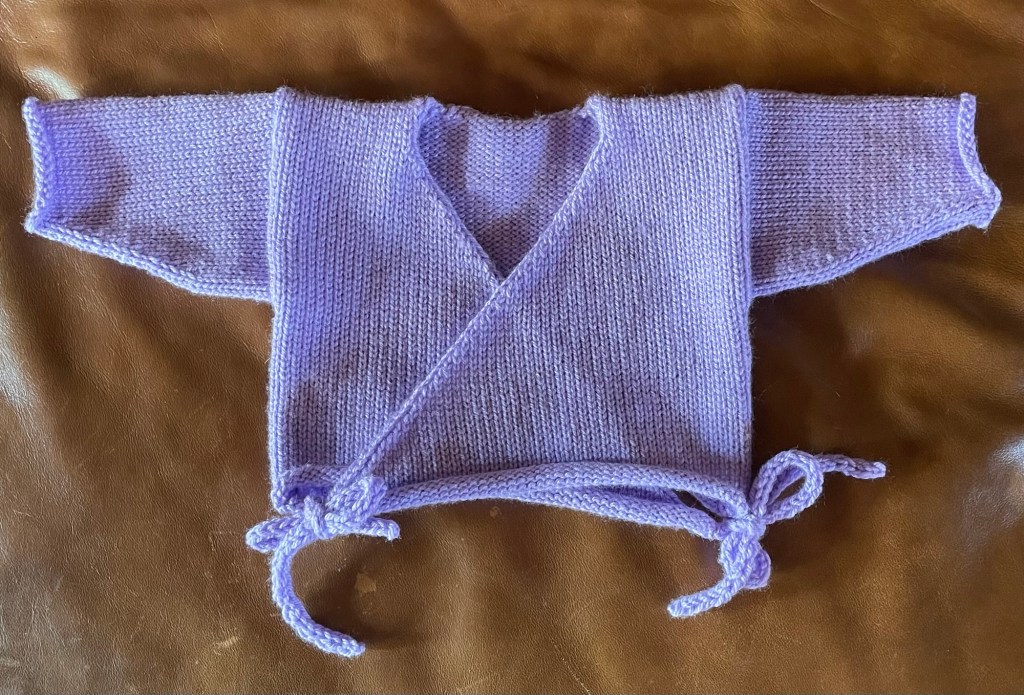
For my next practice project I found a beginner baby sweater pattern online. I bought some cheap acrylic yarn at Walmart to make this sweater for my granddaughter. I seem to be very into purple lately.
Purple yarn I have purchased lately
The back is just a square, the fronts are two triangles made by doing doing decreases up one side, and the sleeves are rectangles with some increases on each side.
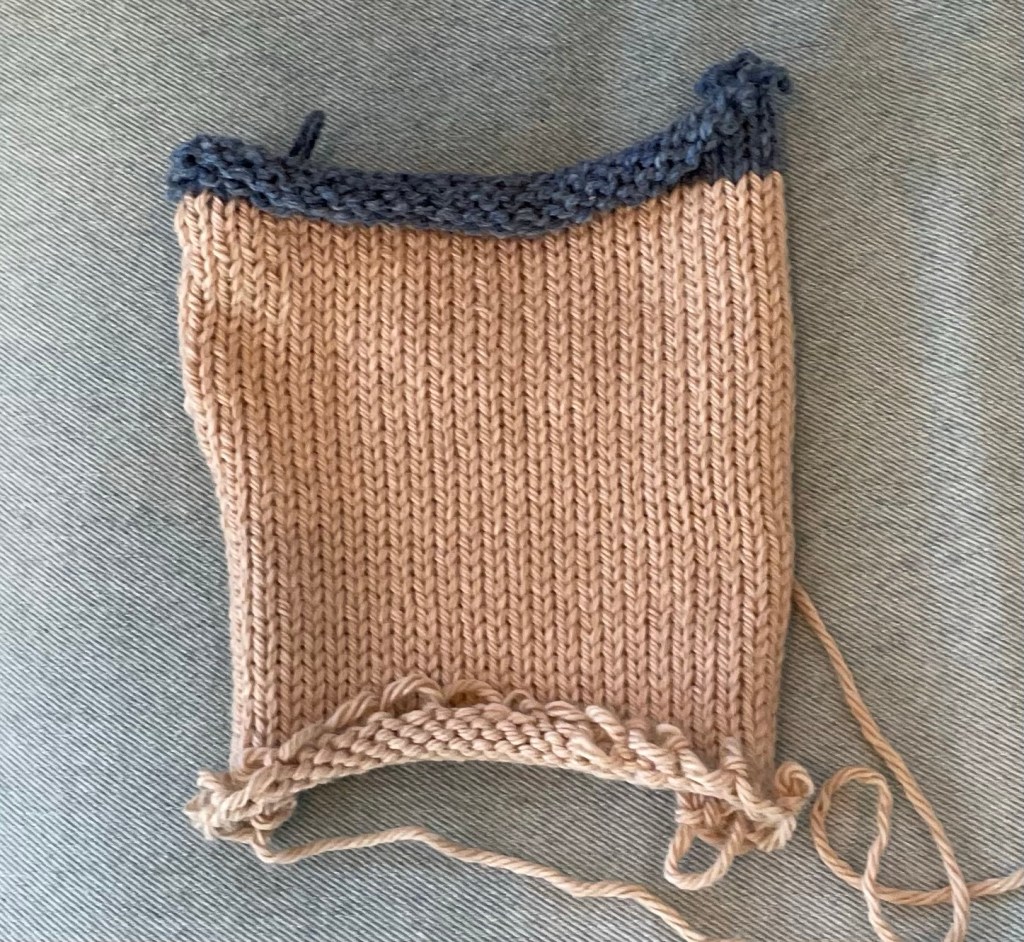
Following is what the project looked like after I knit each of the five sections, and then using the machine, joined the shoulder seams together, and the sleeves to the body.
This photo looks too pink
Finishing the sweater involved hand joining the side and sleeve seams using mattress stitch, knitting I cord ties on the machine, and weaving in many many ends. There were 18 ends to weave in, not including a few more that were created when I did the hand joining of the sides. The joins on the machine at the shoulders and top of the sleeves seemed a little bulky to me.
I did not do a gauge swatch, since this was just practice. After knitting all the sections I determined that I was getting the expected stitches per inch, but more rows per inch than the pattern gauge. That meant that the number of rows the pattern said to knit resulted in a shorter length than intended, relative to the width. So this is a three quarter sleeve length bolero sweater haha.
The next time I was in St. Paul, I tried the sweater on my granddaughter. It was a little big around, and the sleeves were a bit too short, but it was wearable. It made a nice outfit over a Halloween onesie with no pants.
I aspire to knit a sweater for myself. Normally I like a top down circular pattern for a sweater, which results in less seaming and fewer ends to weave in. Knitting a sweater on the machine involves making flat panels that have to be stitcher together. It is possible to do the top of a sweater in the round, and then knit the body of the same sweater on the machine. Or knit the main pieces from the bottom up and then continue knitting the top by hand. It will be fun to experiment with different methods.
Maybe I have too many things to work on and figure out now, but now is when I have time, space and ability. I do not have to do everything at once. And I have to remind myself it is OK for our activities to evolve over time, as we move forward in our life.
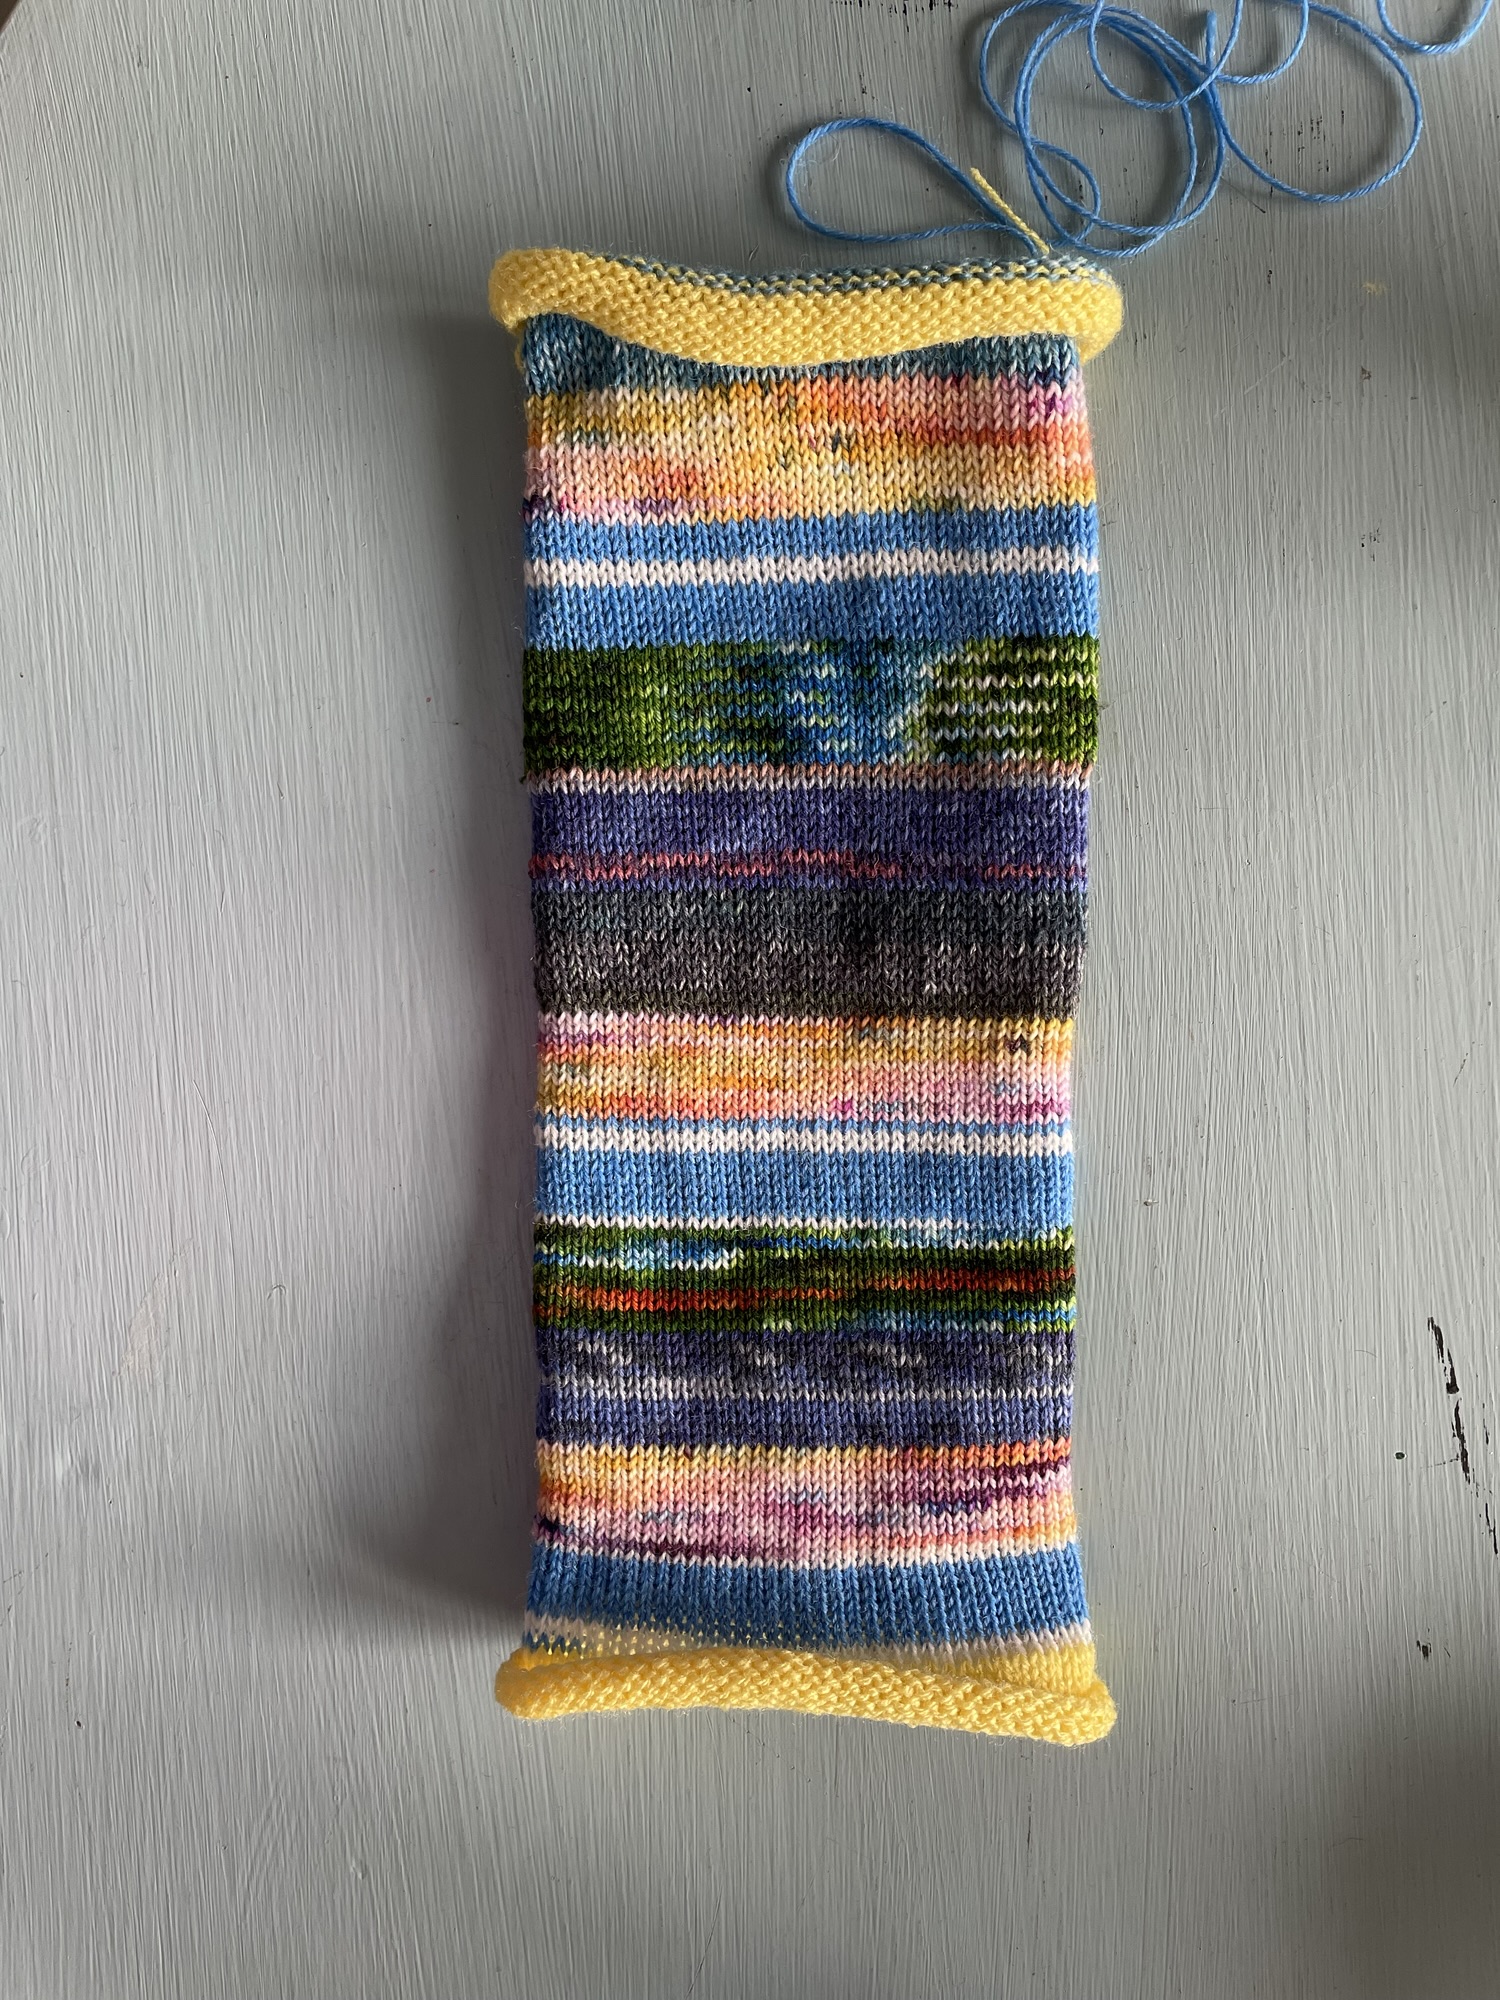
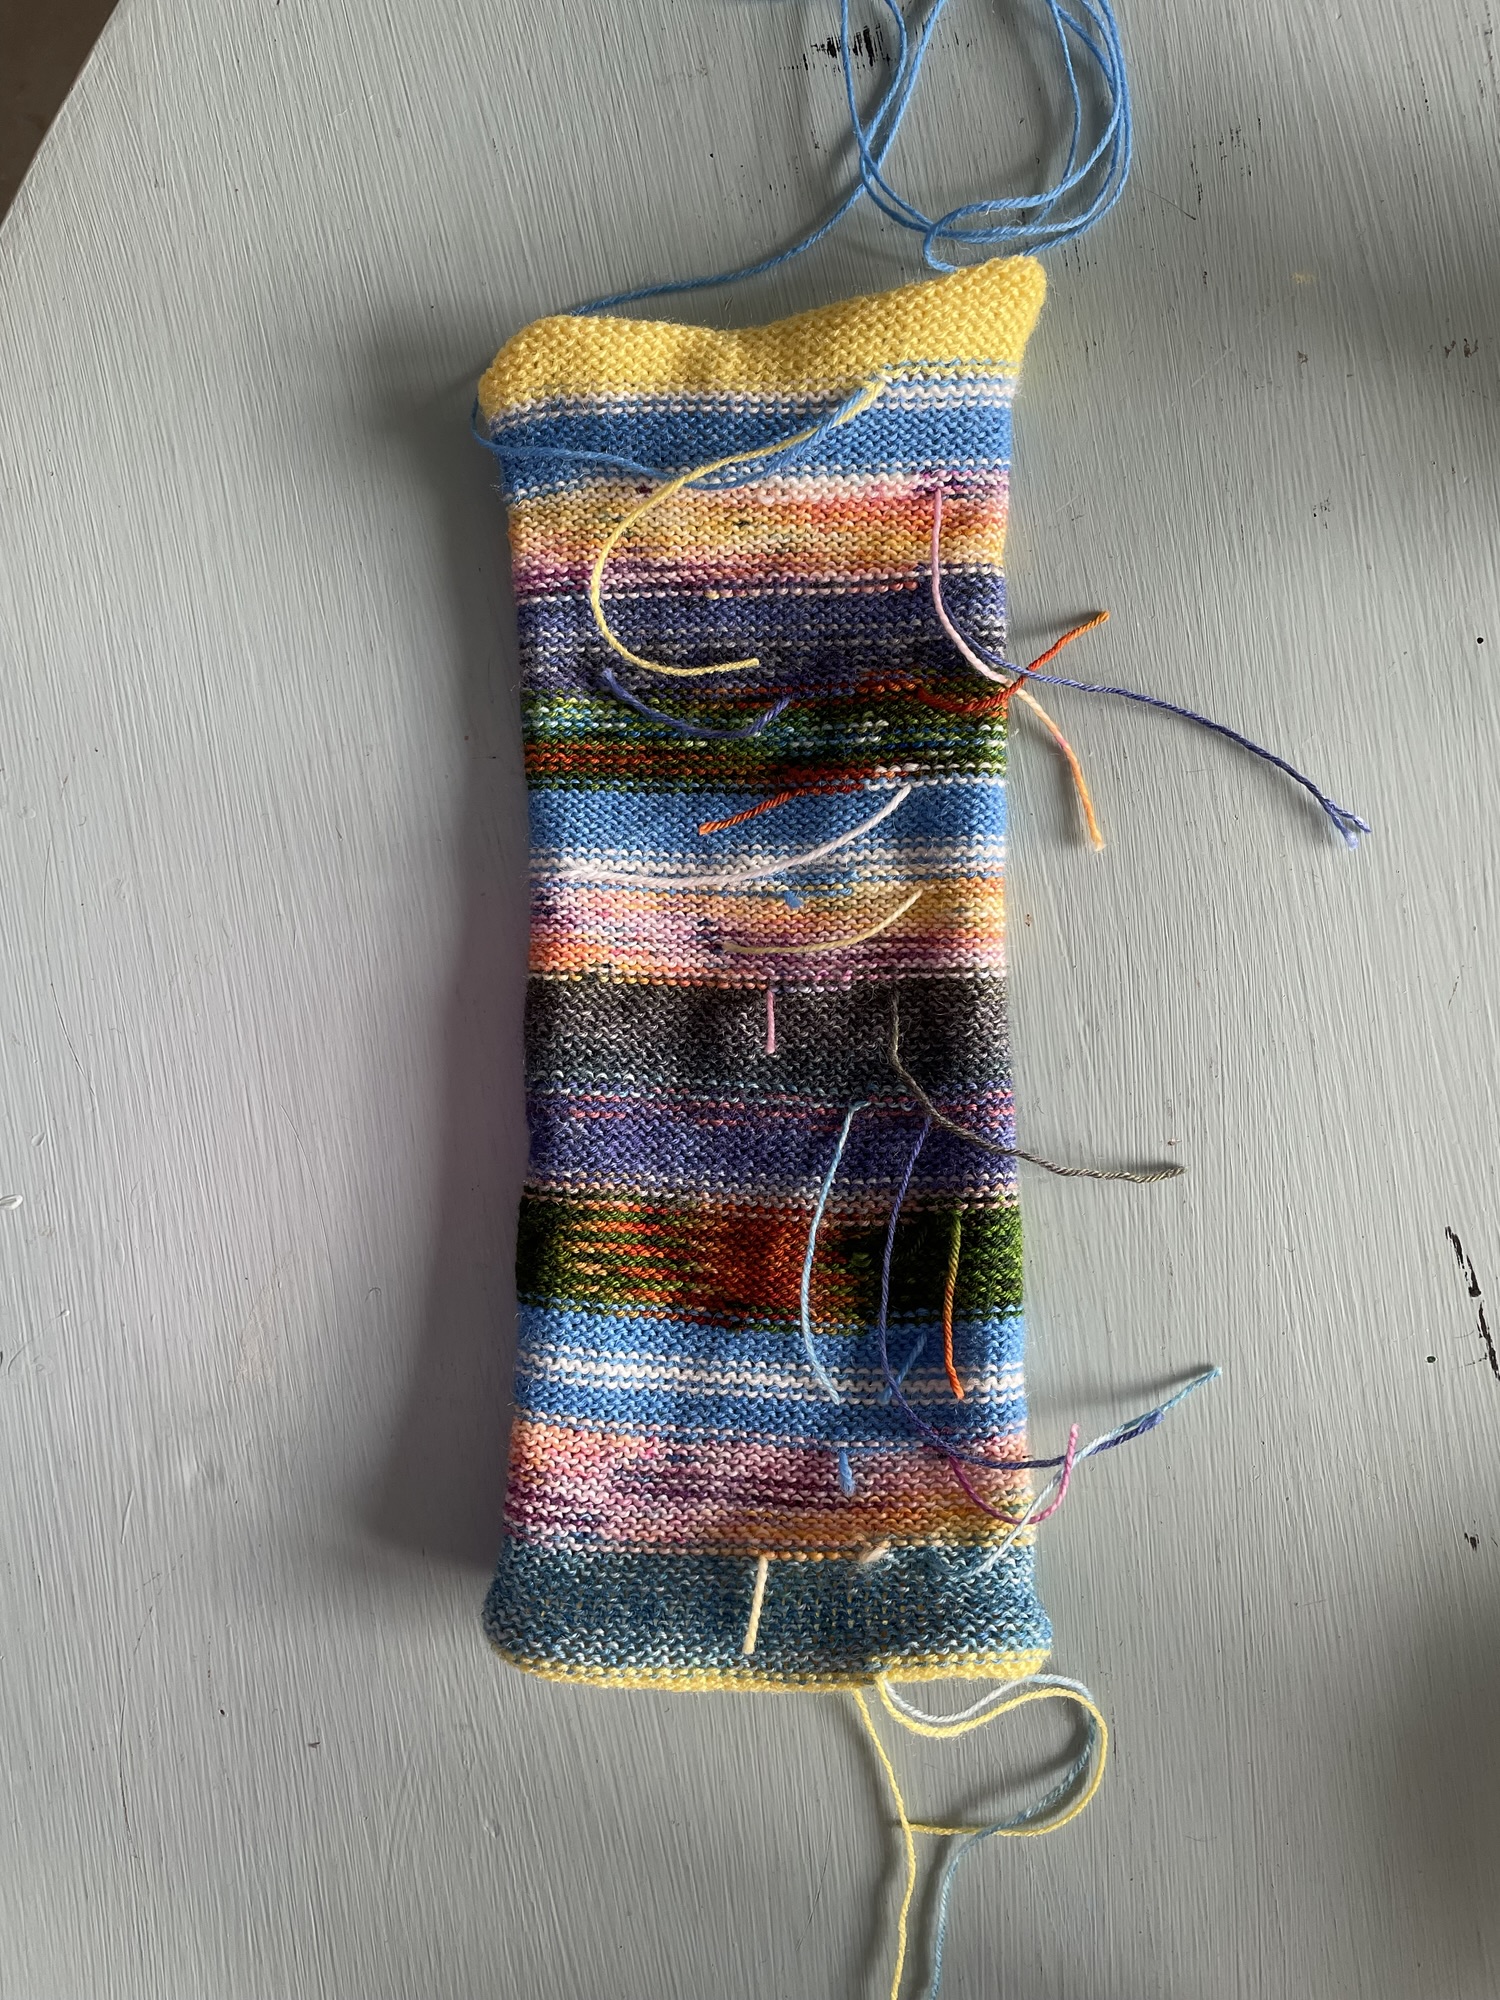
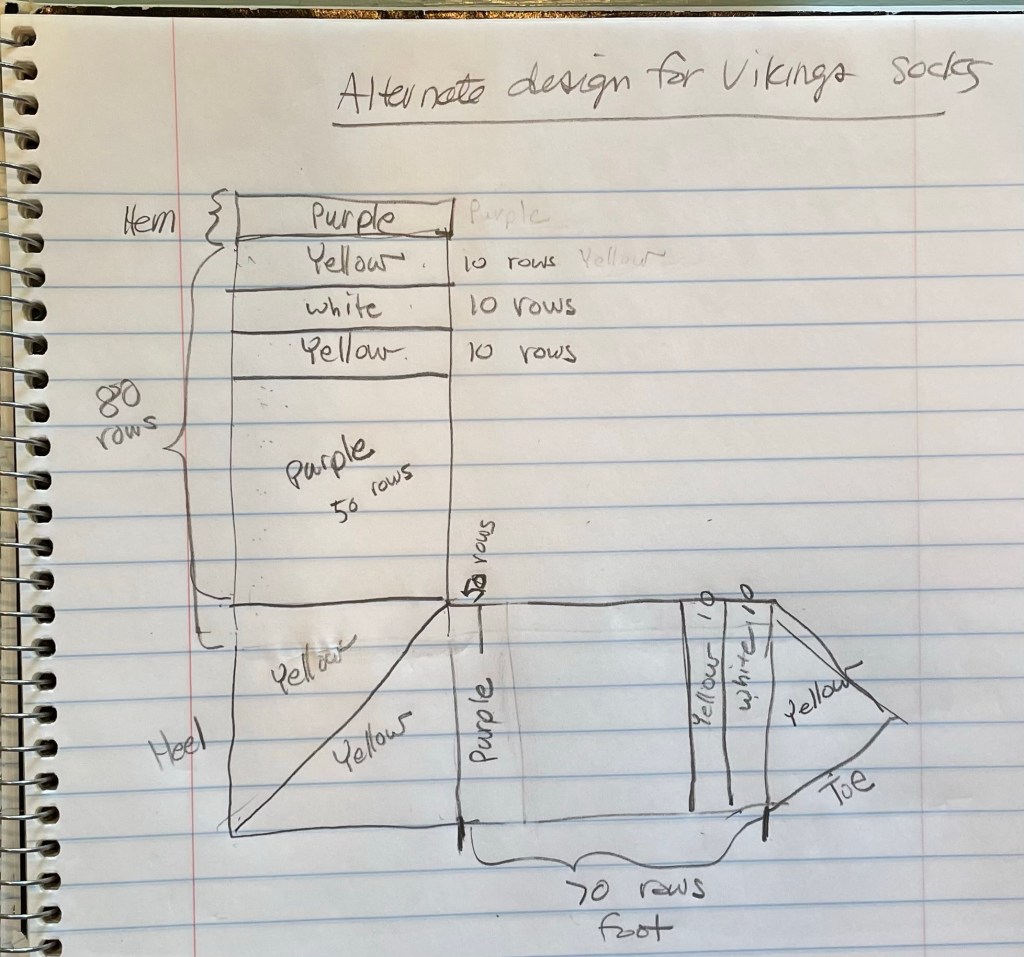
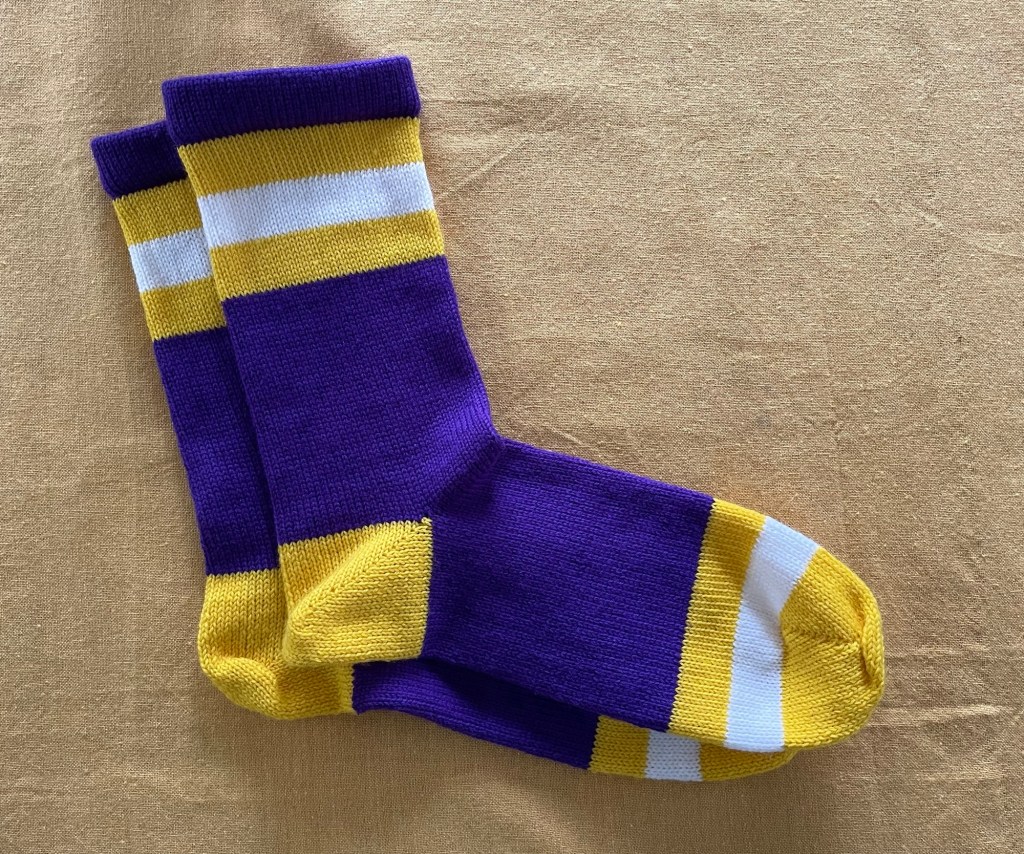
In the knitting world, October is known as Socktober. It’s a good time for me to share updates about my sock machine journey.
My last post about socks was in July, for team color socks I cranked for my husband. I was busy the rest of the summer with other crafts and activities. After getting back in the groove this fall, I cranked out more pairs of socks, including some in other team colors.
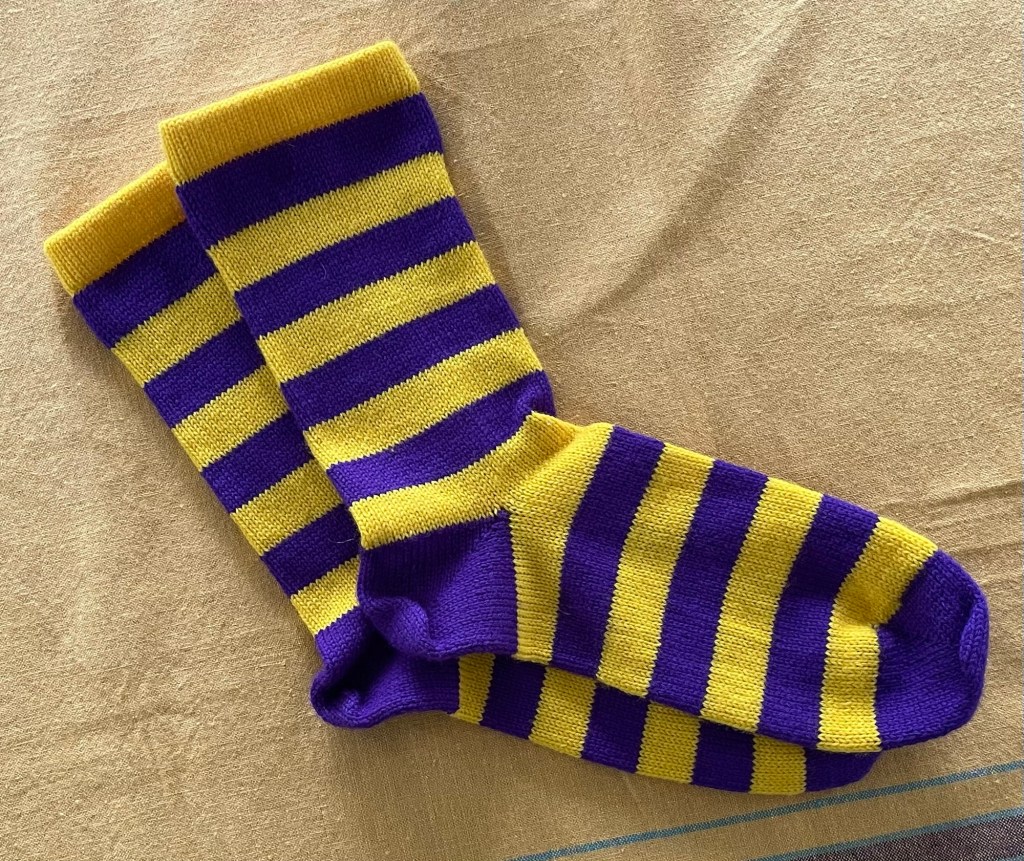
After making two pairs of purple and gold Minnesota Vikings color socks, I left them sitting on the coffee table when we went out of town. Our son and daughter-in-law arrived at our house for a visit shortly before we got back home. Our granddaughter, Blair, found the socks and decided to model them. The following photo reminds me of those reels where supermodels are wearing goofy outfits that no one would really wear.
Modeling two pairs of Vikings color socks
I cranked a pair for myself using Sweet Georgia Tough Love sock yarn in a variegated purple color. Wayne and I both wore our socks while watching a Minnesota Vikings football game.
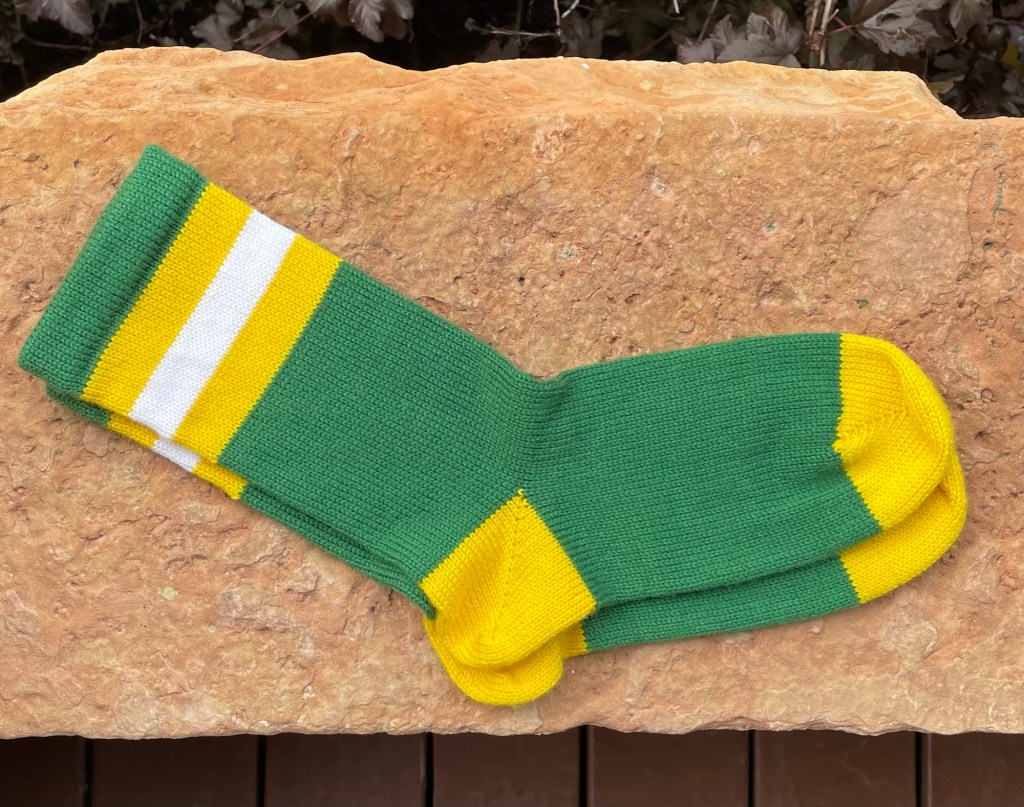
I cranked some Green Bay Packers socks for my daughter-in-law, and for her dad.
Green Bay Packers socks
On the second sock of the second pair of Packers socks, I got to the end of the cone of green yarn nine rows before it was time to start the yellow heel. I had another skein of green yarn, but the color was different. I consulted with Wayne about whether to add nine rows of white, use the non matching green, or switch to yellow nine rows before the yellow toe. No matter what, the socks were not going to match. We agreed that switching to yellow was best. They ended up as quirky Packers socks. In the photo below you can see that the sock on the bottom has less green and more yellow at the toe than the other sock.
One sock has more yellow at the toe
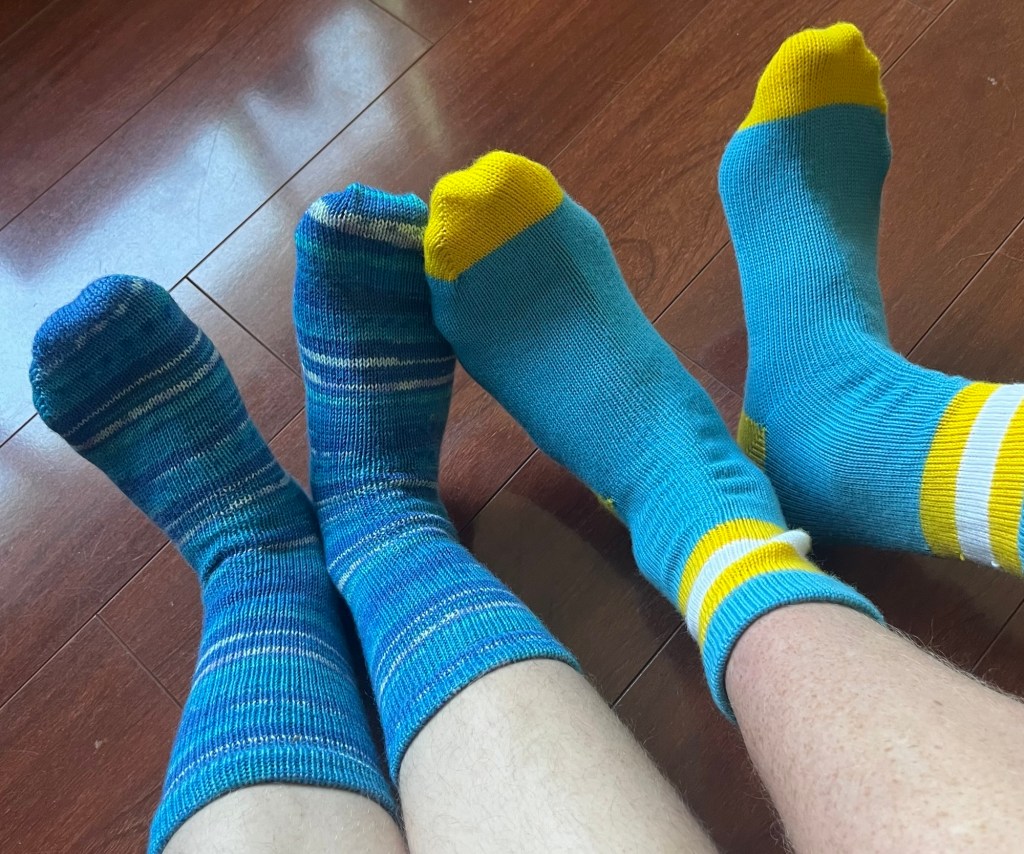
James and Kelsey are a mixed team family. They modeled their Vikings and Packers socks while watching Sunday afternoon football.
Vikings and Packers sock
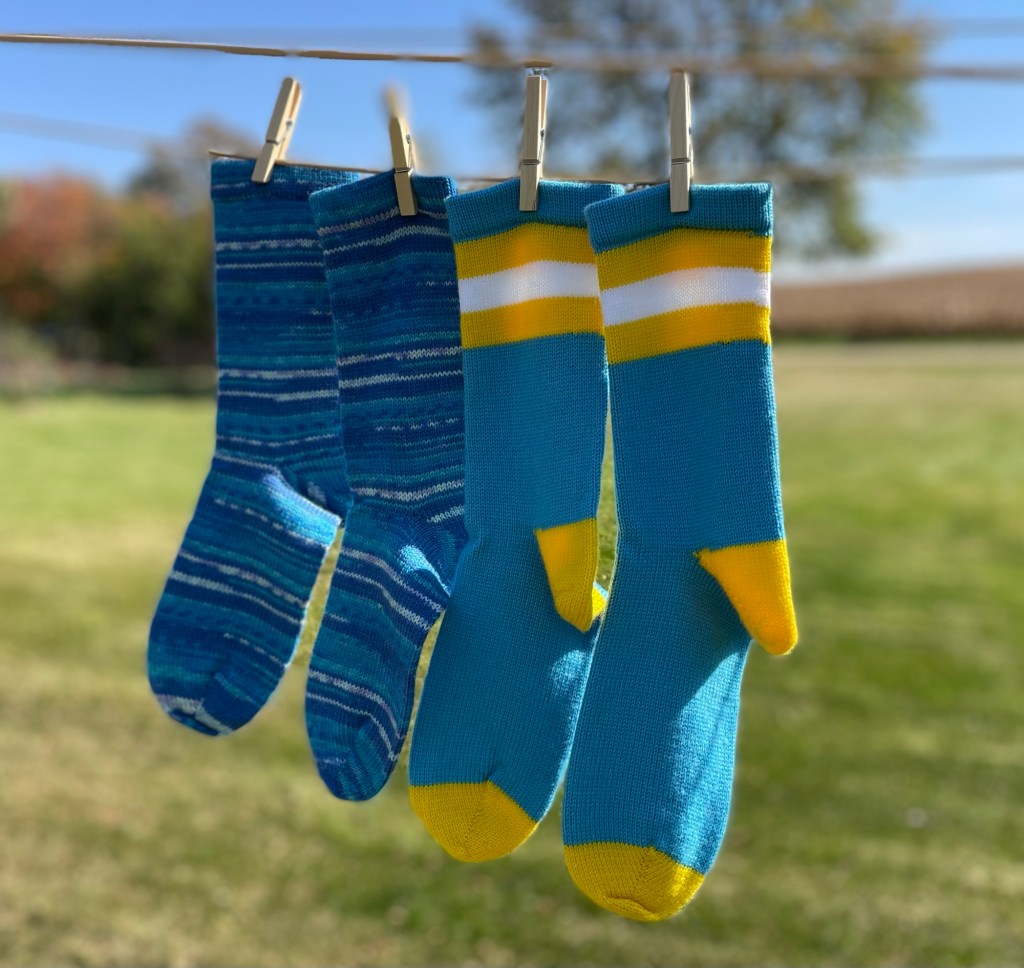
My daughter’s boyfriend is a Los Angeles Chargers fan, so I cranked him a pair of socks with the appropriate colors. They are also a mixed couple. Isaac loves football, and Britta does not care about football. I made her a pair of non football team color socks, that coordinated with the pair for Isaac.
Following is a photo of my sister while on a camping and hiking vacation in Canada, wearing socks I cranked for her.
Last winter Wayne made me a small sock machine table to use in our RV and when going to crank-in’s. It was a little tippy, the piece of wood used for the work surface was slightly warped, and the legs tended to come loose, but it worked for the purpose. I have a better table I use in the house. When I was moving things around in my work area at home, the hardware on one of the legs of the small CSM table completely broke off.
It was time for a new table, that I would need in time for an October crank-in and to bring to Arizona in the winter. When reviewing ideas for portable sock machine tables, one option seemed to be pretty popular among crankers. It was a no-brainer to use a foldable workbench base from Home Depot, rather than reinventing the wheel.
While checking for the product online, I assumed it would be available at my local Home Depot store. Instead, options were free delivery to the store, or to my house. Deliver free to my house? Sure. I got a notice on the day of delivery with tracking information. The product was sourced in Ohio, and from there went to Mauston, WI, then to Rogers, MN, and on to to Fargo, ND. From there it was placed in the delivery truck to our house, which is an hour from Fargo. I don’t know whether it is better for the environment to pick it up in town or have it delivered, but that is another topic.
Following is a photo of the Home Depot workbench assembled and with my sock machine clamped on. The top is two pieces of wood that can slide to different positions.
The new portable CSM table was ready to bring to a crank-in at the Knitshop at Rocking Horse Farm in St. Cloud, Minnesota. That is about two hours from my house, on the way to the Twin Cities. They have crank-ins three times a year. I went to this same event one year ago to observe, and the next day I ordered my Erlbacher circular sock machine.
There is a couple with 30 years of circular sock machine experience who attend the Rocking Horse Farm crank-ins. Deb and Pete Oswald are gurus in the sock machine world. If you do any research online you will find their names. Pete restores old machines and is an expert at making fine tune adjustments. He did some tinkering on my CSM ribber attachment.
Pete Oswald making adjustments to my ribber attachment, with Deb in the background
Pete and Deb were willing to stand with me for a photo.
Pete and Deb Oswald with me at Rocking Horse Farm
Deb is known for her “Fast and Easy Heal” method that is available online. She demonstrated how to made a knitted pumpkin during the crank-in. I made one using orange acrylic waste yarn that was offered to me.
Wayne ran some errands in St. Cloud, hung out at a golf course, and kept busy until the crank-in was over. We continued on from there to St. Paul for a grandchildren fix over the weekend. My knitted pumpkin is displayed on our son’s front porch.
Knitted pumpkin made on my CSM
After that weekend Wayne made a new top for the workbench base using a piece of wood in the basement, and with a cutout like my other travel CSM table that broke.
Home Depot workbench table with a better top
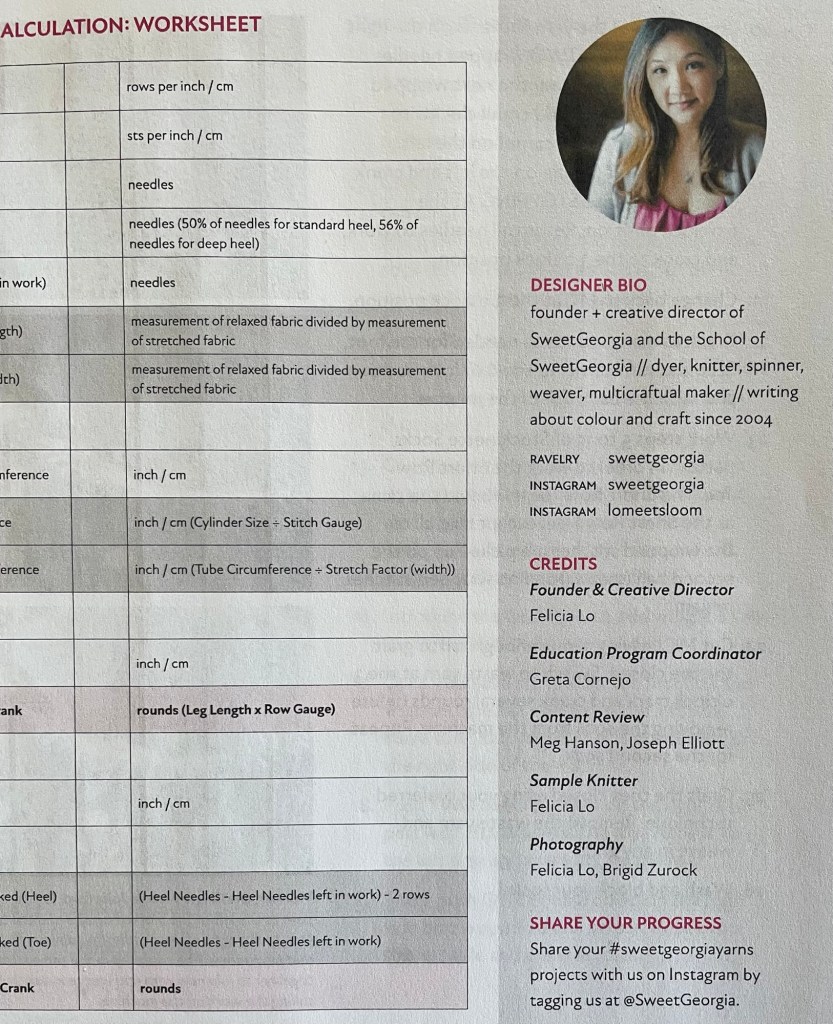
In other sock machine news, the School of Sweet Georgia is offering an online beginner circular sock machine (CSM) class. Over the summer after launching their new online community, the founder Felicia Lo asked if anyone in the community wanted to be available to review and proof patterns before publication. I was a little intimidated, but added my name to the list, knowing that I could choose which projects to help with. Felicia reached out to me and another person about reviewing the new sock machine class workbook and patterns. I was up for that! We received a link to some PDF files, which I printed out on paper.
Following is the cover of the workbook, which looks amazing. Felicia has an Erlbacher sock machine, the same kind as mine.
Cover of the School of Sweet Georgia CSM class workbook
I read through all the information carefully, and actually did all the things as instructed in the workbook. Felicia used a slightly different method for doing heels than I had been using. I liked it better and am now doing my heels that way, resulting in fewer dropped stitches.
I did not find any mistakes per se in the workbook. However as a newer cranker, I noticed some things that were confusing or could be more clear. I typed up a document and sent it back to Felicia, with detailed notes and comments, specific points that could be added, and other observations based on my experience. Later Felicia shared a revised PDF that included many of my suggestions, and I got credit on the last page of the pattern! Following is a photo of the front of the starter sock pattern, followed by a snapshot of the last page with my name in the credits.
Page 1 of the starter sock patternBack page of the starter sock pattern, with my name under content review
In conjunction with Socktober, Felicia interviewed Grayson Erlbacher, the general manager at Erlbacher Knitting Machines. She talks about the history of sock machines going back to the late 1800’s, and how her father’s gear business got involved in manufacturing them. It is quite interesting, even if you do not know anything about knitting or sock machines. You can listen to the interview on youtube here.
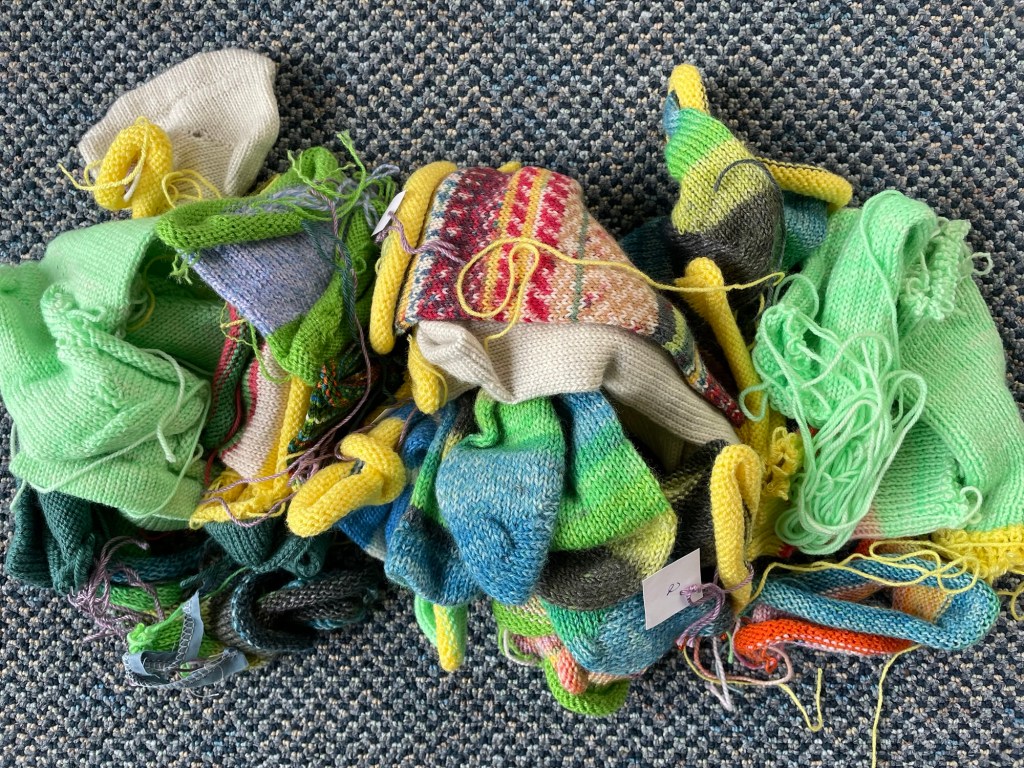
I received my CSM in November of 2024, just under a year ago. I have come a long way since then, as evidenced by the pile of practice knitting and fails shown below.
Cranking samples and fails
Last fall I was trying to decide if I could justify buying a circular sock machine. I decided to go for it, and I am so happy I did. There was a learning curve as expected, but it has been a fun journey with many blessings.
I always look forward Fiber Day at Northcroft farm, which happens twice a year about 15 miles from my house. The Ellison’s invite fiber lovers to their sheep farm for a day of crafting and socializing with old and new friends. Sometimes I end up going by myself. This time my sister and two friends came for the weekend to hang out and attend the event with me. My sister Betsy does not do any fiber craft these days, but she has been plein air painting. It is a great setting for that, and she likes to be with the people. Mary Lou and Deb are big knitters.
It is good to plan activities for Fiber Day that I do not get around to at home, or that I do not have the supplies or equipment for. I enjoy spinning, and my spinning wheel is conveniently sitting in the living room ready for me. I have not been using it regularly at home, so I like to bring my wheel to Fiber Day where I have a chunk of time without interruptions.
I bought my Lendrum spinning wheel around 20 years ago. The man in Canada who has been making them for over 40 years retired. This summer I realized I should order some replacement parts while they are still available. While I was checking online, I noticed that in addition to drive bands, there were replacement connector pieces for where the “footman” connects to the “treadles”. I ordered those too, plus the recommended special kind of screwdriver needed to replace the connector pieces.
Replacement parts for my Lendrum spinning wheel
What do you know, a few weeks later one of those connector parts broke in half.
The broken connector part
Before ordering the new parts, I had not noticed how yellow and crackly the original pieces were.
Old and new connector parts
I was able to get the old pieces off and the new ones on using the special screwdriver, so the wheel should be good to go for another 20 years, which is probably longer than I will physically be able to spin.
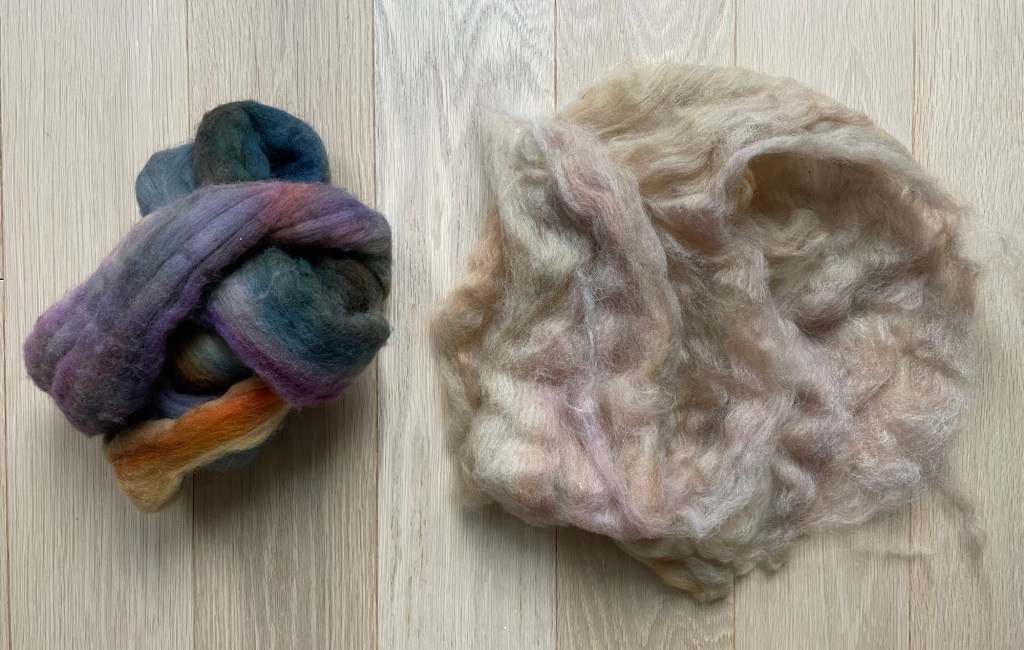
I have been working on spinning up a hand dyed Malabrigo 100% merino wool combed top that I bought at the Yarnery in St. Paul. At the time I did not need anything else to spin, but I have heard it said that buying craft supplies is a different hobby than doing the craft. I worked on it for awhile, but it had gone on the back burner while I worked on other spinning projects.
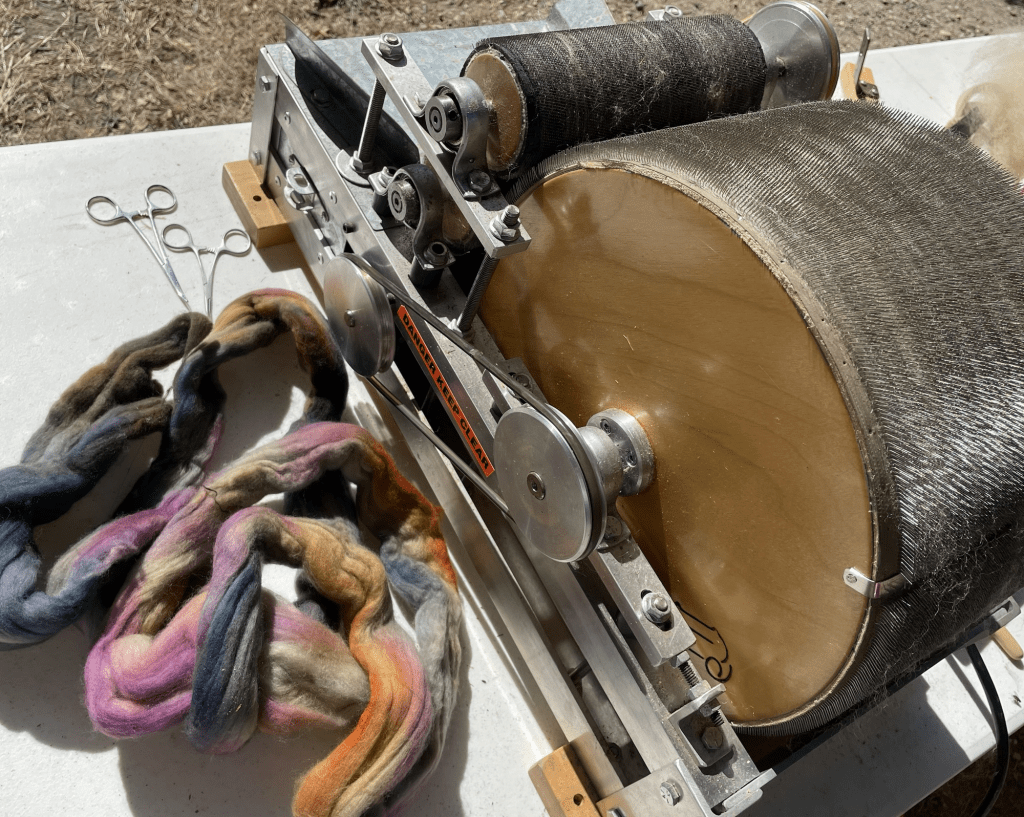
Commercial combed top comes very densely packed, and requires some time and effort to get it loosened up enough to spin. A year ago at Fiber Day I had the brilliant idea (not) to run some of it through the drum carder to made it easier to spin.
Nube 100% Merino combed top from Malabrigo
This turned out to be a learning experience in color theory. All the pretty colors blended together and turned into grayish tan. Oops, not what I had intended.
Wool combed top before and after carding
In the photo below is half of the original braid spun up on one bobbin, and a bit of the blended braid on the other bobbin. Fortunately, most of the second half of the original braid is left. It will probably be ages before I finish spinning it, and then plying the two singles together into a two ply yarn.
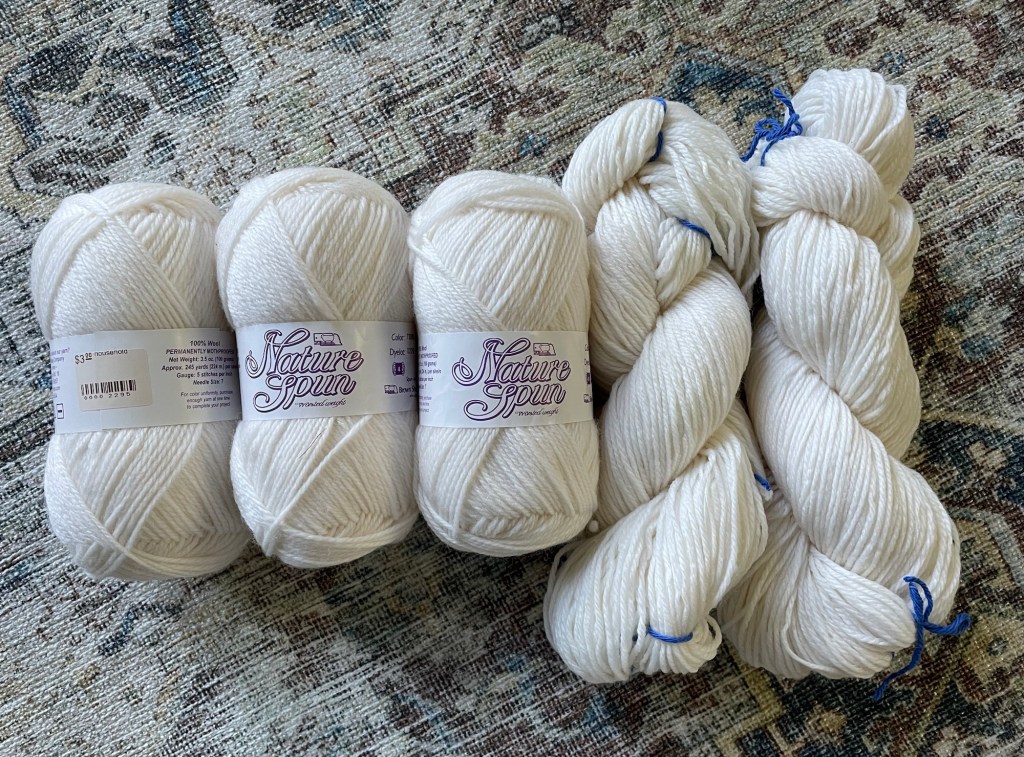
Dyeing is a good activity to do at Fiber Day, since it is something that I am not inclined to do at home. I had purchased five balls of white Brown Sheep Company 100% wool worsted weight yarn at a thrift store for $3.00 each. I wound them all into skeins in preparation for dyeing at fall Fiber Day.
A few weeks ago I watched an online School of Sweet Georgia class on dyeing a batch of yarn all the same color. Felicia at the School of Sweet Georgia has a background in chemistry, and was a Pharmacist before she started her business. Her class emphasized accurate measuring of fiber and dye, and record keeping of exactly what you did. That appeals to me, and that is what I would do if I was planning on getting supplies and setting up a space for dyeing at home.
I tried to dye yarn at home once years ago, before there was good instruction online. I purchased an electric burner that I could plug in outside on my back patio, and found a big stock pot. I guess the burner was not powerful enough, as it could not keep the water hot enough. I did not have a good experience, and in general decided I would rather do dyeing projects where someone else has the right equipment and knows what they are doing, like when I did the self striping sock yarn class at Rocking Horse Farm.
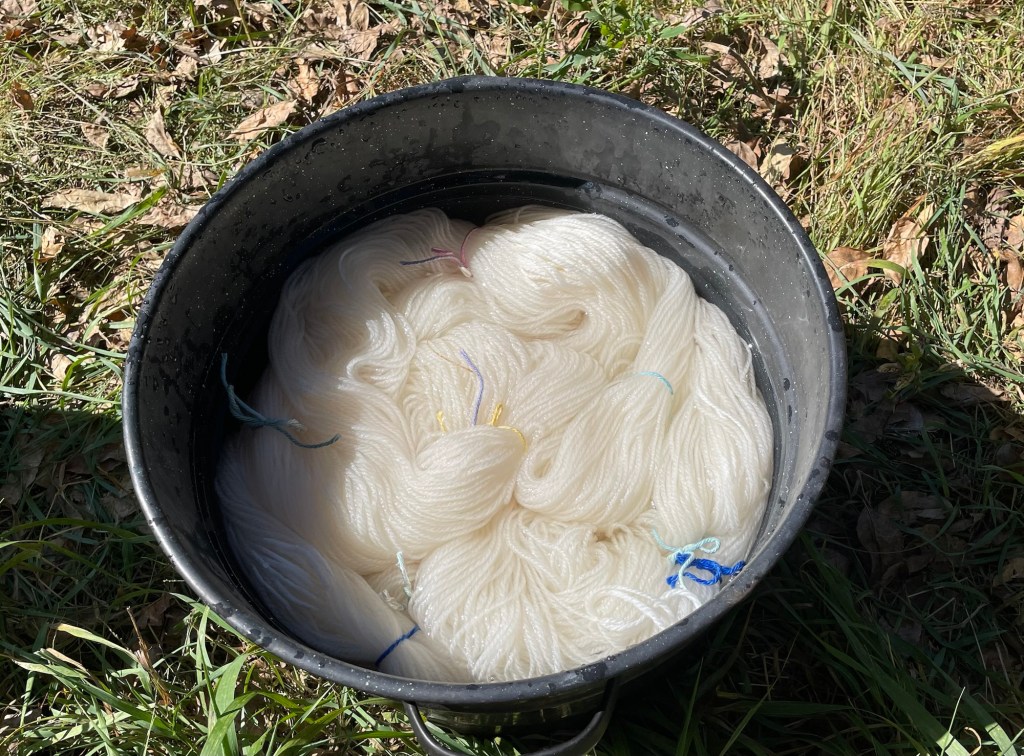
At Fiber Day, the first step was to soak my white yarn in some clean water.
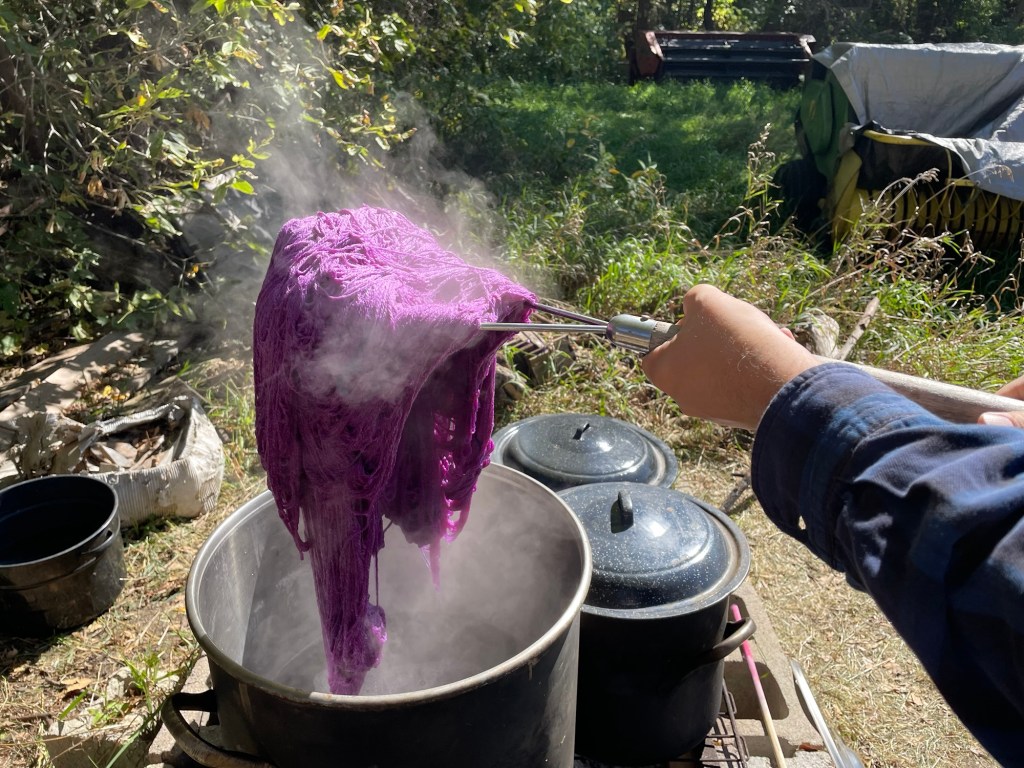
I had not decided what color to use until the last minute. There was a color card so you could see what the colors were supposed to be. I picked a color called Hibiscus, that was a pretty lavender.
A helper person who was monitoring the dye pots told me how much dye to put in a large pot of water ready to go on the open fire, based on my 16 ounces total of yarn.
The yarn simmered in the pot for about a half hour, and then the helper person removed it for me and hung the skeins on a drying rack.
My yarn dyed and drying on a rack
It was a lot darker than I expected or wanted, but being that I did not have any real plan for the yarn it was OK. The photo below shows some wool that another person dyed using the same color that is more like what I was going for.
Later in the afternoon I told Joanie Ellison how much dye I had used, in order to figure out how much money to pay for supplies. She was surprised, and said the correct amount was one forth of what I had used. Oh No! No wonder it came out dark.
Back at home I rinsed the skeins of yarn out with fresh water about 10 times, but never got the water to run clear. I finally give up after there was only a bit of dye coming out.
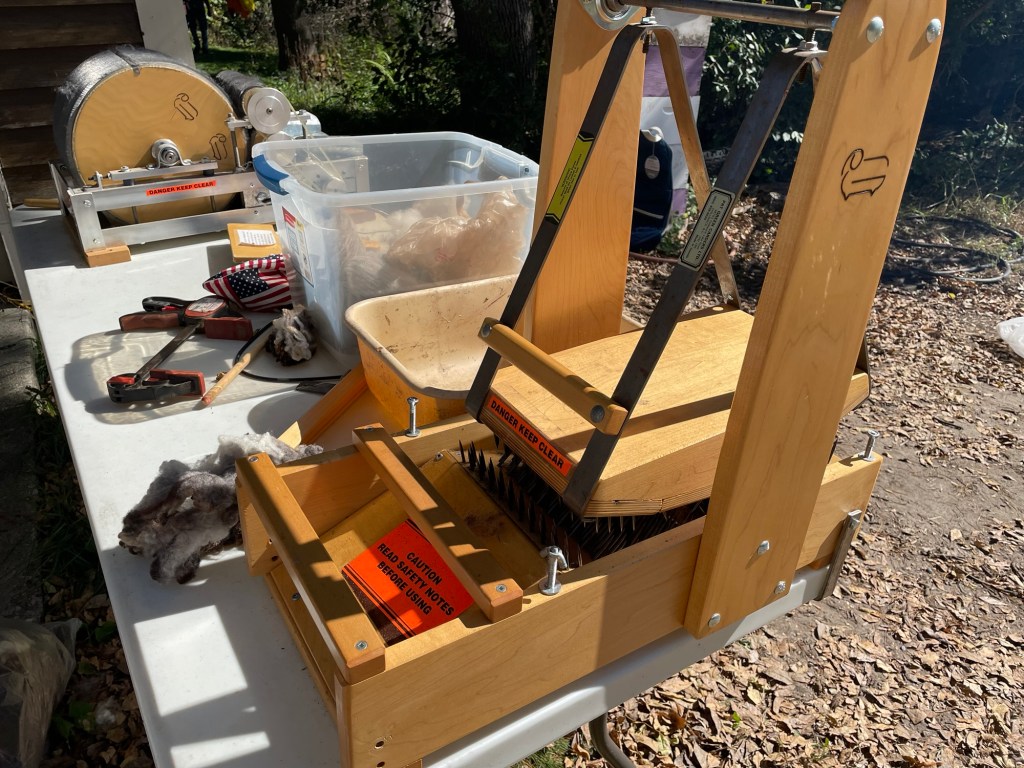
Using the Ellison’s picker and big electric drum carder to prepare fiber for spinning is another good Fiber Day activity. I have more carded batts and rolags than I can spin any time soon, so that was not on my to-do list this time. I was able to give Mary Lou some guidance on using both pieces of equipment, including not catching and ripping her shirt while using the picker (speaking from experience).
The wool picker in the foreground, the big drum carder in the background
Mary Lou picked and carded some wool she had received after helping at shearing day. She hopes to learn how to spin it. I sent my smaller non electric drum carder home with her to the Twin Cities so she can card the rest of the wool at her leisure.
A batt Mary Lou carded on the drum carder
A group of string musicians had a jam session on the deck.
Betsy worked on two different plein air oil paintings behind the house.
Following is a photo of the painting that was more complete, and that I really like.
Plein air painting by my sister Betsy
There were supplies and instructions on hand for “painting” a crinkly silk scarf. Mary Lou made one that was in progress in the selfie photo below of Betsy, me, Mary Lou, and Joanie Ellison.
Mary Lou’s scarf started out with multiple shades of blue. After taking the scarf home while still wet, she forgot about it and all the colors blended together. I still think it is very pretty.
Mary Lou’s hand dyed silk scarf
The weather was unusually warm for late September in Minnesota. Betsy and Mary Lou went swimming at the cabin beach! Deb and I declined that opportunity, as we were sure the water was quite cold. It is barely warm enough for me in July.
We had dinner outside on our lakeside deck.
Everyone seemed to have a nice relaxing weekend. I am not sure what I am going to do with the purple yarn, but it is the right thickness for my new flatbed knitting machine that I have not written about yet. Stay tuned.
Last winter when we were in Arizona, I worked on knitting two child size sweaters. The first one was for our granddaughter born in April. The second one was for her older sister, who is about 22 months older. I thought it would be fun for the girls to have matching sweaters.
I also wanted the baby size sweater to match a pair of cotton print pants I had made for my daughter when she was a baby. I have no idea what size they are. I had knit a baby sweater for granddaughter Blair that matched the pants, but the sweater turned out very small, and I thought the pants were for a bigger child. I forgot about it, and by the time we had Blair try them on when she was about 10 months old they were capris instead of pants.
Blair at 10 months old wearing the too small pants
I came up with the plan of sister sweaters last December when I was assembling yarn and supplies for knitting projects to work on in Arizona. I found the following 100% merino wool yarn at Tangles to Treasures in Fergus Falls. The colors matched the little pants and there was enough for both sweaters.
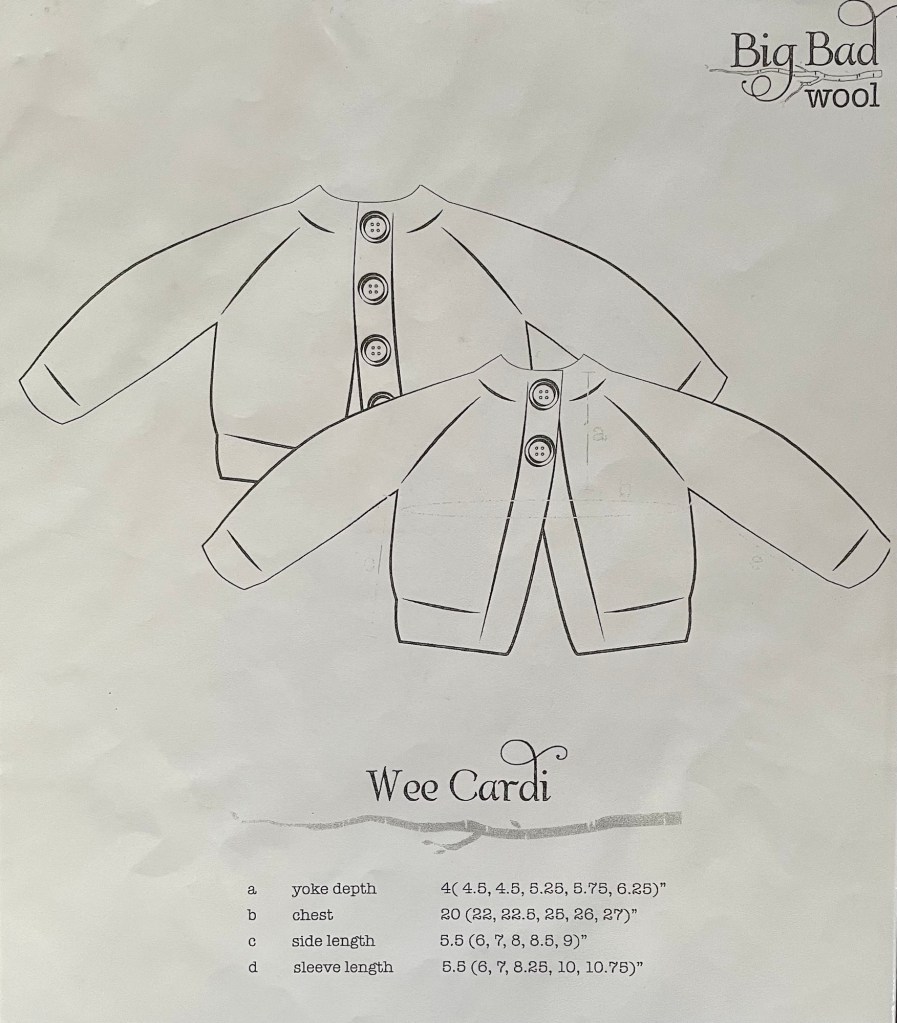
I had a top down pattern on hand that I liked, with two buttons on the girls version. Click here for a link to the Wee Cardi pattern from Big Bad Wool on Ravelry.
I started with the smaller sweater, casting on for a size six months. Since the baby was due in the spring, she would be more likely to wear a sweater in the fall.
I did not make a swatch or check the gauge, until I got done with the raglan yoke increases. It did not really matter exactly what the final measurements were. However when I got to the body section after putting the sleeve stitches on holders, I measured the gauge I was getting. The pattern said to knit for 4 1/2″, but I was getting more stitches per inch than the pattern, so the length would not be in proportion to the width, based on the number of stitches.
I used double pointed needles for the sleeves. Since my gauge was a little different, I tried to adjust the number of sleeve rows. There were a few decreases, but I thought the sleeves looked very big around. There also seemed to be a mistake in the pattern, so that if you followed exactly what it said the sleeve would be way too long. Or maybe I misread the pattern. Given all of that, I was close to finished with the first sleeve when I decided to rip it out and start over, with more decrease rows spread out evenly, and ending up with a narrower sleeve and more reasonable overall length. The front band was knitted on after picking up stitches along the center front.
Finished with the sleeve and ready to start the front band
Following is a photo of the smaller sweater after the knitting was done, but before I wove in all the ends. Torri had used the same yarn to knit a sweater for her mom. She told me that when she tried to block it, it got all stretched out. That got me worried as I have had a bad experience before with blocking a sweater. Later she said that after washing it in the washing machine it was all good.
I wove in all the ends, but decided to wait until I got home to block the sweater in my washing machine there, instead of in the laundromat at the 55+ Resort where we were staying.
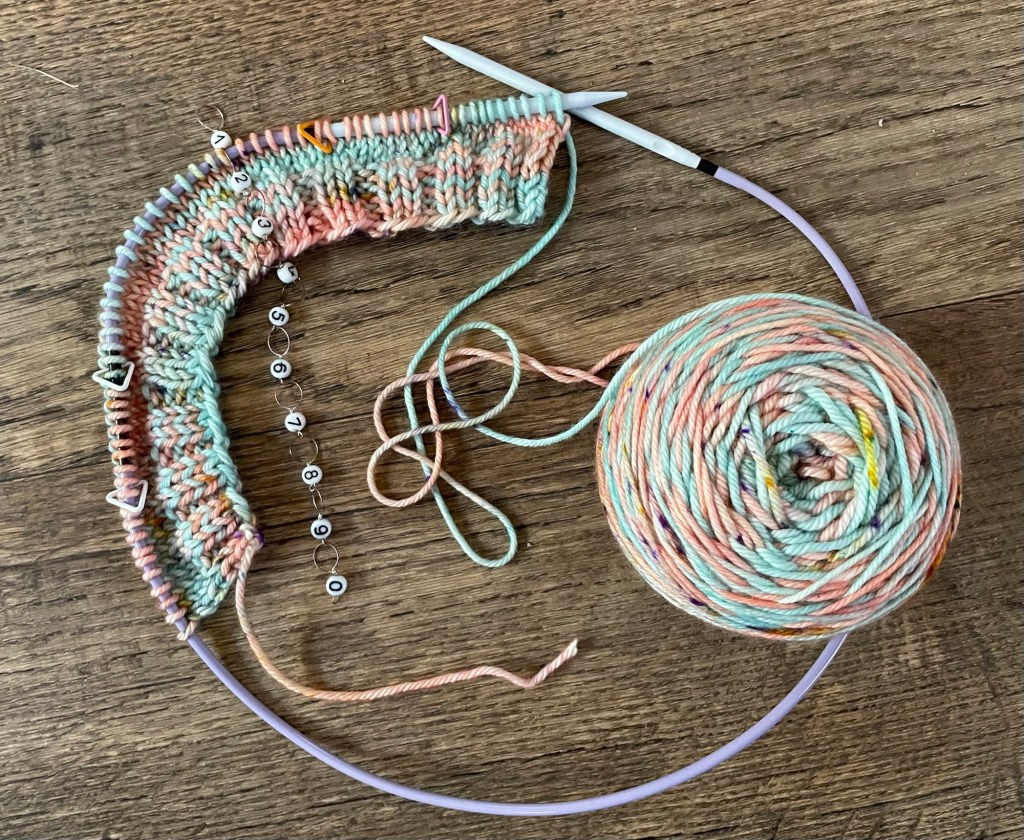
For the second sweater I cast on for size three. Blair is at the top of the growth chart, and by fall she would be over two years old.
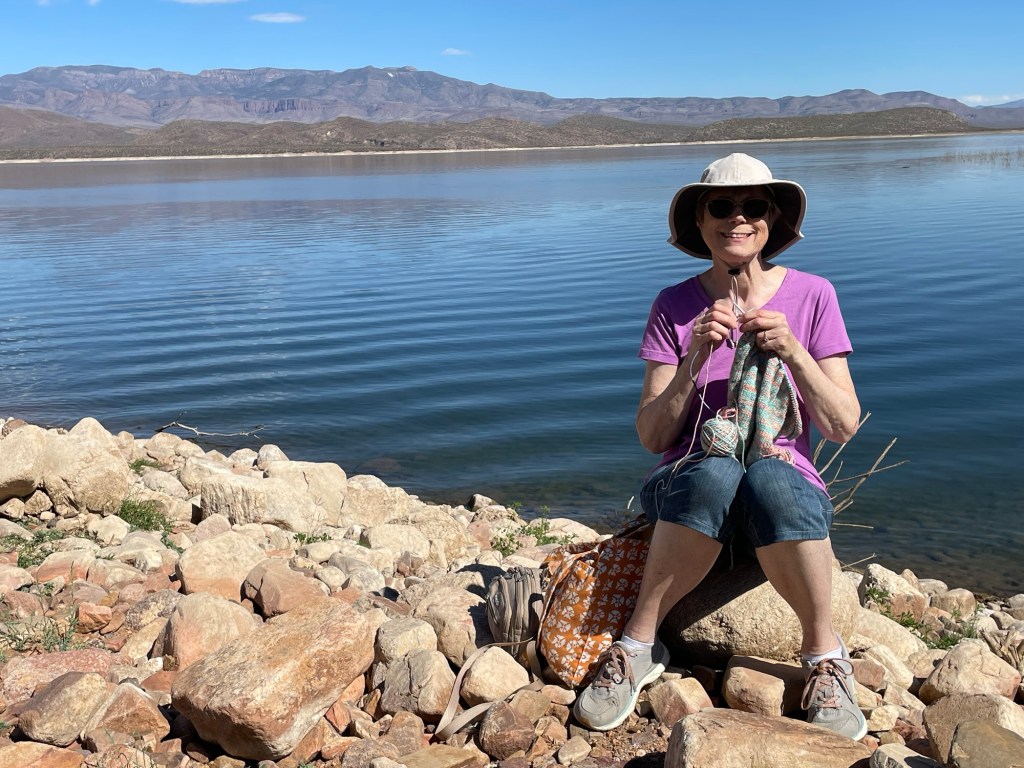
Working on the toddler size sweater at Roosevelt Lake in Arizona
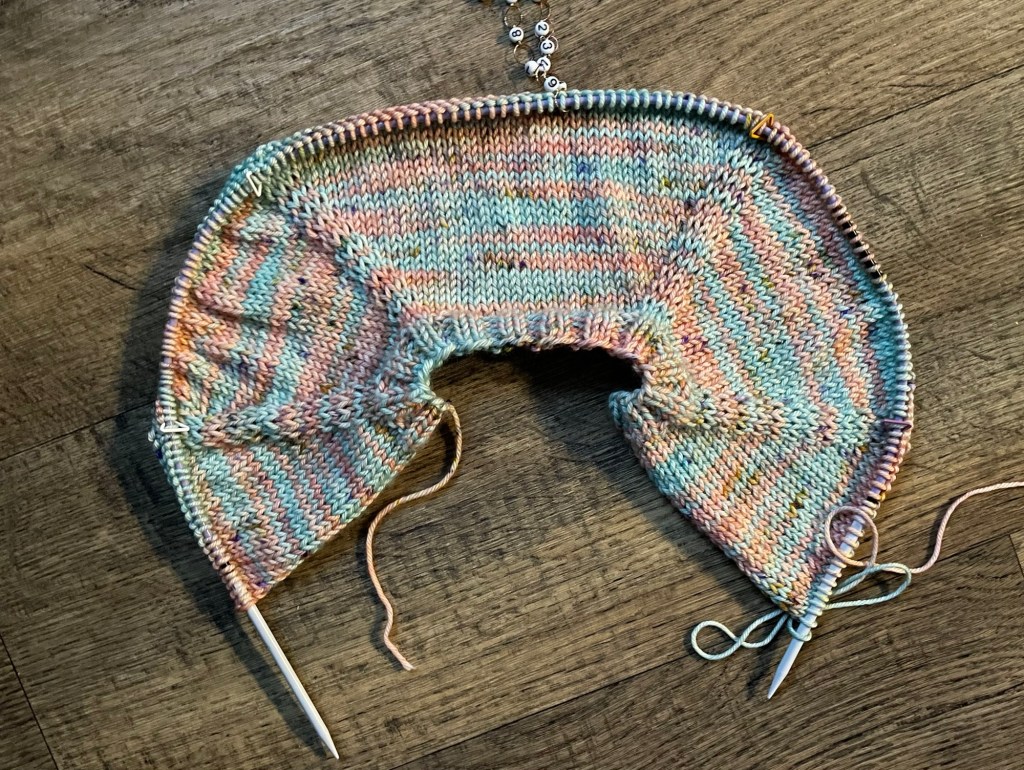
When I got to the sleeves on the second sweater I figured out how to do magic loop with a long connector cord. I do not like using double pointed needles, as I find they are sticking out all over, get caught on things, and I am prone to accidentally pulling a needle out of the stitches by mistake when I am supposed to be grabbing the empty needle. I should have been able to figure it out on the bandana/cowl knit for my sister, but for some reason I had a mental block about it that time.
I finished all the knitting on the second sweater towards the end of March in Arizona. I worked on weaving in ends and sewing the buttons on in the car on the way back home. The top button seems a little too close to the top, and the second button too close to the top button. It was too late to change the placement of the buttons since the button holes were knitted in to the front band. Or maybe it is never too late, but I was not going to re-do the front band. They will just be quirky sweaters.
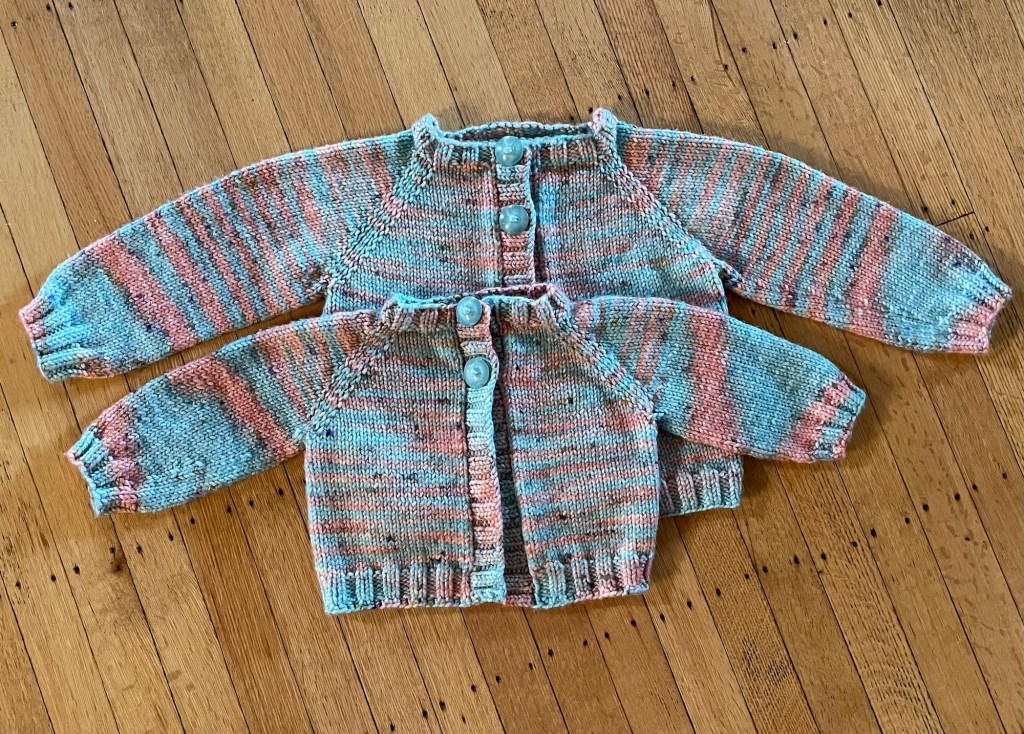
Following is a photo of the two sweaters after blocking.
In the spring when Nora was born, the six months size sweater was too big, and Blair was not into sweaters or jackets. Even when it seemed cold outside to me, she was fighting anyone trying to wrestle her into one, or taking it off if you got one on. Then it was summer and there was no need for sweaters.
We went to their house recently for a few days to help out our son with the girls. Kelsey was on maternity leave all summer, but went back to work in September. James is on leave now for about six weeks. He is a very capable parent, but right after Kelsey went back to work, she had to go on a work trip. James had agreed to do a couple of work tasks that were easier for him to do than to show someone else. We were happy to help.
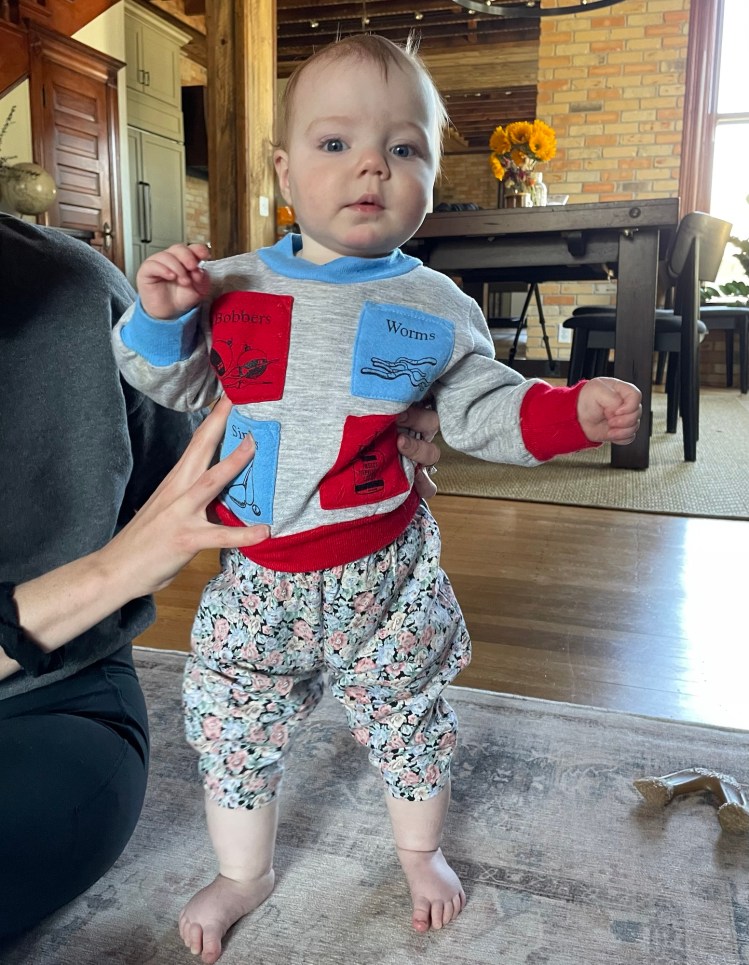
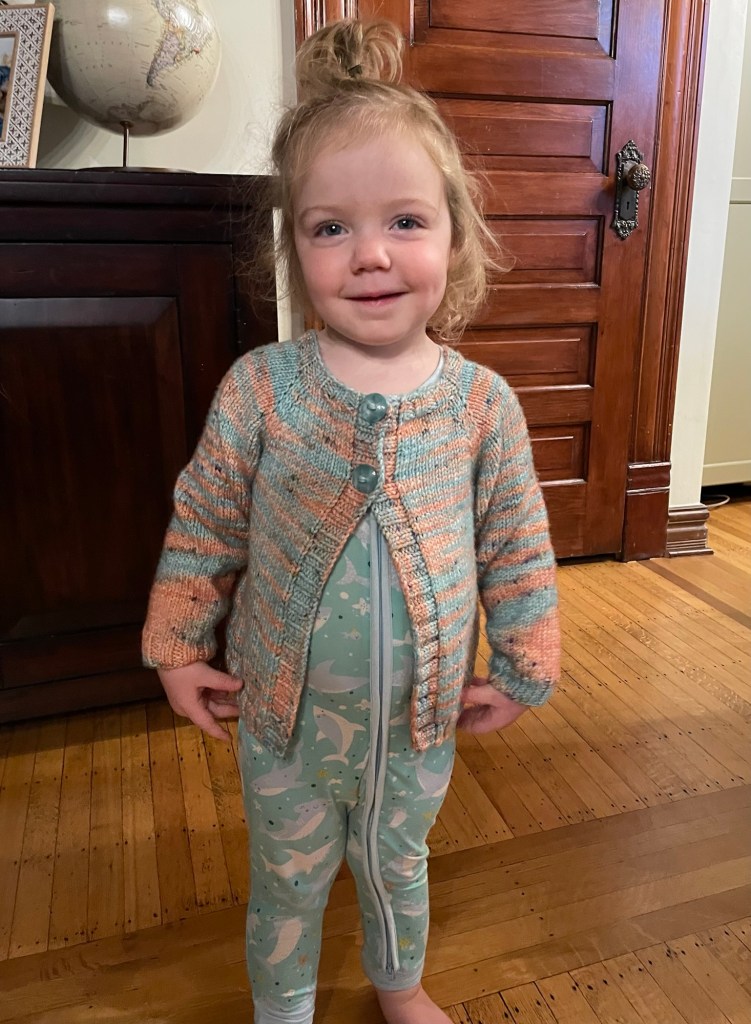
While we were at their house I found the sweaters I had finished in the spring. I was not sure if they were the right sizes, or if Blair would be willing to put hers on. I was very surprised when Blair saw the sweater on the coffee table, and attempted to put it on over her pajamas. The colors matched and it fit reasonably well, if not a little big. I was very relieved that it was not too small.
The nice thing about five month old babies is you can dress them up however you want.
I put the infant sized sweater on Nora, with the flowered pants. The sweater was a little big, and the pants were a little small, and the patterns are a bit much together, but the outfit works.
Blair was willing to put her sweater on again for a photo with Nora the next morning. Yay! They look cute. Not sure how much use the sweaters will get, but I had fun knitting and photographing them.
This post is about the second part of our RV vacation with friends in August. I wrote about the first eight days in Yellowstone National Park here. This all seems like ages ago now.
After leaving our campsite near West Yellowstone, we drove south to the Tetons for four nights. Two of the four couples in the group had a different itinerary and were on their own by then. Harvey and Glenda moved with us on Friday, August 22, to Gros Ventre Campground inside Grand Teton National Park. There is also a road, a wilderness area and a mountain range with the same name. It is French, so we were not sure whether the locals pronounce it the French way, or an Americanized way. Some people were saying it like “Grose Ventrey”. The camp host pronounced it the French way, sounding like “Grow Vont”.
This campground has electric hookup only, like the campground in West Yellowstone. We were only going to be there for four nights, so the amount of water in the fresh water tank was less of a worry. The campsites had cottonwood trees rather than pine trees, and varied in size. We both ended up in campsites that were smaller than we had hoped for that were a challenge to back into.
Harvey and Glenda arrived and got set up early enough to head into Jackson Hole for a night on the town. Being Friday evening, there were many people out and about. Glenda reported that the most common attire for women she saw was a skimpy outfit with cowboy boots and a cowboy hat. Apparently I did not bring the right clothes. We stayed at the campground, as we had arrived later and needed time to get settled.
Our campsite at Gros Ventre Campground
After we had been there a couple of nights, we shook our heads as the biggest fifth wheel trailer ever arrived after dark, and tried to back into what seemed like a too small spot across from us. There were multiple people in their party outside directing, with many loud shouts of STOP. They made it into the space eventually. Wayne said they had an accessory called a “slider hitch” for right angle backing in, otherwise I do not think it would have been possible.
The Shoshone people had a name for this area that meant “many pinnacles”. In the early 1800’s French trappers noticed the three largest peaks, and what came to their mind was “Les trois tétons”, or in English, the three breasts. In the 1880’s white people settled in the area. Grand Teton National Park was formed in 1929, encompassing the major peaks of the Teton Range and the Jackson Hole valley.
Saturday, August 23
Now that the RV fresh water tank was full again, I was able to take a (short) shower. The cell service was even worse at this place, but the camp bathroom was nicer. It was very clean, and had actual flush toilets and a sink with running water. Harvey and Glenda and Wayne and I spent the day touring together.
Our first stop was a historic log style Episcopal church known as Chapel of the Transfiguration. With gorgeous views of the Teton mountains from inside and outside the building, it is popular for weddings and photography.
Chapel of the Transfiguration
Next on the agenda was Menor’s Ferry and General Store, just across the way from the chapel. In the early 1900’s Bill Menor operated a store, and a ferry service across the Snake River. Bill’s store was painted with whitewash from his brother Holiday’s lime-kiln. Apparently Bill did not have a pleasant attitude. Holiday was known to say “My Partner’s Mean, but I’m Menor”.
Bill Menor’s general storeReplica (?) of Bill Menor’s ferry boat
On the way to Colter Bay Village, we had lunch at a lake shore picnic area. Colter Bay Village on Jackson Lake is a big complex with lodging, camping, a visitor center, hiking trails, stores, a marina, boating and more. We went on a boat ride on Jackson Lake. The views were beautiful despite some haze from a wildfire to the south. The naturalist on board shared a lot of interesting information about the lake and area. I did not write anything down, but I remember she said that because Wyoming does not have any food production, water from Jackson Lake provides irrigation to Idaho in exchange for food produced there. Depending on the weather conditions, the level of the lake can change drastically. We cruised fairly close to the highest peak of the Teton range, stopping for a photo opportunity. The naturalist talked about hiking trails on the mountain, and a current problem of a porcupine frightening hikers camping overnight. The porcupine has been stealing shoes from campers. As of the time of our boat cruise, at least 50 shoes had been reported missing.
After the boat ride we headed back to the campground, seeing some elk on the way. I took a photo of the pretty view, but it does not have any elk in it.
There was a ranger program in the evening by a NASA employee talking about the James Webb Space Telescope that was launched in December 2021, and the Hubble Space Telescope launched in 1990, including a slide show. She had a job working directly with the James Webb telescope and was super enthusiastic about the latest discoveries and shared many cool photos on a huge screen.
Sunday, August 24
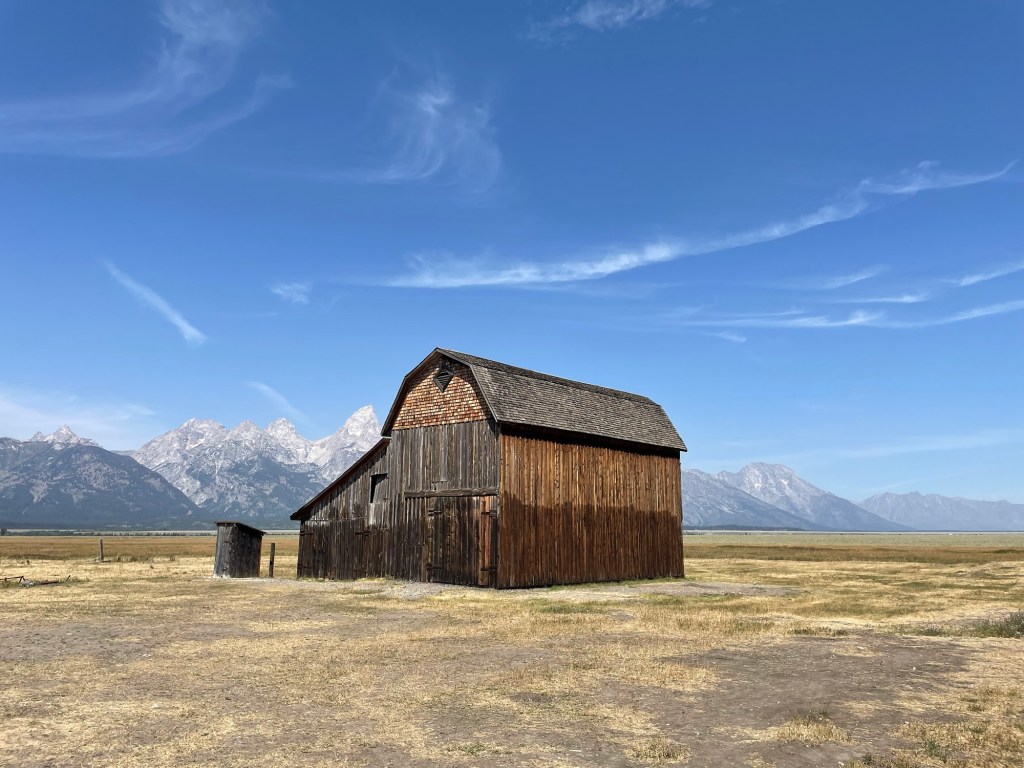
We spent the day on our own. The first stop was Morman Row historic district, a Mormon settlement beginning in the late 1800’s. At one point there were 27 homesteads, with families working communally. Some of the houses and barns are still standing. As everywhere, the views were beautiful and I can understand why they wanted to settle there. In the end the conditions were too harsh.
There was a group of plein air painters there, or painting outside. My sister has been learning oil painting and spending a lot of time plein air painting, so I had to share the information on this group with her.
The next stop was Cunningham’s Cabin, an Appalachian style log cabin built in the 1880’s. After looking at the cabin, we walked over to check out some horses that were grazing nearby.
Cunningham’s Cabin
The next point of interest for the day was Craig Thomas Discovery & Visitor Center, also known as “Moose Entrance”. We looked around at the displays and watched an educational movie. Later we saw an actual moose off the road. Any photos would have been a brown blob, so instead here is a photo from one of the displays inside the visitor center.
Dinner was eaten at the RV again, followed by another ranger talk. This one was about animals in the park, including beavers. Beavers are the second largest rodents weighing up to 110 pounds. Beaver dams contribute to the formation of necessary wetlands. They were almost extinct at the end of the 1800’s due to the popularity of the Top Hat. Top Hats worn by gentleman were made out of felted beaver pelts. The production process used mercury, resulting in many workers being poisoned, thus the term “mad as a hatter”.
The Wikipedia article about Top Hats had the following photo.
Monday, August 25
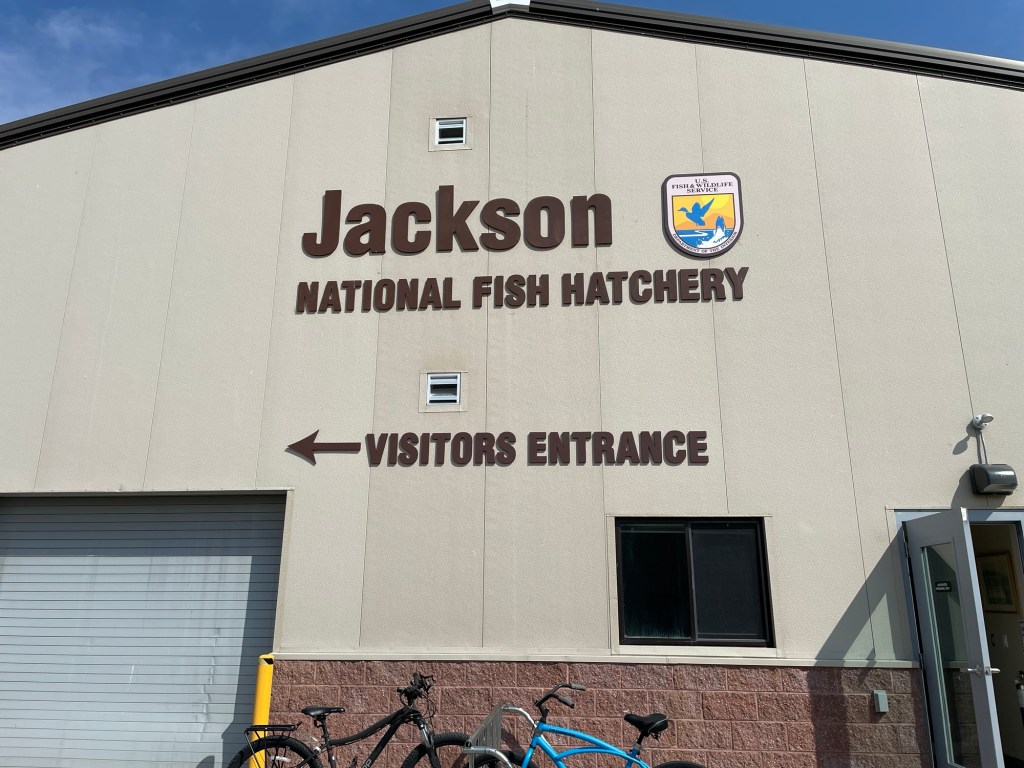
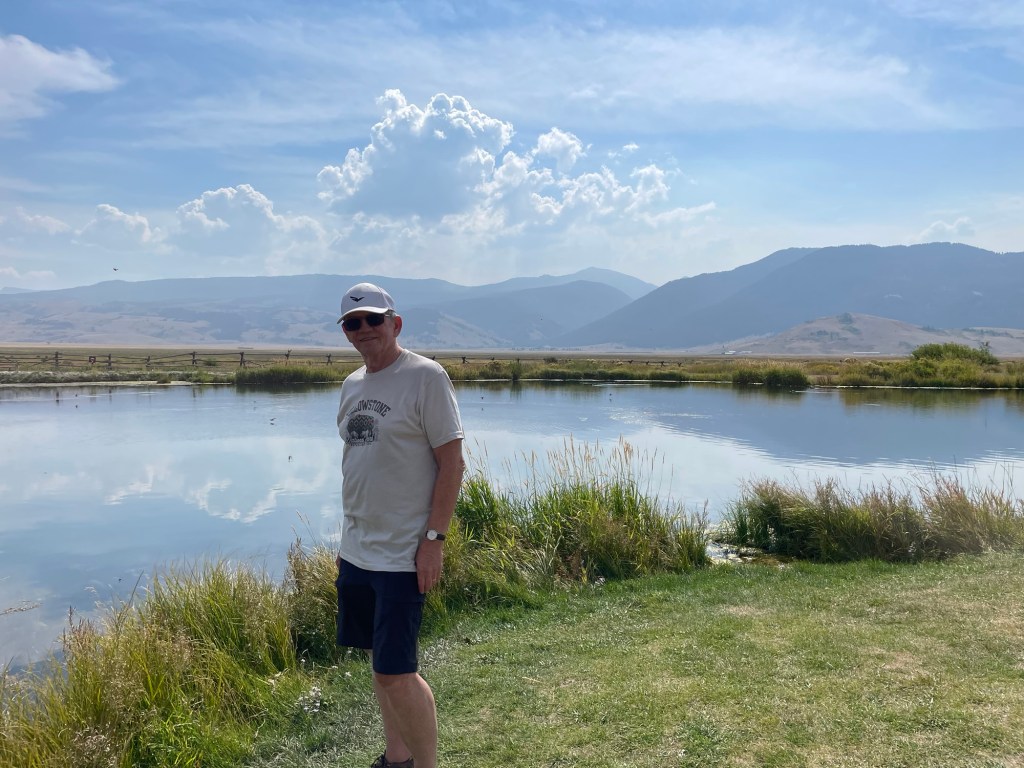
We spent the day with Harvey and Glenda. Wayne is a big fisherman, so at his request the first stop was the Jackson National Fish Hatchery. Inside there were tanks with native cutthroat trout at various stages of life, before being released into various Wyoming lakes and streams. I did not get any photos inside the building. The tour we had there was by a guy who is actually a bear expert. Harvey ended up telling him about the time he and Wayne helped with a rescue after a Grizzly Bear attack in Glacier National Park in the 1970’s. We have all heard this story too many times.
At the Fish Hatchery
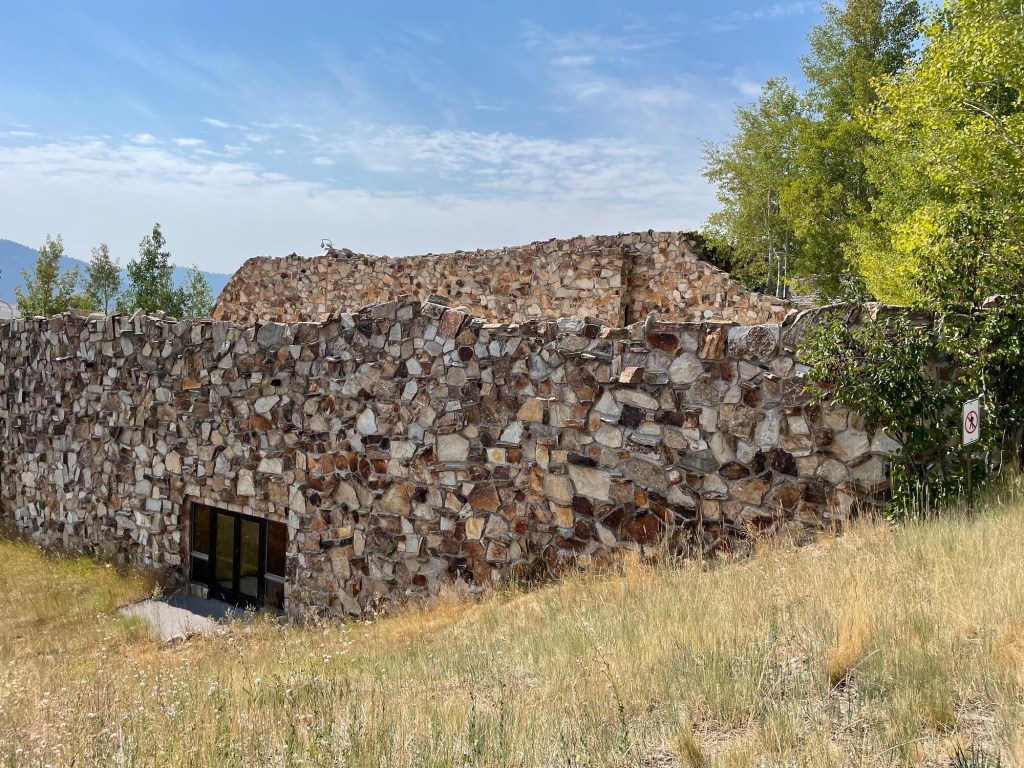
After the Fish Hatchery, Glenda requested that we stop at the National Museum of Wildlife Art that we had passed by a couple of times. The back of the outside of the building was very unique and cool.
The back of the National Museum of Wildlife Art
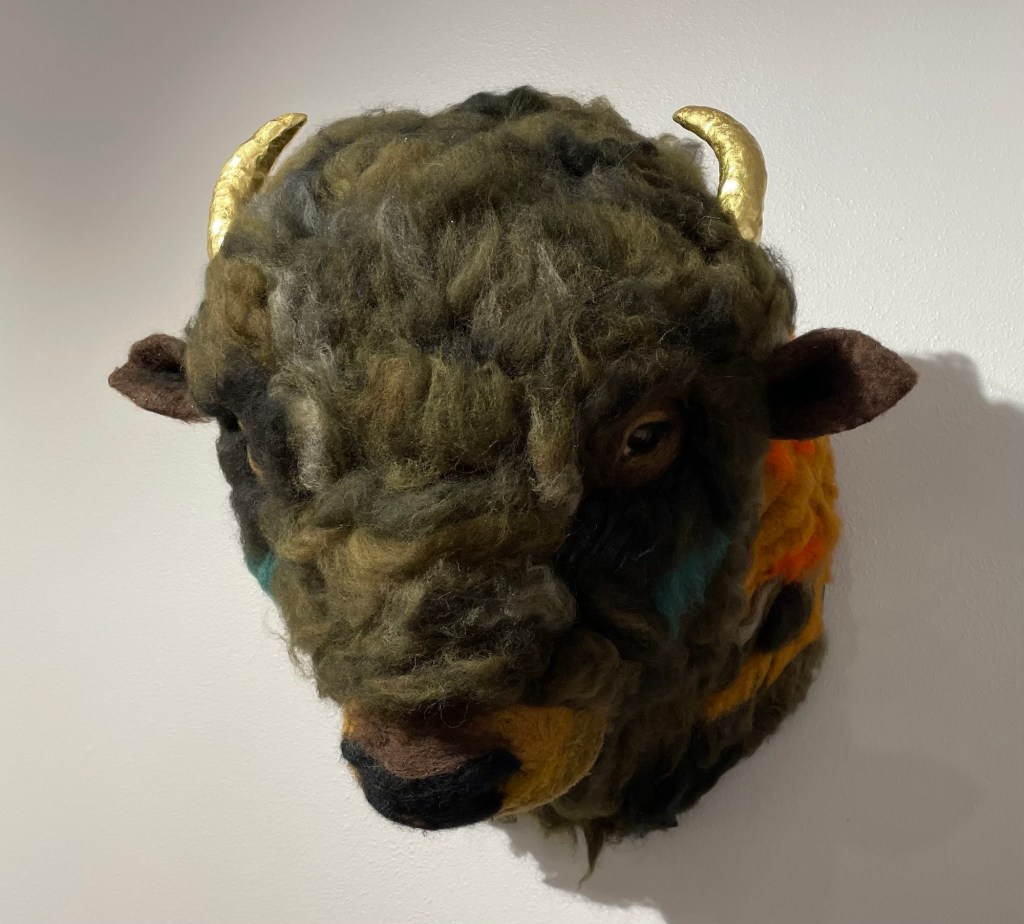
There were many paintings, plus a display of fiber art. I liked this felted bison.
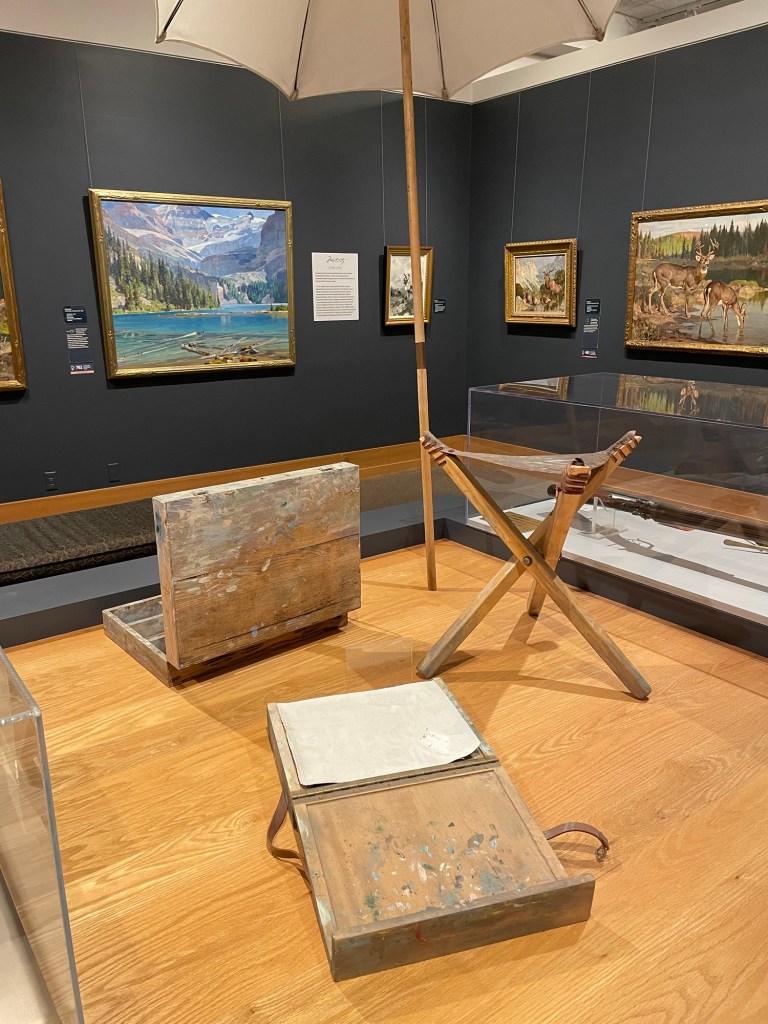
There was a display about Carl Rungius, an early plein air painter of wildlife, so I had to take photos for my sister.
The next destination was at my request, “Knit on Purl” yarn shop in Jackson Hole. The shop was originally on Purl street. It is on a different street now, but they kept the clever name. I bought some hand dyed sock yarn in colors inspired by the Tetons, and another skein in a plain pretty shade of gold.
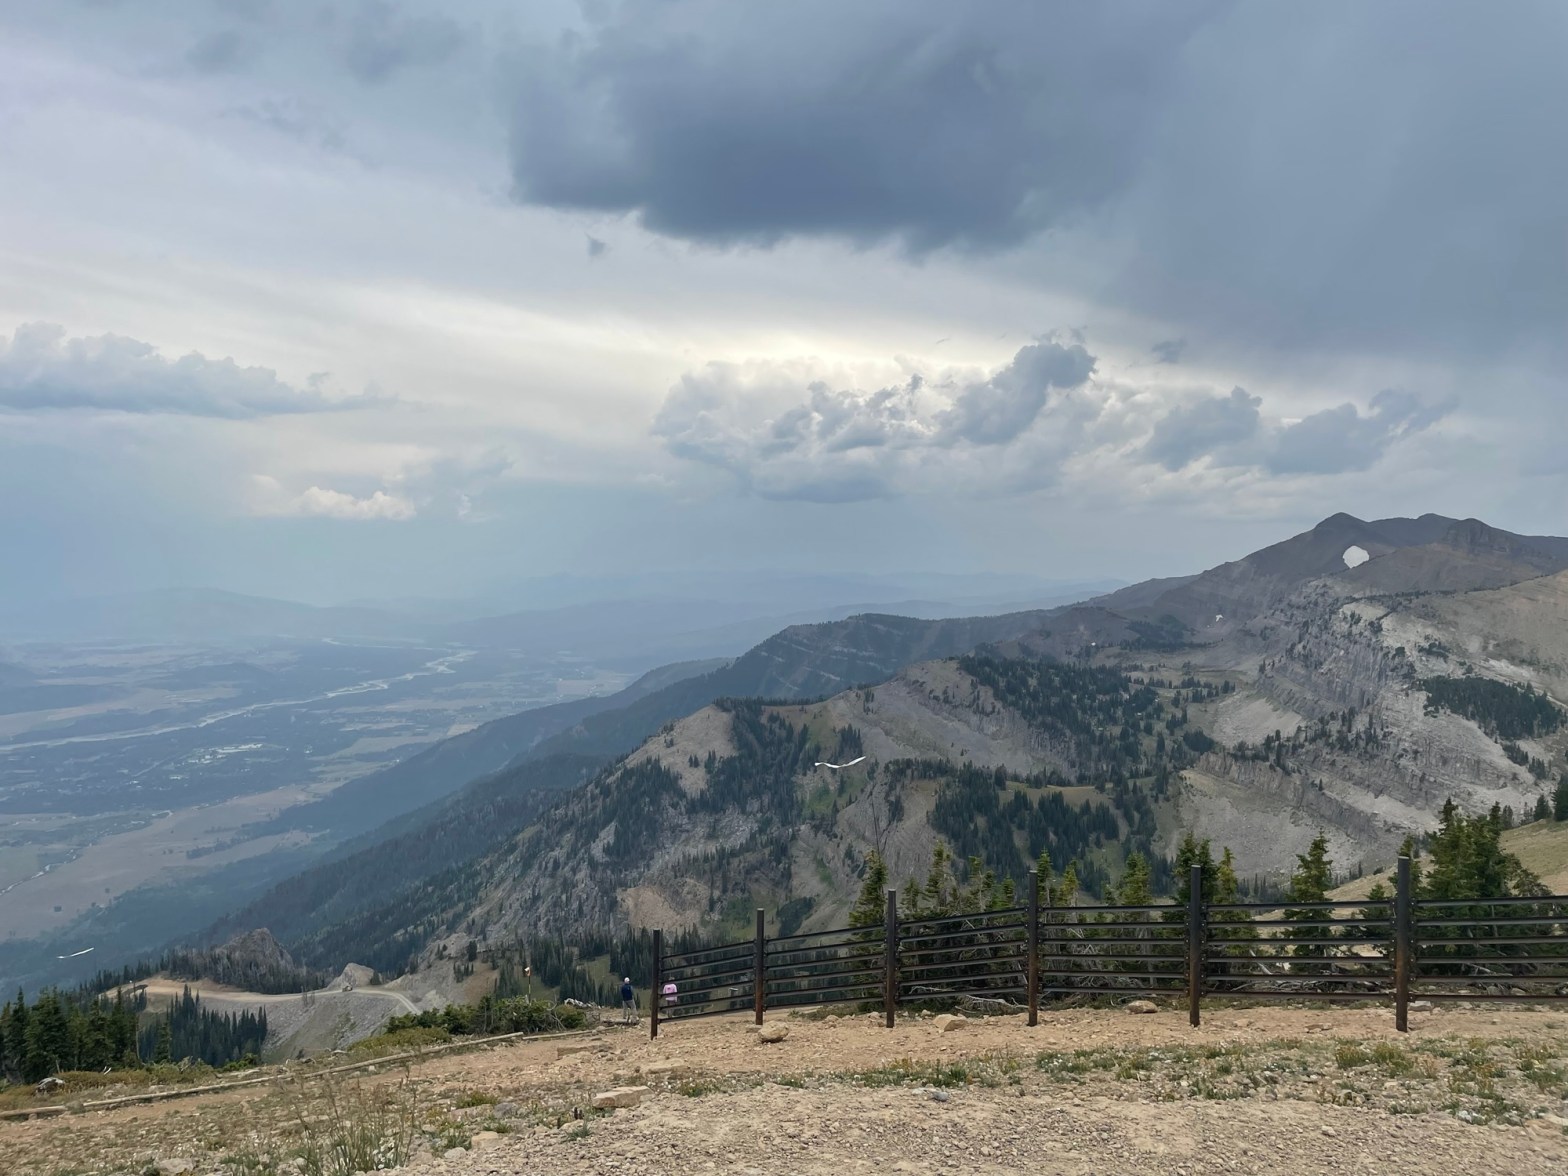
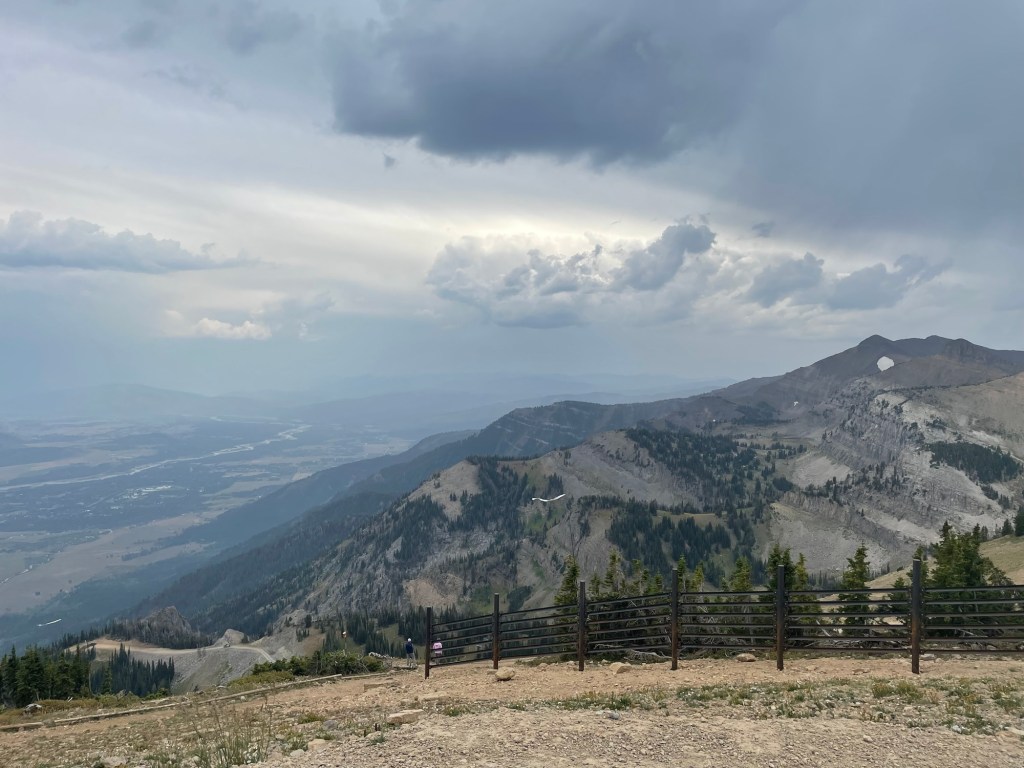
After Glenda and I were done at the yarn shop, we all went to the Teton Village ski resort to look around, and go on the Tram ride to the top of the ski hill. There was a discussion about whether we would be able to see anything since the wildfire smoke had gotten progressively worse each day. There were many mountain bikers using the ski hills and the chair lift. There were special hooks on the chair lift to carry bikes up the hill. We decided to go for it. Despite the haze, the view was amazing from the top of the mountain.
There is a small restaurant at the top that specialized in waffles, of all things. We had to get a waffle and beverage.
After the tram ride it was time for an early dinner at Snake River Brewing in Jackson Hole.
Tuesday, August 26
We checked out of Gros Ventre campground at about 11:30 am, after waiting in line to use the dump station. We headed east through Wyoming. I brought sandwiches to eat lunch on the road.
Stopping for dinner while towing the RV requires finding a place with a big parking lot, or open space nearby. There are long stretches with no services in Wyoming, but we ended up finding the “Cowboy Bar & Grill” in a town called Buffalo. As we were leaving, I spotted a building across the way that caught my eye. It was a fiber mill! The “Mountain Meadow Mill” advertised 100% American made products from Wyoming grown wool, a giftshop, and tours of the mill. I would have loved to see the place but it was closed for the day.
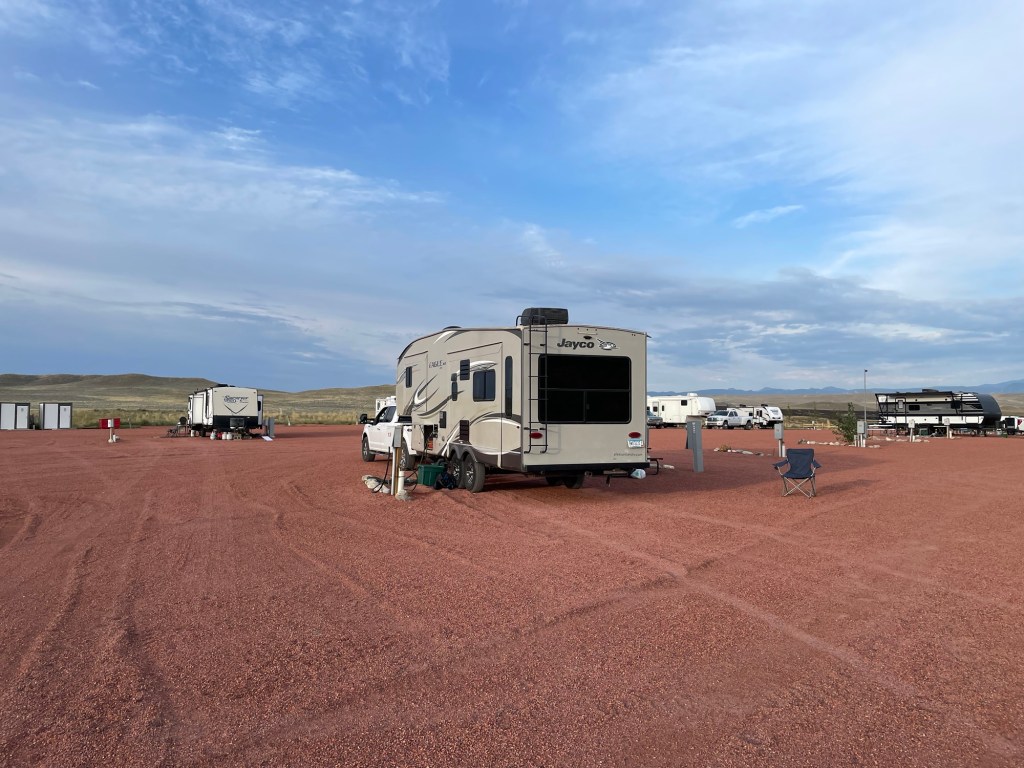
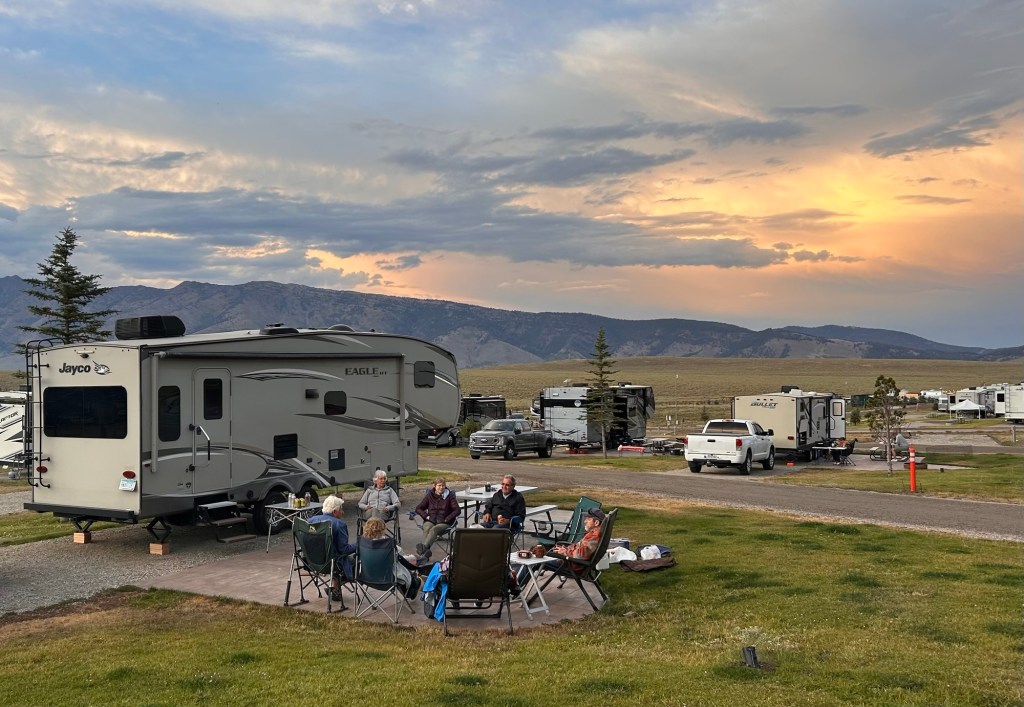
The weather was conducive to sleeping in the RV for the night, but we had a stressful time searching online trying to find a camping place that seemed right. Finally we located a place called Bighorn View RV Campground that was off of Interstate 90 east of Buffalo, Wyoming. It was starting to get dark out, and we were not sure we were going the right way as there were no signs, and we were directed down a side road in the middle of nowhere. We arrived to a big parking lot with campsites marked off with full hookups stations, just in time for a beautiful sunset. There were not many other trailers there, so we picked a spot off to the side and had plenty of space. We connected to electricity, but kept the truck attached to the RV and did not open the slides. There were two very nice portable bathrooms with showers across the parking lot. The price was only $50 including tax, so we will make note of this place for future reference.
Sunset upon our arrivalReady to leave in the morning
Wednesday, August 27
We pulled out first thing in the morning for the last leg of this RV trip, driving all day across the rest of Wyoming, South Dakota, and into Minnesota. After stopping to get a few groceries in Fergus Falls, we made it home late in the evening. It was a successful and memorable trip. It was also good to sleep in our own bed after two weeks.
There are no more big vacations scheduled at this time, but after a week home we went down to the Twin Cities for a few days to help out with the grandchildren. Kelsey went back to work full time after being on maternity leave all summer. James began six weeks of full time parenting right after Labor Day. One day after starting work, Kelsey had to go on a short work trip. At the same time. James had agreed to do some work tasks that that were easier for him to do himself than to train someone else. We were happy to do grandparenting duty. Now we are back home and summer is over. Although we are having a stretch of warm days, it feels like fall. I am looking forward to having time at home to crank more socks, and weave on my floor loom again. First I have to finish a couple of projects I started in the middle of summer.
In August we went on a two week Yellowstone and Tetons RV vacation with friends. We had a great time, and it would not be surprising if we do another group trip. With that said, this trip was not my idea. Wayne and his friends came up with the plan to meet at Yellowstone. I like Yellowstone. I have already been to Yellowstone two times. I would have picked a different destination I have not already visited. Wayne came up with the itinerary, made all the arrangements, and researched possible activities. I was so busy over the summer that I did not think about it until it was time to pack for the trip.
We bought our 5th wheel trailer four years ago, with the idea that we would be able to use it for snowbirding, as well as for other vacations. It turns out that this is the first time we have used it, other than at a 55+ resort in Arizona during the winter.
As the time got closer to departure day, I looked forward to getting away after a very full summer. Packing was easy using my very detailed spreadsheet of what is stored in the RV, and what I need to assemble. It was stressful due to regrouping after hosting a big family get together at our house and the cabin, and preparing for two different groups of people to use our house while we were gone. I was also working hard to finish a weaving project in order to post about it before we left.
We got the truck and RV loaded and prepared as much as possible the night before, including connecting the 5th Wheel Trailer to the hitch in the bed of our Ford 150 pickup truck.
Wednesday, 8/13/2025
We pulled out of our driveway around 7:30 am. It was easy driving from western Minnesota, going west on Interstate 90 across North Dakota and Montana. In four trips towing the RV to Arizona and back, Wayne has done all the driving. This time I gave him a break for about two hours, my first time driving while towing the RV. All I did was drive onto the freeway, and later off the freeway. It was not hard, as you can hardly tell the 5th wheel trailer is there, other than that you cannot see anything out the rear view mirror. The giant side mirrors make up for that.
Of course I had a knitting project to work on during the trip. I am attempting to make knitted and felted slippers. Eventually there will be a blog post, assuming they work out. Or maybe even if they don’t.
We had planned on sleeping in the RV for one night while en route, using the bed and toilet without unhooking the trailer from the truck or opening the slides, and without any utilities. When we are on the way to Arizona it is too cold, so we have never done this before. As we were making our way across Montana it was in the upper 90’s Fahrenheit, and at one point the car thermometer registered at 100 degrees. It would not cool off fast enough or far enough to make it habitable inside the RV overnight, so instead we booked a hotel room near Columbus, Montana, west of Billings.
Thursday, 8/14/2025
Cell phone service was very limited as we drove across Montana. We had trouble touching base with our friends, and Wayne had to give up on a phone call with his cousin that kept dropping.
We stopped at a Safeway store in Bozeman for groceries, knowing that prices would be higher in the town of West Yellowstone near our campground. When walking past the butcher counter, an employee noticed the Arizona sweatshirt I was wearing. He wanted to chat about where we were from and our connection to Arizona, being he had lived there for a time. His sister lives near where we snowbird in Gold Canyon. He gave us some bags of ice, so we did not have to buy any. We had an extra cooler in the truck, but also bought a styrofoam cooler to hold more cold food.
About an hour from our destination, we stopped at a pullout along a stream and ate sandwiches I had brought from home.
Lunch break
By mid afternoon on Thursday, August 14, we arrived at Baker’s Hole, a National Forest campground about three miles from West Yellowstone. One of the other couples, Steve and Sally, had arrived a few days earlier and already scoped out the area. The third couple staying in the same campground, Harvey and Glenda, arrived by early evening. Our campsites were all next to or across from each other.
The campground was how I envision camping, with spacious campsites and many pine trees. The sites have angled spaces which is nice for backing the RV into place. My only complaint is that it was located quite close to the highway, and there was a steady stream of traffic noise all the time, except during the night. There was also a small airport nearby. The other first world problem is that there was no wifi and the cell service was very bad. It was OK to be off line for most of the trip, but frustrating to not be able to check the weather forecast in the morning.
Our Fifth Wheel Trailer
Setting up the RV is a slow process for us, but we did not have any problems. That does not always happen. The campsite had electric hookup, but no water or sewer. This was new for us. There was a place to fill our RV water tank at the entrance, but no way to add more water to the tank in an efficient way. We were filling up jugs of water for drinking and cooking, rather than using the water out of the faucet from the tank. Also, we were only using the toilet at night and only for peeing. There was an outhouse nearby that we used during daylight hours, but no campground shower facility. Showers in the RV had to be very short to conserve water.
Steve and Sally invited us to dinner at their campsite, across from ours. It was nice not to have to figure out dinner after just getting set up. I contributed green beans from our garden that had traveled from Minnesota and needed to be eaten.
Friday, August 15
Steve and Sally invited the whole group to their place for “Cowboy Breakfast” the next morning. They have an ALiner pop up camper which is smaller than what the other couples have, but very cozy and efficient, and can be towed by their Subaru. They have a very complete setup for outdoor cooking. The forth couple in our group, Loren and Linda, drove over to join us for breakfast from where they were staying in a private campground about 20 miles away.
Steve and Sally making Cowboy Breakfast
After breakfast and some planning we all headed out for a day of sightseeing inside Yellowstone National Park, with two couples in our truck and two couples in Loren and Linda’s truck. Sometimes there are long lines to get into the park, but we breezed through the entrance with our senior passes and starting out later in the morning.
Most people have at least heard of Yellowstone National Park. For the record, it is located mostly in Montana and is known for the wildlife, and for the variety and number of geothermal features including geysers, mud pots, and colorful steaming thermal pools. The highest elevation lake in North America is located in Yellowstone. There are rivers, waterfalls, and canyons. It sits on the Yellowstone Caldera, the largest super volcano on the continent, now considered dormant. It is a Unesco World Heritage Site, and a must see amazing place. I took a photo of the map below that I saw displayed somewhere in the park.
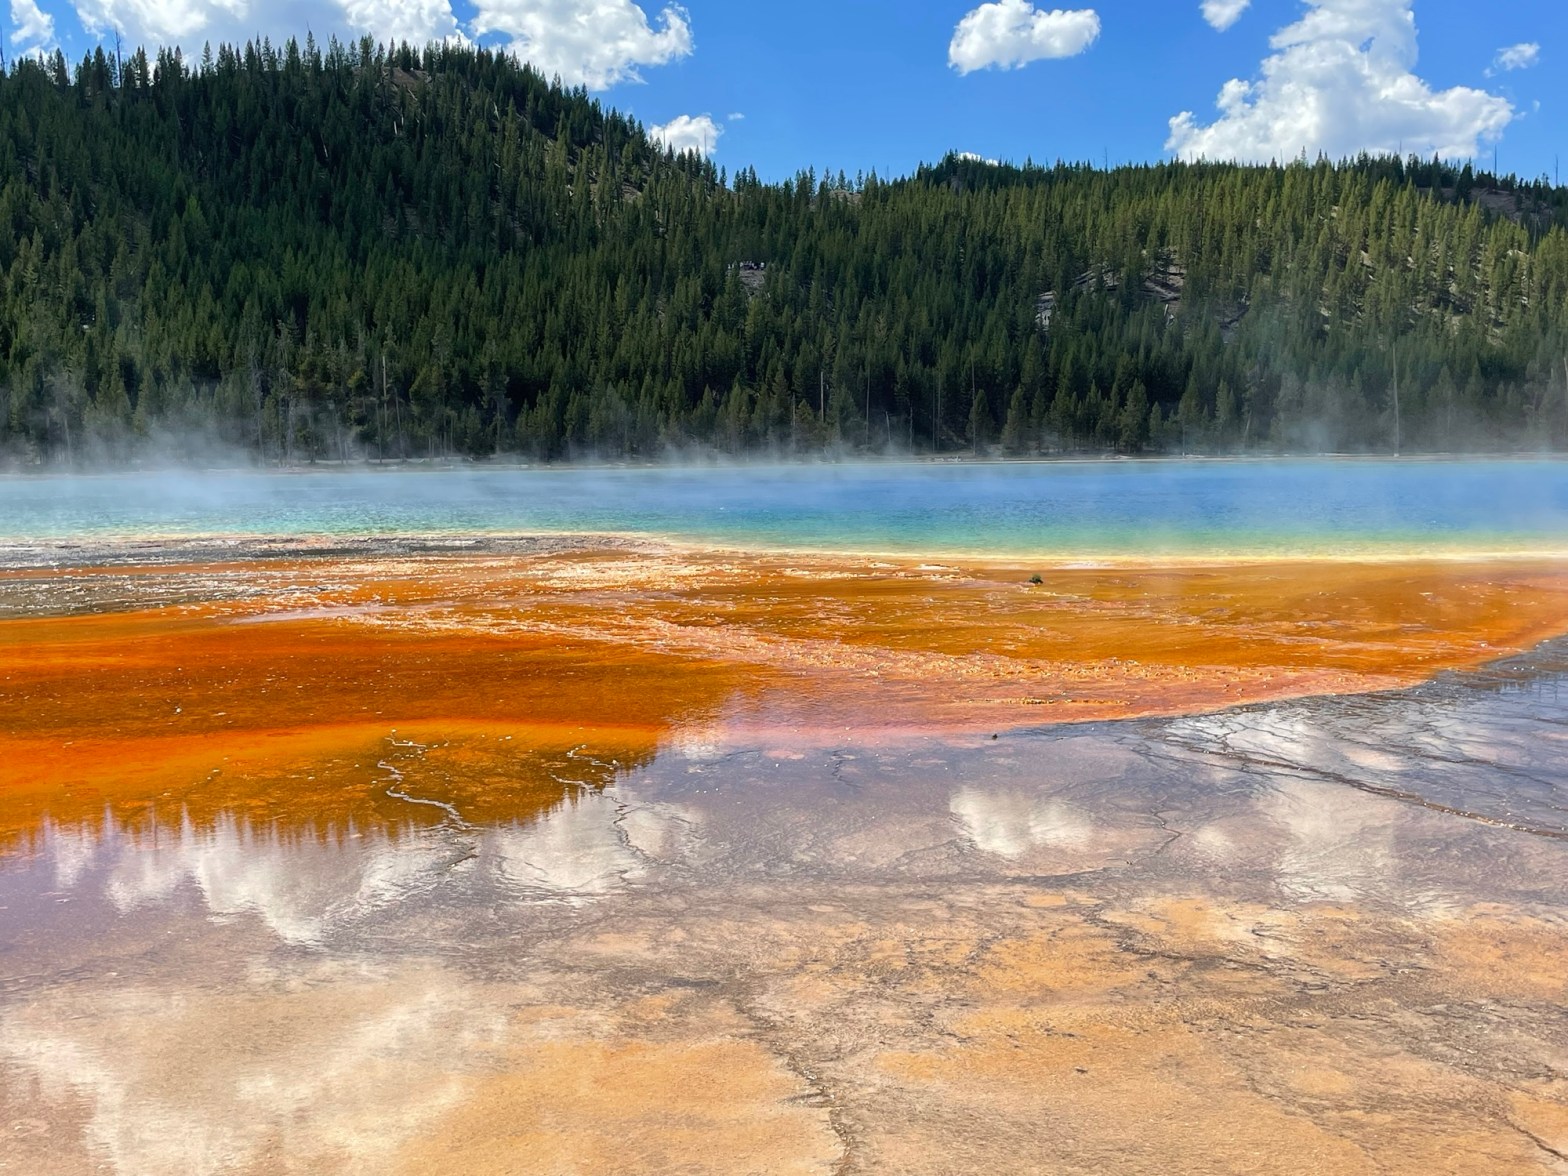
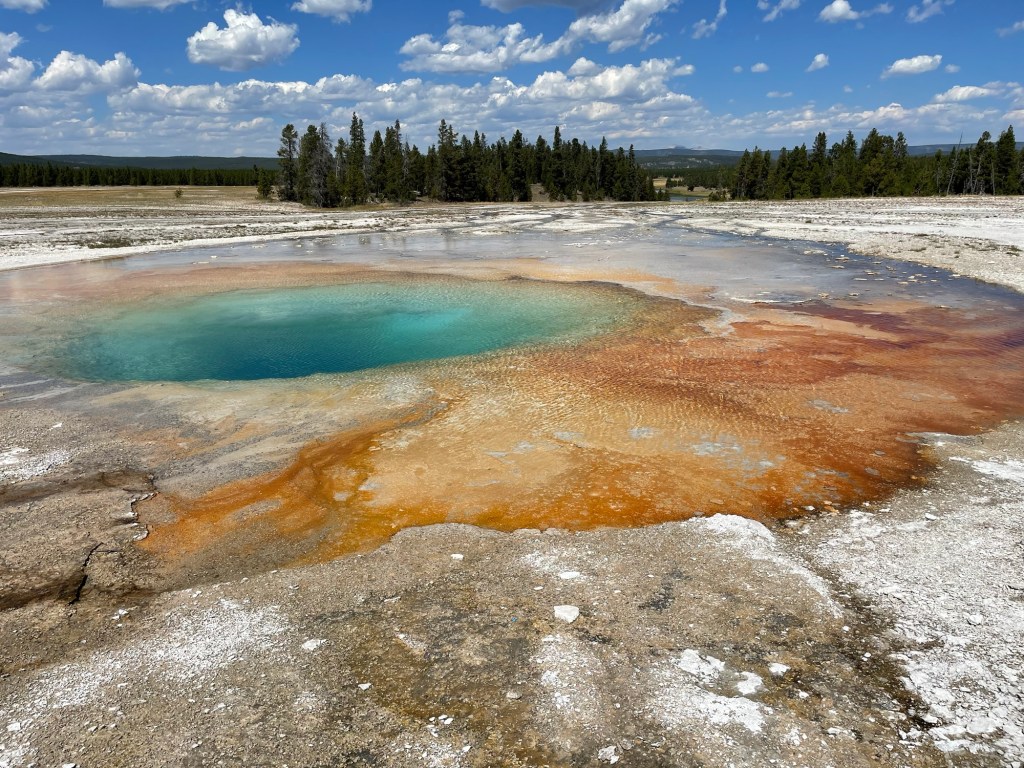
The first stop of the day was Midway Geyser Basin, an area with pools of steaming water and brilliant colors. The Grand Prismatic Spring is huge and blue and steaming, surrounded by green and orange and gold. It was impossible not to take too many photos from various vantage points along the boardwalk path.
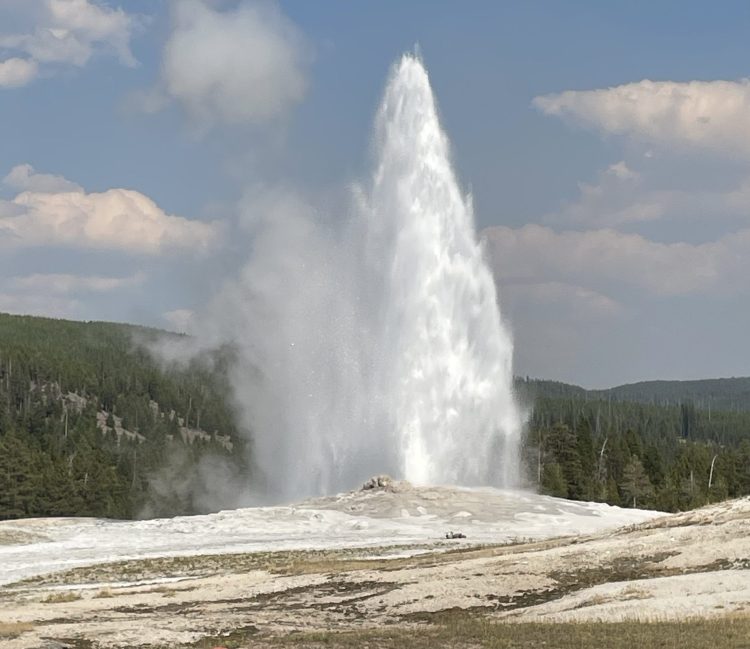
Next on the agenda was the Old Faithful, where there is a complex of buildings including lodging and a visitor center. And good cell service. At the visitor center we watched an educational movie about the park, and then went over to watch the eruption of the Old Faithful geyser at the expected time. Old Faithful is not the highest geyser in the park, but it is more regular and predictable.
Old Faithful
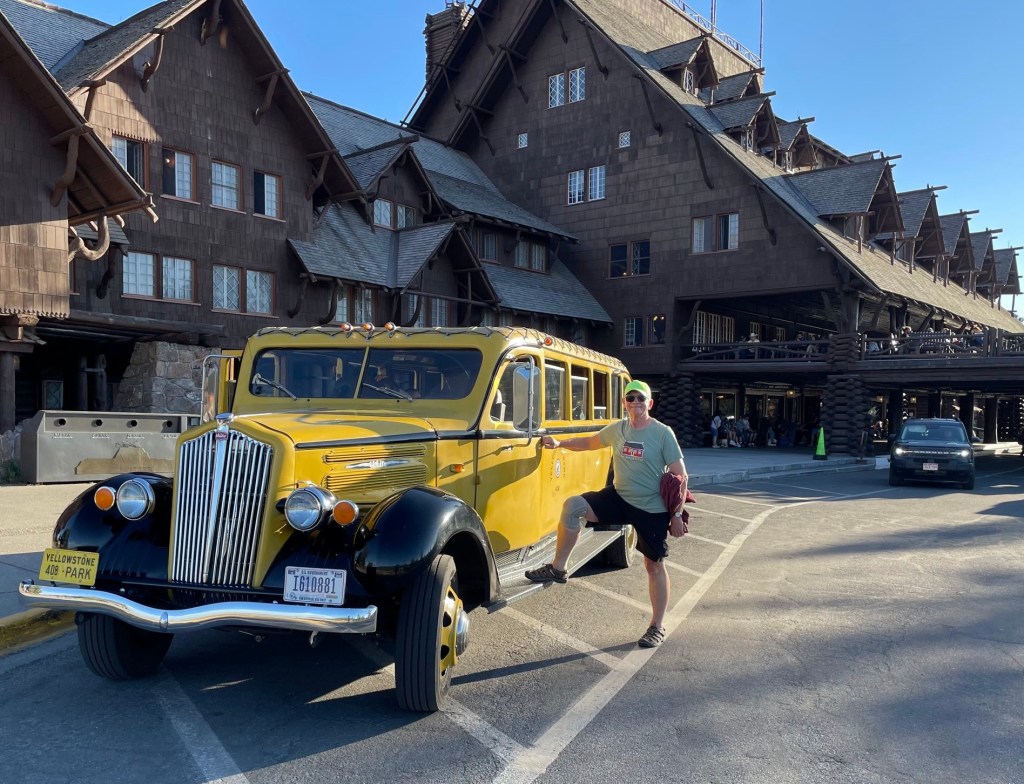
It was hot outside, so in order to get out of the sun, we had beverages (and in my case an ice cream cone) followed by Happy Hour inside the Old Faithful Inn. Old Faithful Inn is the earliest classic log cabin style national park lodge, build in 1904. After we got home, my phone knew that I was googling information on Yellowstone, and in my feed was the link for a story about the Old Faithful Inn on CBS Eye on America. There is some good video and detail about the building for those interested. I found a photo online of the original facade of the Old Faithful Inn.
Wayne in front of a vintage style Yellowstone van at Old Faithful Inn
I forgot to bring something I needed for my knitting project. While we had cell service in the Old Faithful area, I googled for a local yarn shop in West Yellowstone. West Yellowstone Fabric & Yarn came up, but it is online only. They were advertising some yarn with colors inspired by scenes in the park, hand dyed by Jeanne from Destination Yarn in Ohio. I would have bought a skein of the “Grand Prismatic” colorway, but it was out of stock.
We considered eating an early dinner at the Old Faithful Inn, but the food options were limited. Instead we headed for the Slippery Otter Pub in West Yellowstone. Steve and Sally had eaten dinner there the night before and recommended it.
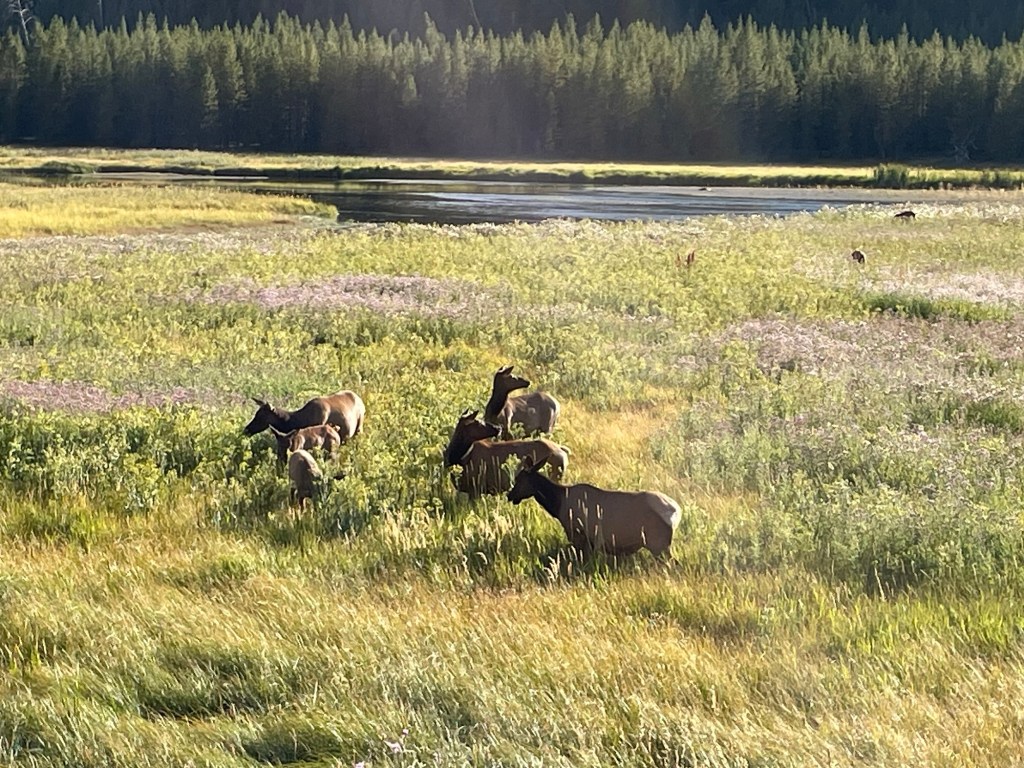
On the way out of the park, there was a back up near the exit. It turned out to be due to people slowing down and/or pulling over to look at wildlife on both sides of the road. There was a herd of elk on one side of the road, and possibly a grizzly bear on the other side. One person in our car may have seen the bear across a stream, up a bank and foraging in some bushes. I did not see it.
Elk by the side of the road
Saturday, August 16
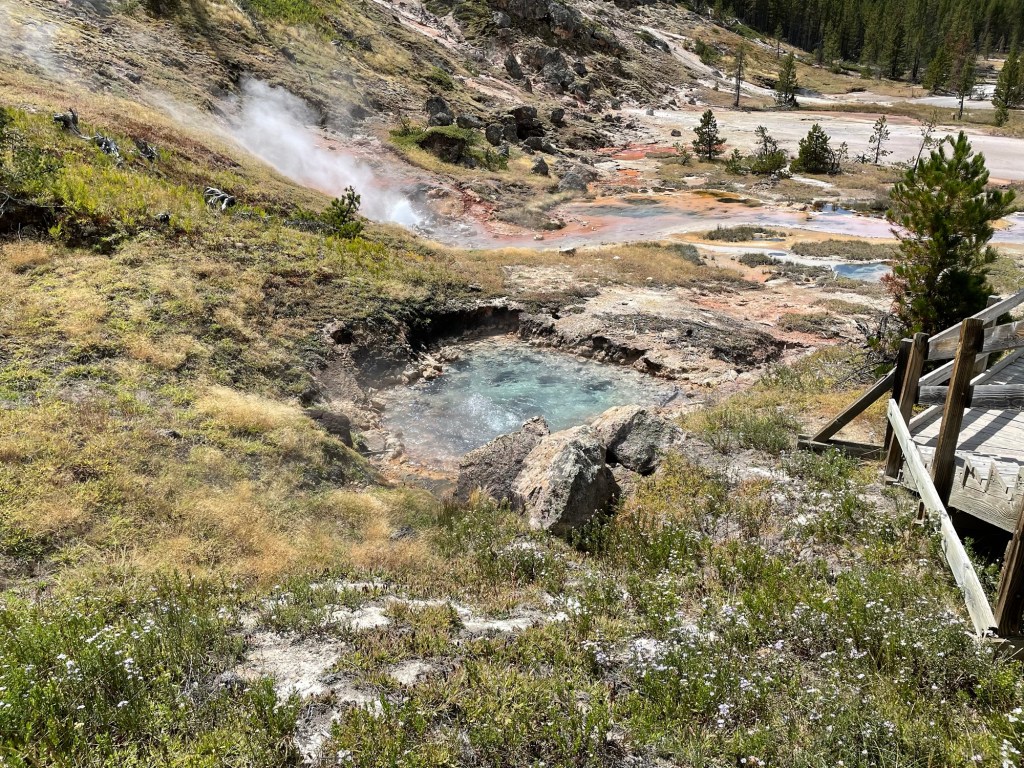
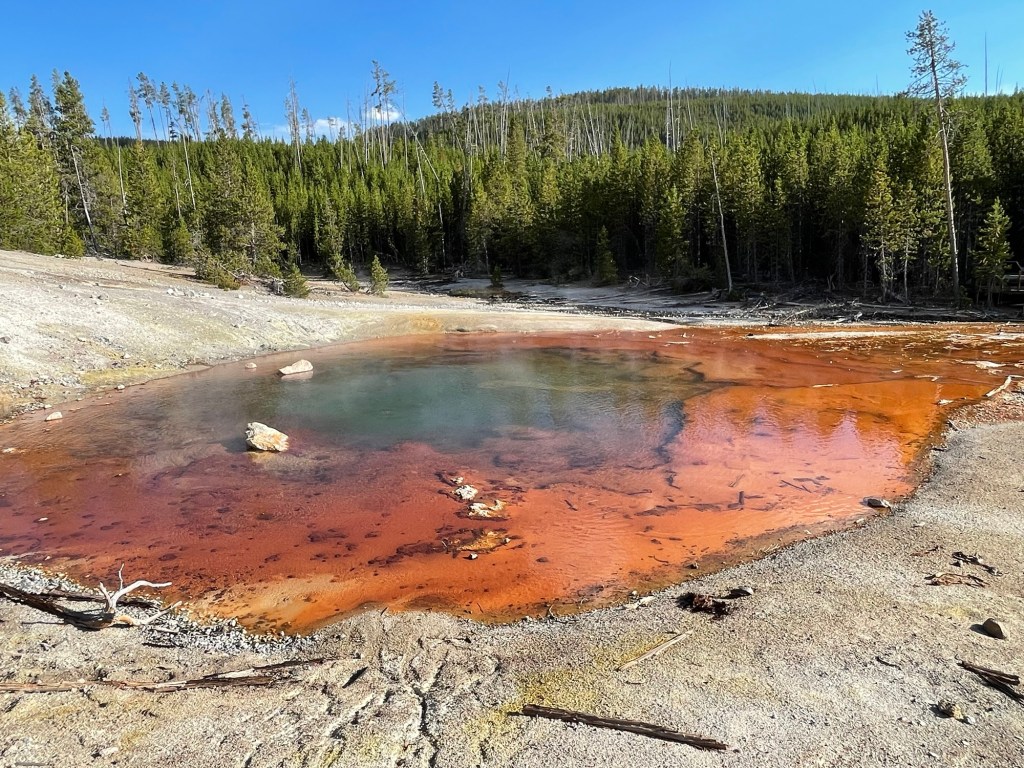
Each couple was on their own for the day. We purposely had a slow morning. I caught up on some cabin LLC bookkeeping that was behind by two months, and typed up notes from the trip so far. After lunch in the RV we drove to the Artist Paint Pots area of the park. The weather report had been for 10 degrees cooler than the day before, but instead it was about 87 degrees Fahrenheit with threat of thunderstorms. A little hot for a lot of walking around. The Artist Paint Pots is another area with a long boardwalk for viewing dozens of springs, geysers, vents and mud pots.
After that we drove to the Mammoth Hot Springs and Terraces. This area has more cool geological formations, plus an entire village with the park headquarters and housing for park employees, guest lodging, a Visitor Center, a gas station, a restaurant, and a military fort from the 1800’s. The Army was stationed here when the park was new to stop poaching by hunters and vandalization from tourists.
There was an easy walking loop for viewing the “lower terraces” composed of travertine with water flowing downhill, looking a bit like the inside of a cave. There was a longer path uphill to see the more, but due to the heat, we went on a loop drive in the car to see the “upper terraces”, instead of walking.
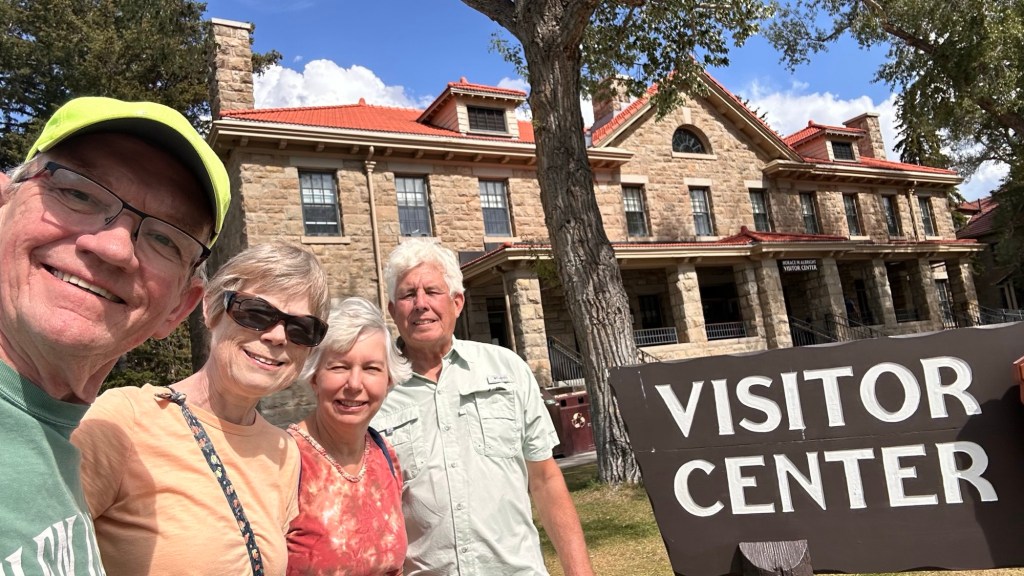
We did not want to move the car to another parking space closer to the Mammoth Hot Springs Village, so ended up walking what seemed like a long way in the heat. We peeked in some of the buildings, and then went inside the Visitor Center. At the gift shop there was a rack of park inspired socks, including a pair with “Grand Prismatic” graphics. I have to say if I could have bought some of that hand dyed Grand Prismatic inspired yarn and cranked a pair of socks on my sock machine, they would be nicer. We saw Loren and Linda in the visitor center. Later we heard that Harvey and Glenda were there too, shortly after we left. Normally there are elk wandering all over in Mammoth Hot Springs. We saw droppings but not a single elk. We wondered if they were staying hidden in the shade somewhere due to the unusual heat.
Loren and Linda with us at Mammoth Hot Springs Visitor Center
Heading out of the park there was a backup of traffic again. This happened at the same spot every time we drove in or out of the park. We saw a lone bison by the side of the road, and possibly some elk, I cannot remember any more.
Backup of traffic leaving the park
We had planned on eating dinner at our campsite, and then having a group campfire. Around the same time we stopped for groceries in West Yellowstone, we heard from Steve and Sally that the transmission on their Subaru went out just as they were entering West Yellowstone, after their day in the park. It was also starting to rain. There were text messages flying to figure out how to assist them, and changing up plans for dinner. We could not get a hold of Loren and Linda at first because they were still inside the park with no cell service. We took our groceries back to the RV and waited for updates. As Harvey and Glenda were arriving in West Yellowstone after coming out of the park, they happened upon Steve and Sally, and were able to give them a ride back to camp. We agreed to meet for dinner out instead of cooking, at the Slippery Otter again. Loren and Linda finally got all the messages, but they still had to buy groceries and it was getting late, so they did their own thing for dinner.
While we were eating dinner, Wayne had to tell his story of being stuck in Grants, New Mexico when we were on the way home from Arizona at the end of March, and how that was worse than Steve’s transmission going out with all of us together and able to help them. Steve was not convinced he should be happy about his situation, although they were grateful they did not break down inside the park with no cell service to call for help. Being Saturday evening he could not reach anyone at his insurance company, or any repair places or a Subaru dealer. He joked about junking the car and trading it in for a Ford F150 (what the other three couples all have), which Sally did not think was funny.
The group bonfire was cancelled due to rain, and everyone was exhausted by the end of the day.
Sunday, August 17
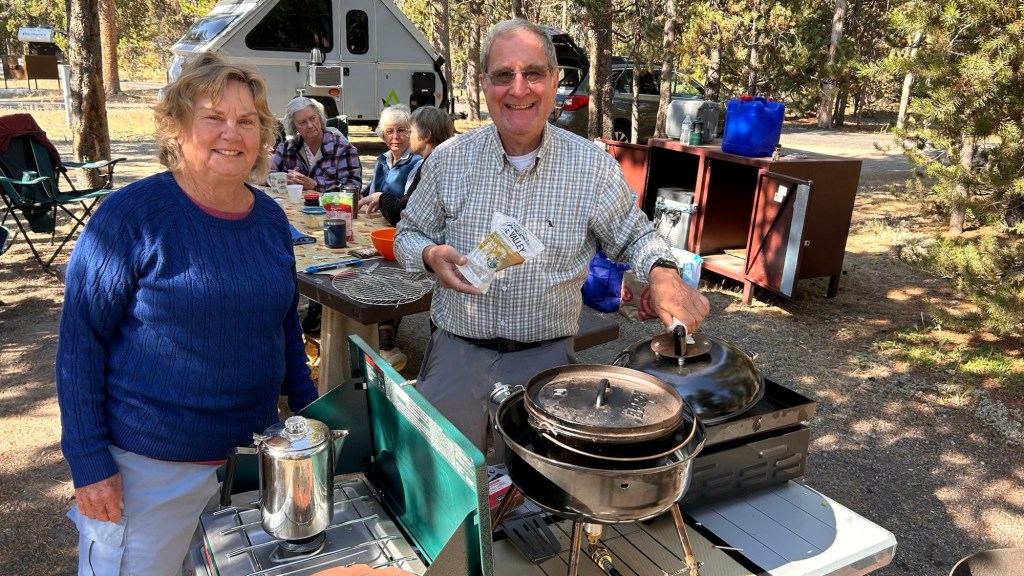
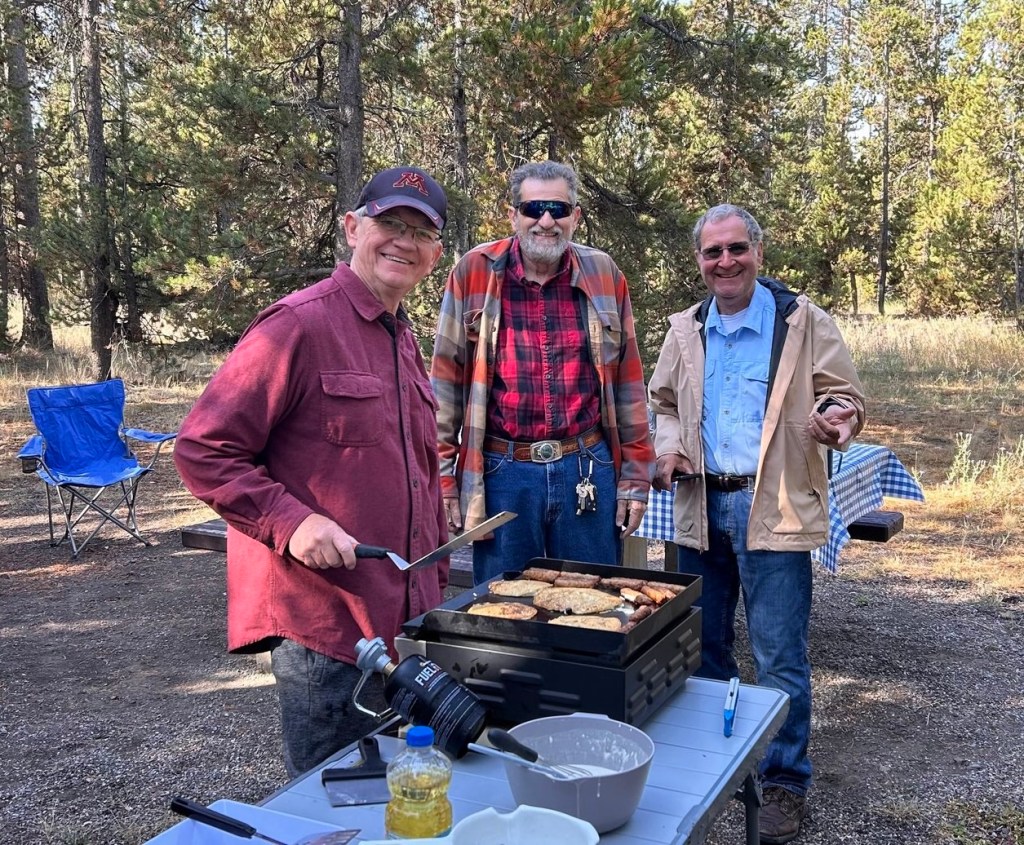
Wayne planned breakfast at our campsite for the entire group of eight people, including eggs, sausages, and pancakes with our family made maple syrup. He forgot that we have a small stove and one frying pan in the RV. I started to think about how we could cook the sausages first and put them in the small oven to keep warm, then cook the eggs and put them in the oven, and lastly cook the pancakes. Then I remembered that Steve and Sally have a big outdoor griddle. They were very willing to move that over to our campsite. Wayne cooked the sausages and pancakes outside on the griddle, while I cooked eggs inside the RV on the stove. It worked well and everyone enjoyed the meal.
Breakfast at our camp site
After breakfast we re-grouped to prepare for a day of sightseeing with two couples each in two trucks. As Wayne pulled out of our camp site, the left front tire was making very bad noises. He pulled over into an empty site and flagged down the other carload. At that point everyone got out of the trucks and the four guys all tried to figure out what was wrong, including jacking up the truck and taking the tire off and putting it back on. It was determined that our truck needed service and we could not use it. At this point two of the four vehicles were broken down. Harvey’s truck was available, but his F150 has a smaller back seat. We shuffled around so that there were five people in Loren’s truck and three people in Harvey’s truck and headed out again.
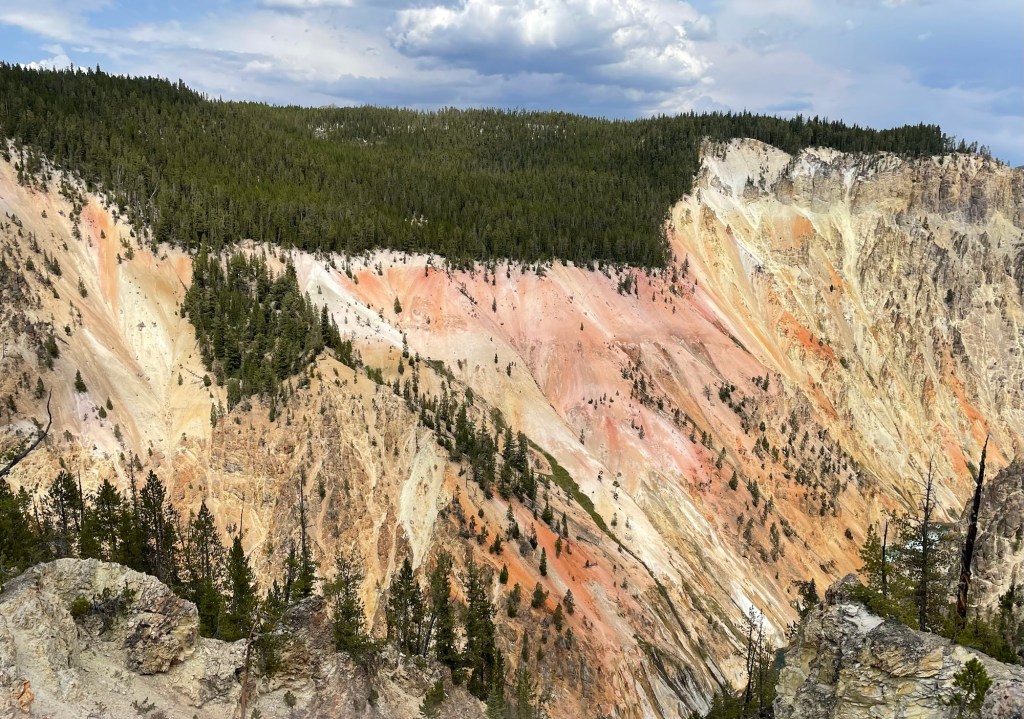
The destinations for Sunday were the Grand Canyon of Yellowstone, followed by the Hayden Valley and Mud Volcano area.
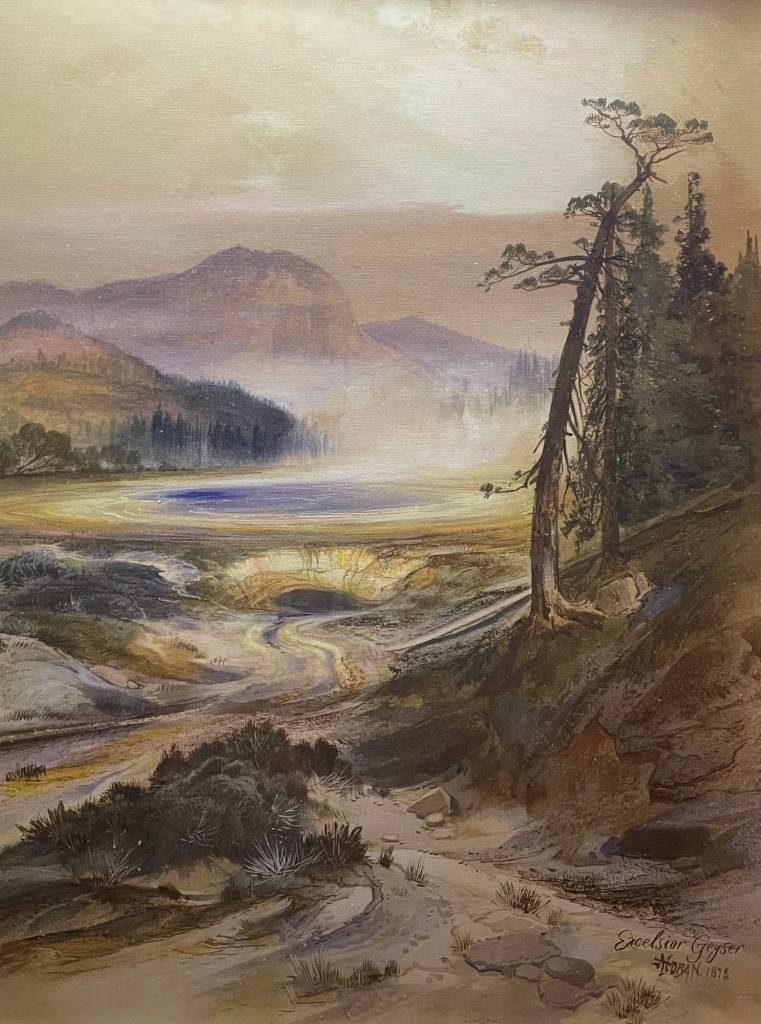
There was an informative ranger talk at the Grand Canyon where we learned some of the history of Yellowstone National Park. The land has been inhabited by humans for around 11,000 years. In the 1700’s Fur Traders came through the area. There were several expeditions by Europeans in the 1800’s. The most important one was the 1871 Hayden Expedition that included a photographer and some artists. A book was made using photos and art from the trip that was used to communicate to Congress and other big whigs how unique and beautiful the place is, and the importance of preserving it. In 1872 President Ulysses S. Grant signed into the law the establishment of the first National Park in the world.
The Grand Canyon of YellowstoneThe Grand Canyon of Yellowstone
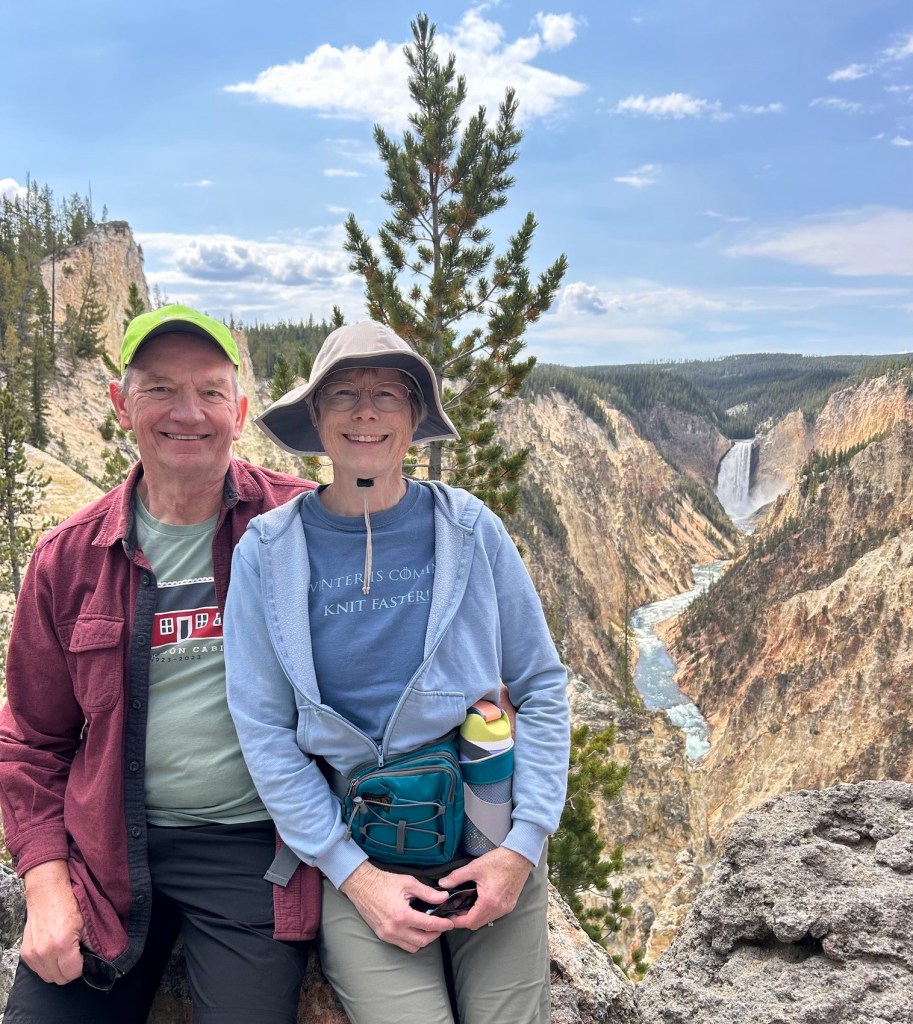
After gawking at the Grand Canyon of Yellowstone, we found someone to take a group photo with the lower falls in the background.
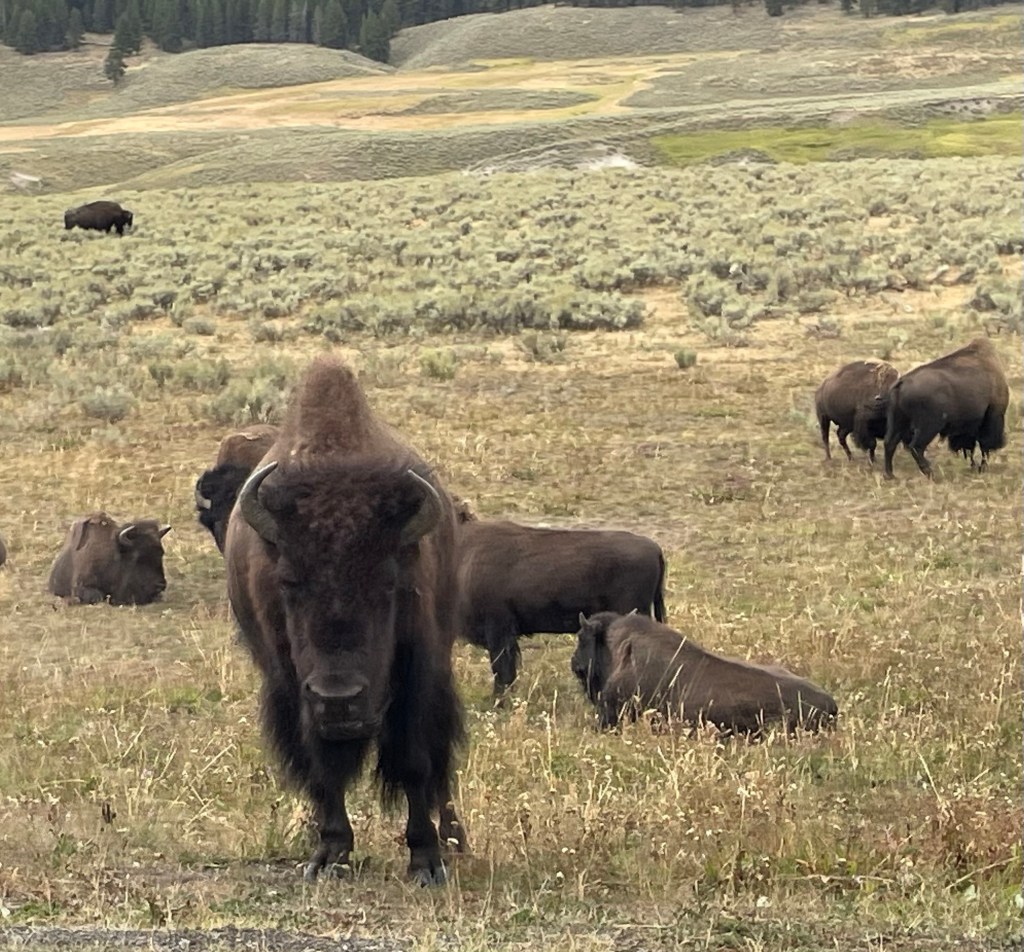
Next we drove through the Hayden Valley, an area where it is common to see animals. We saw many bison, including a few mother bison nursing babies. Some of the bison were making grunting noises, which we later found out happens during mating season.
The Mud Volcano area was the last sight seeing spot for the day. More thermal features are here that look like bubbling witches brews of mud.
For Sunday dinner Loren and Linda invited us to have spaghetti dinner at their camp site at Red Rock camp ground, about 20 miles south. Their camp site was more open with beautiful mountain views, and full hookups. Loren and Linda have a 5th wheel trailer very similar to ours. Or rather ours is similar to theirs. We saw theirs, liked it a lot, and bought a similar model. After dinner we had a camp fire with s’mores. Loren drove some of us back to our camp ground since Harvey could not fit six adults in his truck.
An evening at Loren and Linda’s camp site
Wayne and Steve both fretted about repairs to the vehicles, but were not able to get any information since everything was closed on Sunday. Steve considered many scenarios depending on how long it would take to fix his car, including what to do with their trailer if the repair took longer than their reservation at the campground.
Monday, August 18
Loren and Linda checked out of their campsite and went south to the Tetons, so we would not see them again on this trip.
No sightseeing happened on Monday due to the problems with vehicles, and because everyone was wiped out from all the activity that had happened so far. Wayne drove our truck (it was OK to go a short distance) with Steve into West Yellowstone first thing in the morning. Wayne had found an auto service place that could look at it. Steve was able to get a ride with the tow truck taking his car two hours to Bozeman where there is a Subaru dealer. He was able to get a loaner car to drive himself back to West Yellowstone, and to use until there their car was fixed or there was another plan.
Sally and I got a ride into town with Harvey to look at some shops and get a few groceries, and where we met up with Wayne. Steve arrived back from Bozemen with the loaner car and met up with Sally. Other than that it was a welcome quiet day of hanging around the camp site. I typed up more trip notes and worked on my knitting project.
We hosted a group dinner at our camp site with brats and burgers cooked on our small portable grill, vegetable stir fry, baked beans, and fruit. Harvey and Glenda brought their can cozies.
I checked in with my sister who had used the cabin and our house with friends over the weekend. They had a good time, but forgot that I had suggested they pick produce out of our garden. If no one picks anything before we get home, we will find some state fair record size zucchini.
Tuesday, August 19
Steve and Sally hosted another big breakfast at their place with sausage, and biscuits with gravy or Huckleberry jam. Normally I do not have a big breakfast, but it worked out well so that we could bring snacks in the car for lunch. I had some time to work on a shoelace weaving project, using a different band weaving technique than the pair I made before with tablet weaving before we left the camp site.
We were down to six people instead of eight for another day of sight seeing, since Loren and Linda had moved on. Wayne and I rode with Steve and Sally in their loaner car, while Harvey and Glenda drove their truck. They agenda for the day was West Thumb Geyser Basin and Yellowstone Lake. I discovered the compass app on my phone that includes elevation. On the two hour drive through the park, I took a screen shop documenting that we reached 8,530 feet.
The West Geyser Basin area has a boardwalk around more thermal pools, and a view of Yellowstone Lake. It was unusually hot outside again. Steve had a gadget that he could wave at the thermal pools and get a temperature reading. Some were around 120 degrees Fahrenheit, others were as high as 195 degrees.
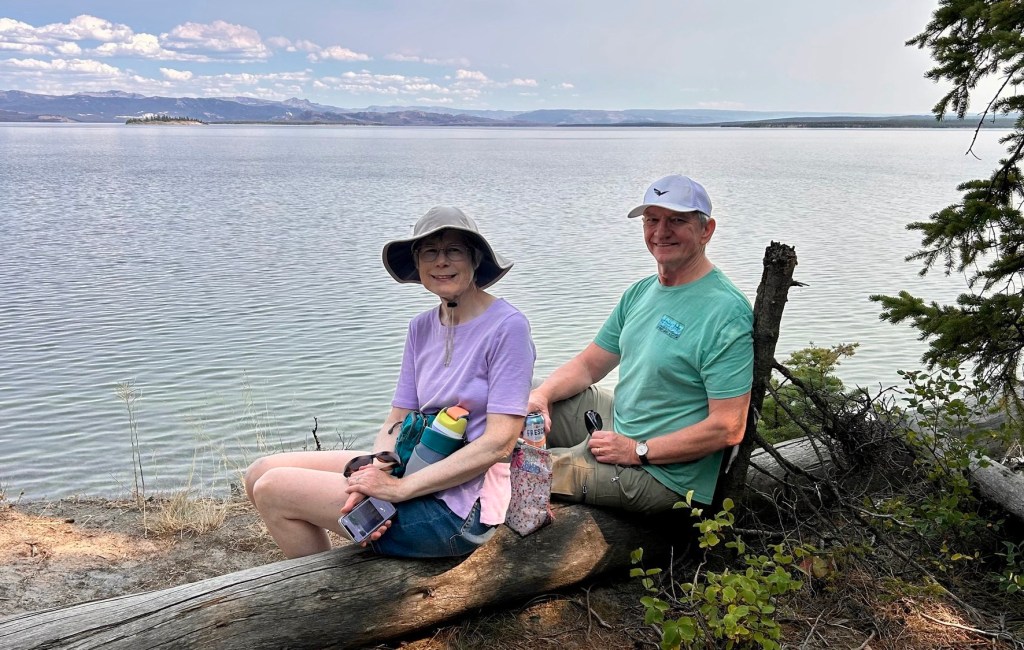
We made a couple of stops on the way back, including a snack break with a different view of Yellowstone Lake.
Some of us saw the bear at the same place where there was a traffic backup every single day on the way out of the park. I saw it this time, but did not try to take a photo. It would look like a brown blob. Following is a better photo of a bear than what I could get from inside the car with my phone.
Harvey and Glenda were in West Yellowstone at a brew pub, Yellowstone Beer Company, when we exited the park. Steve and Sally and Wayne and I joined them there for happy hour, followed by dinner. Several of the people in the group had a locally inspired entree, Bison Jambalaya, which they said was very delicious.
We got word that our truck was fixed already, so were able to pick it up after dinner.
Wednesday, August 20
Everyone did their own thing again. I blew a fuse in the RV blow drying my hair while an electric space heater was running. Oops. Steve and Sally drove their loaner car to Bozeman to look at new cars. We drove to Big Sky to get together with a former coworker of Wayne’s who has a house there. He and his wife were originally from New York, but he was offered a job in St. Paul, Minnesota. Minnesota being flyover country, they thought he would take the job for a year or two, and then move back to the east coast. Now, 25 years later, they still make the Minneapolis area their primary home. We met them at a restaurant for breakfast in Big Sky, and then they gave us a tour of the area. This included the ski resort which was active with mountain bikers, a place where they like to go hiking, an exclusive golf course, and a new housing development for people who have more money than they know what to do with. It was all very beautiful and we enjoyed catching up with them.
After regrouping back at the RV, we drove into Yellowstone for the afternoon. We were headed back to the Old Faithful area, stopping on the way for Firehole Canyon Drive and Firehole Falls, Fountain Paint Pots, and Black Sand Basin. Firehole Canyon is very scenic drive, and the thermal pools and areas at Fountain Paint Pots and Black Sand were amazing.
We had a picnic dinner at the Old Faithful area, and then walked to the Old Faithful Upper Geyser Basin boardwalk to see more geysers. We did not see much geyser activity and Wayne’s knee was bothering him, so we gave up on that and drove back to camp.
I had been eyeing the Haagen Daz ice cream shop in West Yellowstone, my all time favorite brand of ice cream. We had driven by multiple times. I convinced Wayne that it was a good time to stop for a cone on our way back to the RV.
Steve and Sally returned to the campground in their brand new Subaru Outback Wilderness with a trailer hitch, in time for a campfire at our place.
Thursday, August 21
Steve and Sally left for home with their new car towing their ALiner trailer, as per their original schedule. We caught up on some housekeeping tasks at our trailer for the morning.
We spent our last afternoon at Yellowstone with Harvey and Glenda, visiting the Grizzly & Wolf Discovery Center in West Yellowstone and the Norris Geyser Basin inside the park.
The Grizzly & Wolf Discovery Center is a private non-profit wildlife park and educational center in the town of West Yellowstone. In addition to bears and wolves, they have information and displays on eagles and birds of prey, and an aquarium with otters and fish. We watched a bear being very silly.
Our final activity in the park was walking around “the hottest, most acidic, and most dynamic” (according to a sign) Norris Geyser Basin.
Our RV fresh water tank registered as empty, so Wayne turned the hot water heater off. No more showers. Water was still coming out of the faucets, but we we were not sure how long that would continue. We had jugs of fresh water for dishes, drinking, and flushing the toilet if needed. We had not done any laundry since leaving home. Harvey and Glenda were going to be away from home longer than us, so they did laundry at a laundromat in West Yellowstone. I washed out a couple pairs of underwear by hand. In lieu of hand washing anything, Wayne bought a couple of new tee shirts in town. Maybe he turned his underwear inside out? I do not know.
Friday, August 22
It took all morning to prepare for leaving Baker’s Hole campground and towing the RV to another campground near Grand Teton National Park. This was different than packing up the RV after a winter in Arizona. I left food in the refrigerater, and most of the dishes and food in the cupboards, moving only heavy or loose items into boxes on the floor. Baker’s Hole campground does not have a dump station, but we were able to empty out the black and gray tanks at Yellowstone Grizzly RV Park in West Yellowstone.
There are several possible routes to get from the west side of Yellowstone south to Grand Teton National Park. They all involve driving through mountainous areas with curvy roads. Wayne decided that the least scary way was going through Yellowstone, rather than around on the east or west side, so for one last time we enjoyed the beautiful scenery in the park. The following art was on the wall in the Yellowstone Inn, I neglected to get the name of the artist. I am not sure if it is supposed to be a specific spot in the park, or more of a composite of several areas. I thought it was pretty and gives a good overall sense of the place.
Snapshot of a painting on the wall at the Old Faithful Inn
One thing that was always in the back of my mind is the fact that Yellowstone is sitting on a dormant super volcano. I saw the following display that shows how for the ash from various volcano eruptions was spread. The Yellowstone eruption spread ash all the way to where we live in Western Minnesota.
It is not expected to erupt again anytime in our lifetime, but eventually when it does go off, it will not be pretty. With that in mind, we made our way out of the park and on to the next leg of our vacation. Our time in the Grand Teton National Park and the journey home will be featured in another post.
Note: Some of photos were from Wayne, or possibly one of our friends who shared them with me.
Over a year ago I was gifted a vintage Structo Artcraft four shaft table loom. At the time I was excited to have it, as the size is in between my small rigid heddle loom and my wider floor loom. I practiced using the table loom by weaving off the warp yarn that came on it. I wrote about getting the loom, learning some history on the brand, and my first attempt at weaving on it here.
Lately I have been considering whether or not to keep the Structo Artcraft loom. It takes up quite a bit of room, and anything I would weave on it can be made on my floor loom. However I wanted to weave an actual project on the loom before making a final decision.
Last fall I ordered some gift items from graphic artist Cindy Lindgren, a close friend of my sister-in-law. Cindy sells products with art related to specific states, Paul Bunyon, Vikings, hiking, and other fun themes. Her website can be found here, and she has some products for sale at retail locations, including MSP airport. I have a poster in my laundry room with her design of Paul Bunyon and Babe the Blue Ox having smores.
Cindy Lindgren poster
A dish towel I ordered from Cindy’s shop has art showing Norwegian Vikings holding kitchen utensils. The same art is available on other items.
Cindy’s Viking Theme towel
I thought it would be fun to weave a set of towels on the Structo Artcraft loom using colors coordinating with the Viking theme towel. They could be given as a fun gift set. At first I thought I might have to buy yarn for this project, but after digging through my weaving yarn I already had the right colors on hand.
I was a little worried about having a mixture of fibers for the warp yarn, including 100% linen, 8/4 cotton, and Duet Cotton/Linen blend. The linen yarn is a bit thicker, the Duet is thinner. Mixing up the types of yarn could cause problems.
After looking at some ideas online, I decided to go for a plaid look in plain weave. No fancy pattern, just the pretty colors. The linen yarn was on the thicker side of the range for the 15 ends per inch reed that came with the loom. Figuring out the details involved making sure there was some 100% cotton yarn between the blocks of linen and cotton/linen blend yarn, not having too much linen yarn as a proportion of the total, and making sure the arrangement of colors looked pleasing.
I wound on half of the warp yarn in one warp chain, then realized that there was not as much of the green cotton and red duet yarn as I thought there was. I changed the pattern of colors a bit for the second half.
Measuring our the warp yarnTwo warp chains of yarn measured for towel weaving project
After measuring the warp yarn ends, I got them ready to begin threading them through the reed slots, also knows as “sleying the reed”.
Ready to “sley the reed”
Some people consider “sleying the reed” a necessary evil, but I enjoy it.
Sleying the reed in progress
I was proud of myself for getting all 300 yarn ends threaded into the reed in one day.
All yarn ends threaded through the reed
The loom is sitting on an old wooden tea cart with wheels, so I turned it around for the next step of threading each end through a heddle from the back. Then I realized that I did not have enough heddles on the loom. Oh No! I had never counted them.
Not having enough heddles meant that I would either have to get more, or reduce the number of yarn ends. I was not excited about spending money on this loom, but it was not a bad idea to have a complete set of heddles for myself or another future weaver. There were options for buying a partial set or a complete set, in metal or texsolv (a durable polyester cord). I have never used texsolve heddles, but decided to try them. I ordered a complete new set, rather than ending up with a mixture of metal and texsolv heddles.
The project was on hold while I waited for delivery of the order. Meanwhile, we had our son and daughter-in-law for the weekend, with their two year old, Blair, and two month old, Nora. We cleaned the house and childproofed for small visitors. Within an hour of their arrival, the house was chaos with toys and stuff everywhere, LOL. It was super hot out with high temperatures in 90’s Fahrenheit and heat index over 100 degrees. We spent time at the family cabin beach in the earlier part of the day before it got too hot. Blair got to see a turtle swimming in the lake, and Wayne caught a fish for her off the end of the dock. There is a video of Wayne with the fish that Blair has since requested to watch dozens of times.
Blair got a boat ride in Wayne’s small fishing boat, and the next day we all went on a pontoon boat ride. It was a great weekend and we looked forward to their next visit.
After we had gotten the house back in order, my texsolv heddles arrived in the mail. They seemed to be too short, even though had I measured very carefully. It is hard to tell from this photo of the original metal heddles next to the new texsolv heddles.
Old metal heddles next to the new texsolv heddles
I considered moving the project to my floor loom. It was not too late for that. However I decided to first bring one of the harnesses (frame that the heddles are hanging on) with the original metal heddles to show Torri, my experienced weaver mentor in Fergus Falls. After taking the twist ties off and actually putting one bundle of heddles on the harness, we realized they did in fact fit. Back at home I spent the evening getting the harnesses off the loom, removing the old metal heddles, and putting the new texsolv heddles on the harnesses.
New texsolv heddles on all four harnesses
The new heddles fit snugly. They do not rattle and clank against each other like the metal version. They do not slide as easily as the metal heddles. I am not sure if that is normal, or if they are fitting tighter than they are supposed to. This is a vintage loom no longer in production, so possibly the standard sizes available are not exactly right.
Threading the yarn ends through the heddles was a slow process for me. The ergonomics were not ideal. When sitting on a stool, I could not see the yarn ends coming out of the reed. Standing, I could see but had to lean over. I made sure to take breaks.
Threading the yarn ends through the heddles from the back
After project was completely warped, I wove a couple of rows and worked the hem stitch at the beginning of the first towel.
Yarn on bobbins ready for weaving
After weaving for only a few inches, something became horribly wrong with the tension and I did not know what to do. I had talked to Torri about coming over sometime to see this loom, as well as my circular sock machine. It was Sunday, so her shop was closed. Luckily for me she was available and willing to stop by my house after she left an event she was attending.
Torri figured out what was wrong immediately. In the photo below you can see a wood dowel with the yarn ends tied on to it, and a white band zig zagging between that and a metal bar below that is not visible. The “zag” at the right end of the dowel had fallen off, so the dowel was not under tension at that end. DUH, I felt so dumb for not noticing that myself, but I was relieved the problem was easy to fix. She made a couple of other adjustments on the back.
Weaving all saggy on the right side
After the weaving was back in shape, Torri enjoyed watching me make a sock on my sock machine, mostly without any mistakes. I sent a jug of our family made maple syrup home with her as a thank you. I was able to continue weaving rows on the towel after she left.
Throughout the weaving project I had tension issues. I am going to blame it on the vintage loom, but there could have been some user error too. As I wove and wound the fabric on to the front beam, it was crooked. If I tried to fix it, then the warp yarns were too loose on one side. I could make small adjustments by beating the rows a bit tighter on that side.
One thing that bugged me, but may not have been an actual problem, was that sometimes when I raised harnesses two and four as in the next photo, they were crooked. I kept on going without trying to figure it out.
Another thing that probably was contributing to my problems is visible in the photo below. On the back beam you can see the metal bar that is connected to the wood dowel by the zig zagging white band at the beginning of the warp. It is off center and not laying flat.
In the following photo you can see how the weaving is crooked, by comparing where the rows line up with the wood on each side.
Another thing that was happening was that when beating a row, it did not beat evenly. If I beat with the reed a second time it would even out.
When I had finished weaving both towels and removed them from the loom, I found some floats, where one of the weft yarns missed some of the warp yarns.
A float where a green weft row missed going under some of the warp yarns
I had to fix the floats by manually weaving a second piece of yarn over the same section. Following is a photo showing where I fixed a different float.
Following are photos of the two towels off the loom. They looked better than I expected given the crooked weaving and other tension problems. For the first towel I wove the weft rows matching the pattern of the warp yarns.
For the second towel, I wove four inches each of the seven different yarns.
I knew that using different types of yarn in both the warp and weft would affect the look of the fabric and result in different take-up and shrinkage. The thicker linen yarn caused those sections to bow out a bit. The fabric seemed very stiff. I had been worried that using the 15 ends per inch reed would make the fabric too dense, but visually it seemed right.
After fixing the floats, weaving in ends, and running the towels through the washing machine and dryer, they did not feel too stiff. They felt nice and substantial. They were also uneven. The towels are not exact rectangles, no surprise. The different thicknesses and textures of the yarns made it interesting and camouflaged some of the imperfections.
One thing I like about making towels is that even if they are not symmetrical and have imperfections, they are still functional. They do coordinate nicely with the Cindy Lindgren towels.
I love the way each of the colors interacts with the other colors as they intersect. I would never have thought of putting olive green and turquoise green together, but I like that combination a lot.
I wanted to finish this weaving project and publish a blog about it before we are out of town for two weeks. We are getting ready to leave for a trip to Yellowstone National Park and the Grand Tetons with our 5th Wheel Trailer. Some people warp enough yarn for 4 or 6 or more towels. Given I am always nervous about tension problems, I prefer to measure a shorter warp. In this case, I was glad I only had enough for two towels, and with the challenges I had, I am glad to be done.
I was frustrated with some of the problems I had, that I am going to blame more on the loom than my skill level. I should clarify that this loom is actually in pretty good shape for being 50 plus years old, but I do like having good equipment. This brand of vintage loom is not made any more, and thus parts are not available for restoring it to perfect condition. I do not really need it. If I did want to have a table loom, I would rather buy a new one or a newer used model that is still in production.
I was considering selling the loom, but I have a better offer. Torri has two flatbed knitting machines still in the boxes that she has never used, and does not expect to use. She is going to trade me the Structo Artcraft table loom for the two flatbed knitting machines. I don’t really have time to go down yet another rabbit hole, but I am interested is seeing how flatbed knitting machines work and what I could make with them. Like the circular sock machine, they can knit something up a lot faster than hand knitting. And it turns out that the School of Sweet Georgia just came out with a class on flatbed knitting machines. I watched part of it already. The instructor is Barb Barone, of Yarniversity by River City Yarns. Barb is very patient and calming to listen to. She is the “Bob Ross” of knitting instructors.
Meanwhile I am assembling a couple of projects to bring on the Yellowstone trip, that are portable for working while on the road and when we get there. I am attempting to make some knitted and felted slippers (that I thought would be done a month ago), and I am bringing a narrow four inch wide loom to practice band weaving. After my crazy schedule so far this summer, I am looking forward to getting away for a couple of weeks.
I love retirement. I love not having to get up early, drinking my morning mocha, and having time to work on my fiber projects. I also like spending time with family. Summer is busy with a bit of travel, houseguests, and groups of people using our extended family cabin near our home.
I currently have about four different fiber projects going on simultaneously. They are all taking longer than expected due to user error, equipment problems, trying to do too many things, and most importantly, not having time due to my routine being disrupted by family reunions, being away from home, and houseguests. When our son visited with his wife, two year old, and 3 month old, there was no possibility of working on projects or blog posts. It was all hands on deck. I am not complaining, but rather explaining why I am way behind on blogging.
The blog posts about my current projects that I thought would have been published by now are not even close to being ready. I have to remind myself it is OK, there is no schedule or deadline. In the meantime I have a post that I put together years ago that I had saved for this purpose.
Someone asked me if I take for granted the beautiful views from our house. No, I do not. My mom designed this house and had it placed at an angle relative to the lot lines so it would face due west. It is up high and back from the lake, and also has views of farm fields and woods to the east. The are many large windows. I love the spot in the kitchen where you can see outside in all four directions at once.
We regularly have amazing sunsets. The afternoon sun from the west also results in having to close the blinds in the living room to avoid fading the furniture and heating up the house in the summer. Often there are interesting cloud views during the day from every direction.
One time when we had guests visiting we were watching a sunset without any clouds. The guests all exclaimed about how pretty it was, but I was thinking it was boring compared to many sunset and sky views I have seen and photographed.
I took all the following photos with my phone over several years, except for one my husband took. They are from various locations including the front and back of the house, the cabin property nearby, the lake public access, or on a walk in the neighborhood. All seasons and times of day are represented. They are not in any particular order. Enjoy.
Ice fishing village from the public accessWinter sun dogs from our yardFrom the road in front of our houseFrom our yard looking west
The following Aurora Borealis photo was taken by my husband in October 2021 from our front yard. That was the first time I have seen the Northern Lights. I took photos at the same time, but this one is better. The view was very far from a normal night sky, but the camera was doing something with the colors. The photos looked more dramatic than what I actually saw with my eyes and that bugged me. The orange at the bottom of the photo is from a light in our neighbors yard down a hill from our property.
Northern Lights viewed from our front yardWinter view from the public accessOn a walk near our houseAt the cabin after a storm had passed bySunset view from our yardCabin sunsetStorm clouds from our yardStorm clouds from the roadWinter lake reflectionsRain moving in at the cabinSunset pontoon boat ride
I attempted to dye Minnesota Vikings football purple and gold yarn for socks. I ended up with something nice (see blog post here), but not that. Plan B was to make team color socks using two different colors of commercial sock yarn from Knit Picks. Two 50 gram balls are needed for one pair of socks.
I cranked some sample tubes on my circular sock machine (CSM) to practice changing yarns, using leftover yarn from other pairs of socks. For the first one I overlapped the two yarns for about four stitches. The plain green yarn was a bit thinner, and I did not notice until I was done with this sample that I had dropped a stitch near the beginning.
First sample changing yarns by overlapping the ends
I remembered later that there is a better method of doing yarn changes called “faux Russian join”. SweetGeorgia Yarns has a good video showing Felicia Lo making “scrappy socks” on her sock machine using this process. I cranked out two samples using faux Russian join that turned out well, and with the right number of rows for Gnome parts. There are many tails on the inside, but they are already knitted in and can be trimmed off. The following photos shows the outside and inside of a knitted tube with yarn changes.
Before starting a purple and gold striped sock I did some math to figure out how many rows of each color to crank. There needed to be approximately the same amount of each color used. With 80 leg rows and 70 foot rows for the sock to fit my husband, it worked out perfectly to have stripes consisting of 10 rows per color, with a yellow hem at the top of the leg, and purple heels and toes.
The following photo is a close up of a yarn change using the faux Russian join method.
Changing yarns using the Faux Russian Join method
I was a little worried that I might run out of purple yarn before the end of the second sock, but that did not happen.
I made a couple of minor mistakes that were not a problem, both at the first color change. I overlapped the colors, forgetting to do the faux Russian join. I also forgot to put the heel spring back on (an extra yarn guide used to increase tension for heels, or the entire sock), so the tension is looser for that one band of color at the top of the leg. That is OK as Wayne’s leg is thicker there. When I got to the second sock, I left the heel spring off on purpose for that first band of color so the socks would match and fit the same way.
When I showed the socks to Wayne, he was impressed, but also apparently had a different pattern of colors in mind with more purple and less gold. That might not have been possible with equal amounts of each color. This photo was taken later after the hand finishing was done.
When I came up with the equal width stripes look, I must have had the following in the back of my mind, which I have seen with college colors. I guess Wayne is not likely to wear these LOL.
Later that same day, I got an email from Knit Picks with a one day only free shipping promotion. How did they know I needed more purple and gold yarn? I would not be surprised if my phone was listening to us talk about it. After discussing with Wayne who else would get team color socks, and that they should have a larger proportion of the main color, I went online to place an order. Not only was there free shipping, but the sock yarn was marked down. I ordered enough for several more pairs of Minnesota Viking color socks, and one pair of Green Bay Packers green and gold socks for my daughter-in-law. They are a mixed team family which makes for some friendly rivalry during football season.
My son had asked me to make him plain black shorty socks. My response was for him to just buy those, but since this Knit Picks yarn was such a good deal, I added some black yarn to the order.
I made a Gnome using my yarn change samples. This one has only two sections, without the “shirt” piece in the middle. I used some actual washed wool from my stash for the beard, instead of fake fur. I hand stitched the beard on rather than gluing it on. I like the way it turned out.
A gnome made out of changing yarn practice samples
We went on a road trip while I was waiting for the Knit Picks yarn order to arrive. Doing the hand work to kitchener stitch the toes shut and weave in ends on the purple and gold striped pair of socks was a good project for the car. When we got back home my Knit Picks order had arrived.
Yarn from Knit Picks for more team color socks
In preparation for cranking another pair of purple and gold socks, I made a drawing and discussed with Wayne the ideal number of rows for each color. He found a Vikings jersey to use as a guide and we came up with a plan.
Cranking socks requires very careful attention in order to avoid making mistakes which are hard to fix. Changing yarns while making a sock requires another level of concentration. I had to pay attention to the number of rows cranked of each color (thank goodness for the automatic row counter), stop at the right place to make the yarn change, and remember to re-engage the heel spring each time in order to maintain the right tension.
While making the heel on the first sock with the new color pattern, I dropped a stitch. A latch must have gotten bumped closed, even though I was trying very hard to make sure that did not happen. Some people can fix that without too much trouble, but I am not there yet. I tried to fix it by undoing several rows of knitting (not easy), until I got back to a point where I could continue going forward again. It was not exactly right, but I did not want to spend any more time on it and it was close enough. Wayne would only be wearing these socks while watching a game, he would not care.
On the second sock, I cranked the leg part and the heel perfectly, but I forgot to reengage the heel spring for the foot section. I was distracted because I was pretty sure I was going to run out of purple yarn before I finished that section. If it has been only a couple of rows, I would have just left it and put the heel spring on for the rest of the foot. But this was almost the entire foot that would look and fit differently than the other sock of the pair.
Probably the fastest solution would have been to start the sock over again from the beginning. Instead I picked up the stitches all the way around with a needle and thread right at the beginning of the foot, and then unraveled the foot rows I had cranked back to that row. I hung the picked up stitches on to the needles on the sock machine. I had to figure out how to make this plan work by raising needles out of work to get the yarn carrier in the right place to begin knitting. It was all very putzy but it worked. It would have been easier to start the sock over again, but I learned some things the way I did it.
I did not run out of purple yarn after all. There was exactly enough, with only a few extra inches left. That means I could have cranked the first sock with more purple. When I was getting ready to graft the toe shut, I found that a stitch had dropped when I was adding the waste yarn at the end of making the toe. I put a stitch marker in the last stitch before the drop in order to keep it from unraveling even more. Fortunately this situation is easy to fix with a crochet hook.
Wayne was very pleased with the second pair of Vikings color socks that more closely coordinated with his team jersey.
I have yarn for two more pairs of Minnesota Vikings purple and gold socks, and one pair of Green Bay Packers green and gold socks. I could earn a bunch of money making and selling team color socks, but honestly I am probably not going do that. There are so many other things I want to do.