
In December I was looking for knitting projects to work on in Arizona over the winter. The Novus Knit Pouch by Laura Nelkin looked like a fun and portable project involving some new techniques, resulting in a 3-D functional item with no seaming or picking up of stitches.
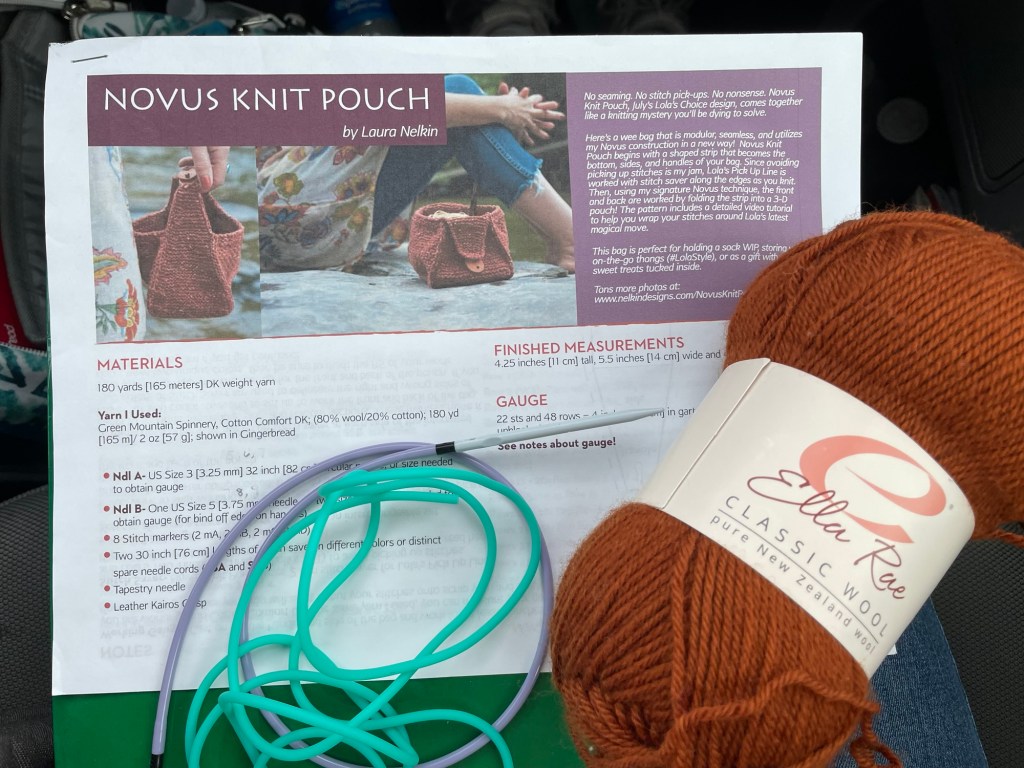
The pattern called for some cotton and wool blend DK weight yarn. I did not have anything like that on hand, but figured the pattern would work with any type of yarn. I found some thicker worsted weight 100% Ella Rae Classic Wool yarn leftover from another project.
The pattern comes with a detailed very helpful video tutorial explaining each step of the project. From the video I learned that while other types of yarn can work, the key is to have a very dense gauge.
I ended up being busy with other projects during our time in Arizona, but assembled supplies for knitting the pouch in the car on the way back home to Minnesota at the beginning of April. After starting the project I realized that a smaller needle would have been better, but my other needles were buried somewhere under the RV. I went ahead, thinking that if it was too floppy I might be able to felt the pouch to make it more dense.
This pattern uses stitch holder cords, which are slightly stretchy silicone tubes that come in different thicknesses and lengths. I have some stitch holder cords from Twice Sheared Sheep. They come in three thicknesses in a little metal box. Laura Nelkin, the designer of the pouch pattern, has a blog post about ways to use these clever tools, that she refers to as stitch savers.
Silicone stitch savers or holders can be used for temporarily holding stitches while a project is in the works. I have used them to hold stitches taken off the needles when I wanted to try something on or check measurements. That can be done with a piece of waste yarn, but the beauty of the stitch savers is that you can stick a knitting needle tip in the hollow end and slide the stitches directly off of or on to a knitting needle. I also used a stitch saver for doing a provisional cast on, used at the beginning of a tubular cast on for a hat.
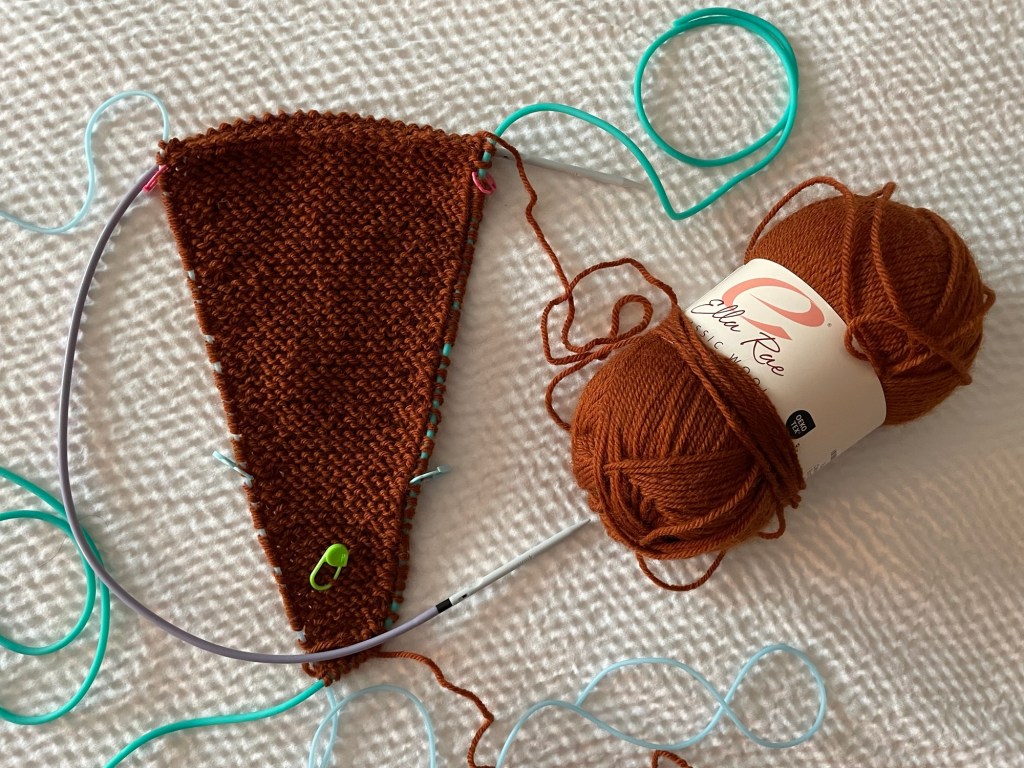
For the pouch pattern, the working yarn is wrapped around the stitch saver at the beginning of each row, so you end up with a stitch saver cord running up each side of the knitting. Later when you need to pick up stitches at the end of each row, you just slide the loops from the stitch saver onto the needle. It is very slick. The pattern can be made without stitch savers by picking up the stitches from the end of each row the old fashioned way.
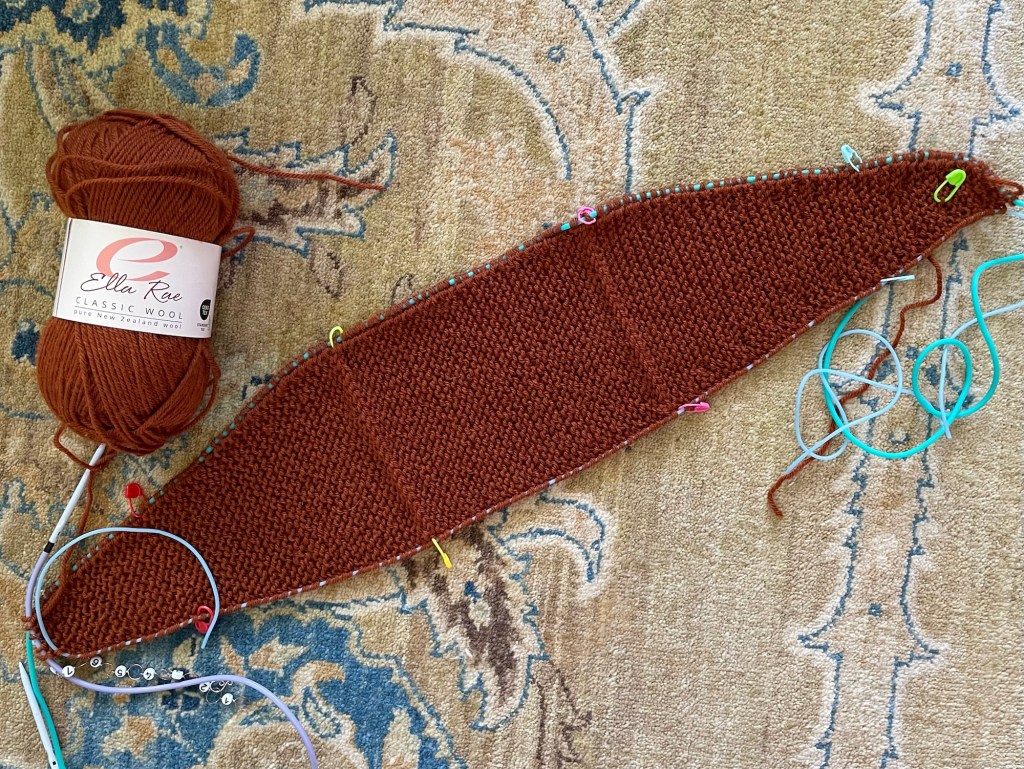
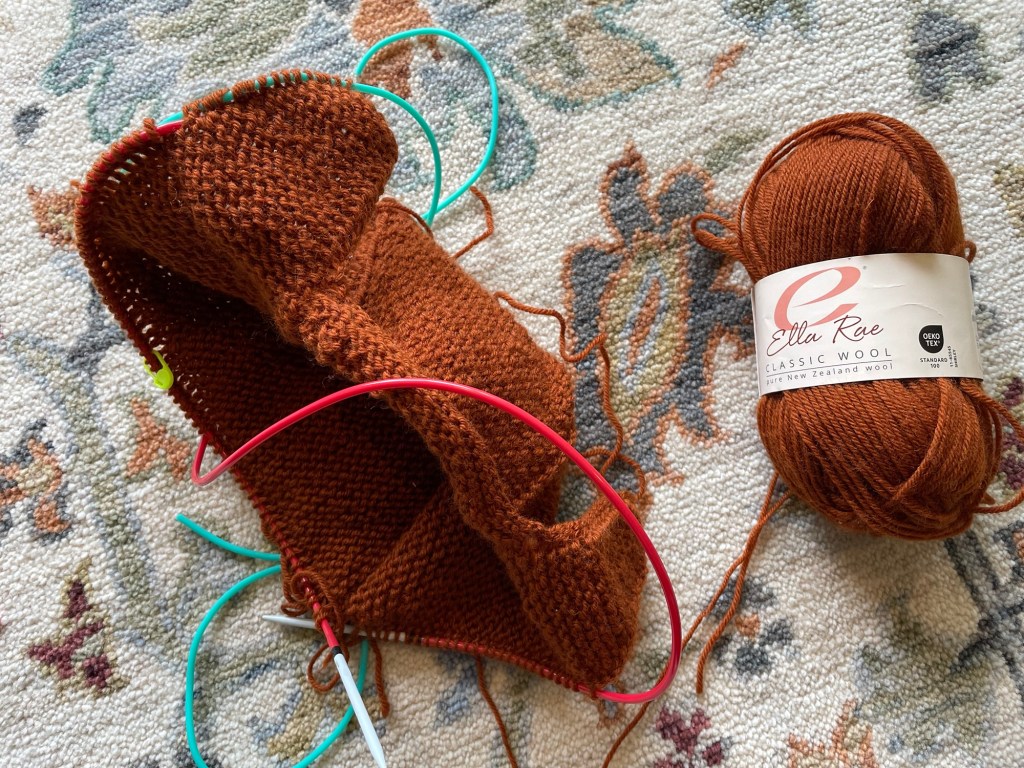
Following is a photo of the pouch in progress, showing the bottom and sides complete, with the stitch savers going up each side. The rectangle section in the middle will be the bottom of the pouch. The triangular shaped sections on each side will be folded up, with most of that forming the sides, and the tips forming the handles. The front and back will be filled in with knitting, connecting the sides together. It is hard to understand how this will happen, you have to trust the pattern.
I did not have two stitch savers in the same circumference, so there was a thinner one on one side. This was not ideal, but I attempted to wrap less tight around on the side with the thinner cord, and I hoped it would not be a noticeable problem later.
The front and back are made by putting the stitches from the stitch saver on the needle and knitting back and forth with linen stitch, doing a decrease in each corner. While reading the pattern before actually knitting this part, it was hard to understand what is going to happen to fill in the front and back. It is hard to explain here but it works. The front is complete in the next photo.
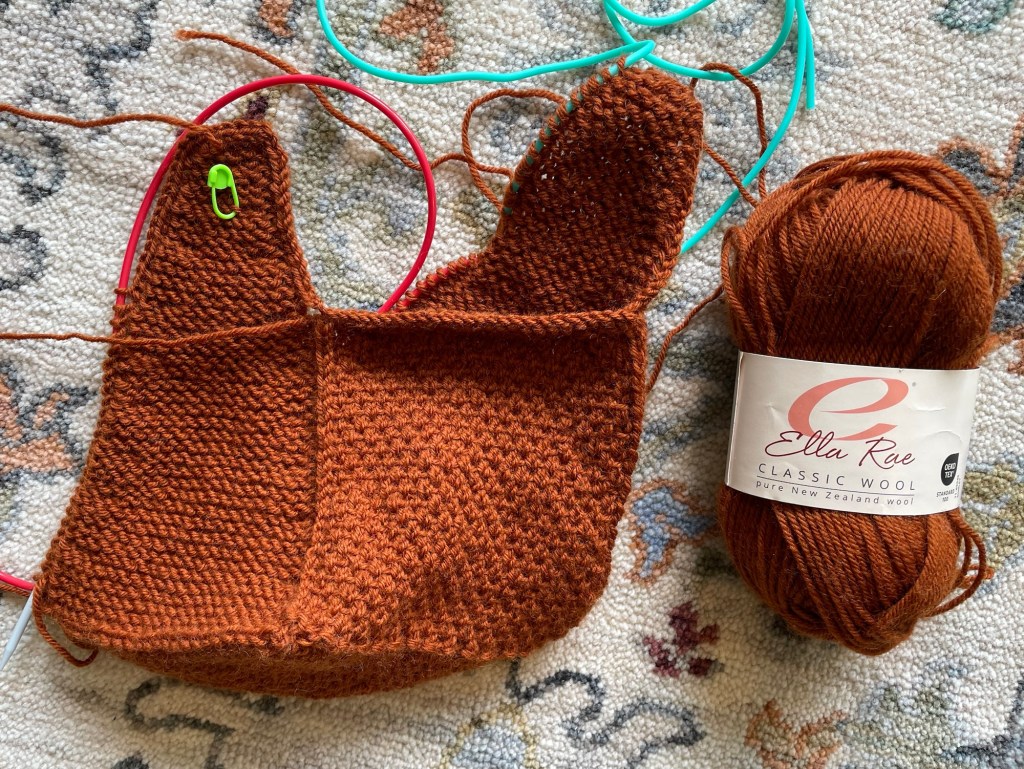
The following photos are showing two different angles, with the stitches from the stitch saver on the other side transferred to the knitting needle and ready to knit the back of the pouch. Very hard to see what is going on.
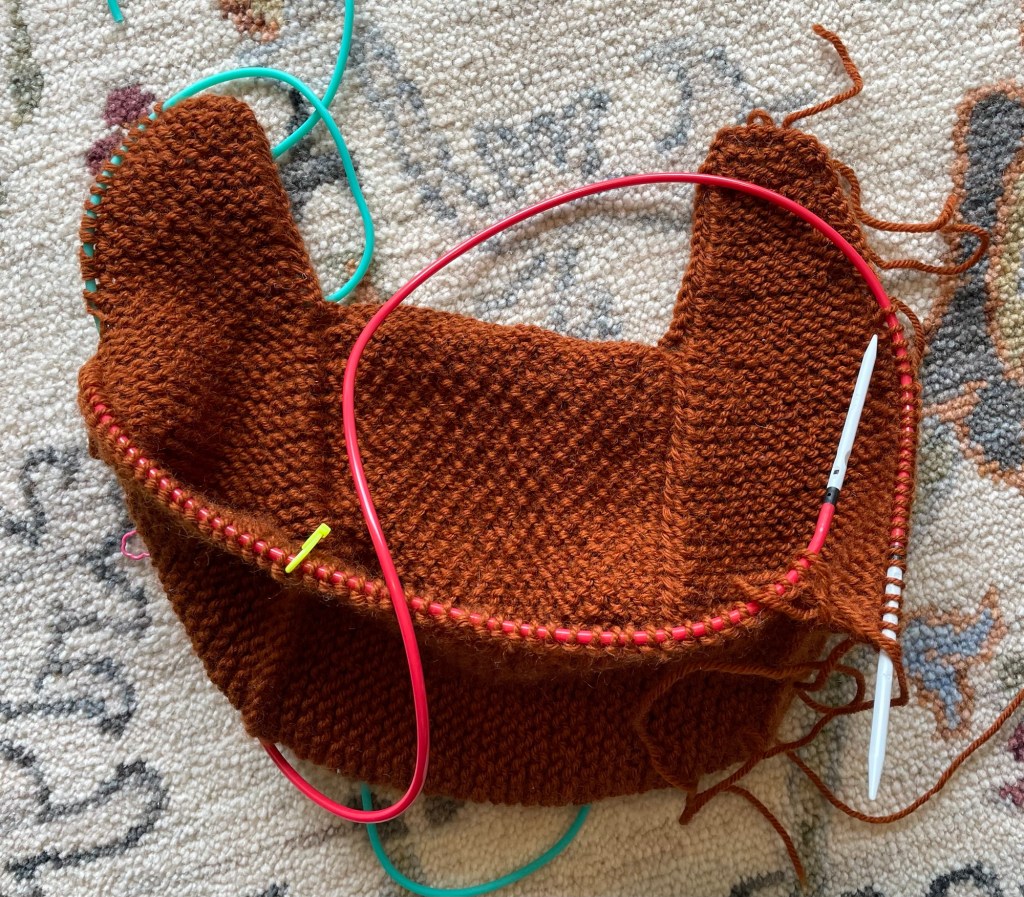
And voila in the next photo the back panel is filled in, and the handles are laying across the top.
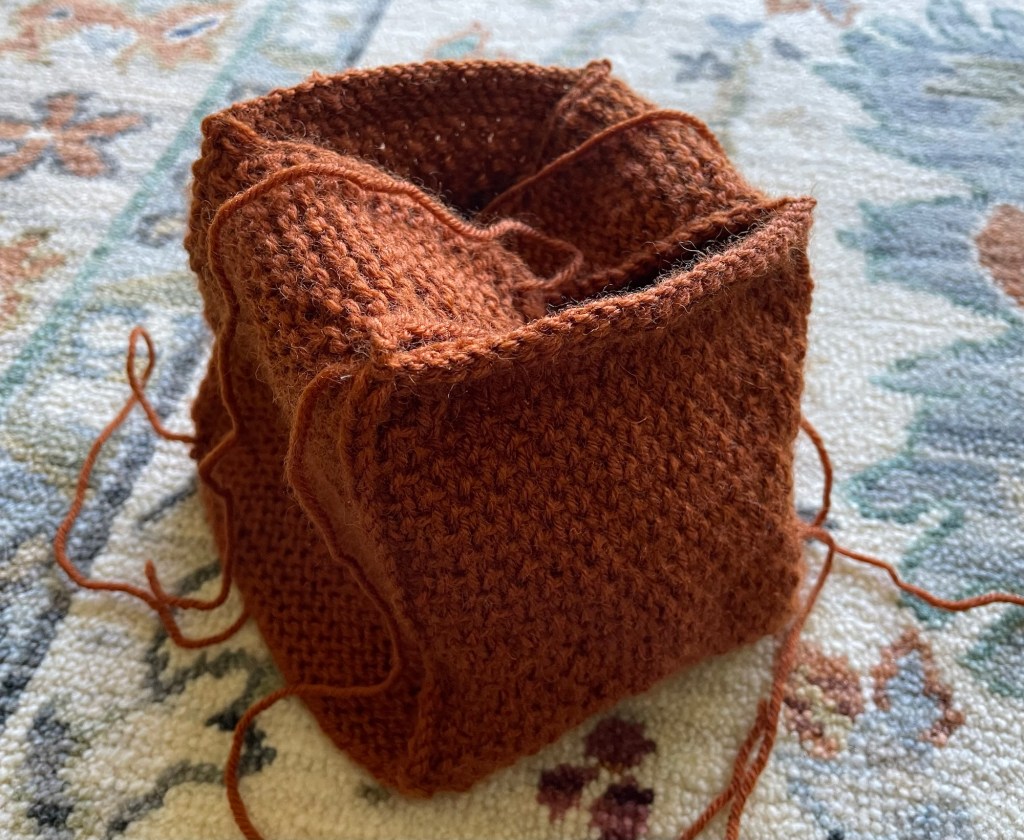
My pouch was floppier than what I think it is supposed to be. It was hard to get it to stand up for photos.
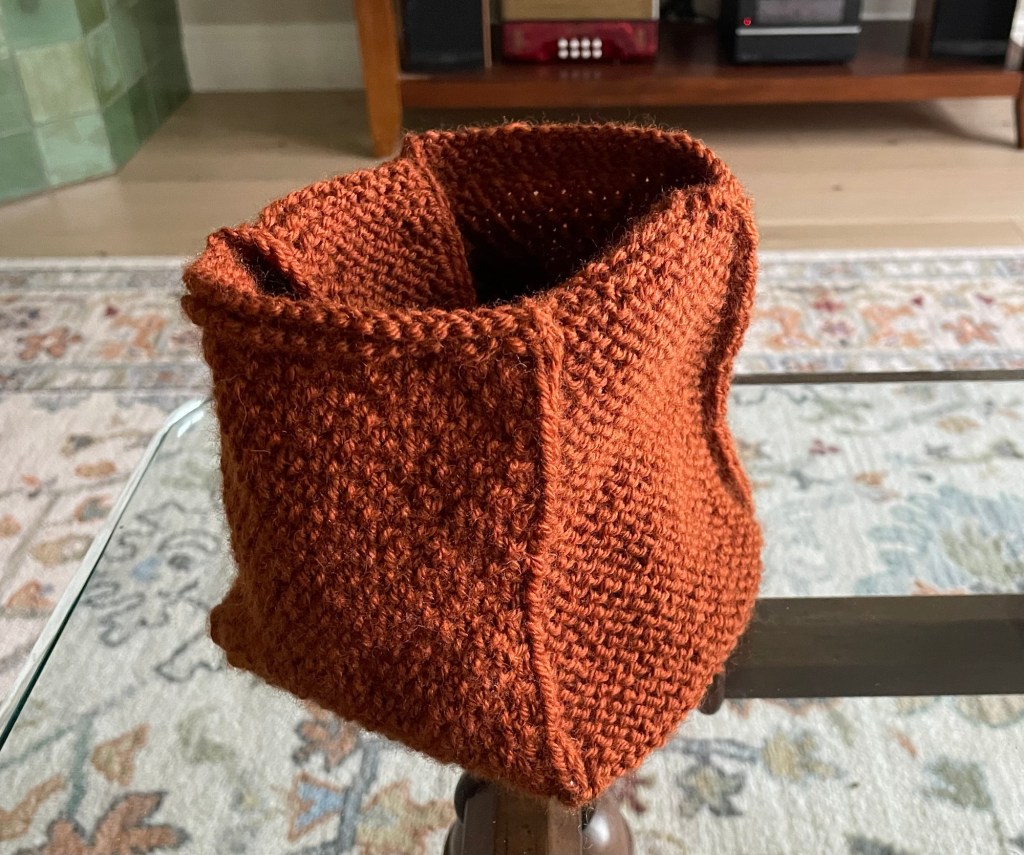
I thought about options for making the bag less floppy, possibly sewing a lining for the bag. I did not really want to sew a liner, so it seemed like the next best option was felting it. This is scary, because felting can be unpredictable. And once it has felted, you cannot get it back to the original condition. I ran it through the washing machine with a load of laundry on warm, and thankfully, it came out beautifully. The fabric felted enough to give it some body, but still retain the stitch definition of the original knitting. Yay! I put a wadded up towel inside the bag while it was drying.
According to the pattern, with their gauge, the finished pouch measurements are supposed to be 4 1/4″ tall, 5 1/2″ wide, and 4 1/4″ deep. My bag was bigger since I used thicker yarn and probably too big of a needle. Of course I forgot to measure it before felting, which caused it to shrink some. After felting it was close to the size of their bag at 5″ tall, 5 1/2″ wide, and 4 3/4″ deep.
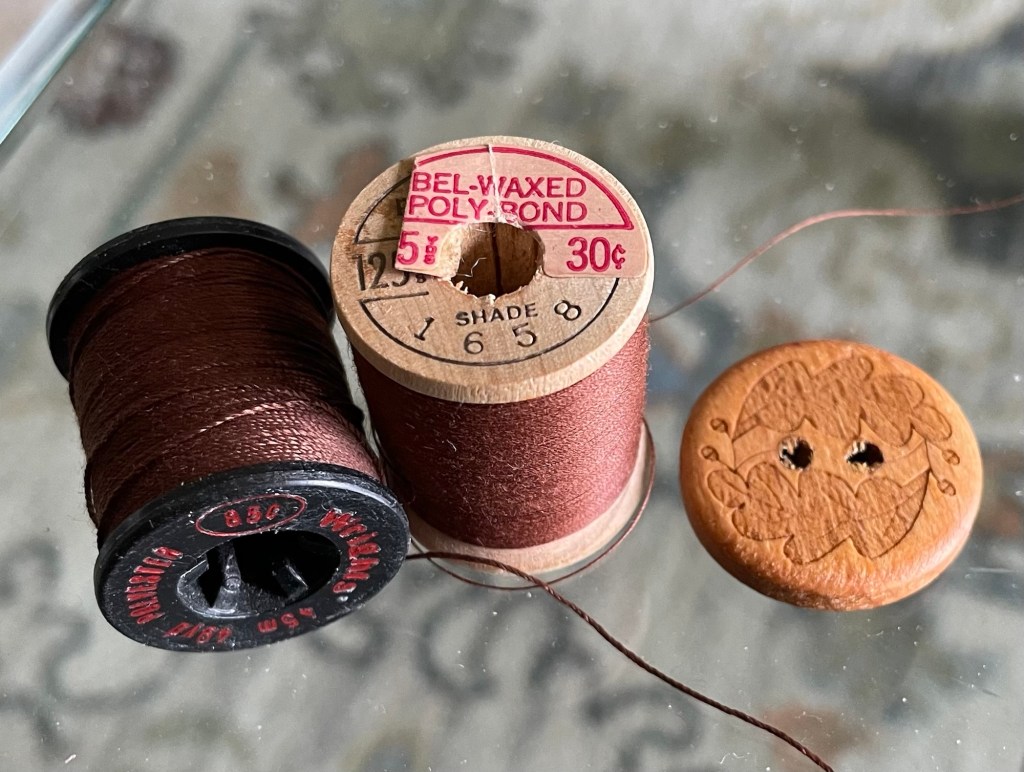
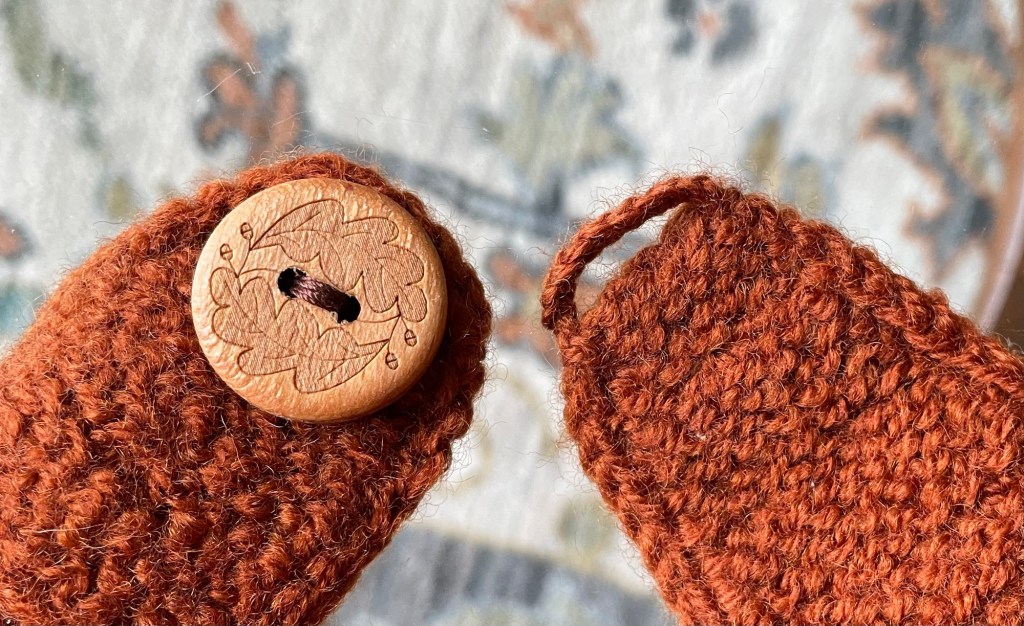
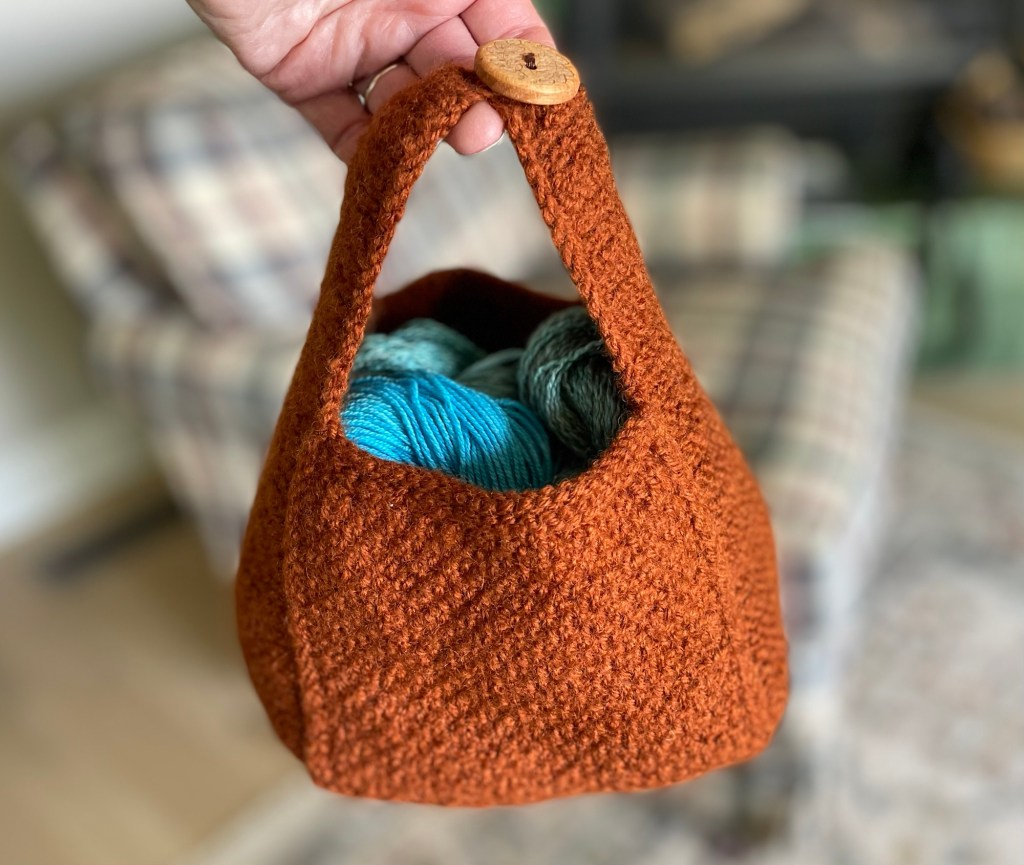
The pattern suggests using a specific set of leather clasps to connect the handles at the top. They are nice and can be purchased here. Since I own a zillion buttons, that seemed like the easiest closure. I checked in several drawers where I have thread stored, looking for the right color to sew the button on. I think the spool of thread for 30 cents in the photo below is left from about 1970, when my mom and my grandma bought the inventory from a stretch and sew store that went out of business. We had entire cases of thread in the basement after that, just like at the fabric store. From that time until today I have rarely had to buy thread.
I fiddled around trying to figure out how to make a button hole after the fact. After a few attempts that I did not like and ripped out, I crocheted a chain stitch loop at end of the handle.
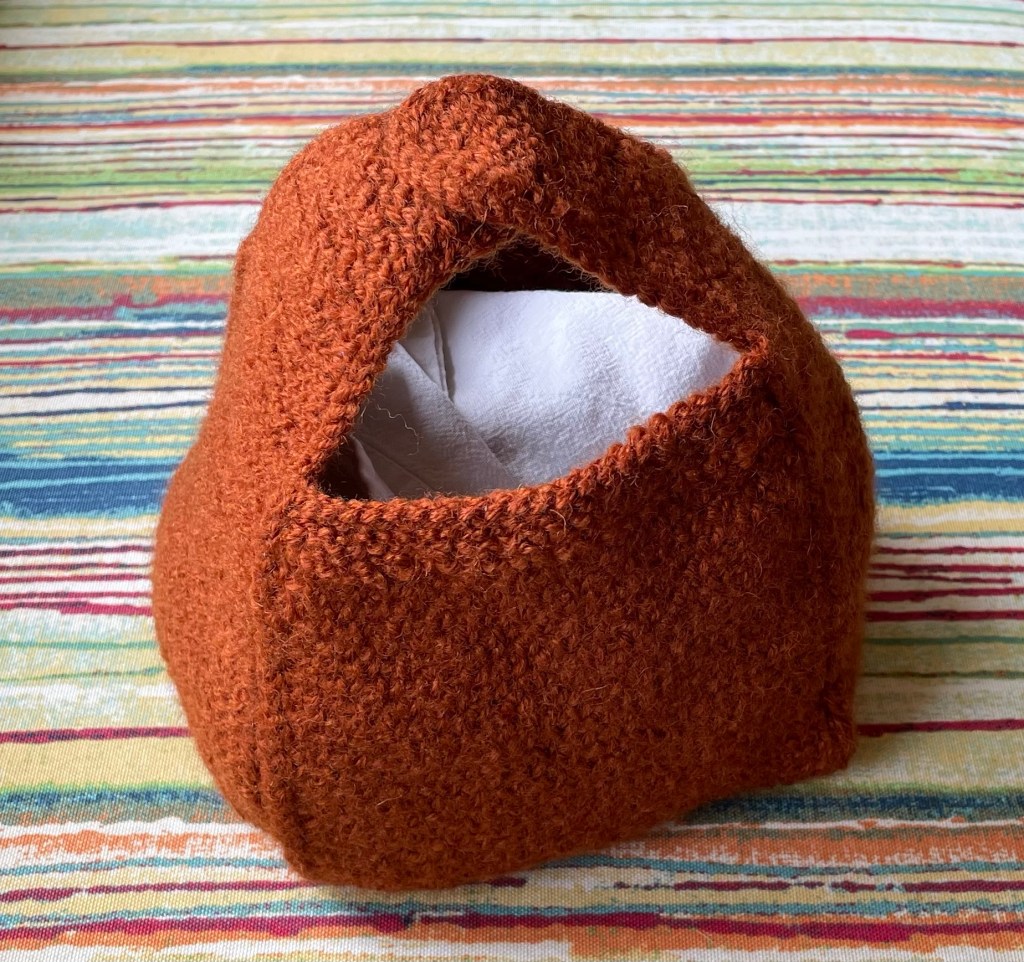
The completed project is shown from different angles in several photos below. For photography purposes, I put some yarn in the pouch that I dyed at Fiber Day last weekend. That will be featured in a future blog post.
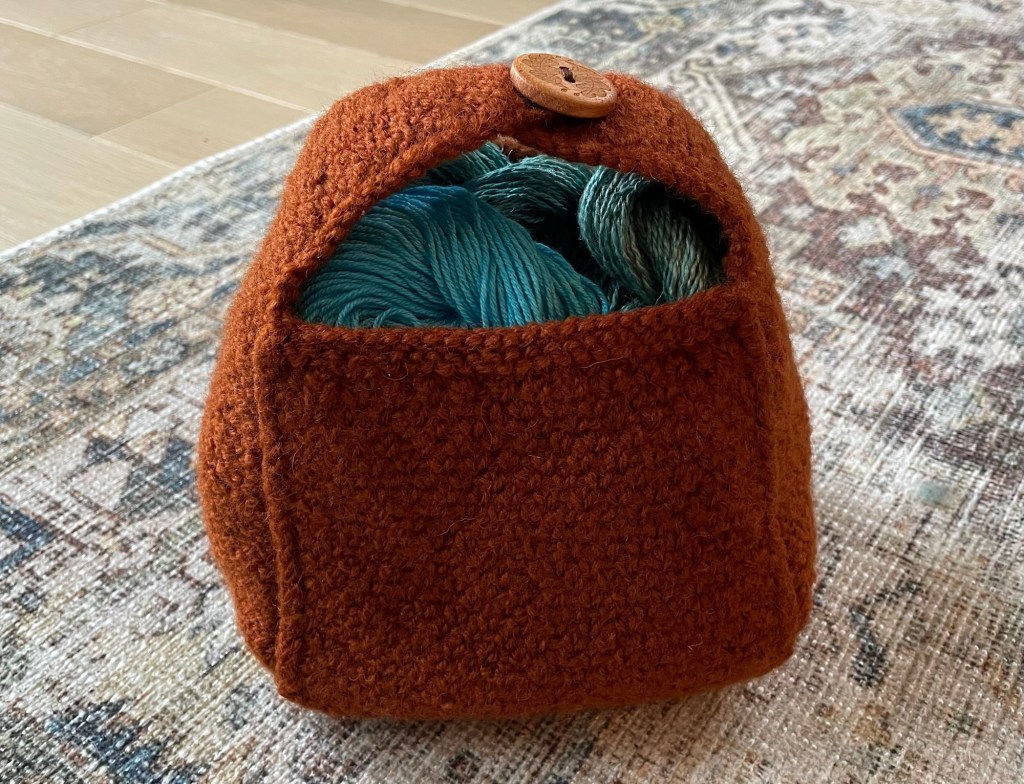
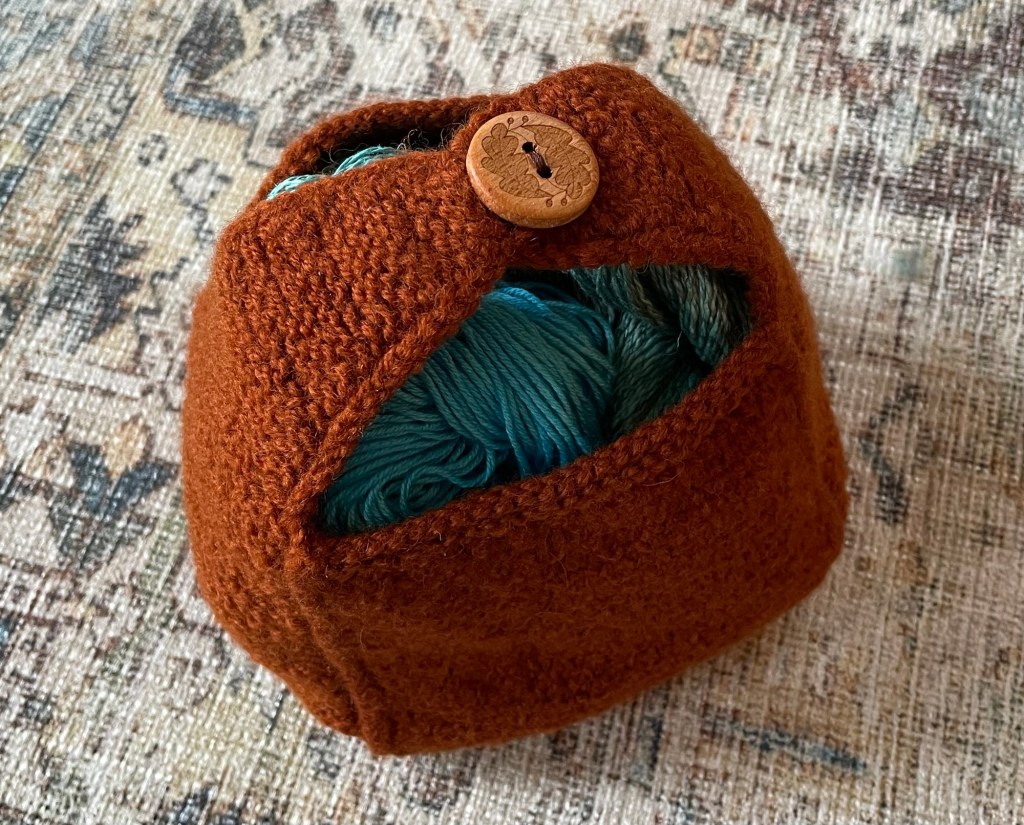
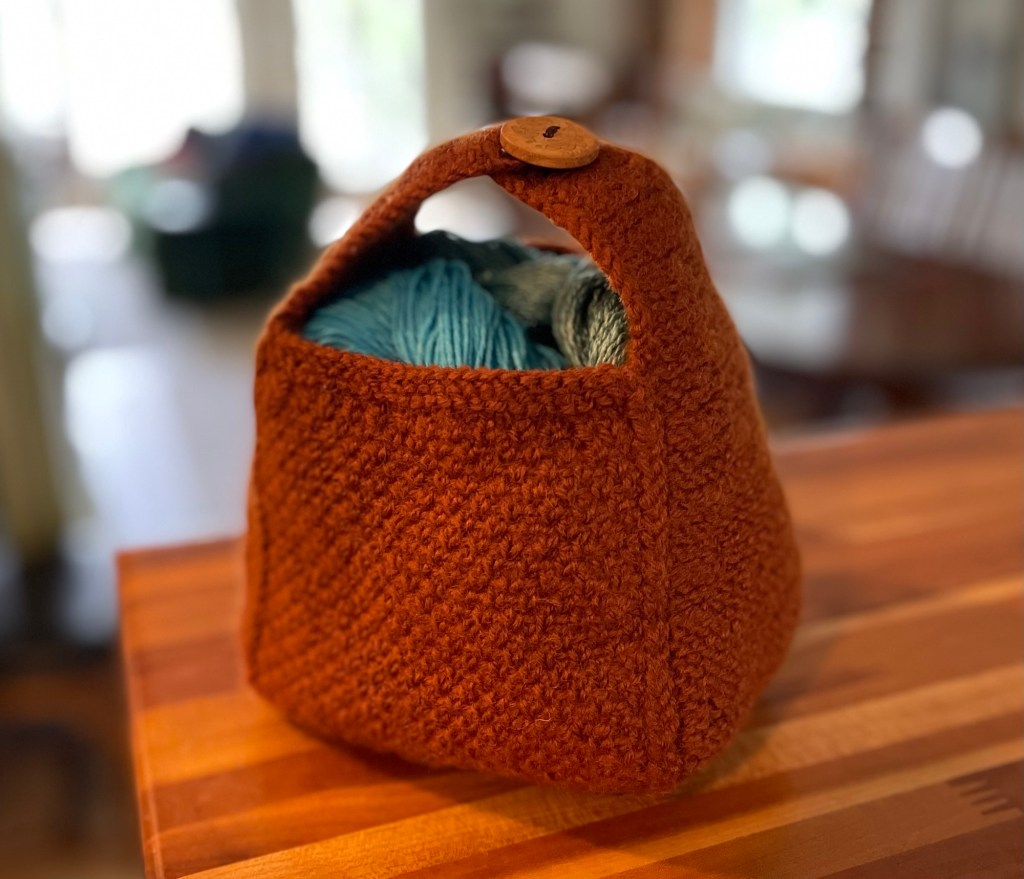
I like the way this pouch turned out. It is a cute size and I hope will actually get used for something. I may have to try it again with the recommended yarn, or at least a tighter gauge.

This is a cute pouch! I love the rich color, and I hope you will find a good use for it. Perhaps a granddaughter would use a pouch like this. I have thread from my grandma and my mom. I keep every wooden spool. Some of the thread has become brittle and breaks easily. I have old buttons, too. Great job, Meg!
LikeLiked by 1 person
I have a drawer of empty wood spools from thread too! Not sure if I will ever use them. The thread for sale today is on plastic or styrofoam spools.
LikeLike
It is a very cute pouch. The button is so pretty. The yarn inside really sets off the color of the pouch.
LikeLiked by 1 person
Thank you! Those are good colors together.
LikeLiked by 1 person
That is so cute! I think your granddaughters would like it 😊
LikeLiked by 1 person
Thank you…yes I think you are right. I guess I will have to make another one!
LikeLiked by 1 person
I think you need to!
LikeLiked by 1 person