
In the summer and fall of 2024 I sewed a skirt for my daughter, using fabric I wove on my four harness floor loom. I wrote about it here.
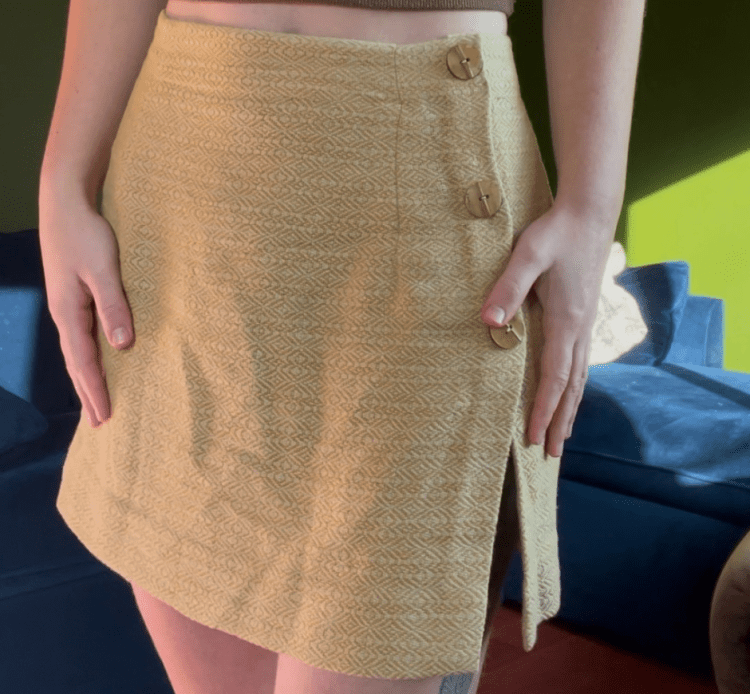
There was enough fabric left to make a matching top. I started the top project this summer when Britta was visiting, but it took me until fall to finish it.
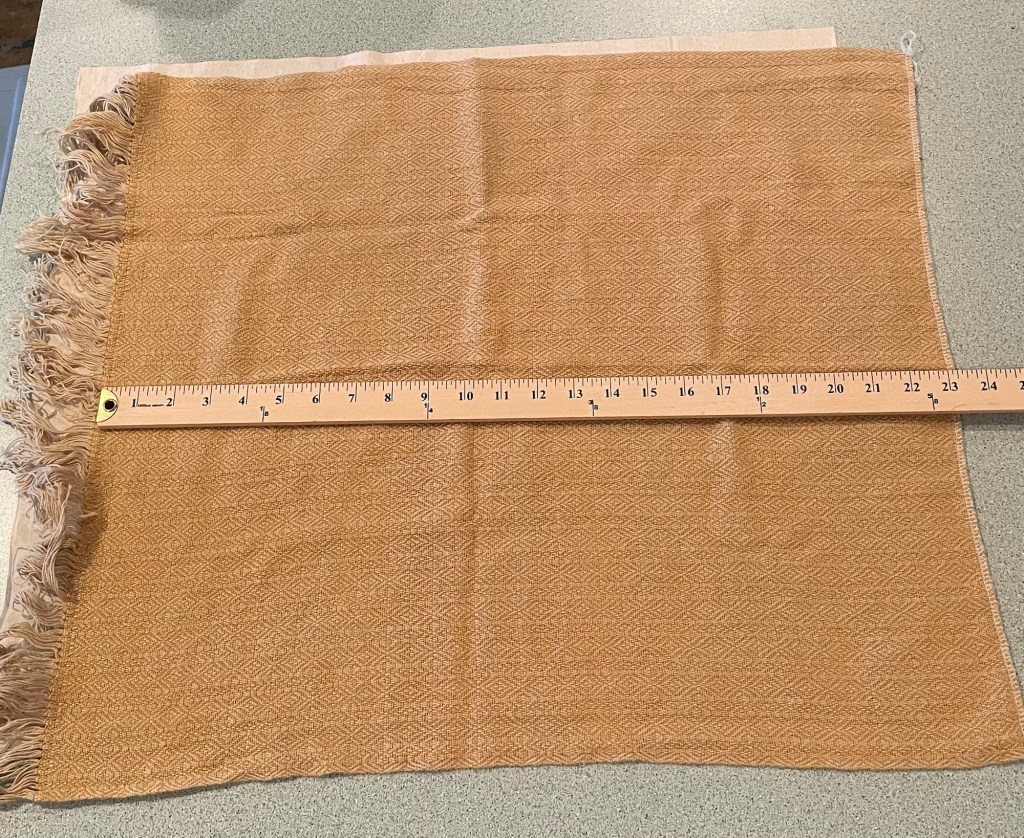
The leftover fabric included a big rectangle, plus a strip that we had cut off the bottom of the skirt to make it shorter.

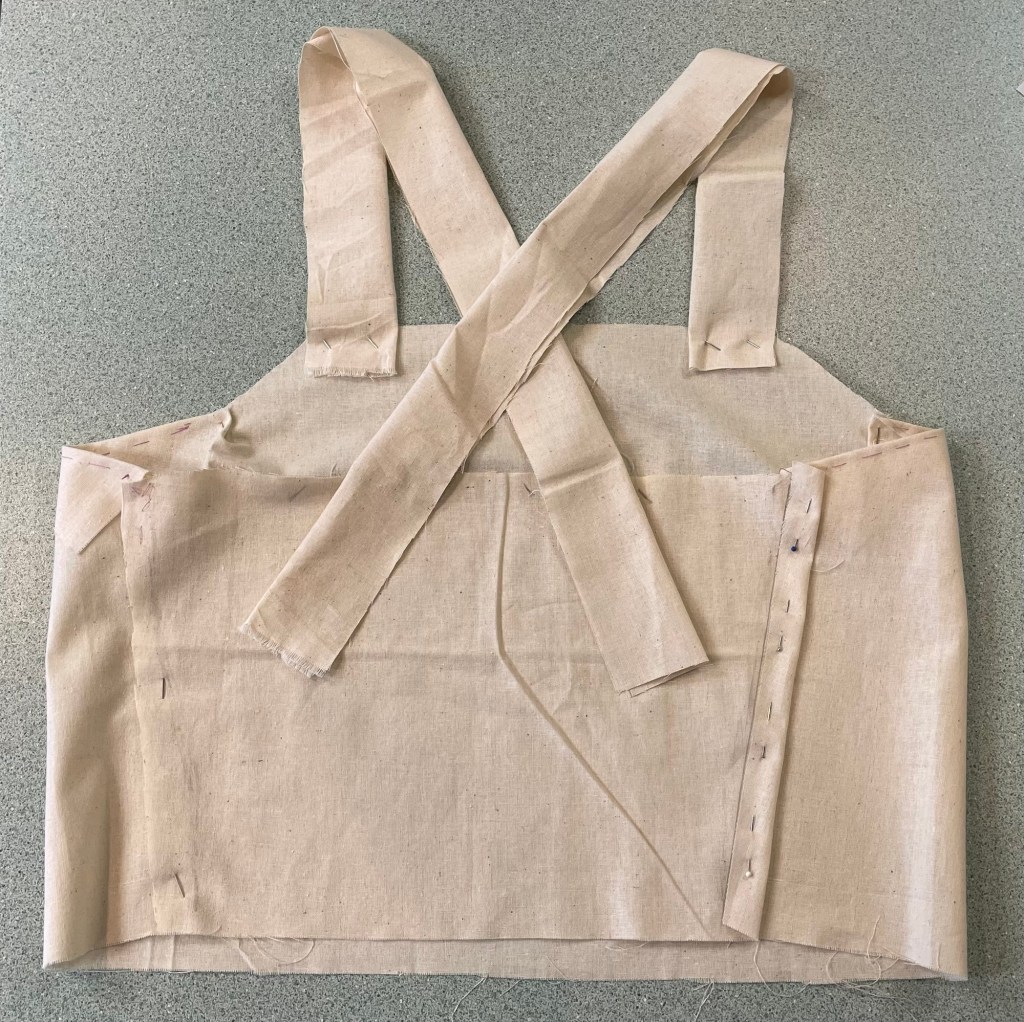
I envisioned a very simple camisole style top with the fabric wrapped around her bodice, and with an opening at the side or back. I found some plain muslin fabric in my stash to use for a mock up. The next photo shows the first version of how the top could work.
The project turned out to be more of a challenge than it might have been for a couple of reasons. Britta wanted the top to be very fitted, and we only had a short amount of time to work on it together when she was visiting over the summer. I did not want to make button holes in the hand woven fabric. I was not sure what type of closure would work best, that could be adjusted later if I did not get the fit perfect. We decided that the closure should be in the center back.

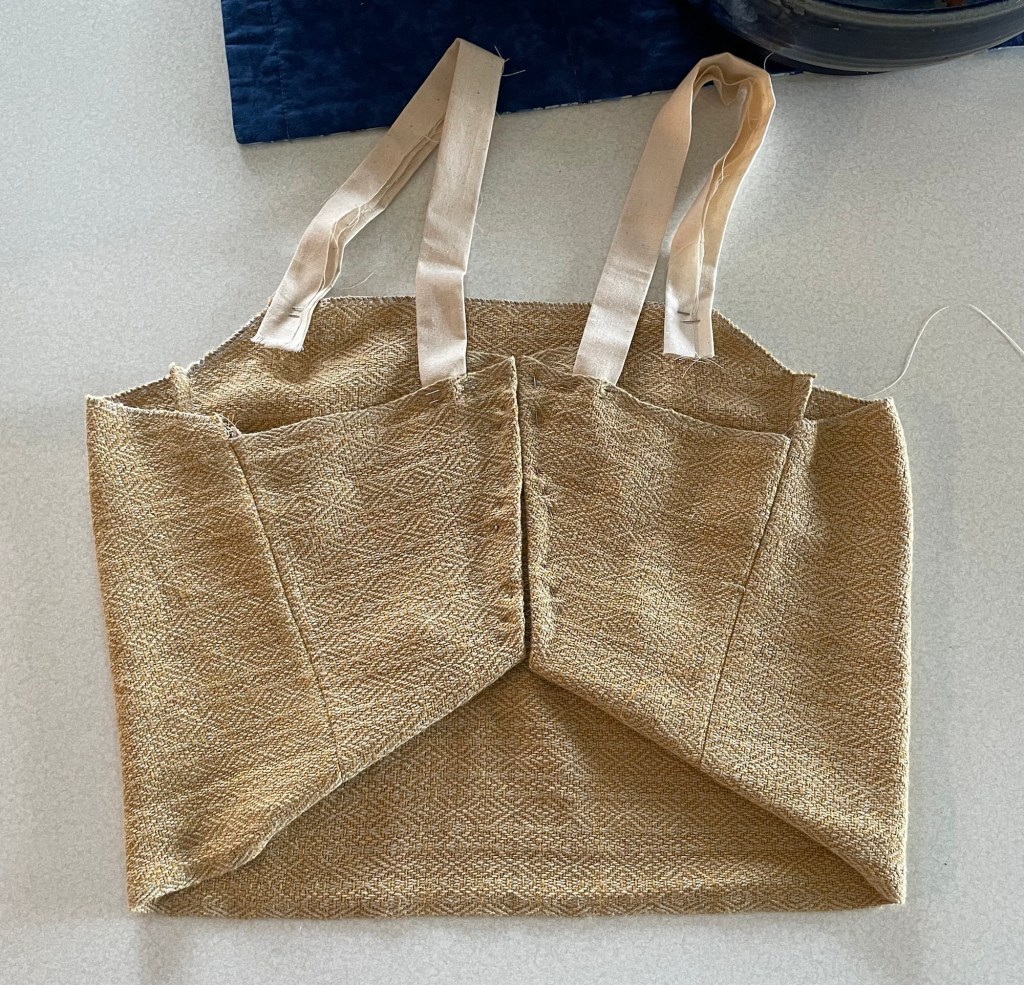
There were only the three pieces to cut out of the actual fabric (not including the straps), using the mock up pieces as patterns. I sewed them together at the sides, which actually wrapped around to the back. After Britta went back to her home in Oakland, California, I continued working on the top.
Britta’s waist measurement is quite a bit smaller than her upper body measurement, so there was extra fabric at the lower back. Darts would have worked. However I thought that folding some of the fabric up at an angle looked nice, would work well for a fitted look, and there would be less fabric to join at the center back.
I used my serger to finish the edges of the fabric where there was not a selvedge, and then folded it over for a very narrow hem that I hand sewed down.

I was able to get the project to this point without too much trouble. My sister-in-law Yvonne, who lives close to Britta, was visiting a few weeks later. I sent the in progress top home with her, along with a padded envelope so she could mail it back to me after Britta tried it on. Yvonne and Britta facetimed with me for a fitting session. I had a bunch of safety pins holding down the places in the back that were folder over, which allowed them to make adjustments. As it turned out, it was pretty close based on measurements I had taken when Britta was at my house.
It seemed like the most effective type of back closure was corset style lacing. That would allow it to be as tight as desired, and also adjustable if I did not get the measurements perfectly. I found some YouTube videos showing how to make corset style lacing, which involved sewing loops on to a secure base. I also had to find something to use for the laces.
The town of 14,000 near my home does not have any good options for fabric and sewing supplies. Even in the Twin Cities, the options are limited now that Joann Fabrics is gone. On one of our trips to the Cities I looked at Michaels, and at a small upscale fabric store in St Paul, near where my son lives. I bought a couple of ribbon options for ties that could have worked, but I was not thrilled with them.
While all this was happening, I had been experimenting with band weaving on a narrow rigid heddle style loom. I wove a narrow band using the same cottolin yarn that I had used for the woven fabric. I was not sure exactly what I was going to use it for. It could be used for either the loops or the ties, if I did not find something better.

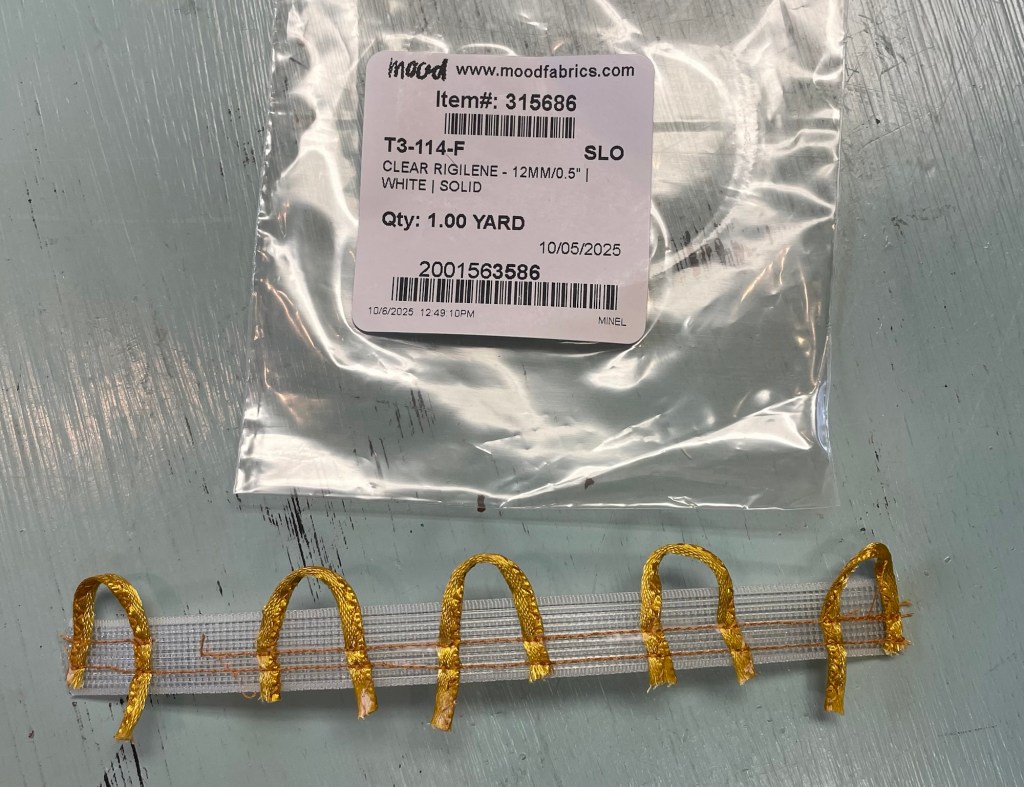
The videos on making a corset style closure suggested using something called “rigilene boning”, a flat plastic style of boning that you can sew fabric loops on to. It was supposedly available at Hobby Lobby. I had never shopped there before, but checked it out on another trip to the Cities. It turns out that Hobby Lobby has a decent fabric department, but they did not have the rigilene style of boning. I did find some ribbon options that were the right color, and some cotton fabric for lining the back of the top. I was not sure if Britta would have picked this fabric out, but the colors looked really good with the hand woven fabric, and I liked it a lot.

I was just winging it at this point trying different things to make the corset back. The videos suggested sewing loops using bias cut strips of satin fabric. I did not want to do that. Instead I made loops by folding 1/4″ yellow ribbon in half and zig zagging it. I thought it would work to sew the loops on to wide grosgrain ribbon, and then sew that on to the lining fabric. The loops wanted to wiggle all over, and when I finally got one loop attached, the ribbon started to rip. That was not going to work.
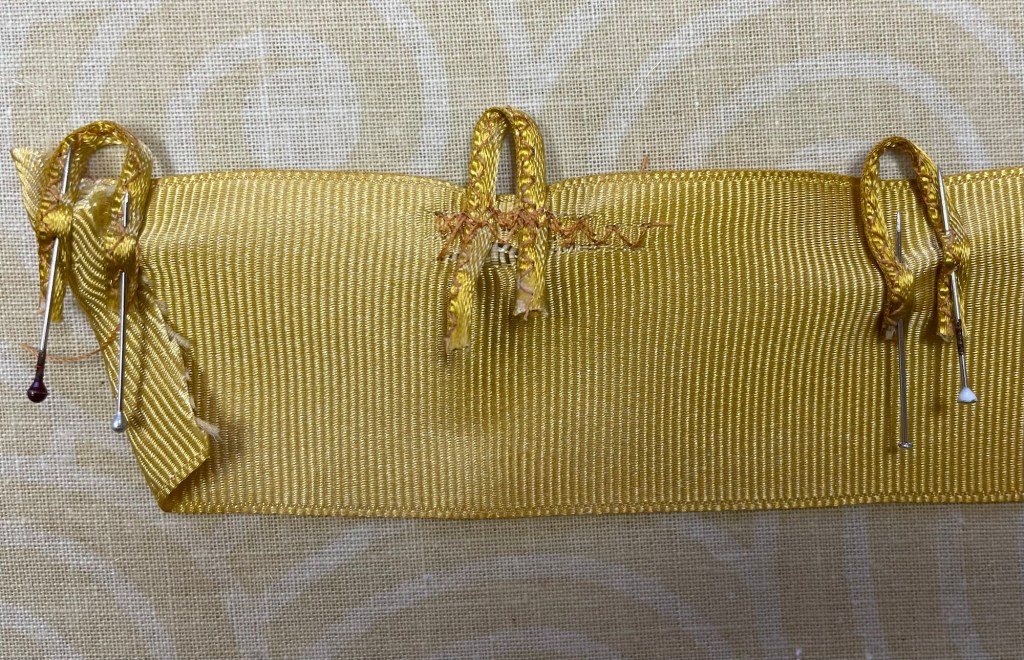
At this point, I went ahead and ordered the rigilene boning online. The project was delayed again while I waited for that to arrive, and was side tracked by other activities. Once it came and I was mentally ready to tackle this challenge again, I was able to sew the loops on to the very stiff rigiline boning, holding them in place with scotch tape.
I cut the lining fabric to match the shape of the back sections, and ironed on some interfacing that I had from sewing projects many years ago.

The next steps were sewing the strips of boning with the loops attached on to the lining pieces with two rows of straight stitch on the sewing machine, and then sewing the lining pieces on to the actual top.

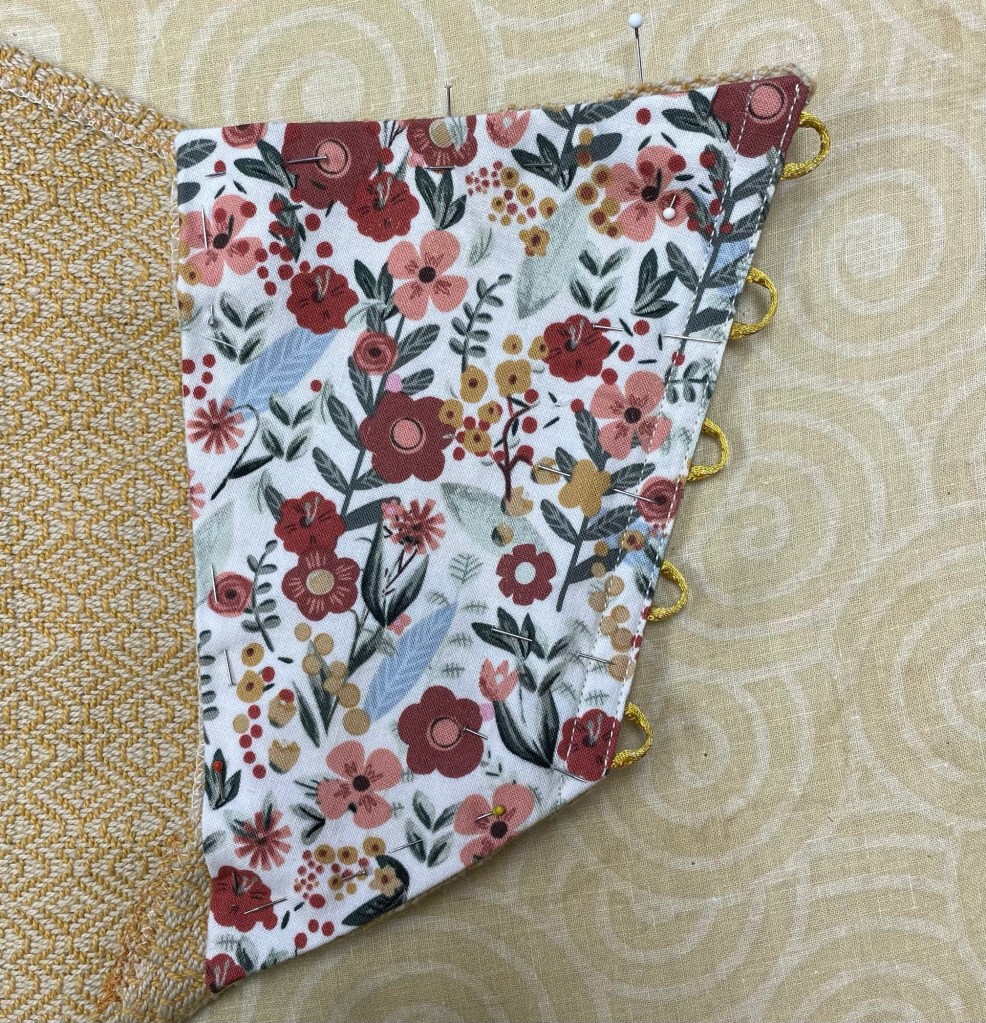
I sewed the lining edge with the boning on it to the top with one row of zig zag stitch on the sewing machine. I sewed the other three sides down by hand, leaving an opening on the top edge for the straps. Earlier I had sewed the straps on to the front by hand. Now I inserted the straps in between the woven fabric and lining on the back and hand stitched it in place. I did not want to sew it on the machine in case it needed to be adjusted later.
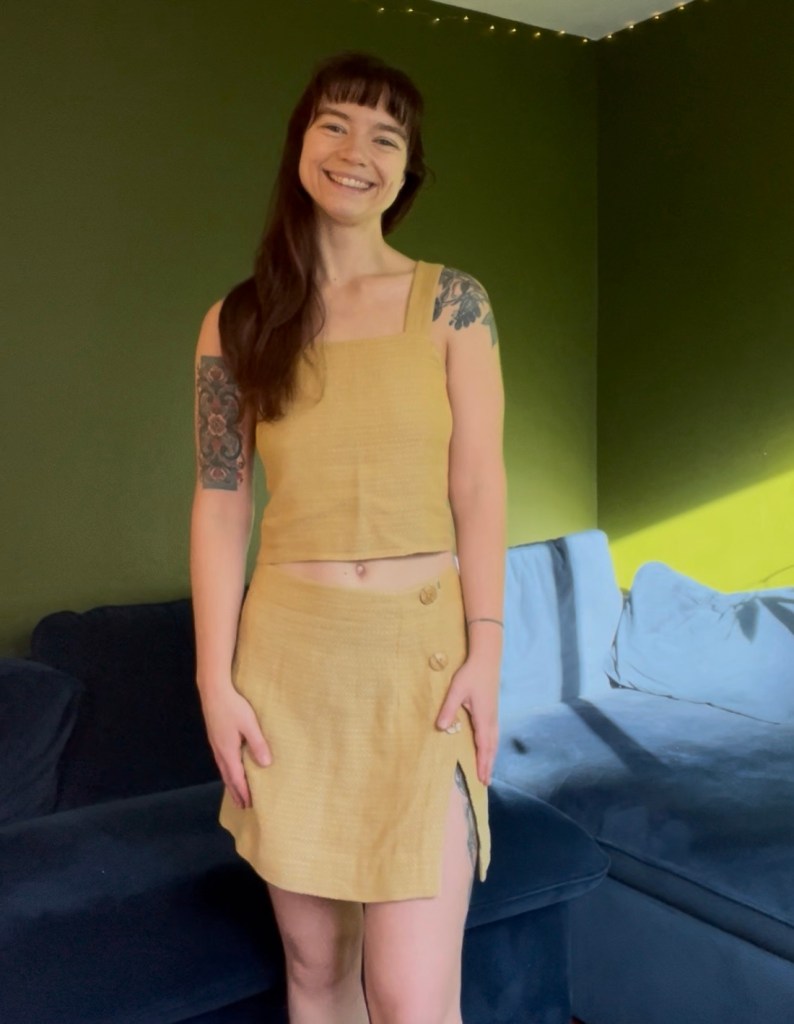
Following are photos of the completed project from the back and front, using the hand woven band for the ties. I am not sure if the bow is supposed to be at the top or the bottom. I have seen it both ways.


I mailed the top to Britta, praying it would not get lost in the USPS along the way. I included some other options for ties that could be used for a different look.

The next photo shows the only scraps that were left of the original woven fabric.

Britta sent photos of herself modeling the outfit. Yea, it fits. It is a little wrinkly, but that is the nature of the cotton/linen blend fabric. I think it is a losing battle trying to keep it ironed.

After Britta got the rosemaling tattoo, she was surprised that more people comment on her fish tattoo.
This project turned out to be more of a hassle and take way longer than I expected. I like the way it turned out, and more importantly, and Britta likes it. There is another project I have in the works for some knitted felted slippers where I am having to figure out how to make my idea work. For the foreseeable future, I plan on sticking to projects where I can follow a pattern, and not have to figure something out from scratch. We’ll see how that works out.

Love it! So many hours of thought and work in this ensemble. Fun to see Britta as the model. ❤️
LikeLike
Thank you! It was a labor of love for sure, but worth it.
LikeLike
It looks great! You are so skilled!
LikeLiked by 1 person
Thank you! I used to do a lot of sewing way back when, so it was fun to combine weaving and sewing in one project.
LikeLiked by 1 person
What a great outfit! And she is so cute to model it! I think it’s good for our brains to try to figure out complicated things, but It’s also good for our brains to follow a pattern! We still have to think even when following a pattern. You are very talented!
LikeLiked by 1 person
Thank you. Yes, it is good to do both at different times. It is not likely I will only follow patterns given my history LOL. Have a great weekend.
LikeLiked by 1 person
That is such a great outfit!
LikeLiked by 1 person
Thank you! She can pull it off with her age and figure lol.
LikeLike
That looks so nice! And I’m so impressed that you can not only sew a pretty outfit for your daughter, but you can weave the fabric too!
LikeLiked by 1 person
Thank you! It was a labor of love. Hope you have a peaceful Thanksgiving with family!
LikeLiked by 1 person