
After weaving towels on my Structo Artcraft table loom, I concluded I did not want to keep it. The vintage loom takes up a lot of room, and anything I could make on it can be made on my floor loom. It was in pretty good shape and functional for its age, but had a few minor challenges associated with being old and no longer in production.
I have been enjoying membership in the School of Sweet Georgia, and their online community of “multi craftual makers” who, like the founder Felicia Lo, like to “make all the things”. A recent class offering is Machine Knitting 101, using a basic flatbed knitting machine. I had never been interested in flatbed machine knitting before, but I watched the beginning of the class. The instructor, Barb Barone of Yarniversity by River City Yarns is the Bob Ross of knitting instructors, with a very calm and gentle approach. Suddenly machine knitting became intriguing. One of the reasons people like flat machine knitting is that it takes so darn long to knit a sweater or anything larger than a hat or scarf. I liked the idea of combining hand knitting with machine knitting the tedious parts of a sweater.
In August I had talked to Torri, my friend and weaving mentor in Fergus Falls, about the Structo Artcraft table loom. It turned out that she had two flatbed knitting machines that she was never going to use. She offered to trade me the knitting machines for the loom. They were in boxes and buried behind other stuff in her shop, so she was not sure exactly what models they were. I agreed to the trade without really knowing what I was going to get.
After we got back from our August RV trip out west and I had gotten settled back at home, I went to Torri’s shop to exchange equipment. The loom took up the entire trunk of our Honda CRV with the back seats down. Torri moved things around to make a space for the loom and dug out the knitting machine boxes. They were both four feet long, bigger and heavier than I expected.
My husband was not excited about more things coming into the house. I assured him that if I decided not to keep either of the knitting machines, I would pass them on to someone else. I was able to move the smaller box into the house by myself and put it on the dining room table, but needed Wayne’s help to carry the larger one inside to another table in our three season porch.
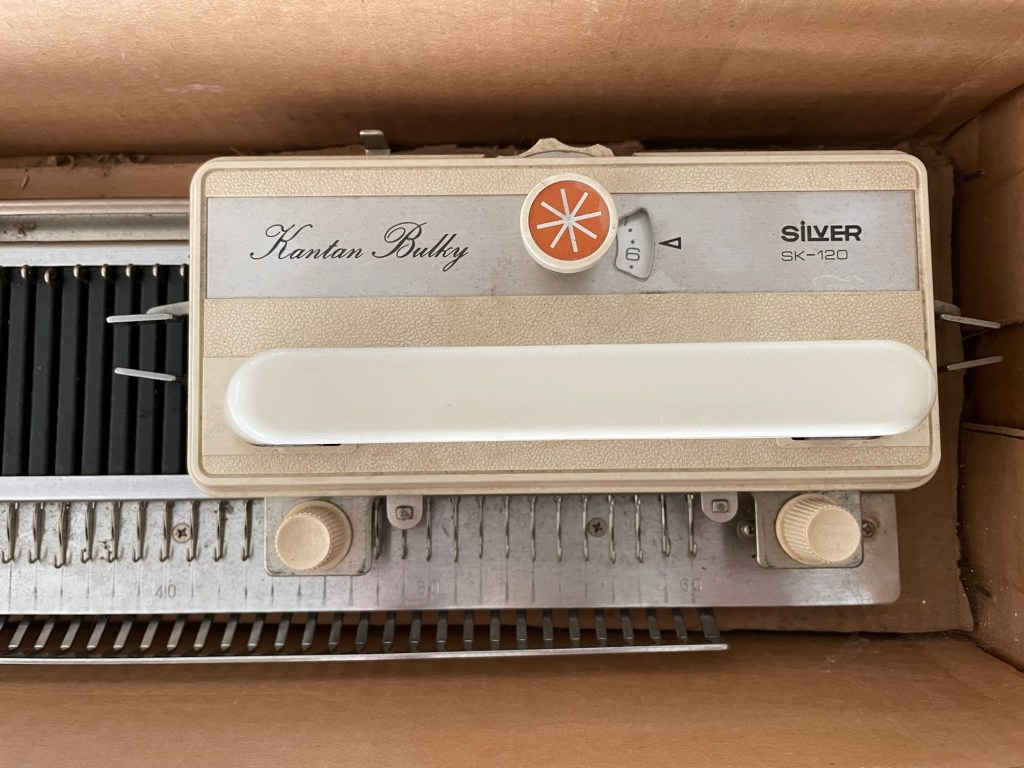
I was excited to open the boxes, to find out what I now owned. The smaller box contained a vintage metal Silver SK-120 Kantan Bulky flatbed knitting machine. The machine was a little dusty but it appeared that all the parts were there. I was able to find a user manual online.
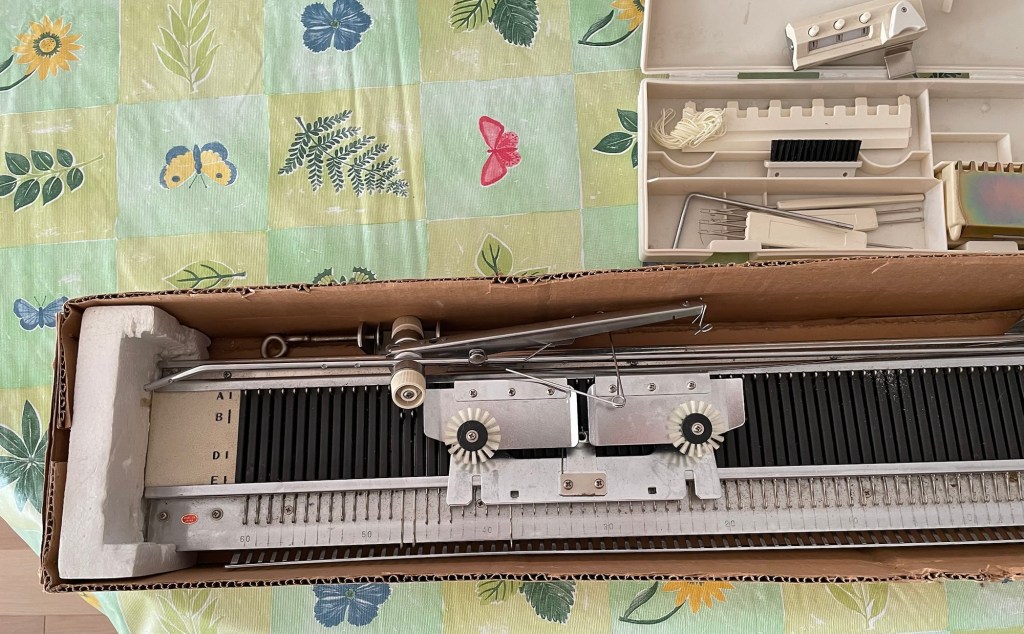
The second very large box contained a double bed White Technique Brevets Mondiaux, made in France, also metal. I found out later it was manufactured under several names, and is also known as a “Supurba”. The “double” means that it can do ribbing and more complicated patterns. It has more needles closer together for thin yarn. It looks very intimidating. This also seemed to have all the parts, including the user manual and some cassette tapes. Hmm, I do not think we have a cassette tape player.

There is an electric attachment used for making fancy patterns.

I was able to assemble the simpler SK-120 machine by referring to the user manual. With my experience using a circular sock machine, and watching the beginning of the School of Sweet Georgia class, I understood the basics of how it worked.
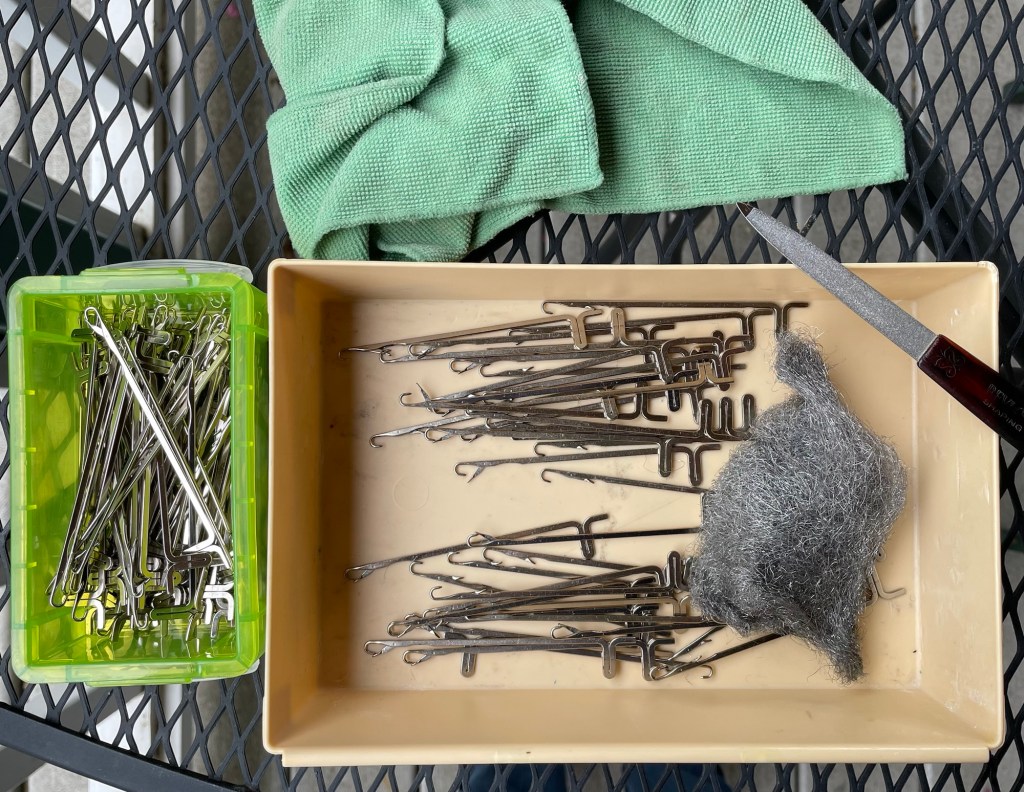
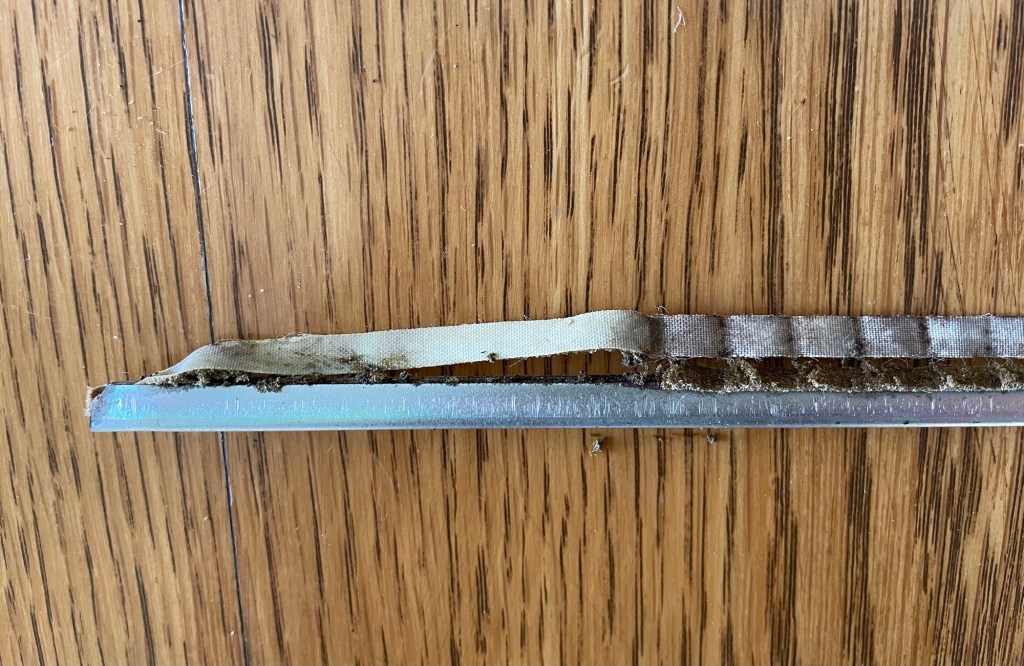
Some of the needles were rusty, or maybe just had gunk accumulated on them. Internet tips for cleaning the needles included steel wool and soaking them in Marvel Mystery Oil.

More importantly, the “spongebar”, a metal channel with some kind of sponge or felt in it that is needed for the machine to work, was completely disintegrated. It is normal for this part to wear out and need to be replaced. I found out that this particular model of machine has a unique shape of spongebar that is not compatible with other brands and models currently in production. Darn. After a lot of searching online unsuccessfully for replacement options, I was getting frustrated. I finally found one site that offered a product, but they were out of stock. I called the number and they did have one after all, so I was in luck.
I was able to get the original sponge bar out of the SK-120 pretty easily.
I spent an entire afternoon cleaning out the track of the SK-120 sponge bar. I used a narrow screwdriver to dig out the gunk from inside the narrow metal track, and then I used toothpicks and goo-gone to get out as much of any remaining stuff still stuck on the bottom and sides.
The replacement piece of felt for the sponge bar came in the mail, and Wayne helped me figure out how to get it inside the narrow track.

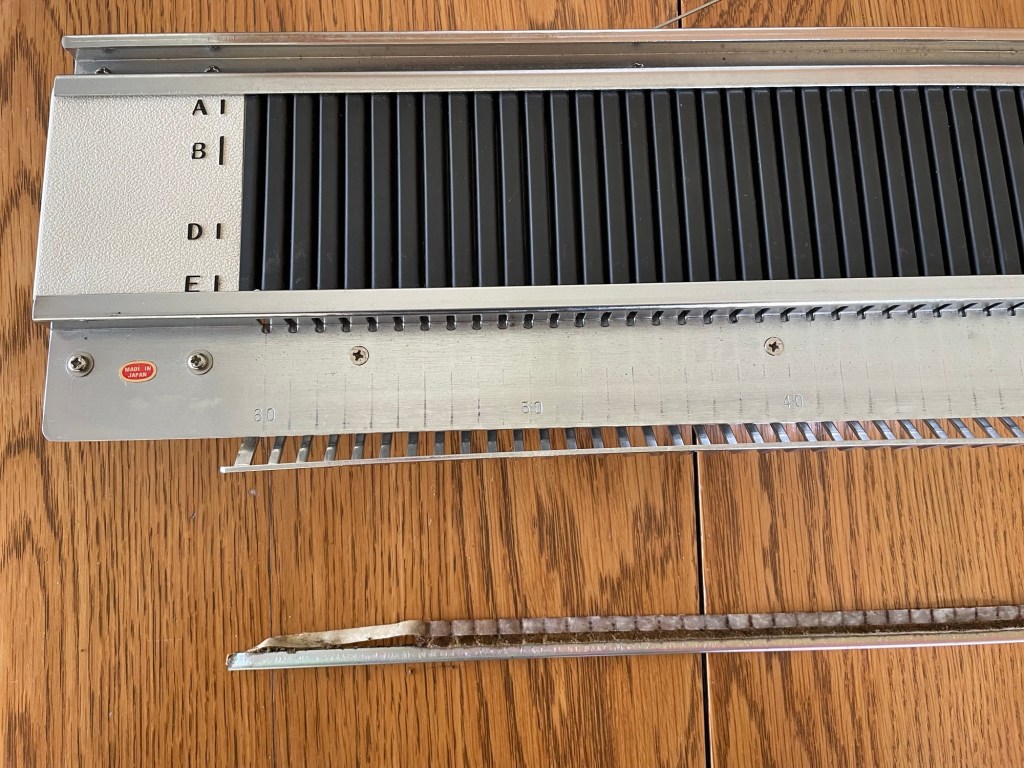
We had to pry the opening in the track a little wider. After trying different methods of getting the felt into the track, I found that it worked to just push it in from the top once the opening was wide enough.

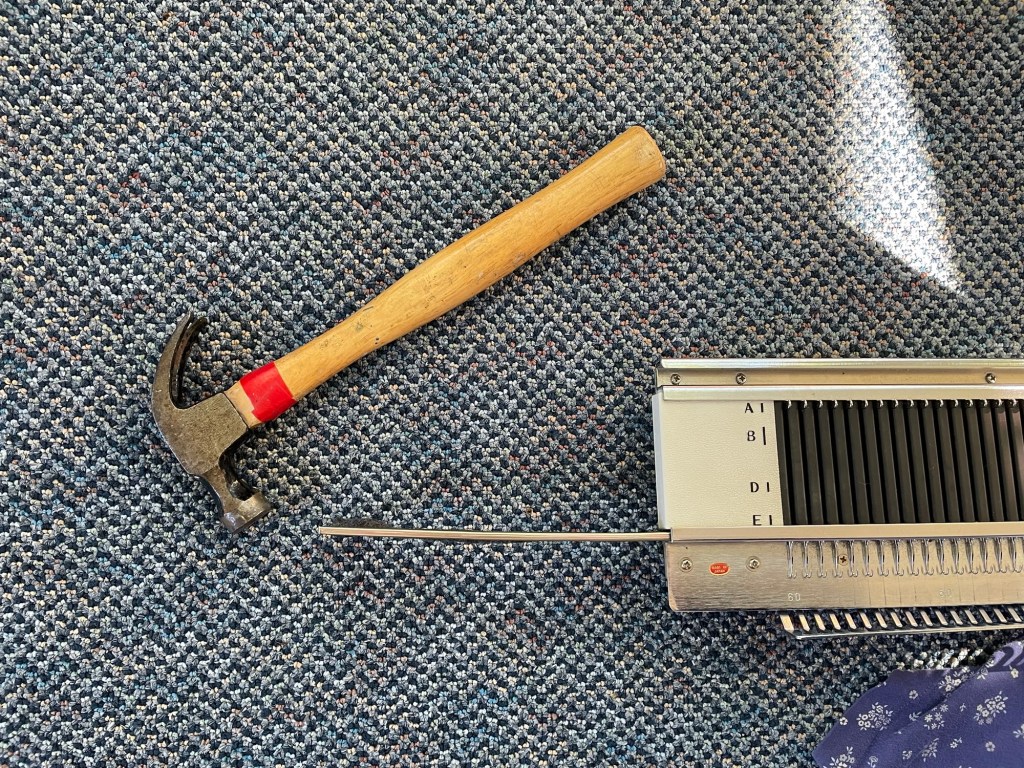
Once the felt was in the track, the track had to be inserted back into the machine, over the needles. First I had to pound the metal track with a hammer to get it to the original width, and then it was kind of banged up. It did not want to go back in the opening.

I got it in a few inches and then it was just stuck. I was able to inch it forward into the space by hitting it with the hammer repeatedly.
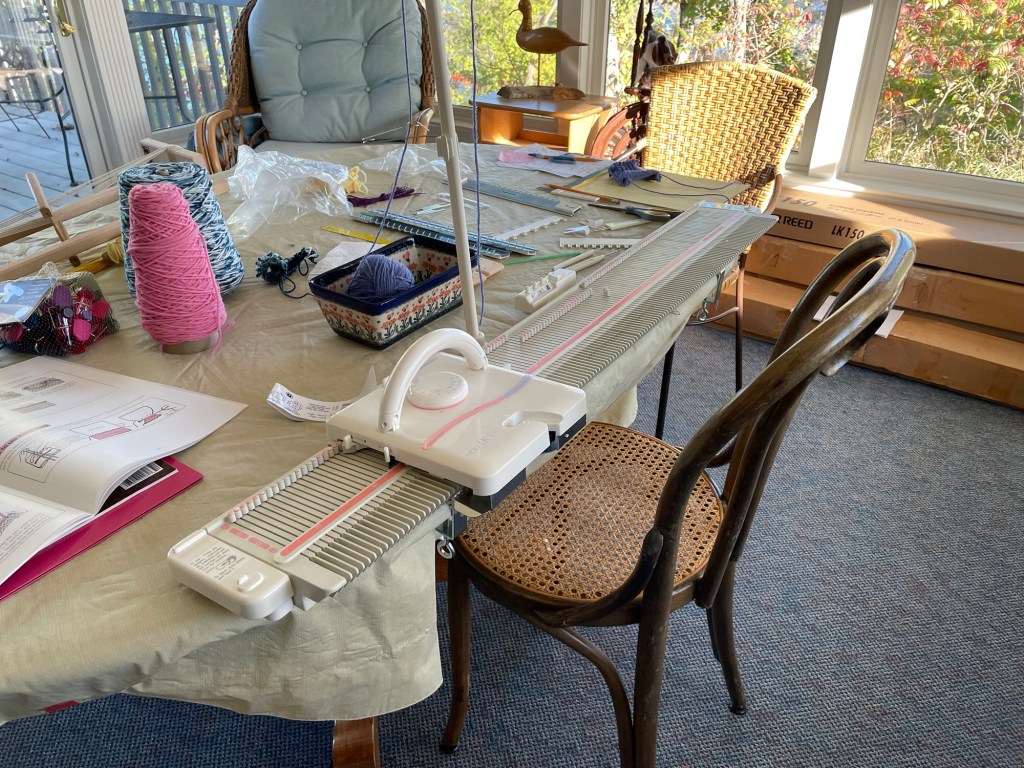
I got the sponge bar completely back inside the machine, but I do not think anyone will ever get it out of there again. This is a problem. I think that if you need to replace a needle, you have to remove the sponge bar in order to get the needles out. The next photo is the SK-120 knitting machine ready to go with clean needles and the sponge bar replaced.

I was able to get the machine to knit a couple of small samples.
Weights are used to keep the knitting down while making stitches, like the circular sock machine.
Some of the needles did not slide in and out easily to form stitches. I felt like I was fighting with the machine. That is not what I had in mind.
There is a shop about two hours from me, The Knitshop at Rocking Horse Farm, that specializes in machine knitting, both flatbed and circular. I have been there a number of times for sock machine crank-in’s and a fiber festival. I have seen flatbed knitting machines in use there, but again, was not interested at the time. I talked to them about both of these vintage machines, and found out a couple of things that were discouraging. First, they have several of the SK-120 machines in their back room that no one wants because it is too hard to get a replacement sponge bar. I had been thinking maybe I could trade this vintage machine for a newer used model, but they do not want another one of these. Secondly, they said that the more complicated machine has a different cast on method than most other machines and they they could not help me.
I did a lot of research online for any information on either of the machines. I found an online group of machine knitters based in the Twin Cities, and reached out to them to see if anyone knew anything about either of these machines. Someone responded right away. She said that the cast on for the White/Superba machine is not different. She directed me to some instructional videos for that machine and invited me to their monthly zoom get together. As in other things, once you get interested, you find other people doing whatever the thing is.
While concluding that I did not want the bulky machine after all, I was online looking at information from the Knitshop at Rocking Horse Farm. They sell LK-150 knitting machines, which is the basic knitting machine used in the School of Sweet Georgia class. I also found some other sites online with instruction on this particular machine.
After discussing with Torri, she said she would take the SK-120 machine back. She was not planning on knitting garments, but was interested in using it for art projects, possibly trying to knit with wire.
While this was all going on, I was needed for some grandparenting in St. Paul. My son was in his last week of paternity leave in the middle of October. His wife had to go on another business trip, and Blair was not feeling well. I was happy to help out. After a few days in St Paul, I stopped at Rocking Horse Farm on the way back home.
Wayne was a little rattled when I got home with a brand new Silver Reed LK-150 machine, and now there were three knitting machines in the house. I assured him that one of them was going back to Torri. I plan on keeping the complicated double bed machine for now, until a future time when I am ready to figure it out. After that I can get rid of it, or not.
The next photo shows the new LK-150 machine. It is plastic, which contributes to the reasonable price and lighter weight. It is also not as durable, but still gets very good reviews, and is recommended for a beginner machine. It is designed for medium weight yarn, but can also knit bulky yarn on every other needle. This type of machine, as with the SK-120, does not do ribbing. You can do a band of ribbing by undoing knit stitches and redoing them into purl stitches by hand, or you can add rows of ribbing by hand to live stitches after taking the knitting off the machine.
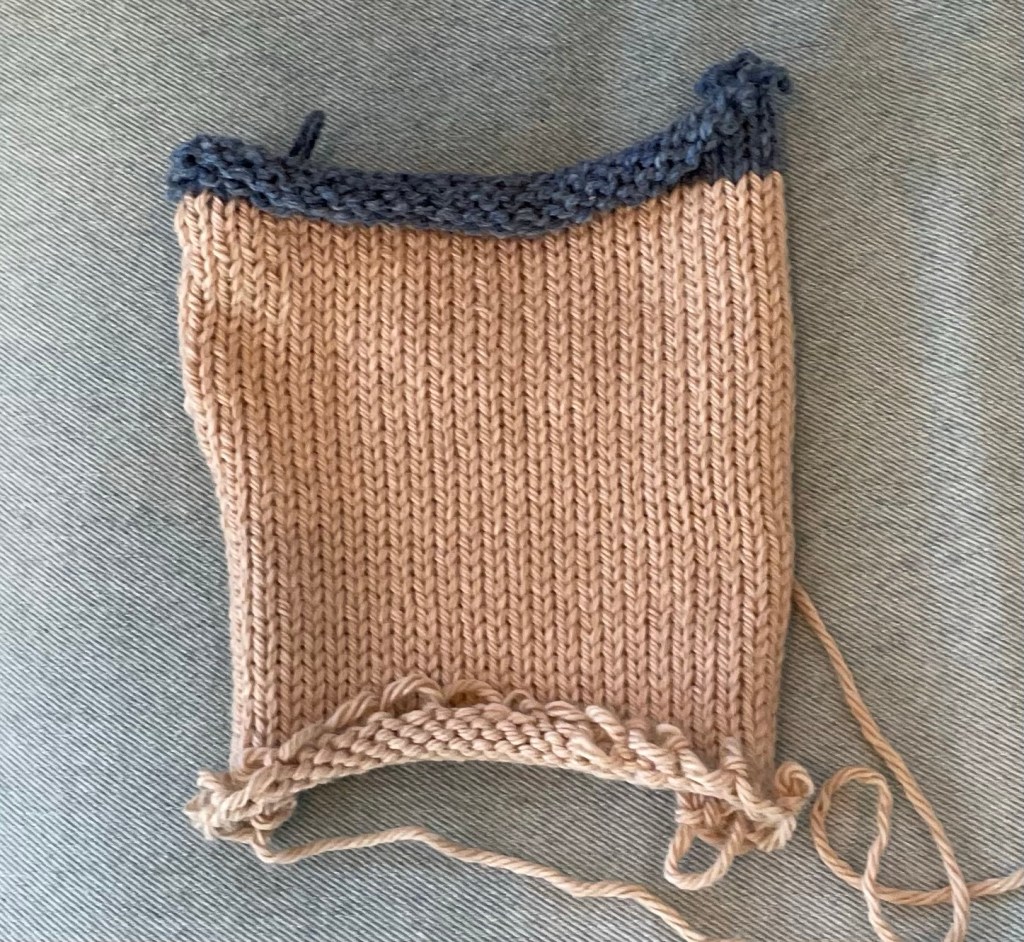
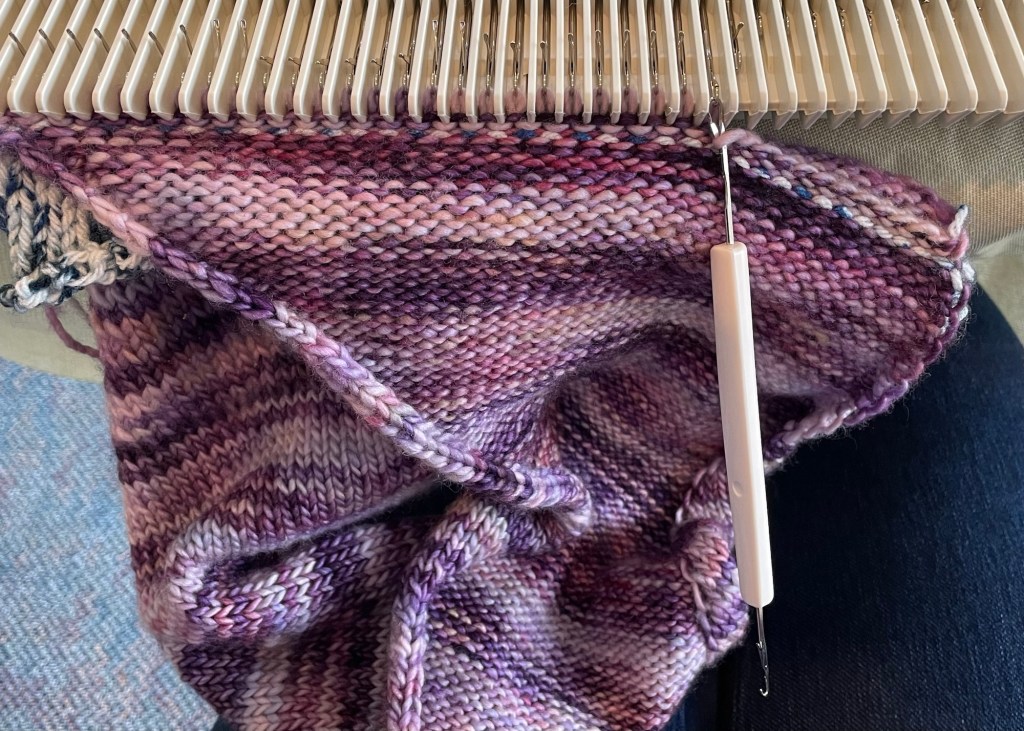
I knit the following sample to practice casting on and off, increases and decreases, and making eyelets, using some yucky acrylic practice yarn. It is hard to see what is going on in the self striping yarn.

One of the beginning patterns included with the School of Sweet Georgia class is a bias scarf, where you knit an increase on one end and a decrease at the other end of every other row. I had one ball of some 100% wool that I bought at Joann Fabrics last winter. It was pretty and soft, but also inexpensive and good for practicing. I tried the bias pattern with fewer stitches across since I only had one ball. The easiest increase method makes a loop down that side of the scarf, which can be a design feature or maybe not the best depending on what you are making.
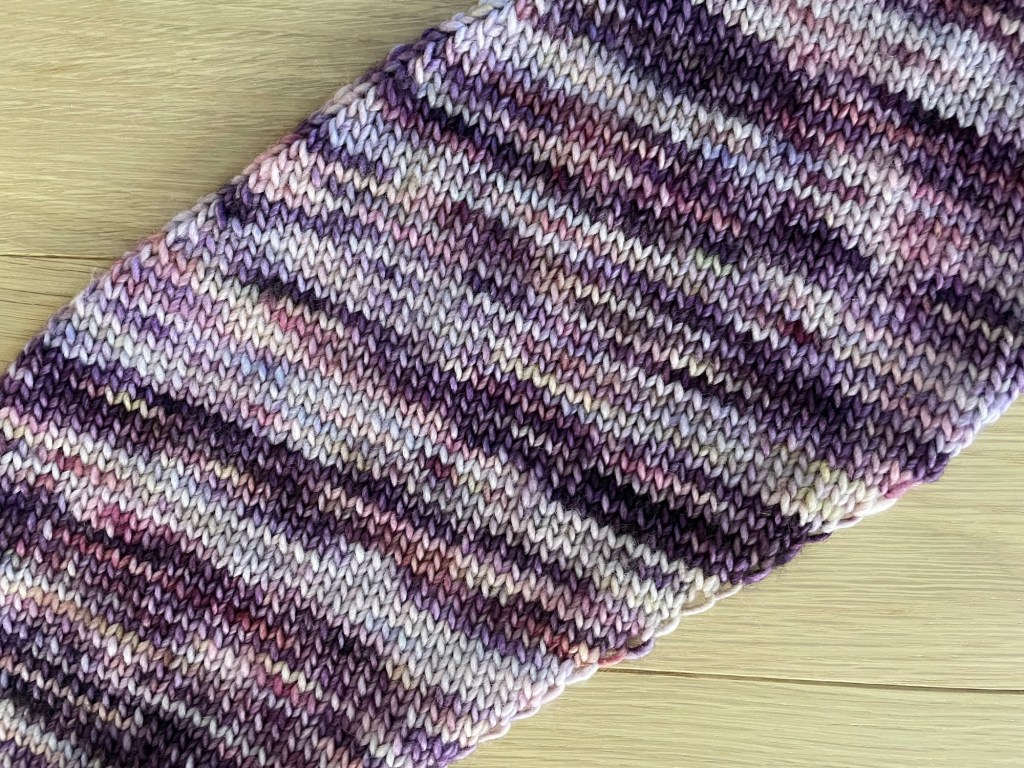
The fabric made with all stockinette stitches curls a little at the sides, which you can see on the back of the scarf.
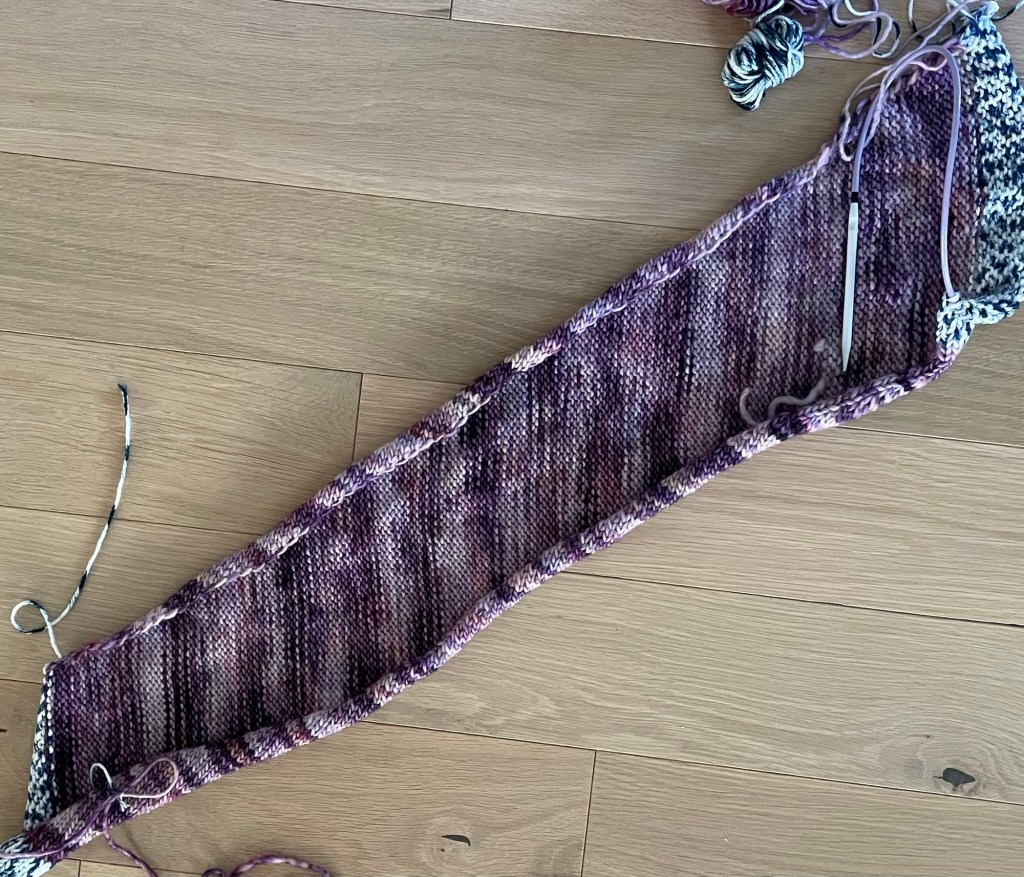
I made it into a cowl by joining the live ends on the machine, using instructions from a different pattern.
The join looks nice and flat on the knit side of the fabric. The back has a small ridge, that can be seen in the photo above. I probably won’t wear this scarf, but it was good practice.
For my next practice project I found a beginner baby sweater pattern online. I bought some cheap acrylic yarn at Walmart to make this sweater for my granddaughter. I seem to be very into purple lately.

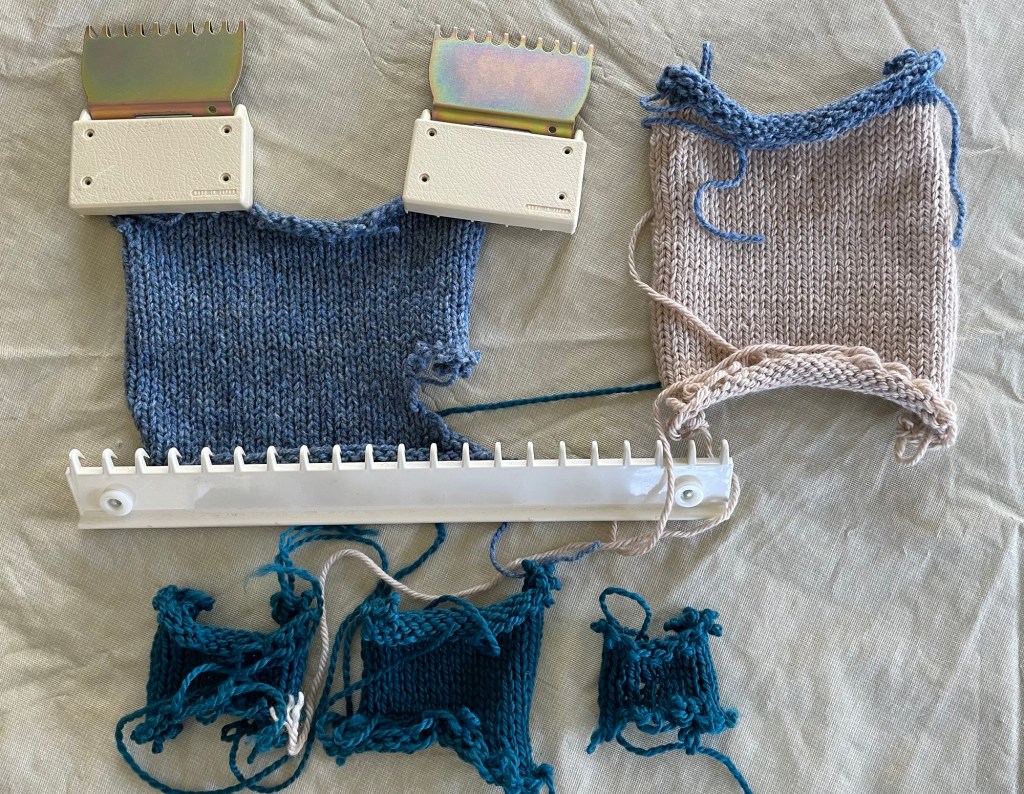
The back is just a square, the fronts are two triangles made by doing doing decreases up one side, and the sleeves are rectangles with some increases on each side.

Following is what the project looked like after I knit each of the five sections, and then using the machine, joined the shoulder seams together, and the sleeves to the body.

Finishing the sweater involved hand joining the side and sleeve seams using mattress stitch, knitting I cord ties on the machine, and weaving in many many ends. There were 18 ends to weave in, not including a few more that were created when I did the hand joining of the sides. The joins on the machine at the shoulders and top of the sleeves seemed a little bulky to me.
I did not do a gauge swatch, since this was just practice. After knitting all the sections I determined that I was getting the expected stitches per inch, but more rows per inch than the pattern gauge. That meant that the number of rows the pattern said to knit resulted in a shorter length than intended, relative to the width. So this is a three quarter sleeve length bolero sweater haha.
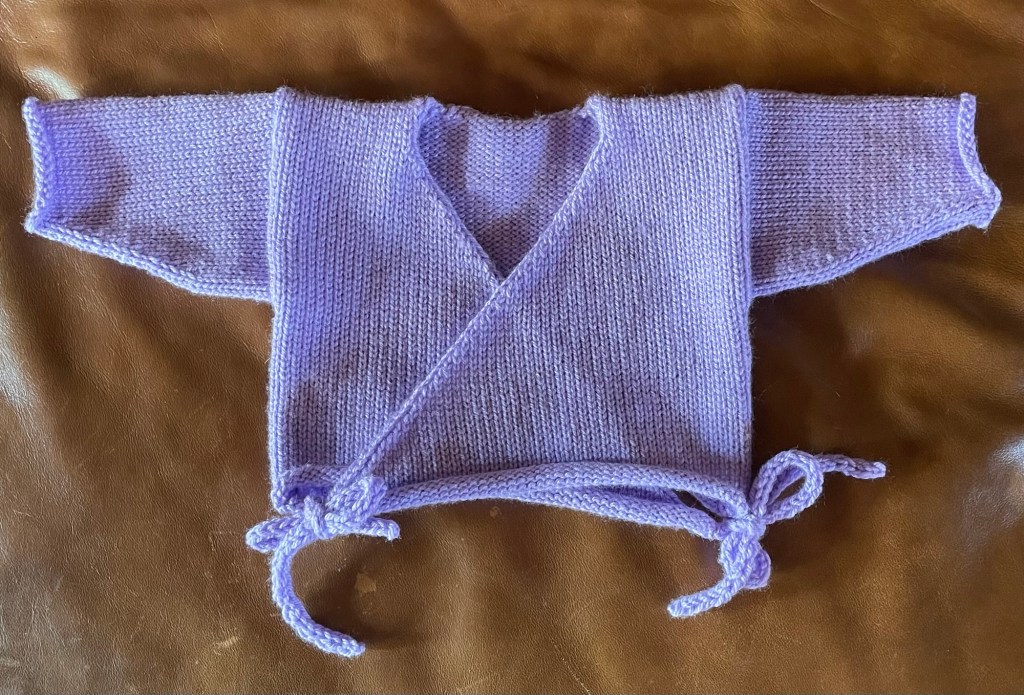
The next time I was in St. Paul, I tried the sweater on my granddaughter. It was a little big around, and the sleeves were a bit too short, but it was wearable. It made a nice outfit over a Halloween onesie with no pants.

I aspire to knit a sweater for myself. Normally I like a top down circular pattern for a sweater, which results in less seaming and fewer ends to weave in. Knitting a sweater on the machine involves making flat panels that have to be stitcher together. It is possible to do the top of a sweater in the round, and then knit the body of the same sweater on the machine. Or knit the main pieces from the bottom up and then continue knitting the top by hand. It will be fun to experiment with different methods.
Maybe I have too many things to work on and figure out now, but now is when I have time, space and ability. I do not have to do everything at once. And I have to remind myself it is OK for our activities to evolve over time, as we move forward in our life.

You have a passion for this knitting, and I think it is wonderful. No one becomes an expert in a short time. And yes, it is fine for things to evolve over time. You are continuing to learn, and that is important in life. I laughed out loud when I read that Wayne got a little rattled when you brought in another knitting machine. I understand! Sometimes when I bring something home or think of buying something, my husband will ask, “Do we NEED this?” And I’ll reply, “Do we NEED ________?” The blank being something that he likes. 🙂 The baby sweater looks adorable – as does the baby. I look forward to reading about your future projects. Thanks for an enjoyable post to read!
LikeLiked by 1 person
Thank you for your positive comments! I told a friend the other day that wanting to do so many things is kind of a curse. It is all good as long as I take it one step at a time and try not to do everything at once.
Hope you have a good weekend.
LikeLiked by 1 person
Oh my word – Blair looks like a Kewpie doll! 😍
I love reading about your knitting escapades. You keep me going on my little knitting projects.
LikeLiked by 1 person
Thank you!! That encourages me!
LikeLiked by 1 person
I love how you are willing to try new things and how you share your struggles with us. The sweater was cute and the model cuter! I hope you get good use out of your flat knitting machines!
LikeLiked by 1 person
Thank you! The challenges and mistakes are part of the experience for sure.
LikeLiked by 1 person
Wow! Great job for your first project! I wanted a knitting machine when I moved to the UK, but they were quite expensive back then. To be fair, I really didn’t do any knitting when I had the children. Looking forward to see what you make next with it.
LikeLiked by 1 person
Thanks! The flatbed machine I got was quite a bit cheaper than the circular sock machine, although there are some that are more expensive. I am working on another baby sweater, and then I may tackle a sweater for myself!
LikeLiked by 1 person