
Ever since I got my circular sock machine, my husband has been encouraging me to make team color socks. He wants Minnesota Vikings football colors, but thinks there is a market for this in general. I agree it is a good idea. I have browsed at a lot of sock yarn since last fall, and bought many skeins at discounted prices, but I had not seen any in Vikings purple and gold. Or not on sale LOL. Also, stripes with two different colors is a more advanced technique on the sock machine that I was not ready for.
When I was at the sock machine Crank-In at Rocking Horse Farm in April, I noticed they were offering a Dyeing Sock Blanks class at the end of May. “Sock Blanks” are sock yarn that has been knitted into a flat fabric ready for dyeing. After dyeing it is unraveled and knitted into socks. Sock Blanks are available in plain white for dyeing on your own, or already dyed by someone else. I signed up for the class, realizing that I could dye a sock blank with purple and gold for Vikings color socks.
Rocking Horse Farm is near St. Cloud, Minnesota, about half way between Minneapolis and our home in west central Minnesota. We had been in the Twin Cities for a few days, but headed for home on the day of the class. Wayne dropped me off at Rocking Horse Farm and headed for a golf course while I attended the two hour class.
Following is a display of sample dyed sock blanks in the retail space at the Knitshop at Rocking Horse Farm.

The sock blanks for the class had been knitted on a flatbed knitting machine on site with two strands of sock yarn held together, so that when the yarn is unraveled for making socks, you have two strands of yarn exactly the same. The dark colors in the photo below are waste yarn knitted on at the end.

While getting an overview of the process, we soaked our sock blanks in water for about half an hour. I paid extra to dye two sock blanks, so I could make a pair of socks for my son as well as my husband.

The dyeing activity took place outside in back of the shop. We lucked out and had a beautiful day. After squeezing out as much water as possible from the sock blank, we laid it out flat on top of a piece of plastic wrap. There were bottles of dye in various colors, but no Vikings purple. Arghh. They did have maroon dye, so I decided to make University of Minnesota Gopher colors Maroon and Gold socks instead.
You could apply the dye onto the sock blank however you wanted. I was going for stripes, but was not exactly sure how the stripes would come out on the knitted sock.
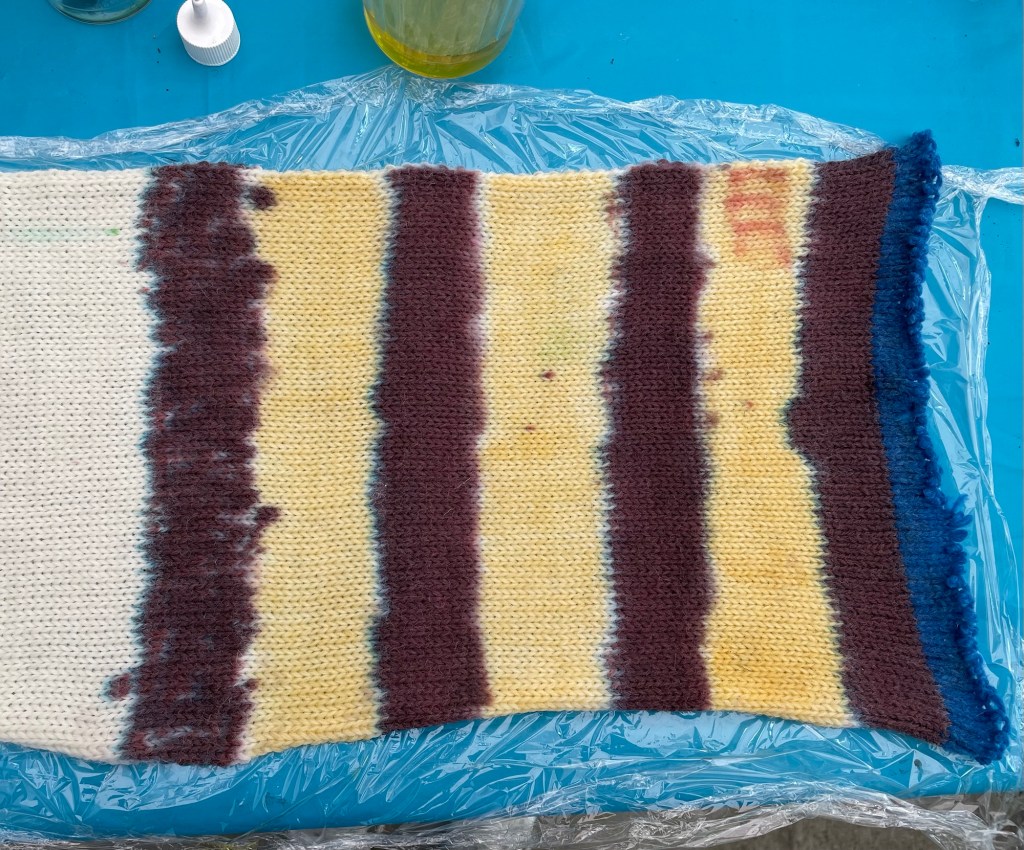
It is possible to use food dye, which is safe to get on your hands and tools, and something people probably have at home. For the class we used a different kind of dye that was mixed with a little vinegar to make it colorfast. We wore gloves while working, squirting the dye from the bottle onto the fabric, or brushing it on with a foam paintbrush.

There was not enough maroon dye to finish my first sock blank. I had to use blue for the rest. I should have had a gold stripe in between the end of the maroon and the beginning of the blue. I think I was flustered due to realizing my plan was not going to work out.

For the second sock blank I made stripes of green, blue, and yellow with some plain between the colors. It was tricky to get enough dye to go all the way through, but not too much. We used our hands to pat down the fabric to make sure the dye was applied evenly through the fabric to the bottom. If the dye was only on the top and not all the way through, the two strands of yarn that had been knitted together would not end up the same.

When all the colors had been applied, a second layer of plastic wrap was laid on top of the sock blank, and then it was folded in thirds to fit in a microwave oven.
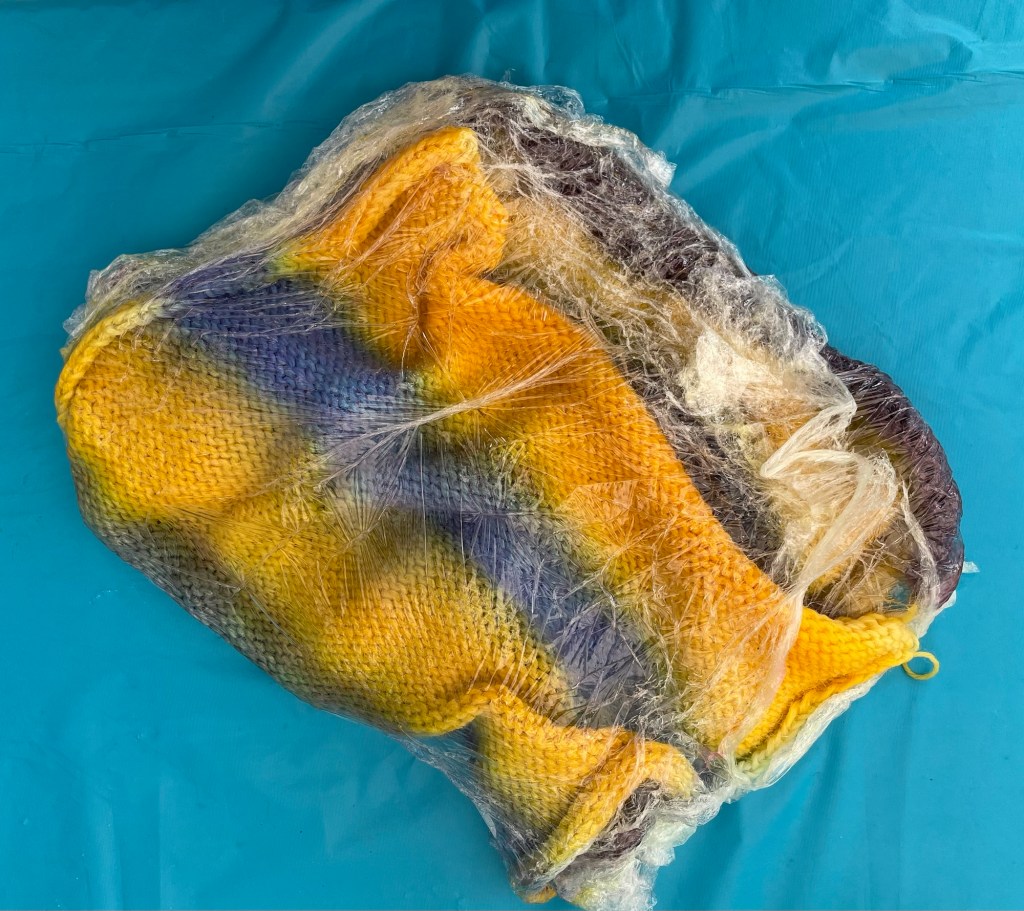
If you are using food safe dye, you can use the microwave oven in your kitchen. Rocking Horse Farm has a couple of dedicated microwaves used only for dyeing and not for food.

To set the dye, the plastic wrapped sock blank was microwaved for three minutes, turned over, and then microwaved for another two minutes. It was very hot and needed to be removed from the microwave with a spatula before laying out and unwrapping to cool off. The next photo of one of my sock blanks after getting “cooked” in the microwave looks exactly the same as the pre-cooked photo. The colors look very dark and one of the stripes even looks like it could pass for Vikings purple.

The sock blanks went through rinses in three different buckets of water, one of them with a little vinegar to help set the dye. Some of the dye rinsed out in the clean water, and some bled a little onto the white spaces.

After rinsing, the sock blanks were hung up to dry on a laundry drying rack. Two people in the class dyed a hank of yarn rather than a sock blank.

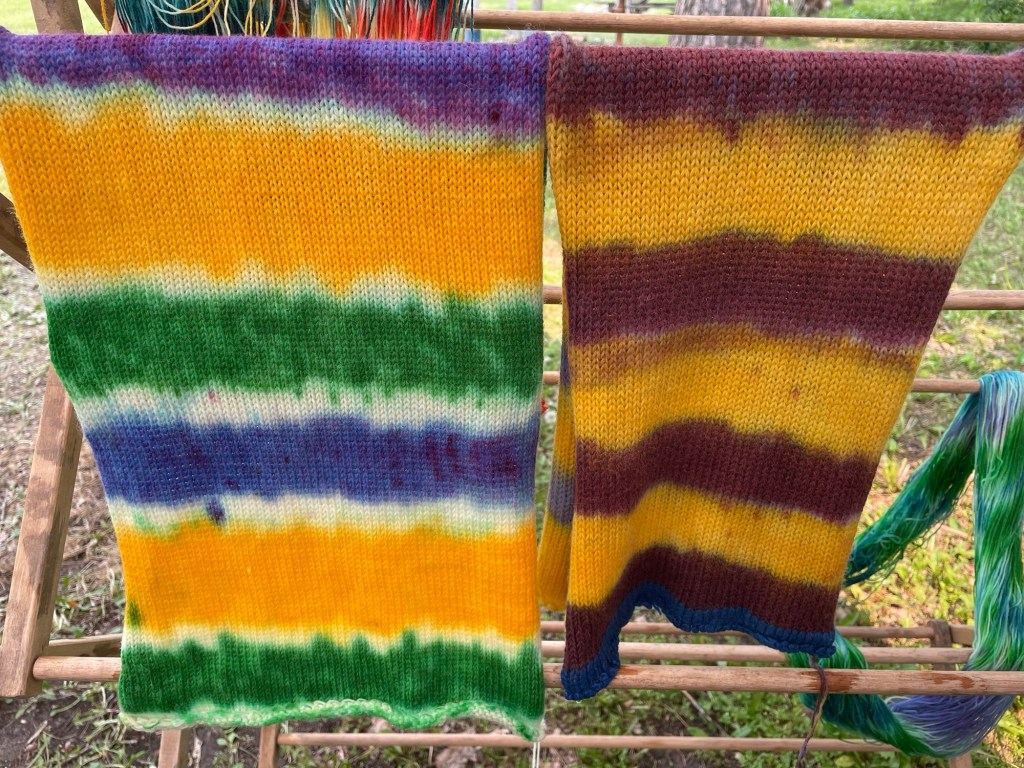
I was happy with my completed sock blanks, even though they were not what I had been hoping for. I have found that generally dyeing is unpredictable, and when I have dyed yarn in the past the results have usually been different than I was expecting.

Rocking Horse Farm sells flatbed knitting machines, as well as hand knitting, weaving and spinning equipment, supplies and yarn. They had a used flatbed knitting machine on clearance for $95.00, much less than a new one. Sooooo tempting, but I hardly have time to use all the equipment I already own.
A few days later, after I was back at home and the sock blanks were dry, it was time to crank out some socks on my circular sock machine. Before I could knit the socks I had to unravel the sock blank into two matching skeins of yarn. This turned out to be trickier and more time consuming than I anticipated.
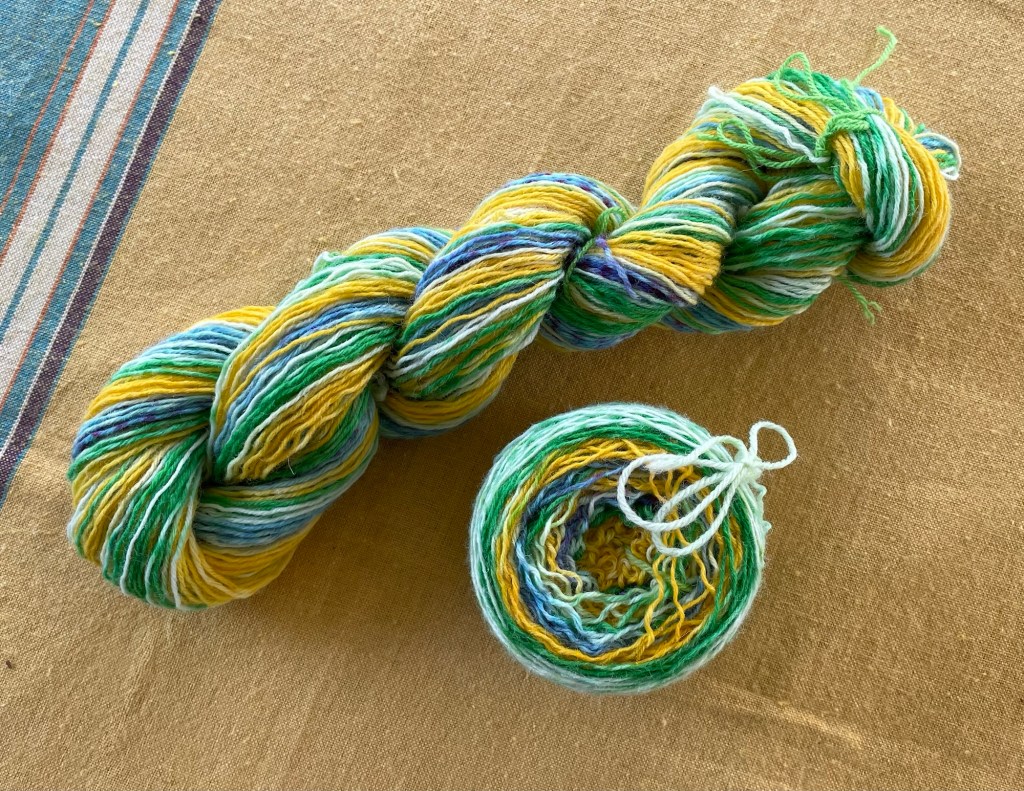
The instructor of the class suggested using two ball winders to wind center pull balls from the two yarn ends as they were unraveled from the sock blank. I do not have two ball winders (who does?). Instead, as I unraveled the two ends, I wound one center pull ball on my ball winder, and I wound the second end onto my niddy noddy (tool used for winding skeins of yarn). It was awkward. I had to unravel a length of doubled yarn, then separate the doubled yarn into two separate strands, wind one of the strands on the ball winder, and then wind the other strand onto the niddy noddy.

The yarn was super kinky from being knitted and then blocked into a flat fabric before being unraveled. This was less obvious on the yarn in the center pull ball that was stretched out. It was crazy on the skein removed from the niddy noddy.

I soaked the kinky skein in water and hung it up to dry to re block it without the kinks. It looked a lot better after the washing.
I neglected to photograph the next step of winding the yarn from the skein into a center pull ball. I started with the wrong end the first time, so I had to re-wind it a second time so that both center pull balls started at the same end of the pattern.
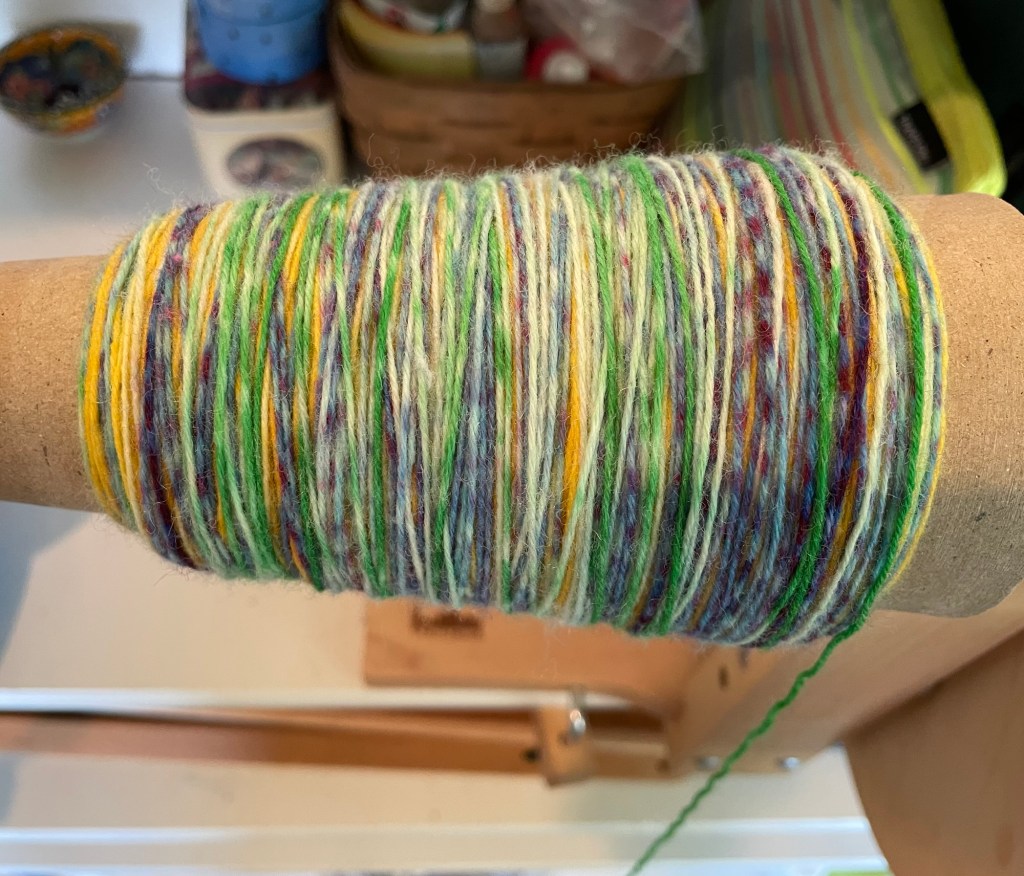
Trying to knit a sock on the sock machine from a center pull ball is asking for trouble, since you are likely hit a snag or yarn barf in the middle, regardless of which end you start with. Yarn for the sock machine should be on a cone, so there was another step of using my bobbin winder with an accessory for winding onto a cone. The following photo was taken in the middle of winding one of the balls onto a cone, when all the pretty colors were showing, before the yellow at end of the ball.
The two cones with the green and blue and yellow yarn were ready to go in the next photo. I planned to make socks for me with this yarn first, to make sure everything went well before I cranked the other pair for Wayne.

Following is a photo of the pair of socks I cranked from the blue, yellow and green striped sock blank.

The other sock blank became the following two center pull balls, before they also ended up on cones.

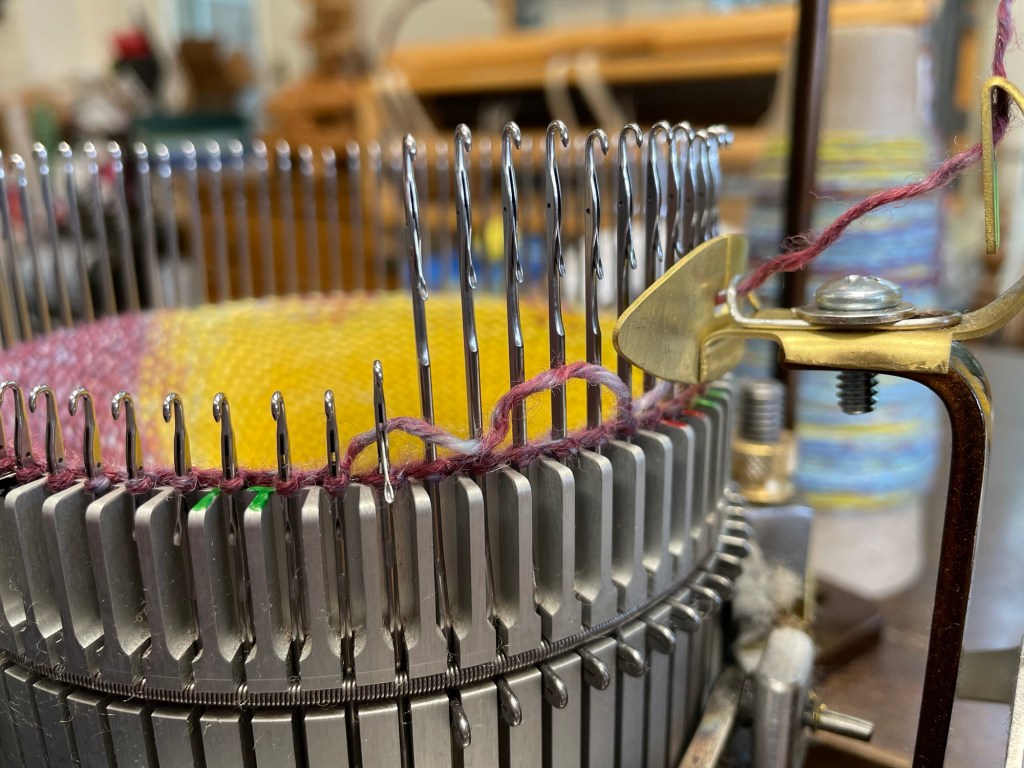
While cranking out the second pair of socks for Wayne, I noticed that the yarn was bunching up funny on the sock machine as I was going back and forth working the heel. I am not sure if that was due to the kinkyness of the yarn, or if there was something wrong with the way the yarn was feeding onto the machine. I was able to guide the yarn by hand at these places on the sock to avoid dropping stitches.
For the second pair of socks, I changed to the 72 needle cylinder for a larger circumference sock to fit Wayne. I started at the maroon end so the cuff would be maroon and gold stripes, and the foot part would be the non Minnesota Gopher colors.

The knitting in the completed socks looked a little uneven at first due to the kinky yarn. After washing and blocking, they looked better. The next photo shows a closeup of one sock before and after blocking.

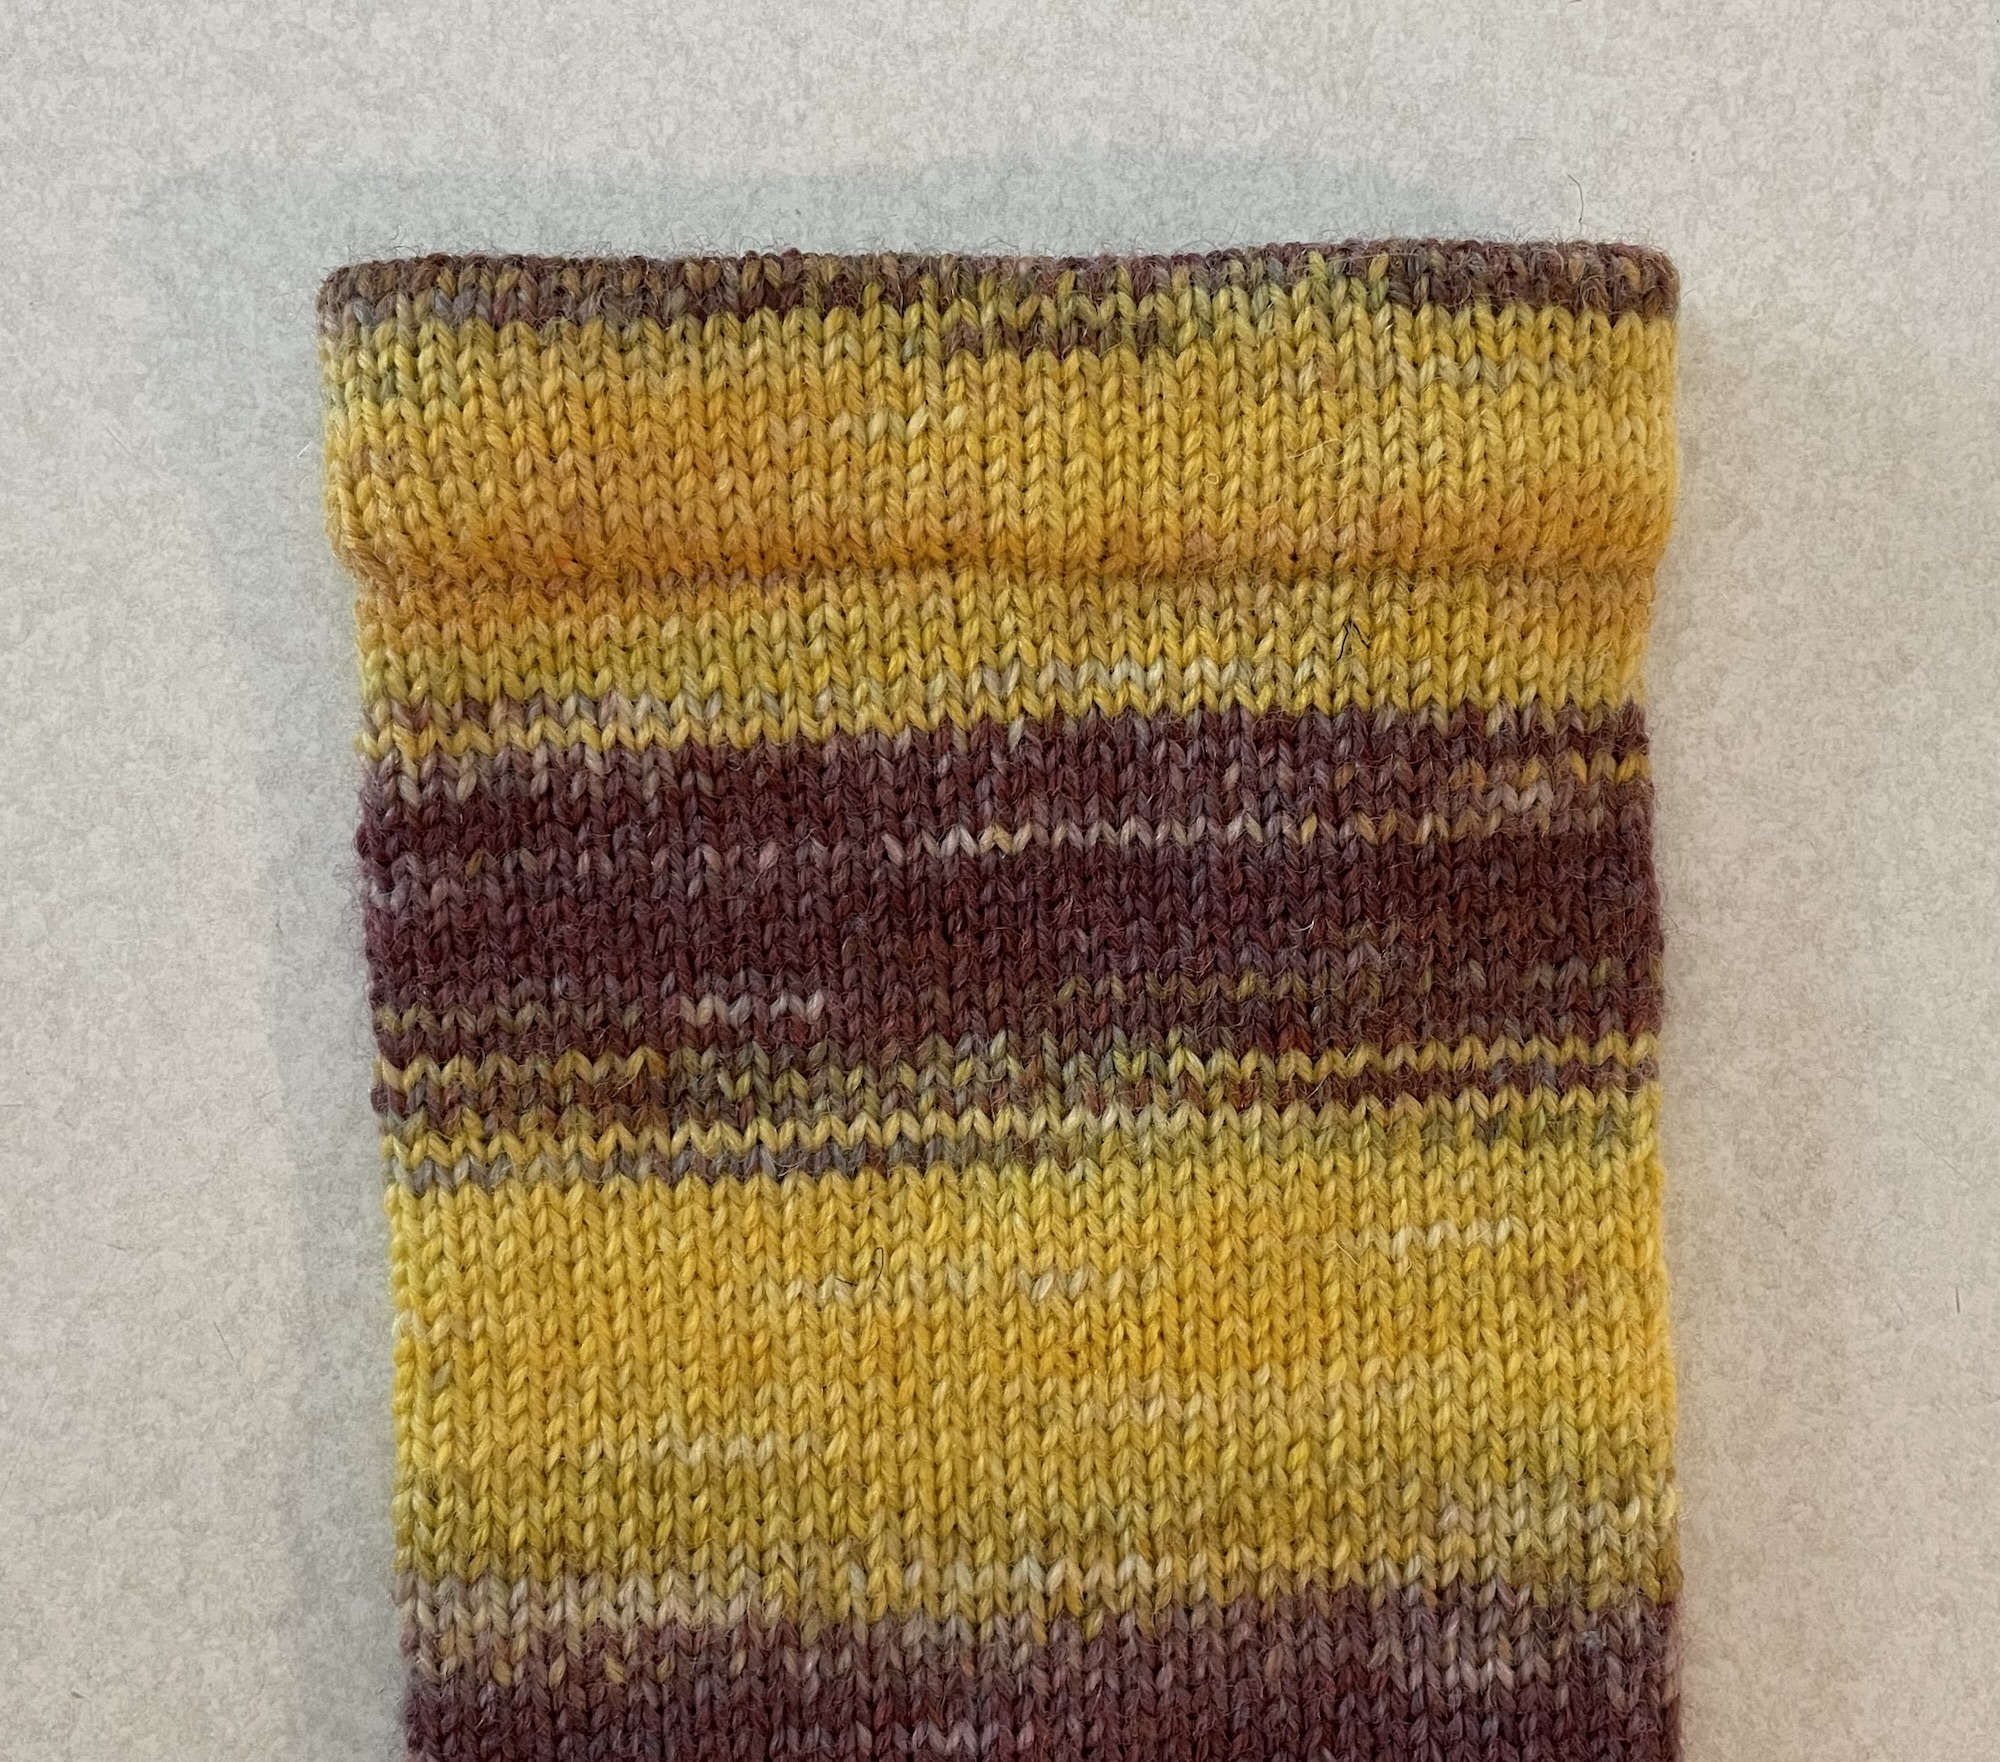
Amazingly, the colors changed exactly at the middle of the heel.

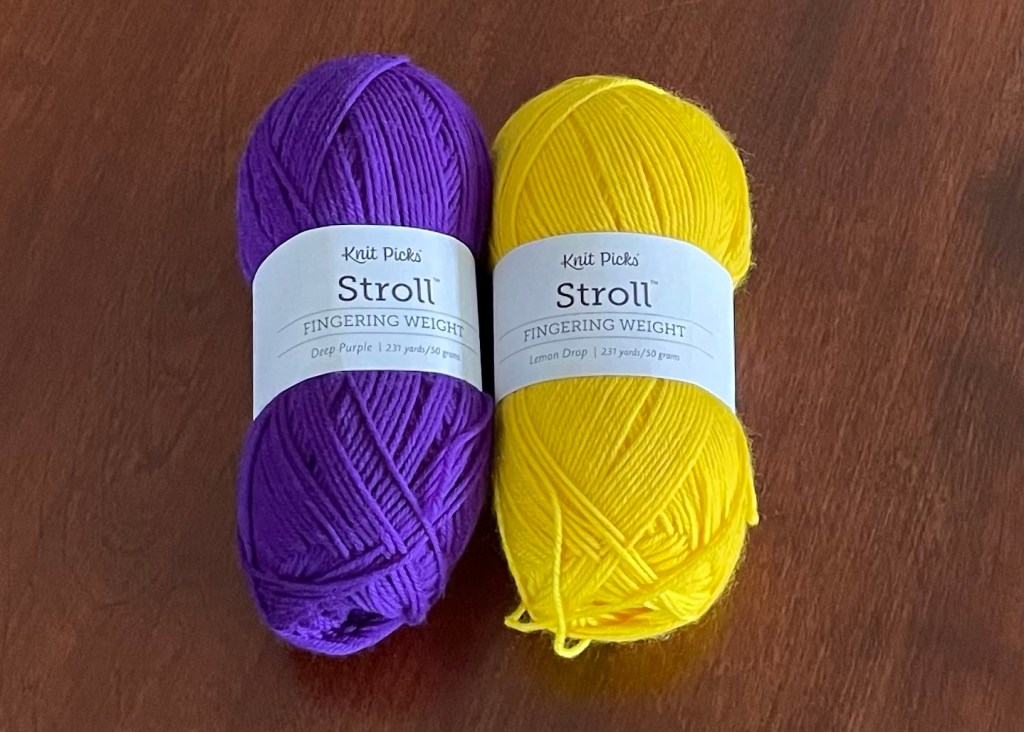
Wayne liked the socks very much, but also found some purple and gold yarn online from Knitpicks. I went ahead and placed an order (cringing at having to pay full price plus shipping haha). After watching a few videos about changing yarns while cranking socks, I am now feeling more confident about attempting striped socks using multiple skeins of yarn.
I have a beautiful pre-dyed sock blank in my stash that I bought from Sweet Georgia Yarns. I have been waiting to use this more expensive yarn until I am comfortable that I won’t mess it up. This sock blank is constructed a different way knitted into a wide tube instead of a flat panel.

I found a video from Sweet Georgia Yarns with information on using double sock blanks with two strands of yarn knit together. Felicia at Sweet Georgia Yarns shows how to wind two skeins of yarn at once onto a swift (tool normally used to get a skein of yarn into a ball) as she unravels the double sock blank. I did not see this video until after I finished my project, but in any case my yarn swift does not turn sideways or have a handle like hers.
My Sweet Georgia sock blank is a single long piece of yarn, rather than two strands of yarn knitted together. There is enough yarn for two socks, but one will be tan and turquoise from the first half of the yarn, and the other will be turquoise and purple from the second half of the yarn. People use sock yarn for shawls and cowls, in which case one long strand is perfect. I could buy another single sock blank in the same colorway, and then have enough yarn for one pair of tan and turquoise socks, plus another pair of turquoise and purple socks.
I also have a plain white skein of sock yarn that I bought at Rocking Horse Farm. I may try dyeing that at home using food dye. So many things to think about and to try.
Wayne and I modeled the two pairs of socks made from the sock blanks I dyed at the class. They are not what I had been planning, but turned out well with fun colors.


Ball winder? Niddy Noddy? Sock blank? Yarn barf? Microwaving yarn? What a crazy hobby! You are so talented, and both pairs of socks came out great. I love the colors. I admire your passion and how you are always learning new aspects of your hobby. Sounds like Wayne really wants those Minnesota Vikings socks! Is this something you would make and sell? What would you price it at? In any case, great job as always!
LikeLiked by 1 person
I guess this is one my more “technical” posts with a lot of jargon haha. I am not sure if I will try to sell socks. Maybe. There is a pretty big range of price for sock yarn, it would have to be yarn on the less expensive size for it to be worth it. I think people sell them for $20 to $30 or more, depending on the size and style. It might be worth trying to sell the gift shop in the RV resort where we stay in Arizona, if I get motivated to make enough. There are so many things to do. If I am making a bunch of socks, I am not doing other things!
LikeLiked by 2 people
I laughed so hard at the term Niddy Noddy. It just sounded so amusing to me. I really enjoyed the post.
LikeLike
Yes, it is a very strange term. I do not know what the story is with how the tool came to have that name!
LikeLiked by 1 person
Wow, they look amazing (winding onto both the niddy-noddy and ball winder must have required a lot of patience)!
LikeLiked by 1 person
Thank you, and Yes, patience and dexterity. I had to keep holding the niddy noddy with my left hand the entire time, keeping the yarn in place, while also managing to crank the ball winder, and then put a weight on the yarn going on to the ball winder while I unraveled another length. If I ever do this again, I will bring my ball winder to my friend’s shop and use both mine and hers, with her help.
LikeLiked by 1 person
There are a lot of steps to making those socks! The part about having to re-wind to get the same color on the center pull reminded me of a Stephanie Pearl McPhee story being tormented by the same thing.
I loved reading this!
LikeLiked by 2 people
Thank you! It was a fun project, in spite of the extra steps and not ending up with what I was going for in the first place.
LikeLiked by 1 person
I just came across your post and wow did I learn a lot! You have such determination and it seemed like you really enjoyed this project. Your socks came out great! I am so impressed with your talent. What a great hobby. I knit but only scarfs and blankets, straight knitting, nothing fancy! You take knitting to a whole new level! Your husband is lucky! Keep enjoying every minute and thanks for the post.
LikeLiked by 1 person
Thank you! Thanks for reading! Hope you have a great weekend.
LikeLike