
In the fall of 2018 I bought the entire inventory of a yarn shop that went out of business. You can read about that adventure here. It was a scary decision for me. At the time I did not know exactly what I was going to do with all the yarn and everything else that came with it.
A few months later I was introduced to Torri, a weaver who had recently rented a storefront in Fergus Falls so she would have space for her large looms. Torri had not intended to be a retail store, but after finding out about my yarn, we embarked on a business relationship where she sells my yarn on commission. It has worked out well for both of us. After getting my bookkeeping up to date this fall, I realized that I had earned back all the money I spent on the 2018 yarn inventory purchase, plus more. This is huge, as I was not sure it would ever happen.
In the meantime, over the last year I have become very interested in Circular Sock Machines (abbreviated as “CSM”). They are expensive. I wanted one. I thought a lot about whether I could justify buying one. One sock machine knitter I met has earned back the money she spent on her CSM by selling socks at craft and fiber fairs. Another friend who does not do any crafts went to a fishing resort with her husband. In the little store / gathering area at the resort there were socks everywhere. It turns out the owners of the resort had a circular sock machine, and said they put their kids through college selling socks. That translates to many pairs of socks. Selling products to recoup the cost of a sock machine was not a factor for me in deciding whether to buy one. Following is a photo of an antique circular sock machine from the early 1900’s.
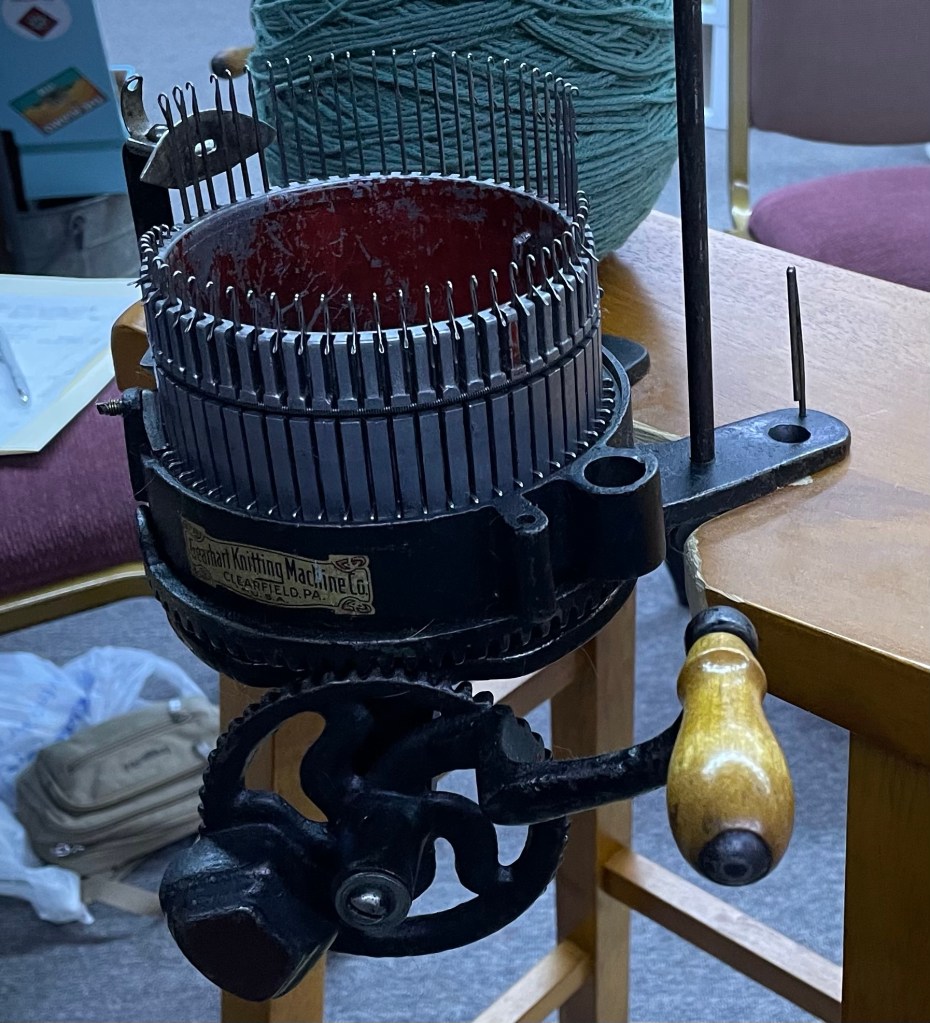
The amount of “profit” I have earned selling the yarn store inventory I bought in 2018 was almost the same amount as the cost of the circular sock machine with accessories I wanted to buy. After much reflection and consideration, it seemed like spending this money on a CSM was a valid decision for me. It was OK. After attending the “Crank In” gathering of Circular Sock knitters in October (read about that here), I decided to go for it. It felt right. I ordered an Erlbacher CSM the very next day, a new machine modeled after the antique one in the photo above. This was another big decision for me, and the start of a new creative journey.
While waiting for my circular sock machine to be manufactured and shipped, I watched a lot of Youtube videos, and assembled yarn and supplies that I would need. I bought some inexpensive acrylic waste yarn that is used when making items on the CSM, and for practice socks. I bought some recommended sock yarn on big cones.
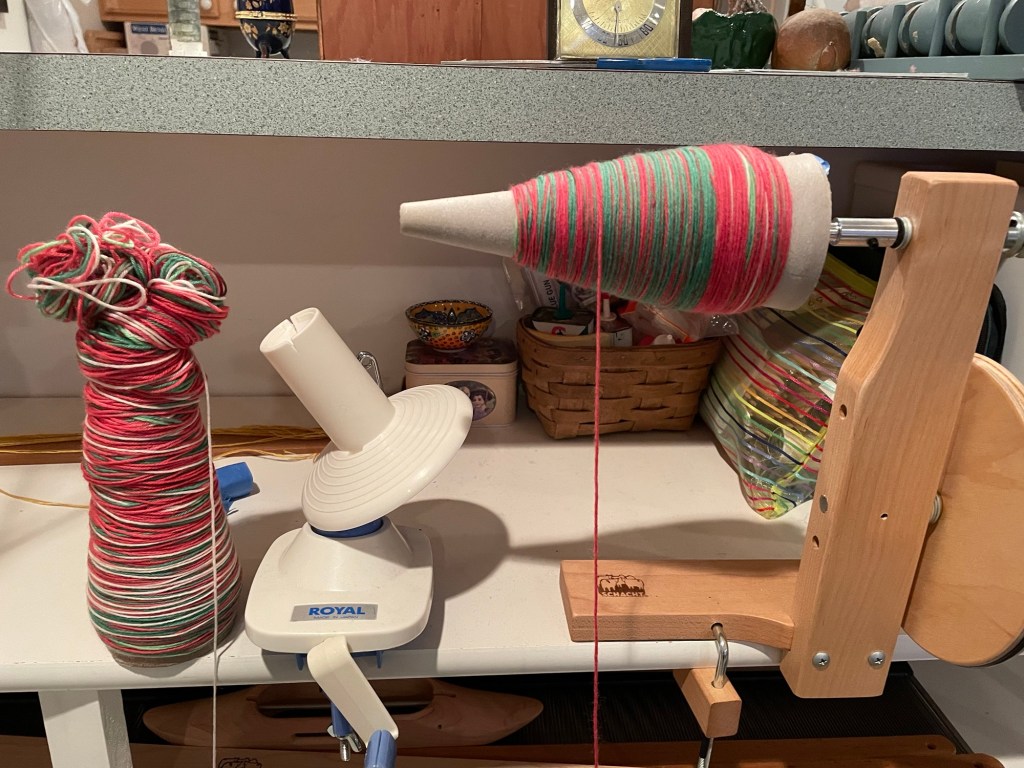
I bought an adapter for my bobbin winder that I use for weaving, so I could wind sock yarn onto cones. The following photos show the bobbin winder on the left with weaving yarn on a bobbin, and on the right with the adaptor for winding sock yarn onto cones.
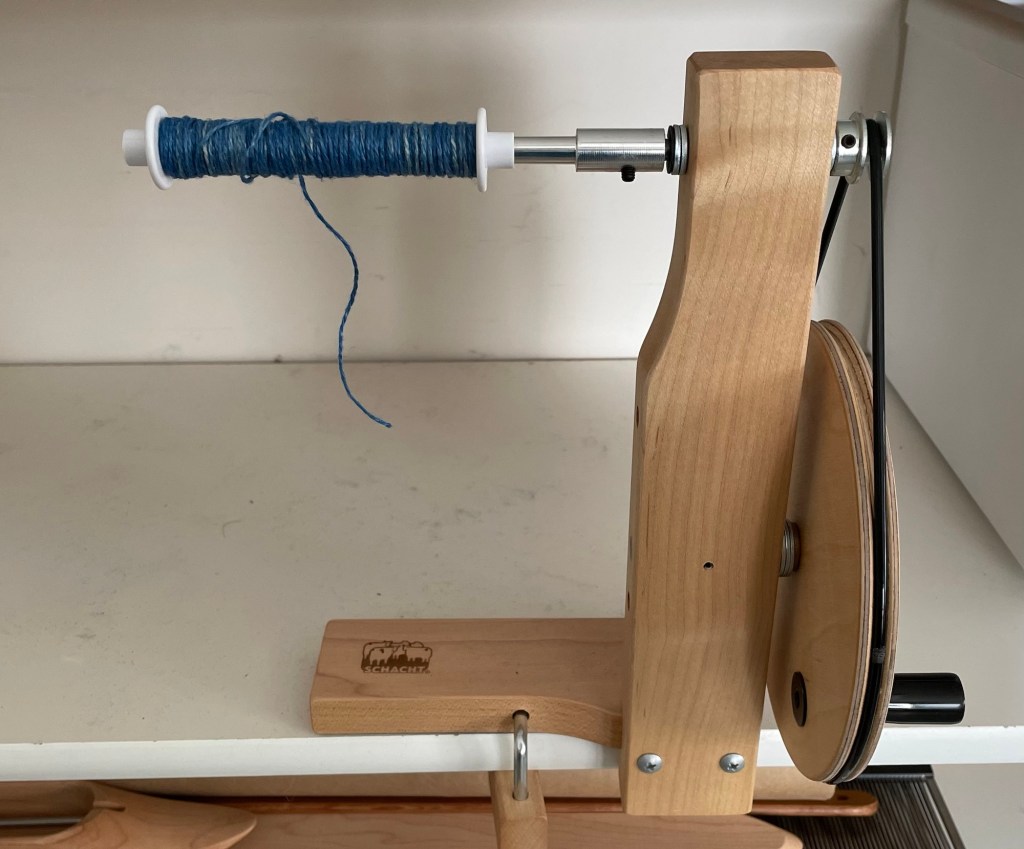
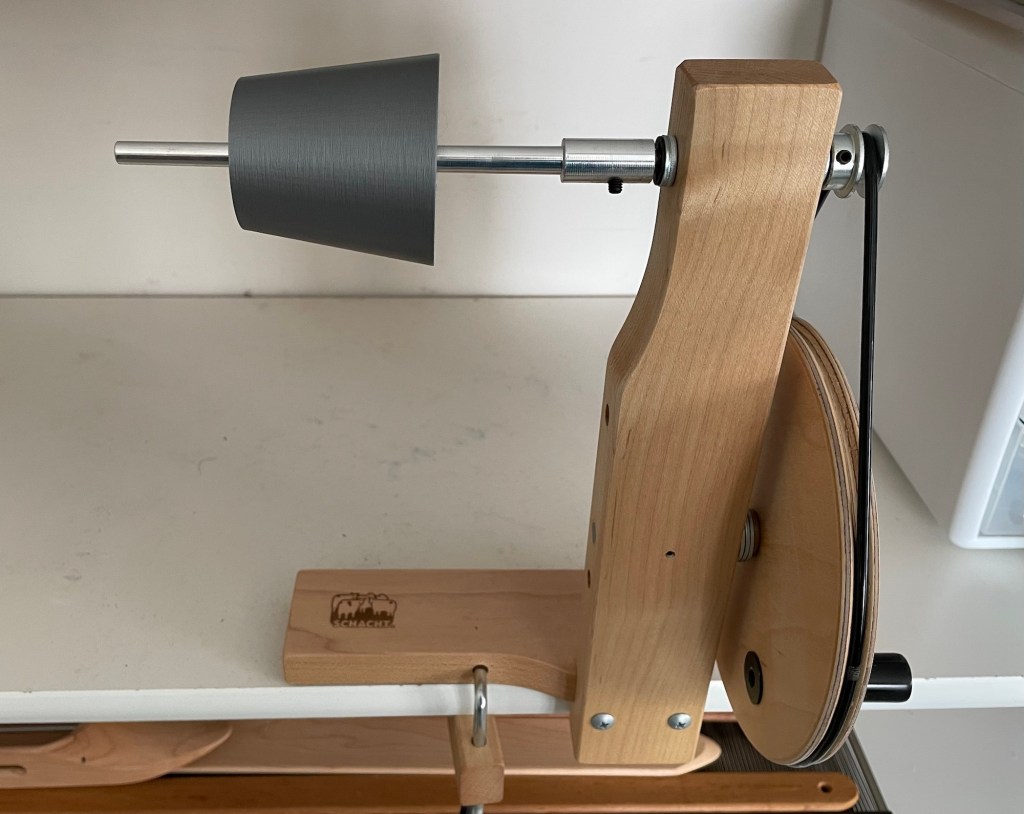
I knew that sock machines have a learning curve. What I did not expect was a learning curve figuring out how to wind yarn onto cones. It seemed pretty straightforward. I put a cardboard cone on the adapter and started winding. What happened was that the yarn near the pointy end of the cone started to creep closer to the top, and pretty soon all the way off the top. This is not acceptable, as it will get tangled up when trying to use it.

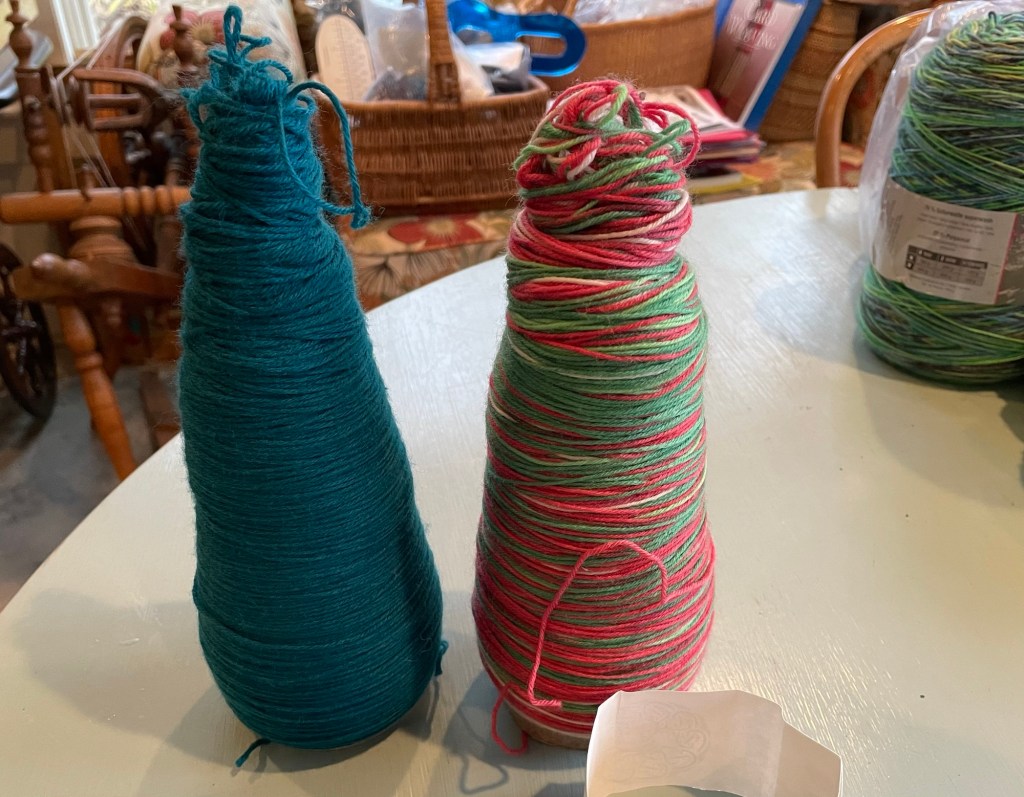
After googling for some tips, I tried re-winding both the turquoise and red/green yarn on to new cones, staying farther from the tip and winding tightly on that end. This was not easy since the part that was no longer on the cone turned into a “yarn barf” as they say.
That method did not solve my problem, but I took measures to keep the yarn near the tip of the cone from sliding off.

There is a facebook page for users of Erlbacher circular sock machines, with posts including photos of successful projects, as well as people asking for help with problems, and even replies and posts from the employees at the company. I figured it was worth a try asking for some ideas from this group, so I posted with a photo and explaining what was going wrong. I got a whole bunch of responses, including from Amanda from Broken Unicorn Crafts who I met at the Crank In in St Cloud. I am starting to understand that “Crankers” might not be a large number of people, but they support each other. The best tips I got related to winding cones were to wind the yarn on at an angle rather that straight around, and to get cones with a wider top. Since then I have been successful with this process. I also wound some leftover sock yarn onto toilet paper rolls using my ball winder for knitting. This is not a perfect method, but acceptable if you use the yarn end off the outside of the cake.

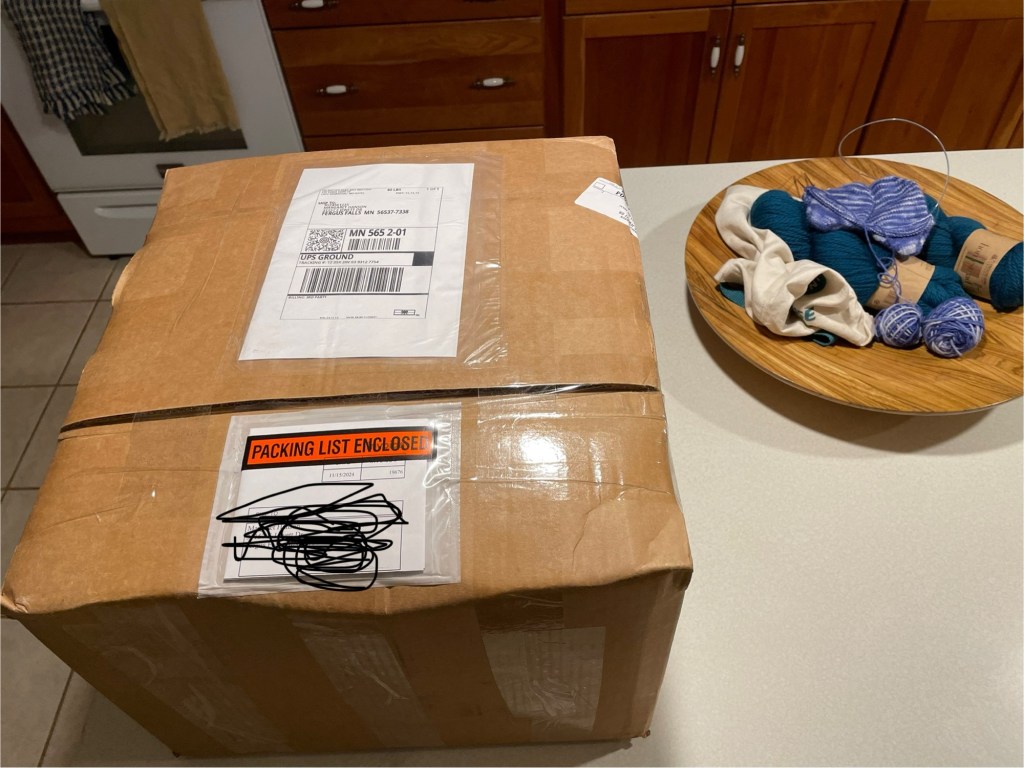
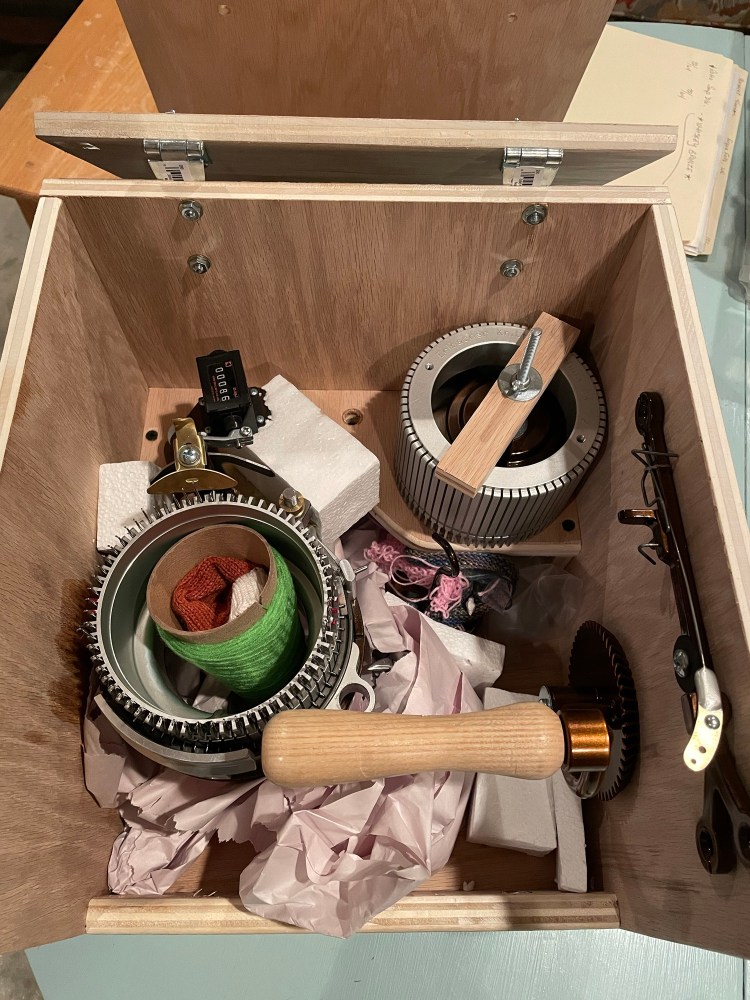
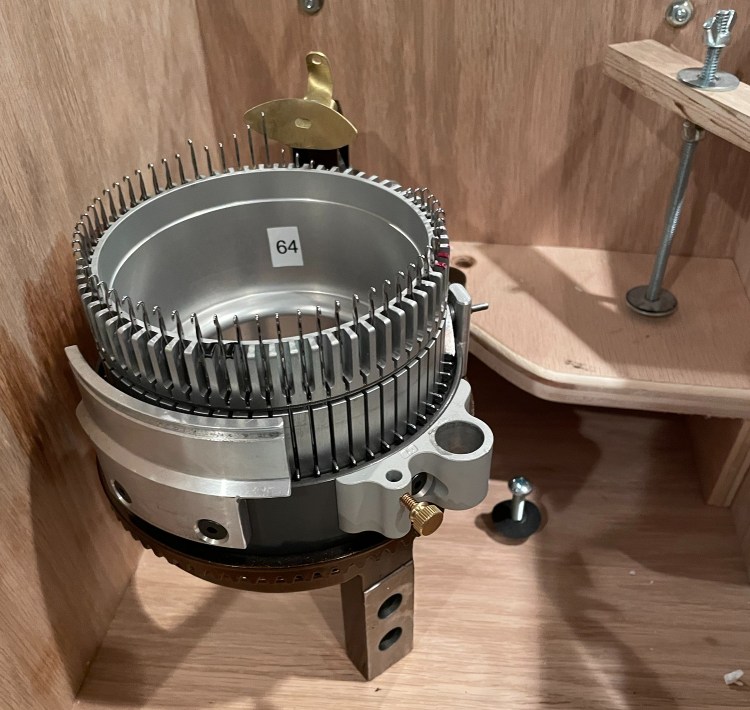
The day finally came when my sock machine was delivered. It arrived in a wooden box with two cylinders (64 stitches for an average women’s size sock, and 72 stitches for an average men’s size sock) and 1 ribber (accessory for making ribbing), plus some tools and accessories. The second ribber I ordered was not ready, but will be shipped later. Earlier I had enquired about the weight of the sock machine for the purpose of preparing an appropriate work table. I knew it was going to be heavy, but was surprised that the box handed to me by the FedEx employee weighed 40 pounds with all the accessories! I got it to the kitchen counter, and then waited for Wayne to carry it downstairs where my work area was ready.
I had watched a video of a woman in Wales unboxing her Erlbacher CSM, so I had a pretty good idea how it was going to go. Her shipment included a paper manual. My shipment had a link for a PDF file. I prefer having an actual paper document, but this document is 40 pages long. I managed by looking at the electronic version on my tablet. It worked OK, and it was helpful to be able to enlarge some of the diagrams. Later I got a paper version at a copy center in town.
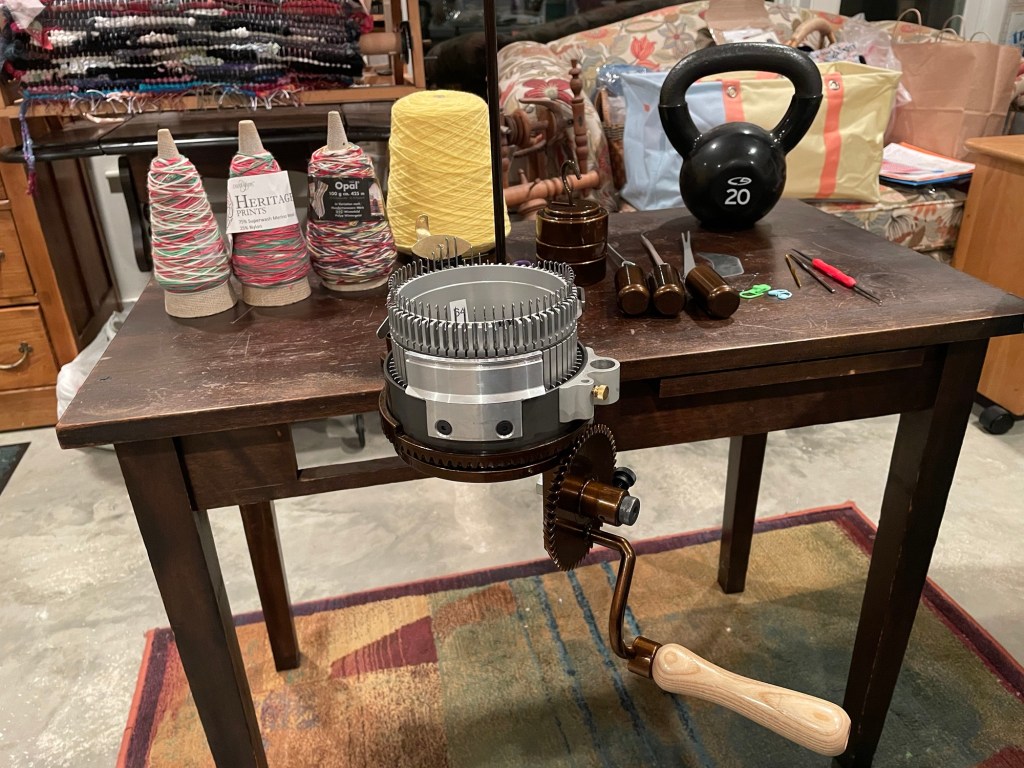
I had a temporary small table ready to clamp my sock machine on to, something we had in the house. It turns out it is too low, and because the CSM sticks out, I had to put a 20 pound kettle bell on the table to keep it from tipping forward. Wayne is going to help me make a better table. Many people with CSM’s have a homemade table, and many of them have a cutout in the side where the machine is clamped on. This is to move the center of weight closer to the middle, and so it is easier to get closer when working. Following is a photo of the small table with the sock machine and kettle bell.

The next photo shows some of the accessories that came with the sock machine, including the other cylinder, the ribber, and weights used when cranking a sock.

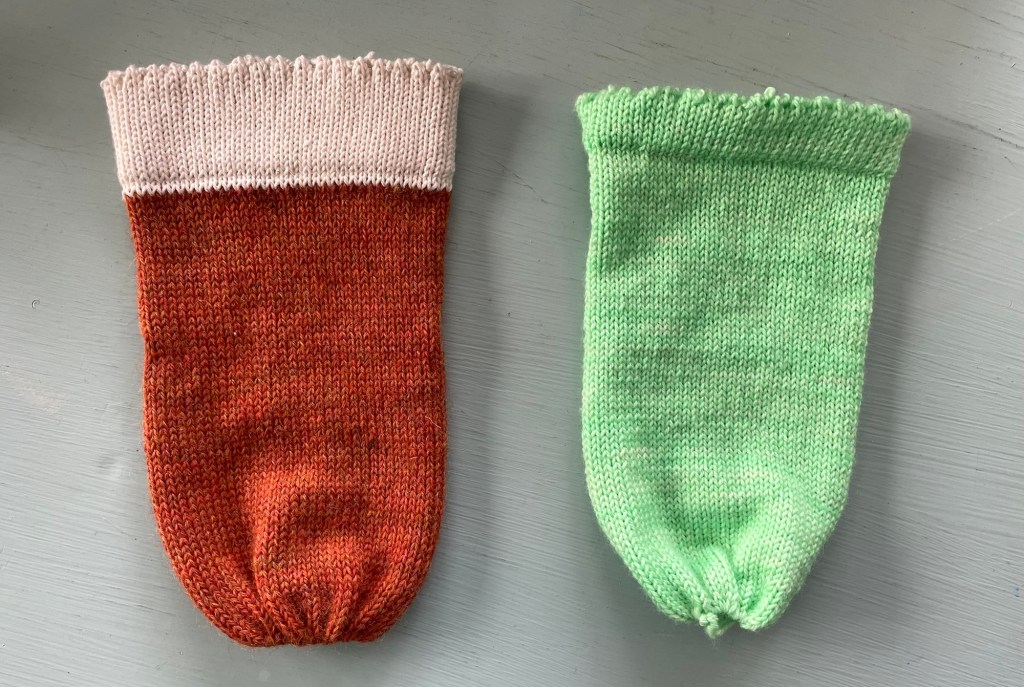
I was able to assemble the machine and get it to work. Woo Hoo! I practiced making a few knitted tubes. The following photo shows the first tube I cranked, out of leftover sock yarn. The blue and white yarn is the same type of yarn used in the hand knit sock below. The green is waste yarn that came with the machine. The tension is looser in the machine knit tube, making it bigger around. The tension can be adjusted, one of the things I will be learning about.

After I was comfortable with that, I followed the directions in the manual for making something called a “bonnet” which is used at the beginning of a project, so you have stitches to cast on to. My shipment included a bonnet for the 72 stitch larger cylinder, so I made one for the 64 stitch cylinder. The rust colored bonnet on the left in the photo below is the one that came with the machine. I made the green bonnet on the right.
My next adventure with my CSM was knitting a long tube using the same green yarn I used for the bonnet. I have used this yarn before for hand knit socks, but in a different colorway. I cranked sections with different tensions settings to see how much of different it would make.
At the end of the long tube, I followed the instructions in the manual for a “fast and easy” heel. Hahaha. What would have taken 10 minutes for an experienced cranker took me hours. Up to this point, I had only cranked in one direction, around and around. Making a heel on the CSM involves putting half the stitches out of work and then going back and forth on the other half of the stitches. I made a mistake at the beginning of the first row going “back” and got the machine stuck. I was dead in the water. Remembering all the helpful folks on the facebook group, I posted there about my problem. I got some responses about what went wrong, but I was still not sure how to fix it. I emailed my new CSM friend Amanda to see if she might be able to facetime with me. She responded right away with her phone number. After talking to her and looking at it again with Wayne, we were able to fix the problem and I was back on track. A short time later I was having problems with the gears skipping. In that case the bolts holding the handle on had come loose. I must not have screwed it on tight enough and it had jiggled itself loose. After resolving that problem, it was time for dinner.
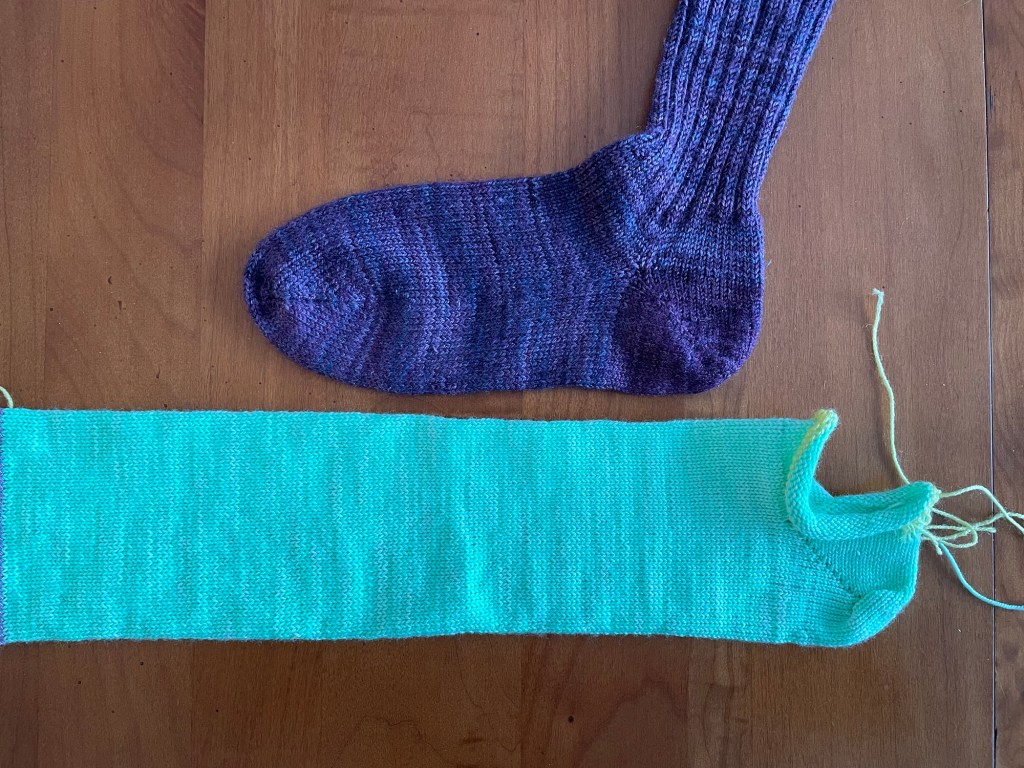
After dinner I told Wayne to go ahead and watch football on TV, and when I finished the heel I would let him know that I was ready to watch something with him (not football). I kept having trouble with dropped stitches. I think this had to do with the tension and extra weights needed for heels. I spent more time picking up stitches then knitting rows. After the heel part was done I worked some plain rows and then a few rows with waste yarn (every CSM project has waste yarn at the beginning and end). Many stitches were dropping. When I finally finished this project it was 10:30 pm, way past time for me to watch TV. Following is a photo of the long green tube with a heel, below a sock hand knit from the same brand of yarn.
I cranked another heel with some user errors and dropped stitches again. My third attempt at a heel was even worse. That time I decided not to bother picking up all the dropped stitches, and I skipped the waste yarn rows, instead just taking the project off the machine unfinished. The following series of photos show the last unsuccessful heel attempt, starting with the bonnet on the machine.
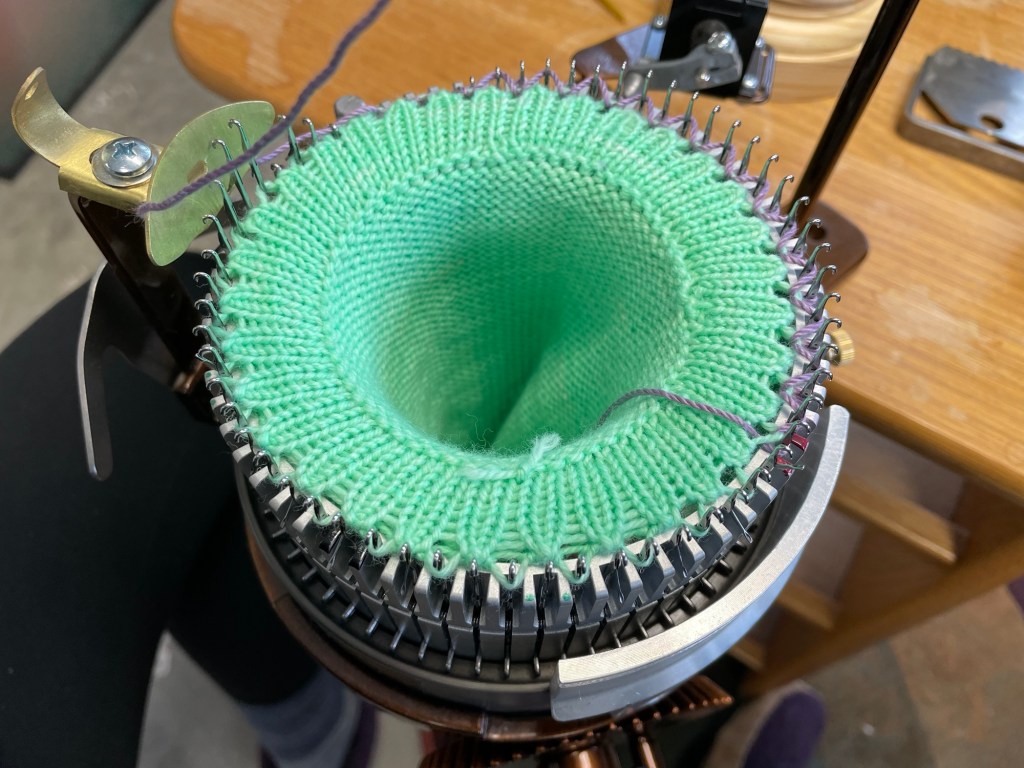
I cranked one row of purple cotton yarn onto the bonnet. That is a “rip cord” to make it easy to separate the waste yarn from the bonnet. After that I added yellow waste yarn.
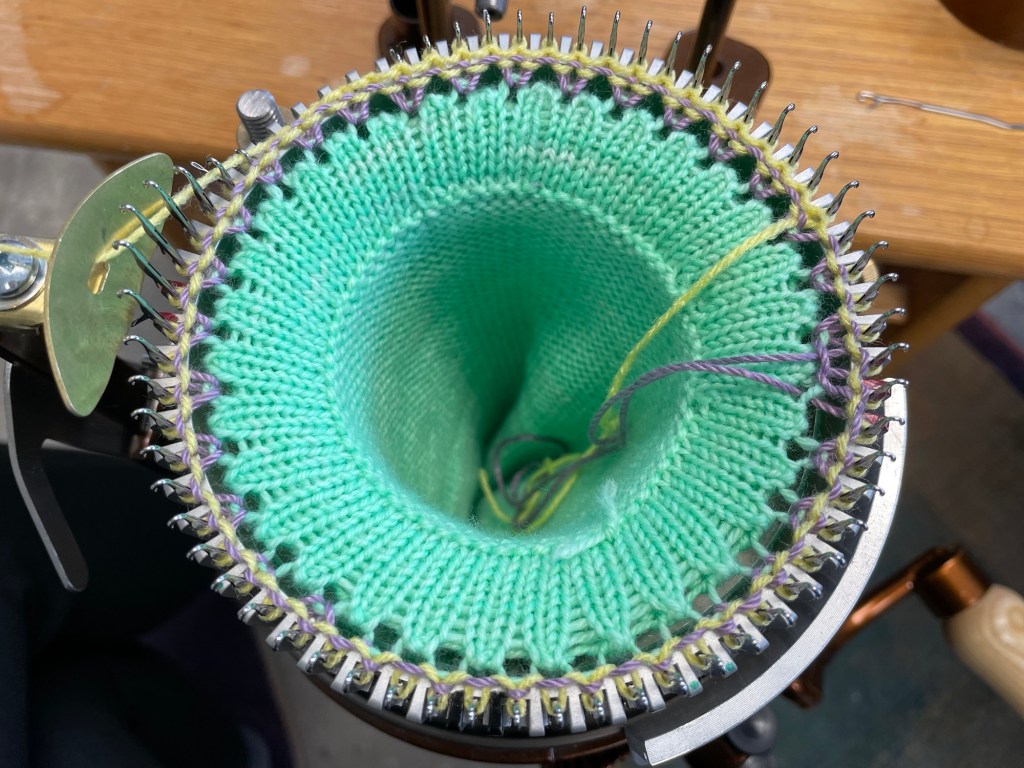
Next you can see another row of purple rip cord between the yellow waste yarn and the darker green project yarn.

Lastly is a photo of the unsuccessful heel still attached to the waste yarn and bonnet.

While moving furniture around in preparation for new flooring in our living room, I noticed a different table that was an improvement over the one I was using for the CSM. It was much heavier and sturdier, did not have wheels, and was a couple of inches taller. If I removed a drawer, there was a place to clamp on the sock machine. Wayne is still going to make me a custom table with adjustable height legs and a cutout, but this table is much better for now. It does not need the kettle bell to balance out the weight.
I had to take a break from the sock machine to help Wayne with new flooring preparations, and because we were leaving for a trip to California. For the third year in a row we spent Thanksgiving with Wayne’s sister and brother-in-law in the Bay Area. They live near our daughter, so it is a good opportunity to have some quality time with her.
During some down time during the trip I watched a video of heels being made on the sock machine (multiple times), using the same method I was trying to do. The written instructions I was using were confusing, and after watching the video tutorial, I understand it, and I think there is a typo in the written instructions. I was dreaming about cranking out heels after that.
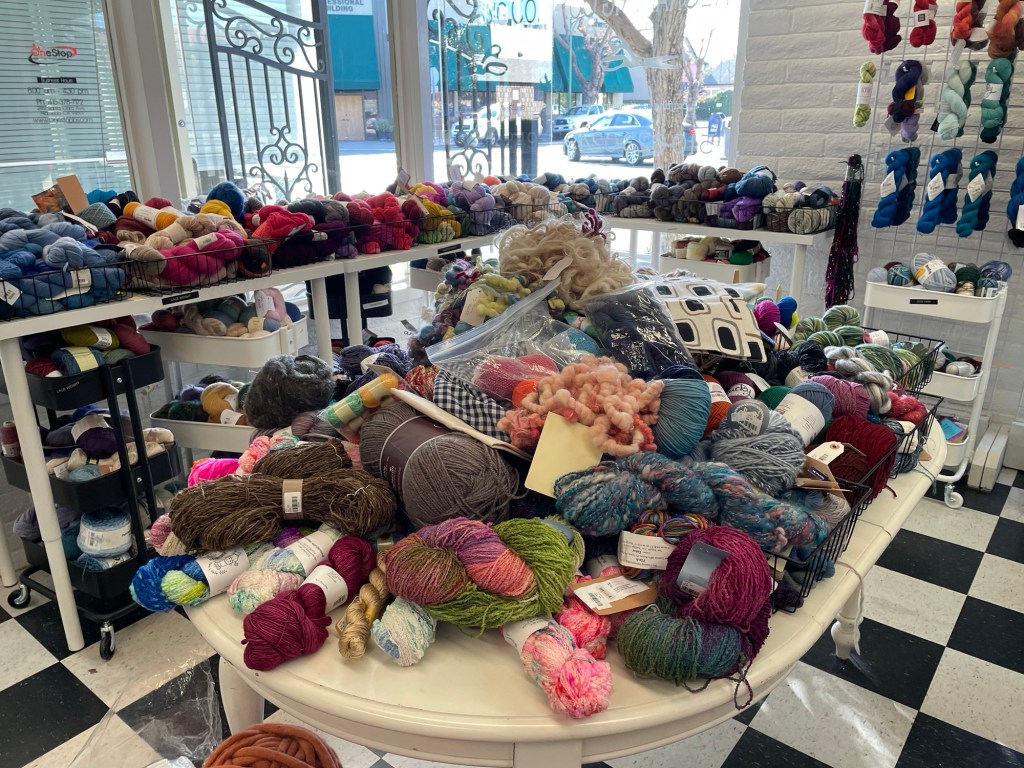
While we were going for a walk the day before Thanksgiving we passed a consignment shop dedicated to crafting supplies. The window was filled with yarn. I know that once I get proficient with the sock machine I will go through a lot of yarn, so I have been watching for deals.

Inside The Recrafting Co consignment shop were many, many skeins of all kinds of yarn.
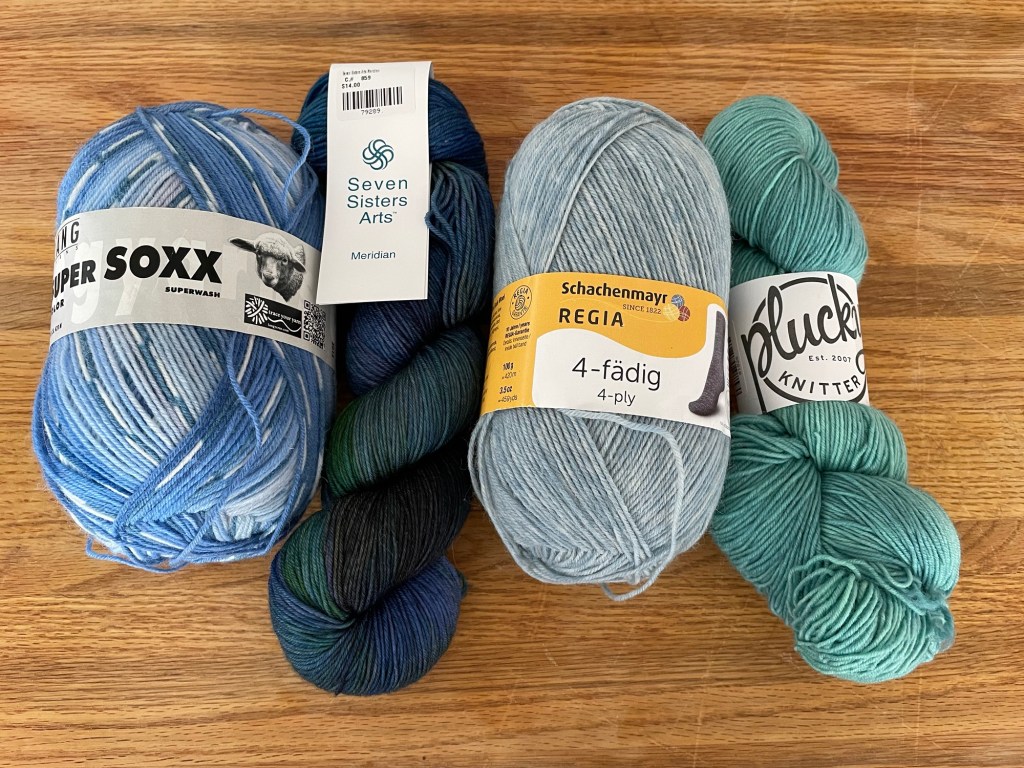
I bought four skeins of sock yarn at half the original price.
We are back home now, but I have not had any time to spend on my CSM. I am going to bring it to Arizona when we go there for the winter. There are fewer distractions living in the RV away from home, so it will be a good time to focus on and learn the sock machine. I have faith that I will be able to make a successful heel and a complete sock in due time, with support from the helpful CSM community.

Congratulations on getting a CSM! I could tell from a previous post that you really wanted one! That last picture of the table with the CSM clamped to it reminds me of a beautiful library table we used as a dining table for years.
Good luck in getting the heels working! It is so nice you have a community to help!
I look forward to more posts about your projects on the CSM.
LikeLike
That table was tucked in our 3 season porch with stuff on it, so I did not think of using it for the CSM at first, until we moved it to a different part of the house. It is a classic style. I am really going to need some people to help me with the CSM. I know there are people in the Phoenix area, I am planning on reaching out to them on their facebook group after we get there. There will be blog posts happening once I get going.
LikeLike
Meg your full postal address is visible on this post, suggest you block that out and repost.
LikeLiked by 1 person
Thank you for noticing that…I will update right now.
LikeLiked by 1 person
Good luck with the heels, all the YouTubers I know with these sock machines put waste yarn in and then hand knit the heels so I assume they gave up trying on the CSM. I hope you work it out.
LikeLiked by 1 person
I thought about that, but I also see people in videos making them effortlessly. I look forward to getting together in person with a group of crankers when I can have someone help me. I fixed that photo so my address is scribbled out. Not the neatest, but got the job done without any research on the best way.
LikeLiked by 1 person
This is very exciting for you, and I enjoyed reading all about it. When I read about that CSM in a previous post, I could tell you really liked it. Your excitement with the CSM comes through in this post. I am guessing that all the yarn from your purchase is gone? I look forward to reading about your journey with your CSM, and I wonder what you’ll be doing with all the socks you make. Will you be opening up your ETSY store again?
LikeLiked by 1 person
As of right now, I am not thinking about selling socks, but who knows. There is a gift shop at the 55+ resort where we go in AZ where people can sell their handmade items, so that is a possibility. I still have quite a lot of yarn. I should take a photo, it is kind of embarrassing. I keep finding more good deals.
LikeLiked by 1 person
I always wondered about how the heel would work on a sock knitting machine, I look forward to seeing how it works out!
LikeLiked by 1 person
The heel is made using the short row method. The toe is made the same way. You have to kitchener stitch to close up the top of the toe. I am sure I will post something once I actually do an entire sock successfully. Meanwhile I want to make a couple of gnomes for Christmas gifts. They are just tubes….no heels!
LikeLiked by 1 person
Oh, the gnomes will be so cute!
LikeLiked by 1 person