
After weaving the rest of the warp yarn that came on my vintage Structo Artcraft loom (read about that here), I was ready to make something on my floor loom. I had not used it since before Christmas, because I cannot bring it to Arizona! I decided to make another set of towels with the same cotton and linen yarn as I used for towels I made on my rigid heddle loom in Arizona (read about that project here), with different colors and a more complicated pattern.
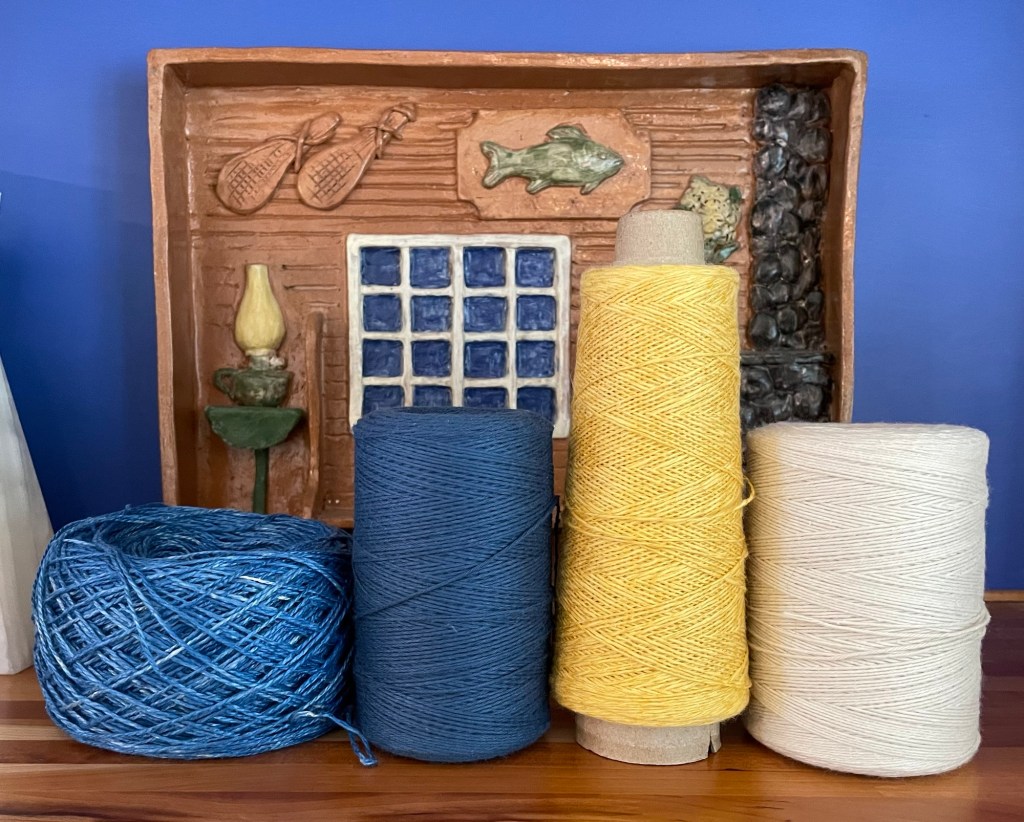
The warp yarn is blue 100% cotton, off white 100% cotton, and a bit of yellow Gist Duet cotton/linen blend. The weft yarn is the same off white and yellow, but instead of the blue cotton, I used 100% blue linen yarn that I had dyed myself.
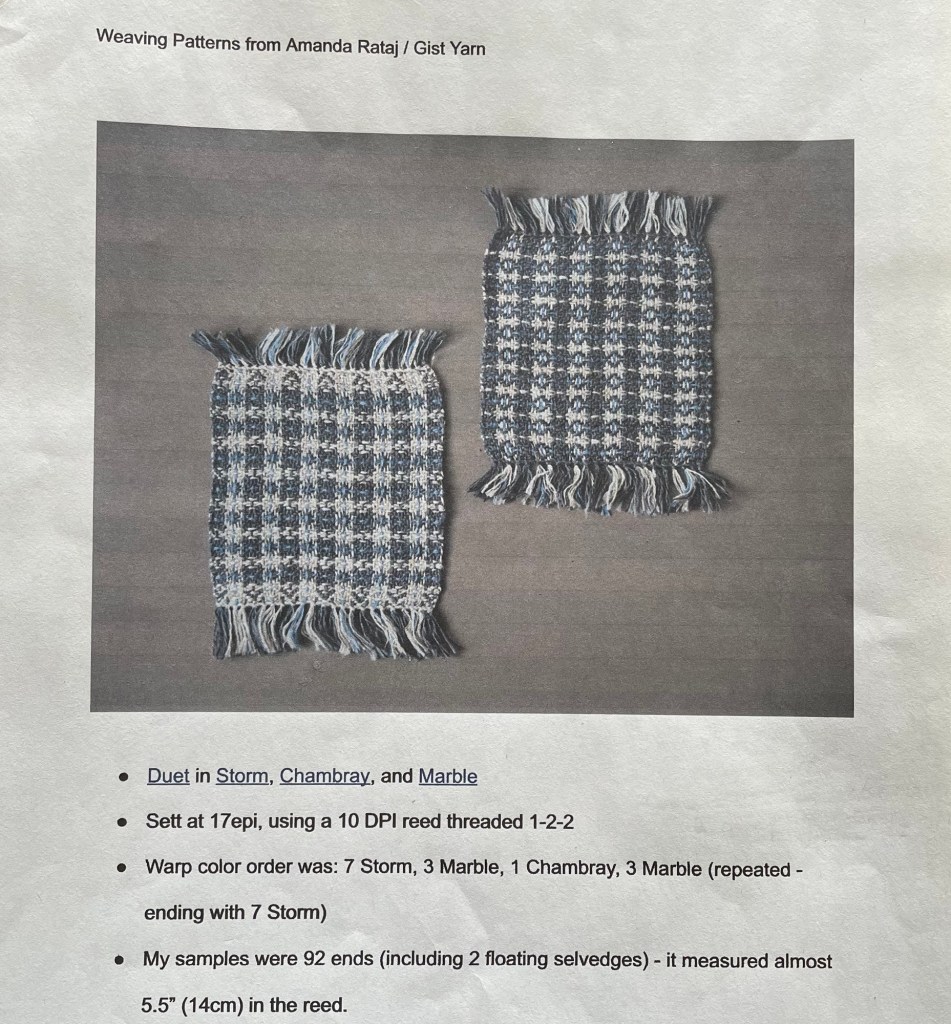
I used a pattern from Gist, adapting it for towel width.
I am still looking for the perfect place to use my warping board for measuring out warp yarn. It should be the right height so I am not bending over or reaching up high. It needs to be stable, not wobbling or jiggling. Nothing should be sticking out between the pegs or interfering with the path of the yarn. The yarn should flow easily off the cone or ball from the floor below. This time I hung the warping board on some cabinet door knobs above my kitchen desk, as it seemed like a good height and nothing was sticking out in the wrong place. I tied it on to the knobs with a ribbon, and then used painters tape to keep it immobile. It was not perfect as the yarn had to sit on the desk rather than the floor, and the wall of the pantry was right there. It worked as well or better than the other places in the house I have tried.

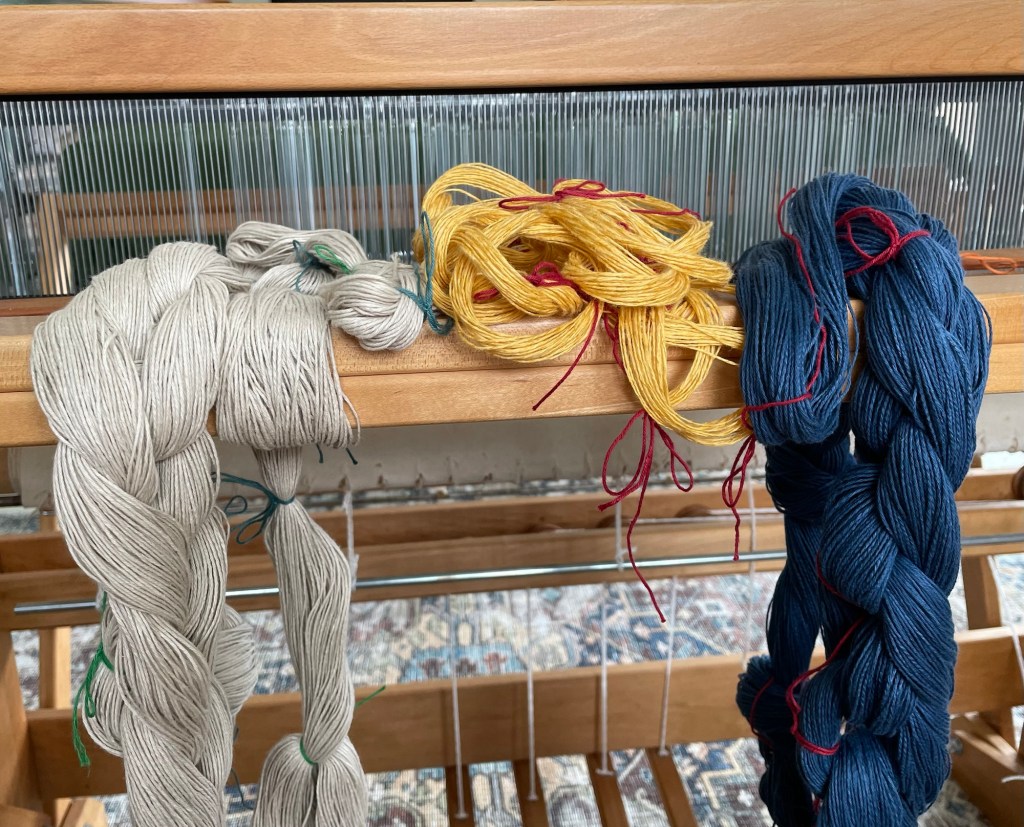
There are different ways to measure out multiple colors of warp yarn. I decided to measure out each of the three colors separately. In retrospect, knowing how that would affect the “sleying the reed” step, I would have done it differently.
Following is a photo with the three different warp yarn bundles, or “chains” as they are called, ready to be threaded through the reed. The red towels with similar yarn I made in Arizona had 12 warp yarns per inch. For this project I used the eight dent reed with two ends per slot, for a denser fabric with 16 yarns per inch.
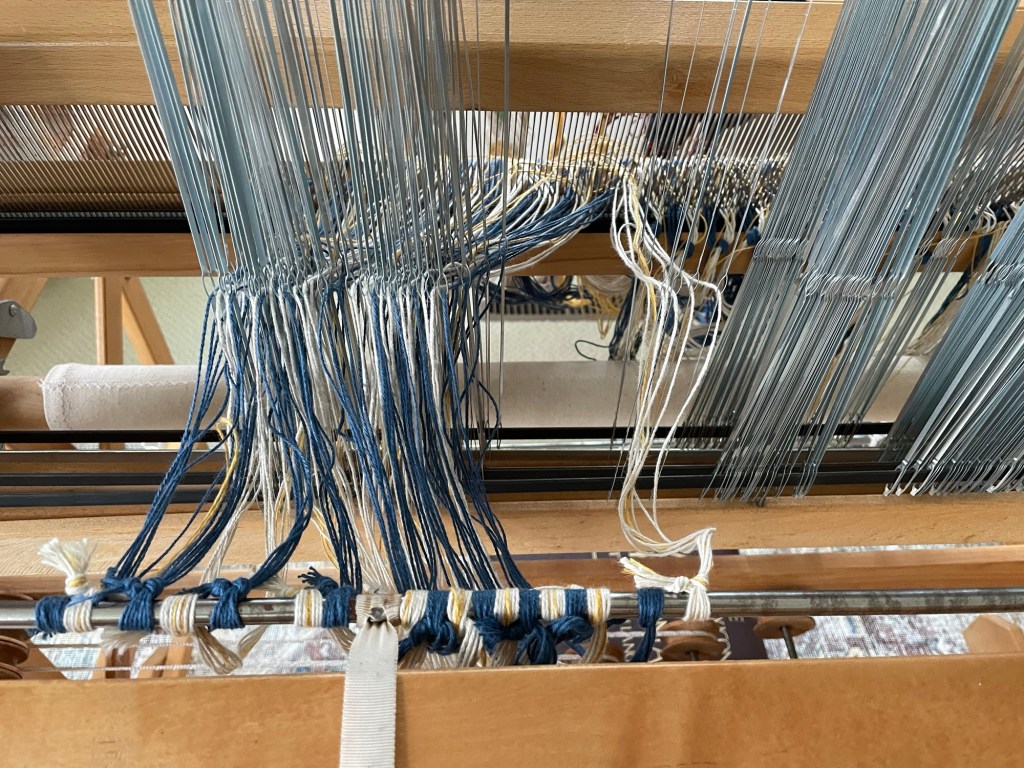
The way to keep the warp yarn in order for floor loom projects is with a “cross” that forms as the yarn is measured out on the warping board. Two sticks are used to keep this cross in place as you “sley the reed” (thread the yarn ends through the slots in the reed), so the ends can be threaded in the same order as they were measured out. In the following photo the “cross” of the blue yarn is visible between the two sticks. The white warp bundle is bunched up on the sticks to the left of the blue yarn.

The pattern has seven blue ends, alternating with a block of seven ends composed of off white with one yellow in the middle. After threading on some of the blue, leaving empty slots for the off white and yellow, I realized that the off white ends would have to majorly reach across the blue ends as they filled in the spaces between the blocks of blue. The next photo is a close up of the blue ends threaded through the reed, with the empty slots waiting for white and yellow.

I wrote out some notes to help keep track of what order to thread the yarn ends through the slots. It was a little confusing given I was using two ends per slot with an odd number in the color blocks, so some slots have two different colors.

After threading all the blue yarn through the slots in the reed, it was time to figure out what to do about the white. My previous floor loom projects had all the warp yarns wound consecutively into one warp chain, with every slot in the reed filled as I went, leaving no spaces. I looked through various instructions in books and online, and found a suggestion that made sense to me to use another set of sticks for the white yarn that could sit on top of the blue yarn. I found two yard sticks that worked for the purpose. It was still messy looking but allowed the white yarn to spread out across the reed on top of the blue yarn, rather than reach way across from one side.

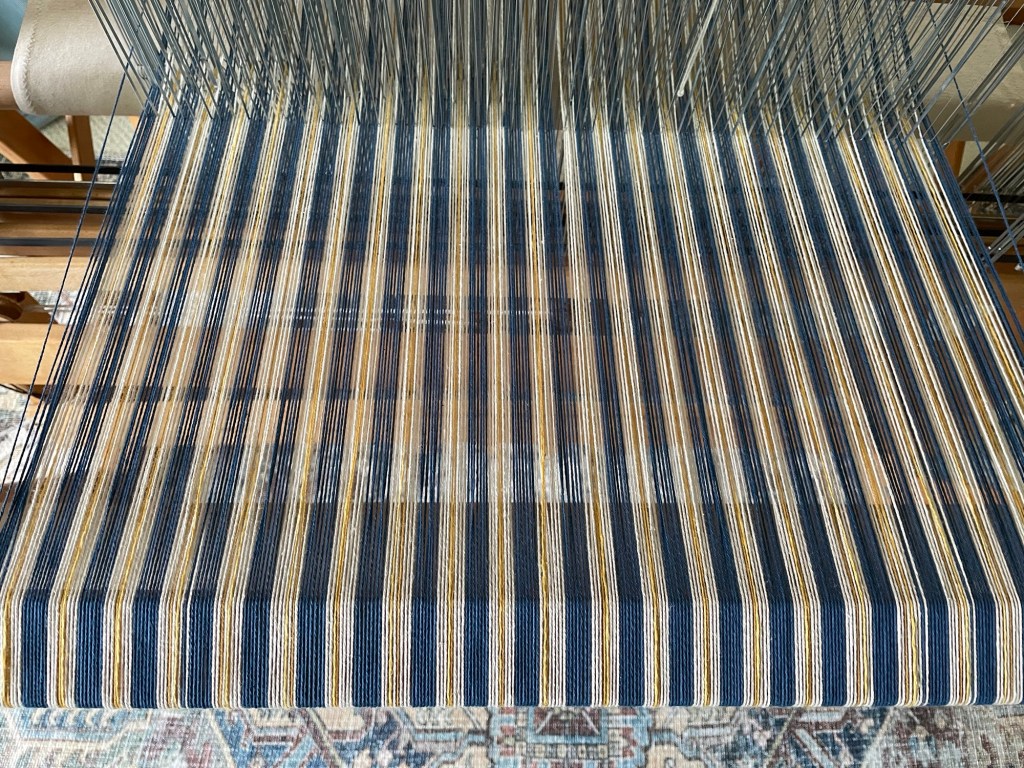
There were only 22 ends of yellow (one per pattern repeat), so I used a method of holding that bundle in my hand while maintaining the “cross” as I threaded (instead of using the lease sticks). I did not get a photo because both my hands were occupied. Following is a photo taken after all three colors were threaded through the slots of the reed.

The yellow Duet cotton/linen yarn is slightly thinner than the blue and off white cotton yarn, with one end of yellow in every repeat of 14 yarns. As I was working I wondered if the yellow was going to get lost in the pattern and not show up very well. Of course I should have thought about this before I measured out all the yarn for the project and starting sleying the reed. While it was still possible, if not ideal, I decided to add a strand of some yellow Cottolin yarn in with each end of the Duet yellow ends. Cottolin and Duet are both cotton / linen blends, but the Cottolin is thinner and the color I had was a little more goldish than the Duet. One strand of each together is thicker and would pop out better. The next photo shows the yellow Cottolin yarn next to the yellow Duet yarn.

After threading all the colors and ends (317 ends, about 20″ across) through the reed, it was time to thread them through the heddles and tie them on at the back.
After all the ends were tied on, I wound the warp yarn around the beam at the back, and then I was ready to tie the other ends of the warp yarn on to the front.

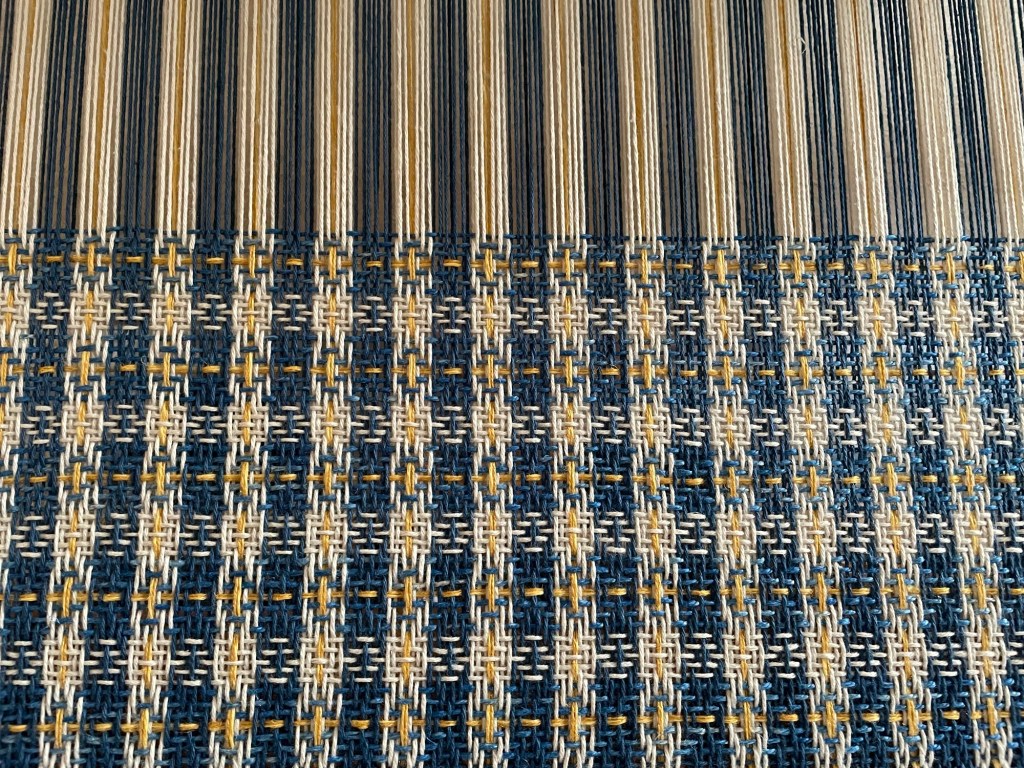
The colors I chose make this towel look very Swedish.
The second towel of the set has a slightly different pattern with three rows of white instead of five. I used white instead of blue for the border and hem stitching.

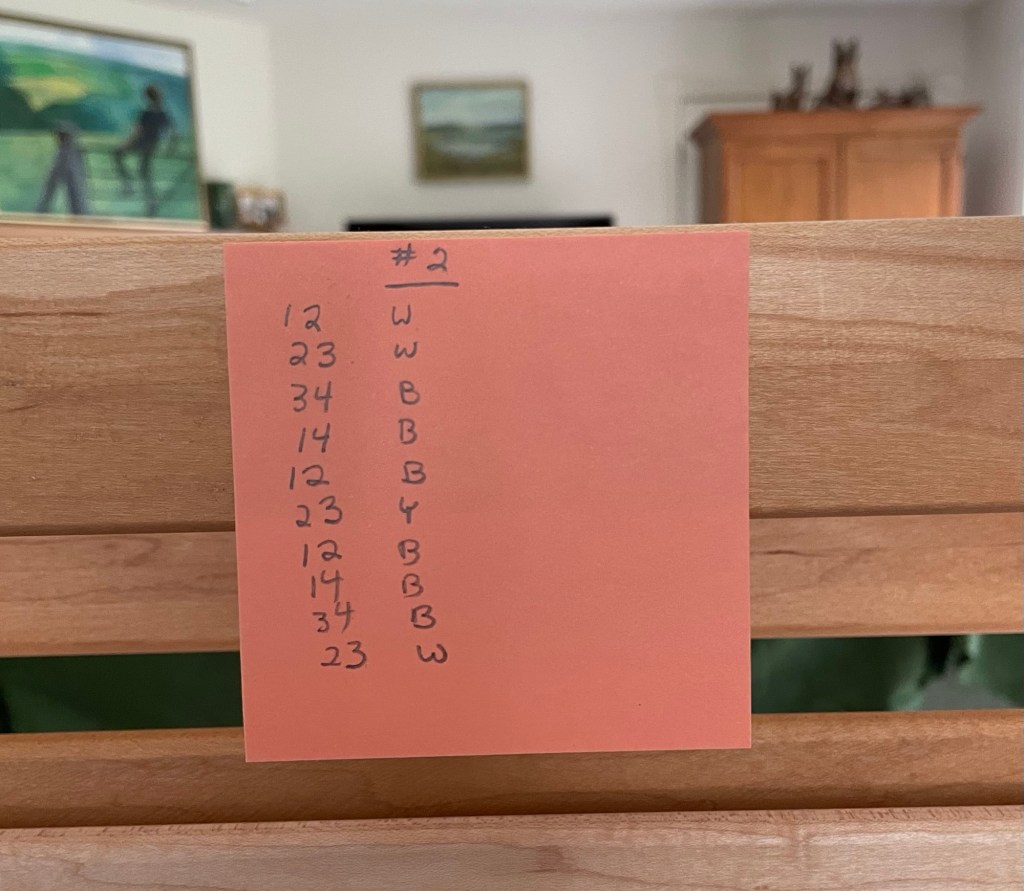
Following is my post-it note with the treadling pattern for the second towel. The first row is harness one and two in white yarn. The second row is harness two and three in white yarn. There are 10 rows in one pattern repeat.
The next photo shows a close up of the yellow and white yarns being carried up the side while weaving a blue row. The odd number of rows in each color caused the carrying up of yarn to alternate sides, so it was a but lumpy but symmetrical.

I had measured out warp yarn to weave three towels. This involves estimating how much yarn is needed for loom waste, fringe between towels, take-up, and shrinkage. I looked at my notes from other towel projects. I have had the problem of not enough warp yarn before, so I wanted to make sure I had enough this time.
I wove 24″ for the first and second towel. When I got to the third towel I used the same pattern as the second towel. When I got to 24″, there was still a lot of warp yarn left so I kept weaving for 31″. That was as long as I wanted to go, and I needed to be done with this project . There was still warp yarn left, but it was hard to tell how much exactly without unwinding it from the back.
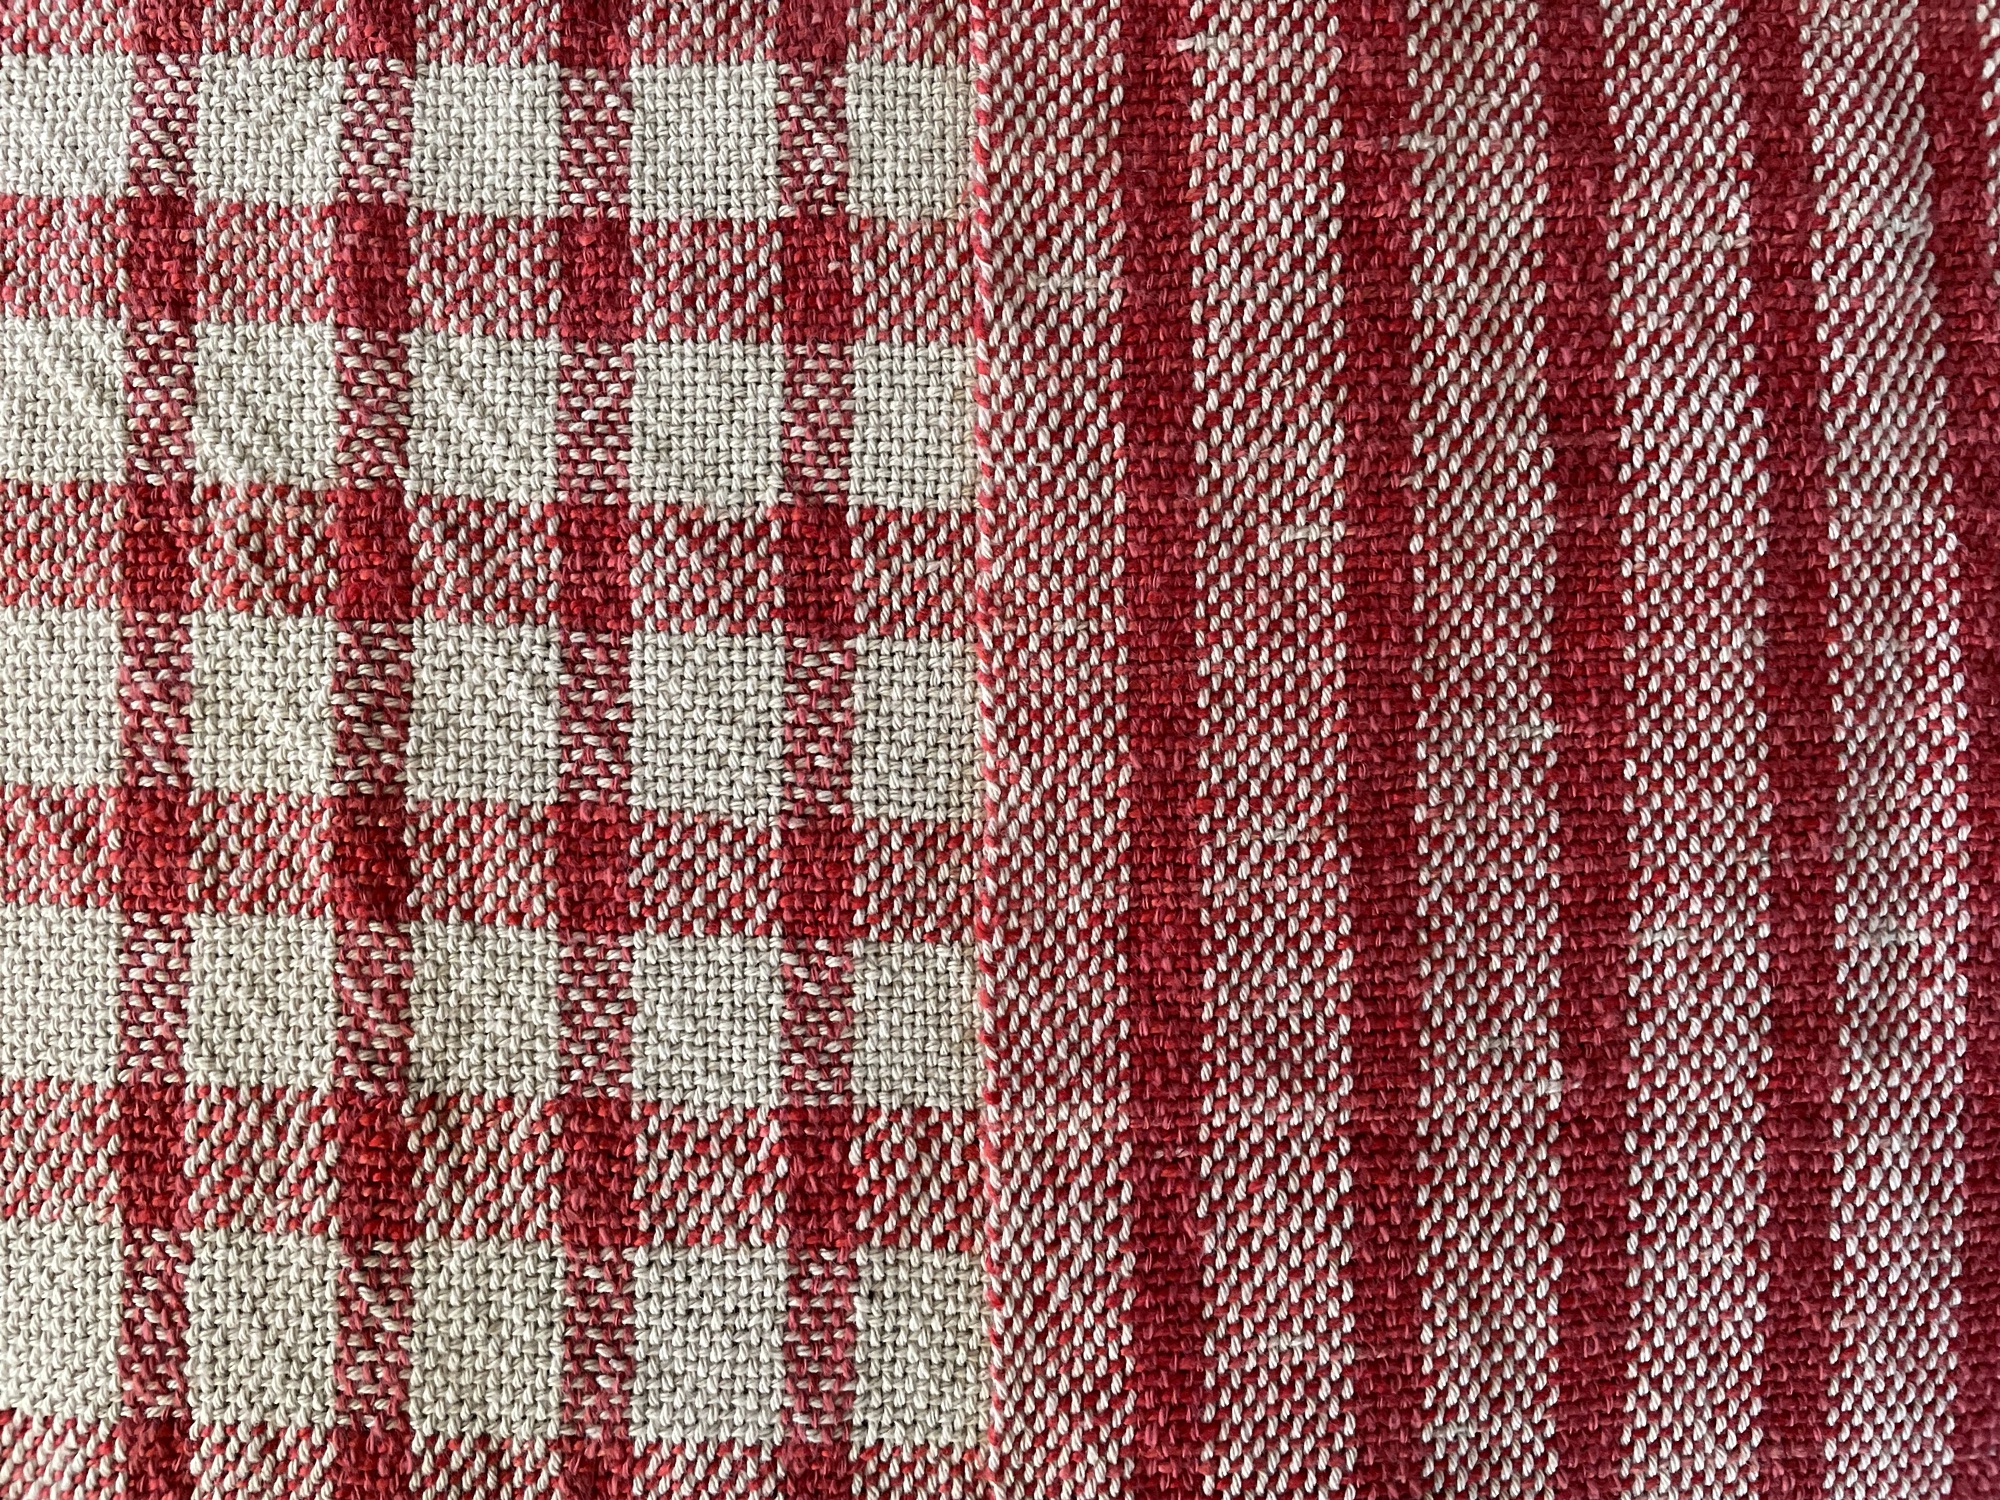
I cut the project off the loom, cut the towels apart, wove in the ends, and then washed the three towels in the washing machine and ran them through the dryer. I noticed something wrong on one of the towels while ironing them. I used the wrong treadling pattern for two blue rows, and possibly some of the rows between. My head hurts trying to figure it out. There is probably a way to fix it, but I do not have time or energy for that in the near future. Can you spot the incorrect rows?

Following is a close up photo showing the two different weft patterns side by side.

Following are photos of this current set of towels, next to the towels I made on my rigid heddle loom in Arizona with the same yarns in different colors. The warp yarns in both cases are 100% 8/4 cotton and Gist Duet cotton/linen blend. The weft yarns are 100% 8/4 cotton and 100% linen hand dyed. The blue and yellow towels have a more complicated four harness pattern with 16 ends per inch. The red towels are plain weave with the pattern formed by the colors, with 12 ends per inch.

My sister asked me if the blue and yellow towels were “harder” than the cottolin towels I wove before the holidays (and wrote about here). Maybe she thought that was the case due to the pattern formed by the colors, but the answer is no. The warping was a little harder due to the way I measured each color separately, but not because of the pattern. Weaving the pattern of weft rows was easier because of the multiple colors. I could tell exactly where I was in the pattern by looking at what color row should be next (although that did not stop me from making mistakes). The cottolin towels had a long repeat and it was not easy to tell exactly which row I was on. With the multiple colors I had to carry the colors up the sides as I wove, so that was an extra step but not “hard”. The next photo shows one of the cottolin towels next to one from this blue and yellow set.

Later in the summer I may try to tie more warp yarn on to the warp yarn still on the loom, leftover from this towel project. I hate to waste the excess warp yarn that I did not use. I tried tying warp yarn on to leftover warp yarn another time that did not go well, but I think I did not use the right type of knot and there may have been other problems. It should work, and reduce the time needed to get another project warped.
At some point over the summer I am going to have to fold and move my floor loom out of the living room when our flooring re-do project happens. Also this summer we have two trips, our annual family reunion at the cabin, and another family get together. One thing at a time.


I love the white, blue and yellow colors you used to make the towels. They are beautiful!
LikeLike
Thank you! These colors look good in my kitchen.
LikeLike
Those are lovely! I don’t know if you like to read, but if you do, you might want to try “The Lady and the Unicorn” by Tracy Chevalier. How they wove the tapestries in the middle ages is a key part of the plot, and I think you would enjoy that!
LikeLiked by 1 person
I do read and thank you got the book recommendation!
LikeLiked by 1 person
Beautiful towels. Do you remember the pattern’s name?
LikeLike
Although your notes are very clear. Love them.
LikeLiked by 1 person
Thank you! I probably found the pattern on the Gist Yarn website, but it does not seem to be there any more. The designer is Amanda Rataj, she has a website but the pattern is not there either. However luckily I had pasted the pattern into a google doc, and then downloaded it into a PDF. So here is it….file:///C:/Users/megsh/Downloads/Weaving%20Patterns%20from%20Amanda%20Rataj%20_%20Gist%20Yarn%20(1).pdf
LikeLike