
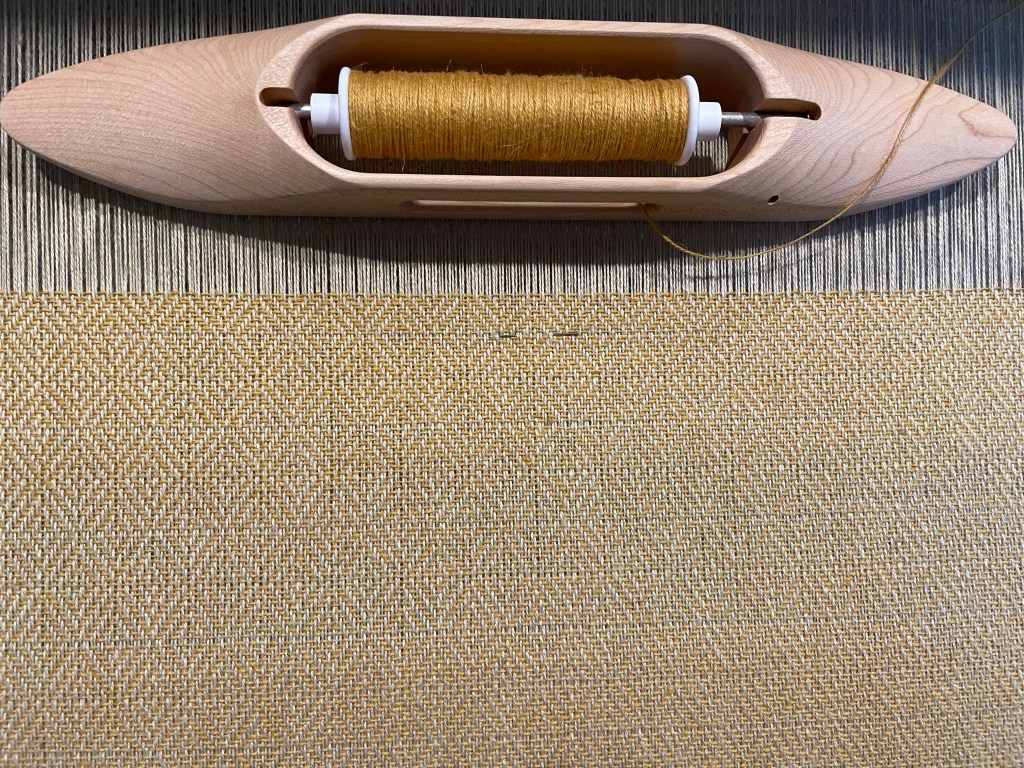
After weaving towels I loved using Gist Duet cotton/linen blend yarn, I was excited to try weaving with Cottolin, another cotton/linen blend yarn that is thinner and has a larger percentage of cotton. I bought some tubes online at yarn.com, and later when I was in Minneapolis I bought more at the Weavers Guild store. Pictured below is a small cloth I made for my daughter using red Duet yarn for the weft.

I had not paid much attention to the Weaver’s Guild in the past when it was located in the Textile Center in Minneapolis. When we lived in the Twin Cities, before I started weaving, I had been to the Textile center a number of times to see exhibits at the Gallery, visit the gift shop, use the dye lab and generally explore.
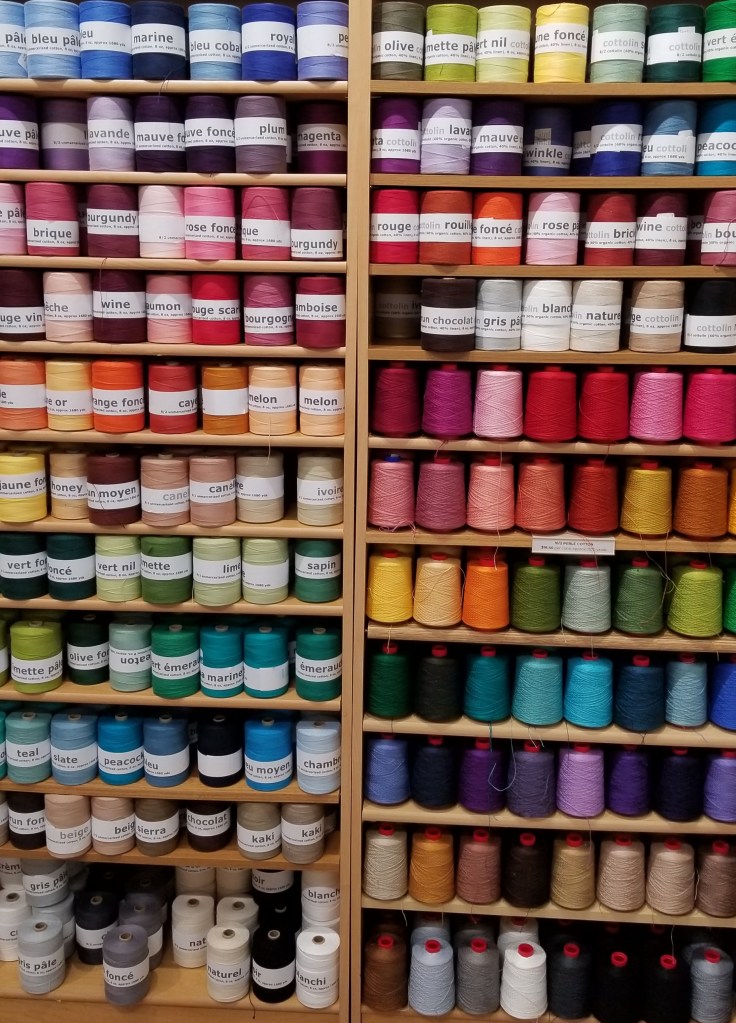
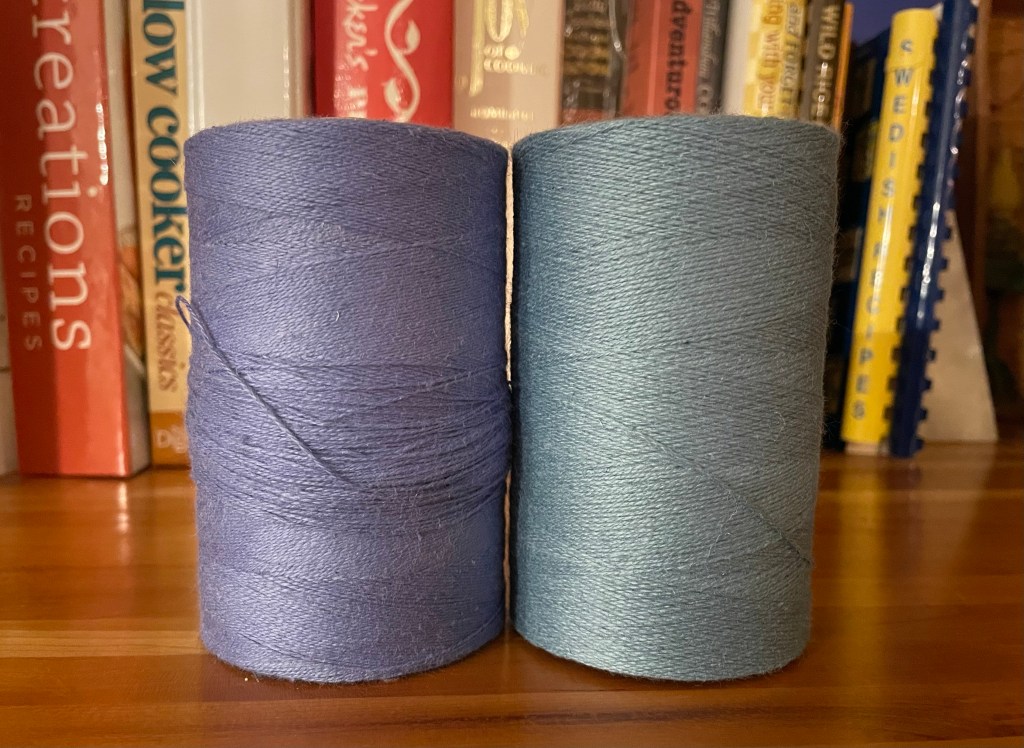
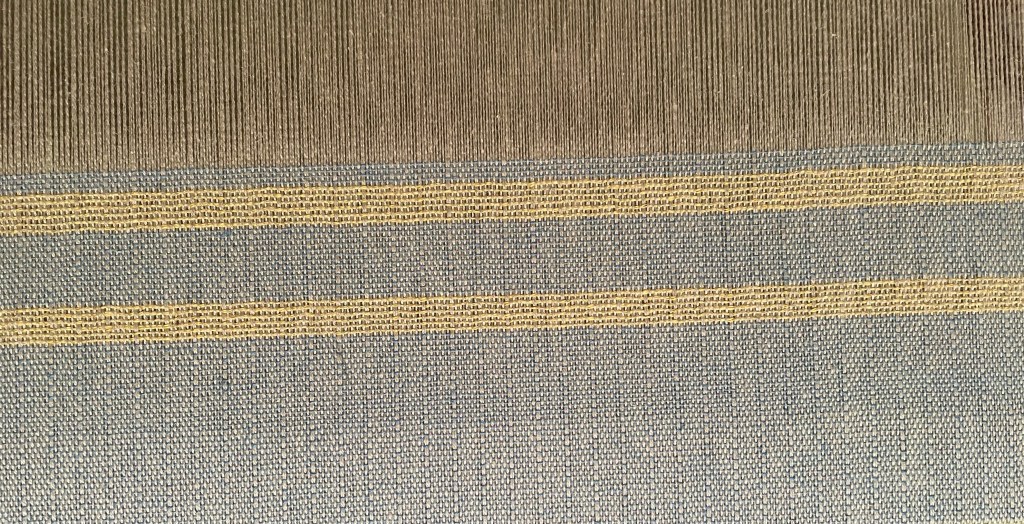
Meanwhile the Weaver’s Guild moved to the Minnesota Center for Book Arts building, also in Minneapolis. I went there this summer with my artist sister-in-law with the goal of buying some Cottolin yarn in person, so I could see the colors in person, and not have to pay shipping. We both enjoyed walking around inside the building and checking out all the interesting exhibits and offerings there, including Gallery space, a book store, classes and workshops related to book making, space for events and book talks, and a coffee shop. The Weaver’s Guild has looms, weaving yarn and supplies for sale, as well as space for weaving classes in the building. Following is a photo of yarn for sale at the Weaver’s Guild store.
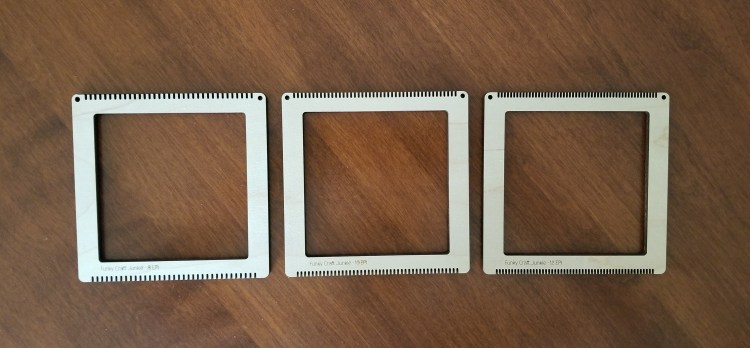
Cottolin is thinner than any other yarn I have worked with, so I did some research on how many ends per inch I should use for warping a set of dish towels. There is a range depending on your pattern and how dense you want it to be. I decided to buy a set of three tiny sample looms so I could weave up small pieces of fabric with two different densities. They are small wood frames about five inches wide with notches across the top and bottom, the right distance apart for eight, ten, or twelve ends per inch.
This project of making samples sounded easy and quick but it wasn’t. For one thing I was deciding between 20 and 24 ends per inch. That requires putting two ends in each slot of the ten or twelve end per inch mini loom. Winding the yarn on to the loom was not hard, but it was tricky to weave the weft yarn through the warp with a needle.
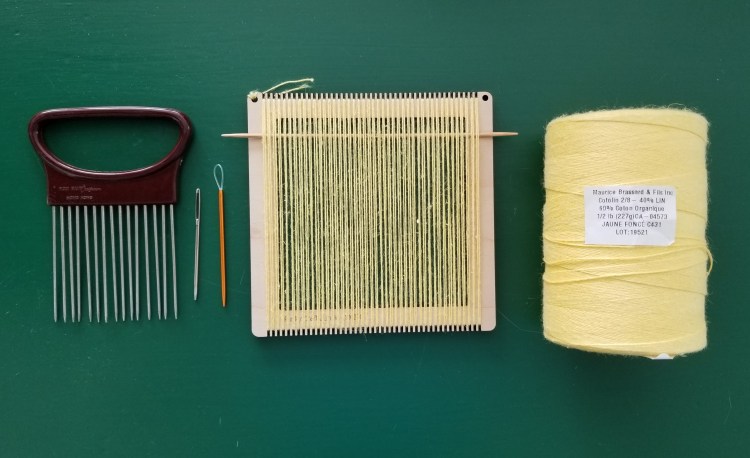
The first sample I made was plain weave at 20 ends per inch. I used a comb that I normally use with my drum carder to pack each row. It was hard to keep the sides from drawing in, and hard to keep the tension even.
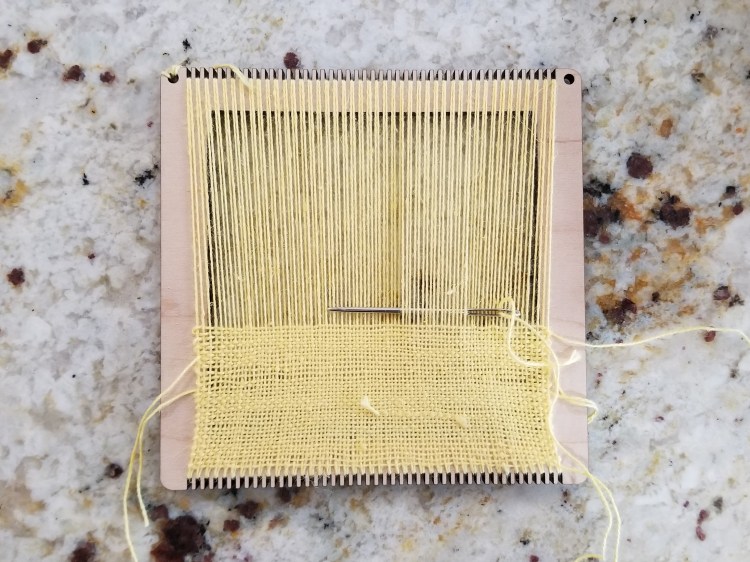
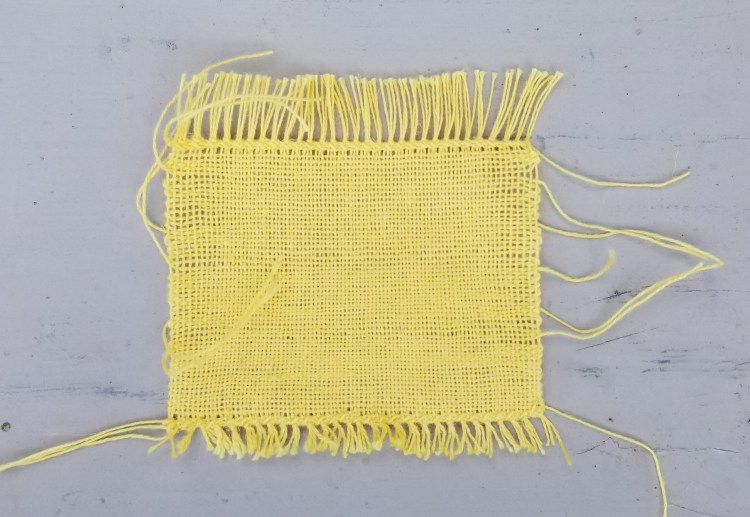
Following is the first sample with hem stitching at each end, before washing.
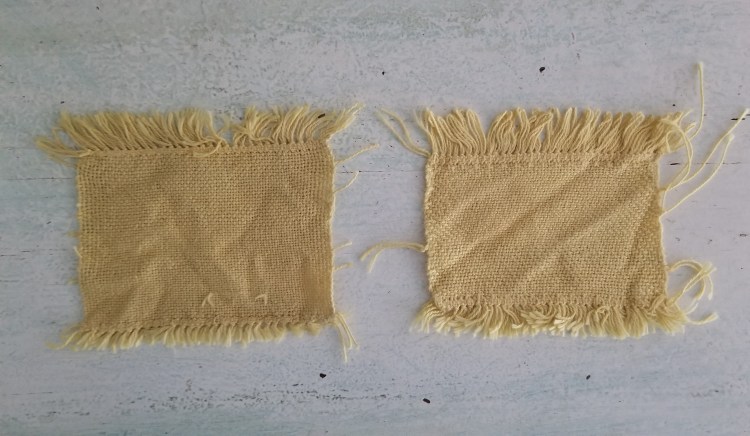
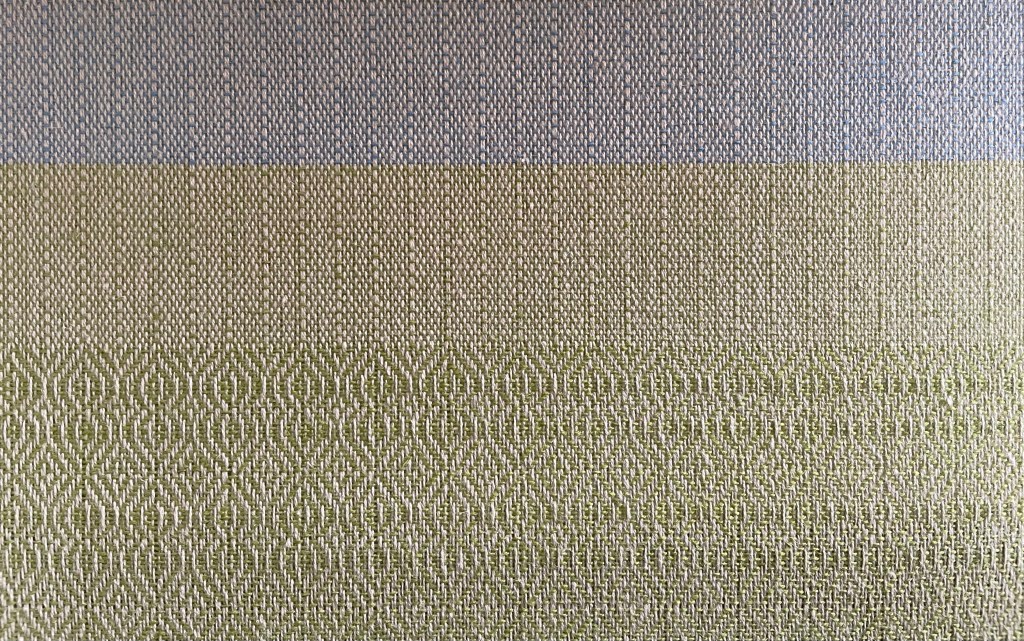
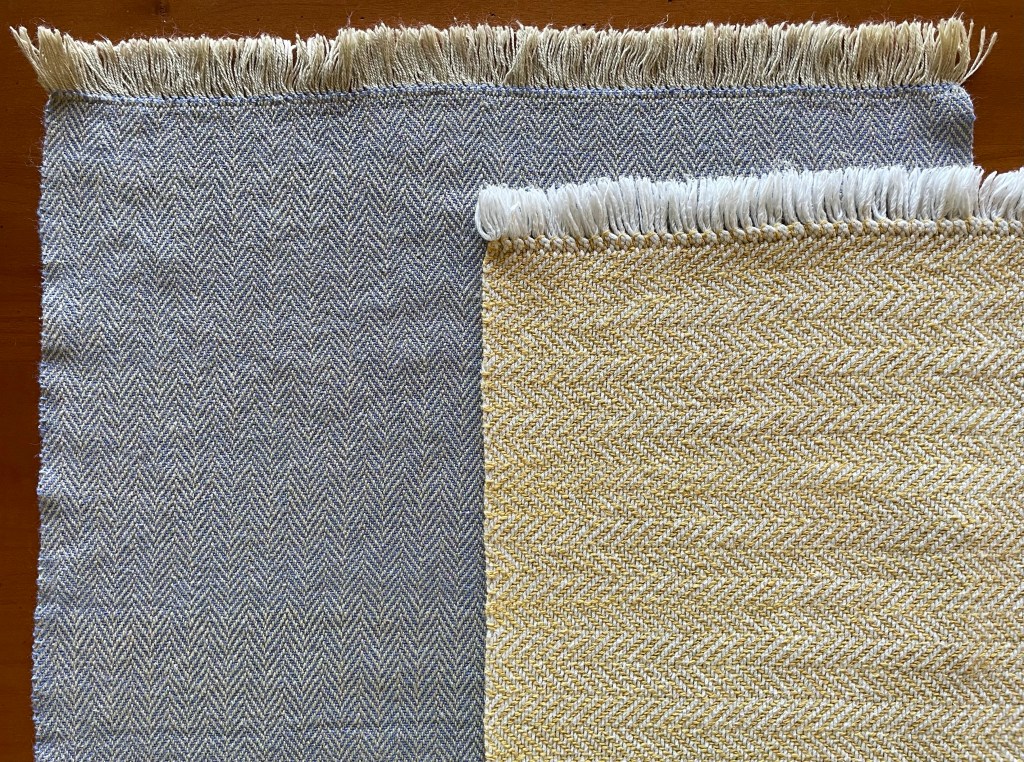
I made the second sample with 24 ends per inch, and with twill instead of plain weave. The twill (over two under one) with so many ends made it hard to get the needle in and out of the right warp yarns. It was slow and frustrating and I made a lot of mistakes. I did not bother to weave in the ends or fix the mistakes. It was an interesting exercise but probably not worth the hassle. I decided to use 24 ends per inch for my towel project, which is what Torri, my weaving mentor, recommended from the beginning. Following is a photo of the two samples after washing. They are wrinkly, even after ironing.
I picked out colors of the Cottolin yarn to use for my set of four towels, which are shown in the next photos. The warp yarn is the natural. The blue in the first photo is a pretty periwinkle color. I like the way the yarns coordinate with the painted tile my aunt made of our family cabin years ago. For the forth towel I used a different color of blue, leaning more towards turquoise. The second photo shows the two blue yarns next to each other.

Once I had decided to go with 24 ends per inch, and selected patterns from my weaving pattern book, it was time to warp the loom. This was by far the largest number of warp ends I had used in any project. My towels were 20″ wide on the loom, with 24 ends per inch, plus 1 extra one each side. That is a total of 482 yarn ends. I used my warping board to measure out the warp yarn in three groups, but I did not take a photo.
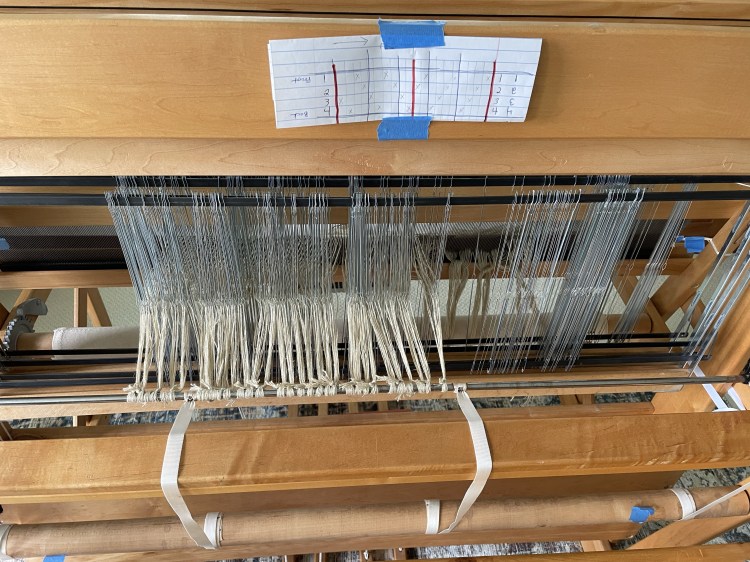
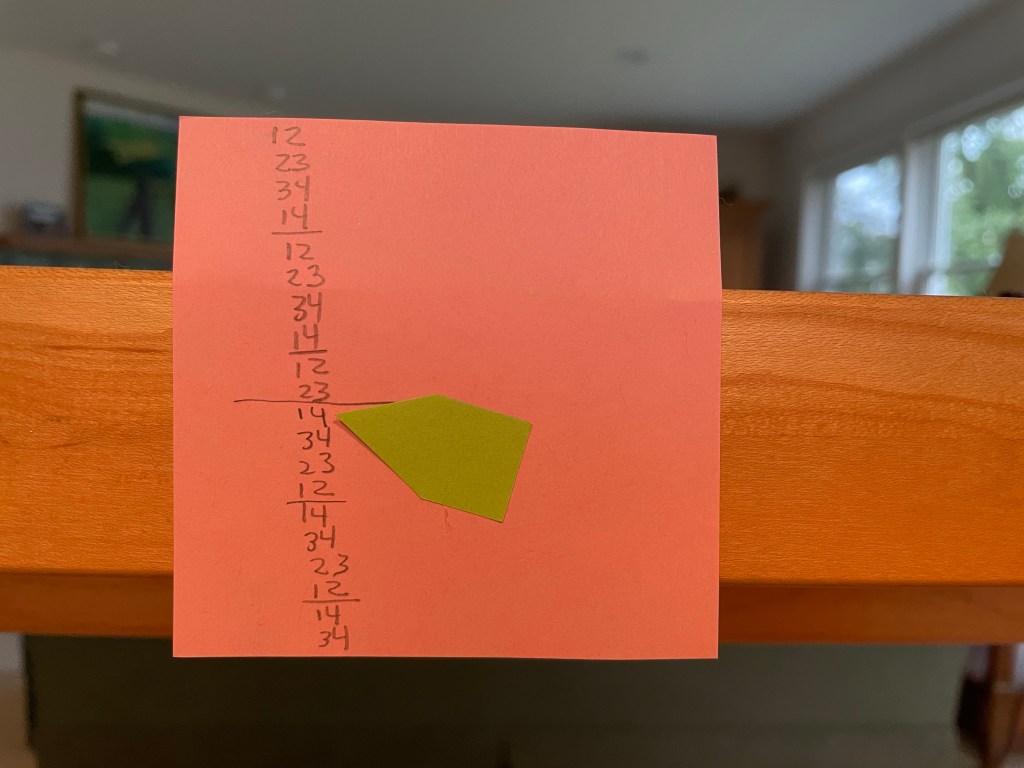
Warping the loom is the most time consuming part of weaving. First you put each yarn end through a slot in the reed from the front. In this case I needed two yarn ends in each slot in order to get 24 ends per inch. I did not take a photo of this step. The next part is putting the yarn ends through the heddles. The pattern tells you in what order to thread the yarn ends through the heddles on each harness. I will not try to explain that this time….just go with it or skip on. I made myself a chart to follow as I was threading. It took me a few projects to understand that the patterns read right to left, but since you are sitting at the back of the loom when threading the heddles, you read the pattern from left to right. My pattern had a repeat of 20. In my chart the rows from 1 to 4 are the heddles, with 1 being in the front and 4 being in the back.

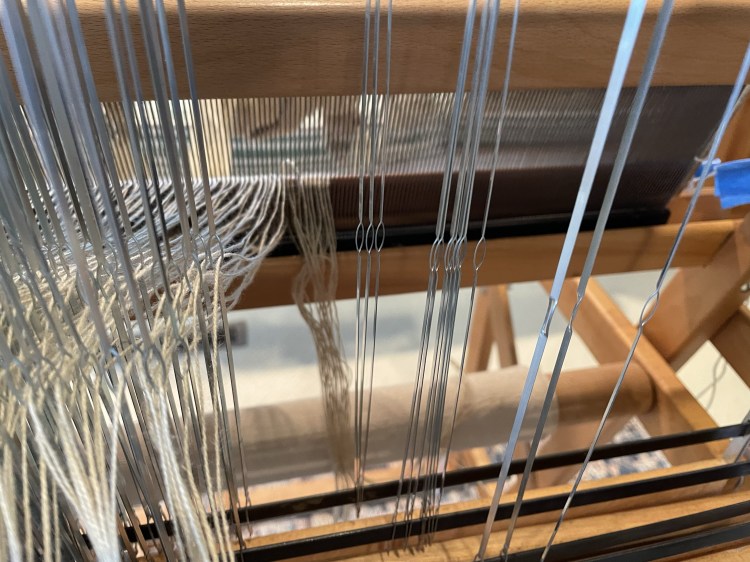
The next two photos show about half of the yarn ends threaded through the heddles and tied on to the bar at the back, from two different angles.
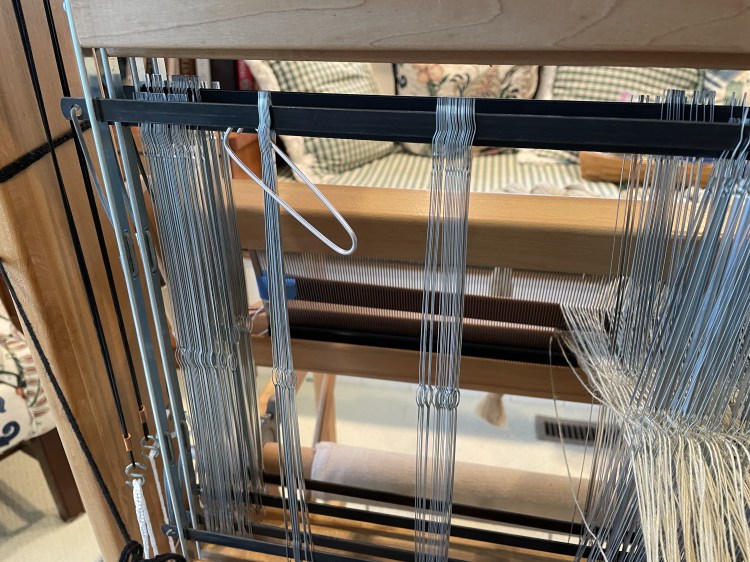
I realized far into the process that I had gotten got mixed up when preparing for threading the heddles. I had pushed too many off to the left of the working area, so that when I got to the end of threading I was going to run out of heddles before I ran out of ends to thread. The next photo shows the remaining heddles at the right side, which are less than the number I needed.
Torri recommended that I undo the bars that hold the heddles on, slide off the number that I needed from the left, and slide them back on at the right side. This was easier than it sounded. I used a knitting stitch holder to make sure the heddles all stayed in the same direction when I took them off and put them back on the other side.
After all the measuring of warp yarn (not pictured), “sleying the reed” (also not pictured) and threading all the yarn ends through the heddles, I was finally ready to weave. I started with some dark blue header rows (that would later be removed), and then wove three plain weave rows of the periwinkle blue Cottolin for the hem stitch at the beginning of the first towel.

The first towel was a herringbone pattern.

After doing hem stitch at the end of the first periwinkle towel, I wove a bunch of plain rows in the dark blue as filler between the first and second towel. Later those rows of weft yarn were removed and the warp yarn became fringe. The beginning of the second towel is shown below, using yellow with a different weave pattern forming diamonds. You can see the pattern better if you squint.
Following is a photo showing more of the yellow pattern of diamond shapes.
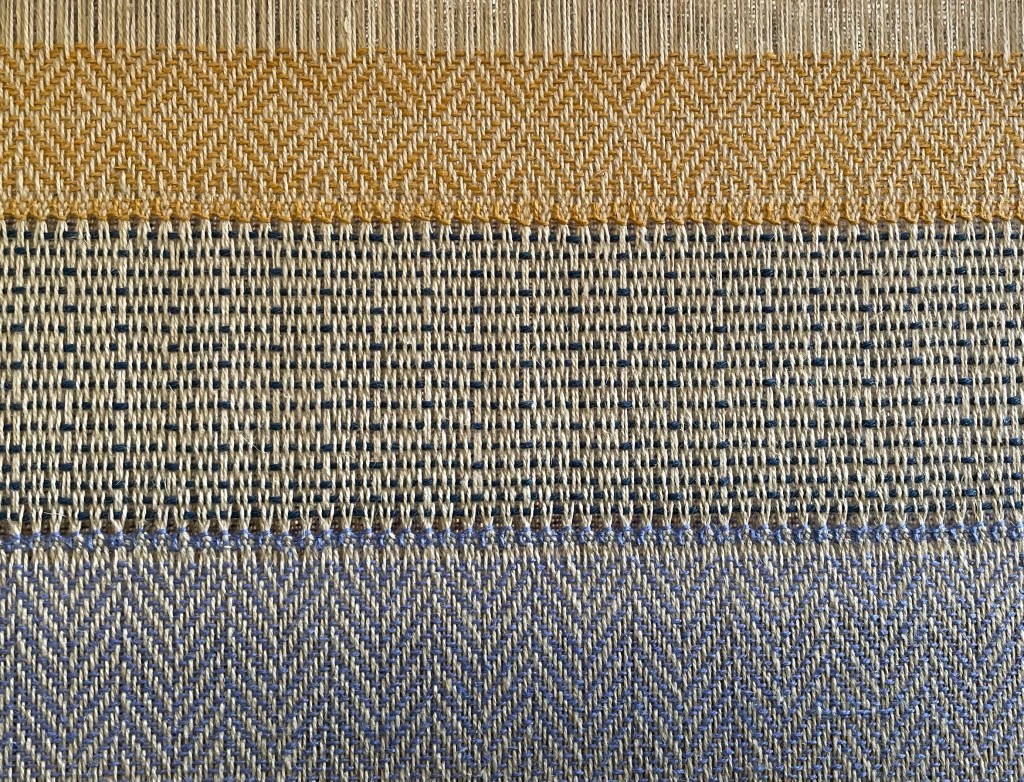
The third towel had a more complicated treadling pattern, in green weft yarn. I was not sure how much I liked it based on the photo in the pattern book, but I like it a lot after seeing it in a real project with more rows than could be shown in small sample photo in the book. This pattern has a repeat of 20 rows. I taped a post it note on the loom with a tape flag so I could keep track of which row I was on. I also put a pin in the weaving at the beginning of a repeat, so if something did not look right or I made a mistake, I could find where to start over that section. After awhile it was easier to make sense of the pattern and to see when it looked right or not.
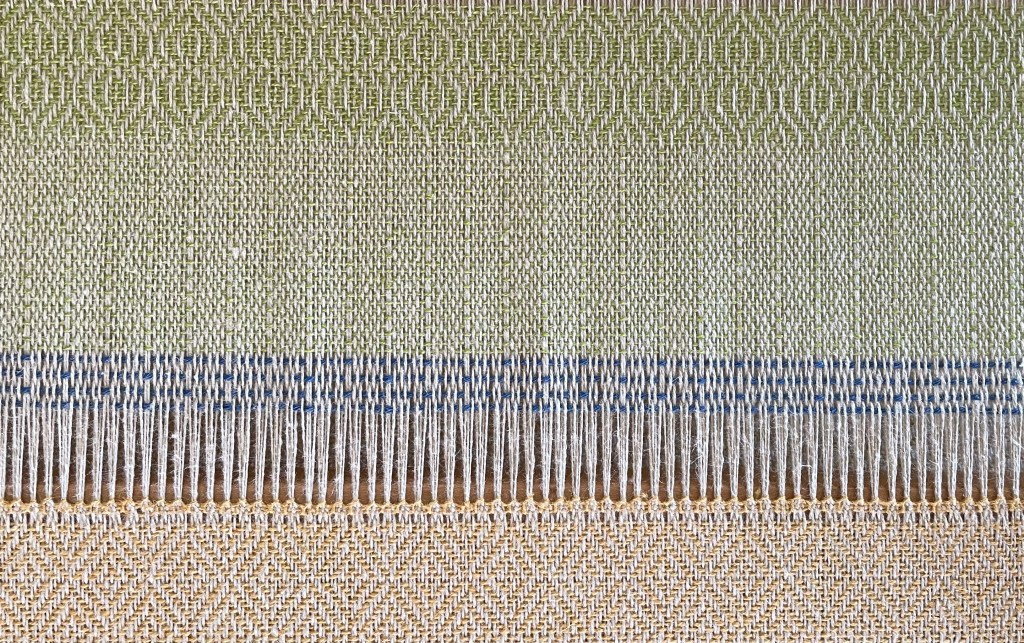
For this towel I decided to do a rolled him instead of hemstitch and fringe. For the rolled hem I wove some plain weave rows on each end. Following is a photo showing the plain weave for the hem of the green towel, and the first repeat of the pattern, after the end of the yellow towel, with some spacer rows in dark blue.
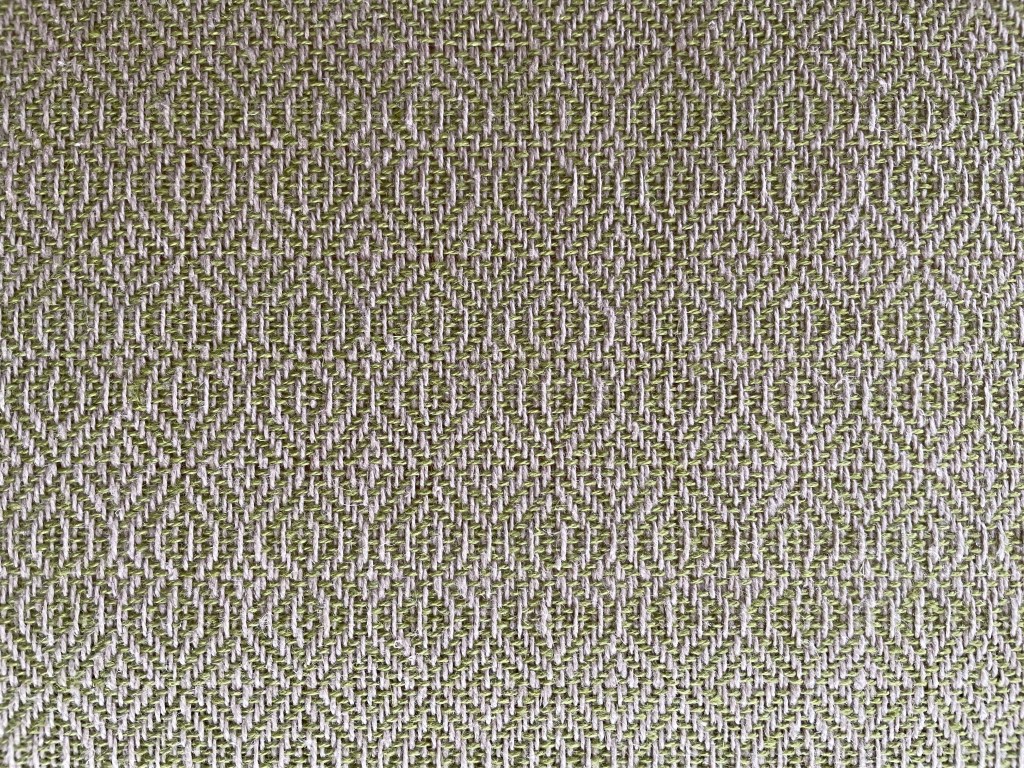
Next is a photo showing a bigger section of the green pattern.
I was trying to finish this project before our Thanksgiving trip to California, so I could give one of the towels to my sister-in-law as a hostess gift. When I got to towel number four, I thought maybe I would just do plain weave for the entire towel instead of one of the more complicated patterns. Because of the threading for my patterns, plain weave is a little different and looked kind of interesting. The following photo shows the plain weave at the beginning of the forth blue towel, after the plain weave rows for the hem of the third green towel. It is hard to tell the difference in the two blue yarns I used in these photos, but the first one was very periwinkle, and one for the forth towel was leaning toward turquoise.
I added some yellow stripes to make the plain blue towel look a little more interesting. After getting a ways along I did not like it and had to make a decision. Keep going and finish it faster but not like it that much? Or undo what I had done and start over. I decided it was better to love the outcome, and that I was not in that much of a rush. Following is a photo of the blue plain weave with yellow stripes that I ended up undoing.
I started over again with blue using the same pattern as for the green, with some plain weave at the beginning for a rolled hem again, instead of fringe.

When I was done with the weaving, I removed the whole thing from the loom and zig zagged on my sewing machine each plain weave end on the last two towels, so it would not come undone when I cut the towels apart.
There is always waste warp yarn at the end of a project. After cutting the towel project off the loom, I had about 30″ of warp yarn left on the loom. With 482 ends at 30 ” long each, that is about 400 yards of yarn!!

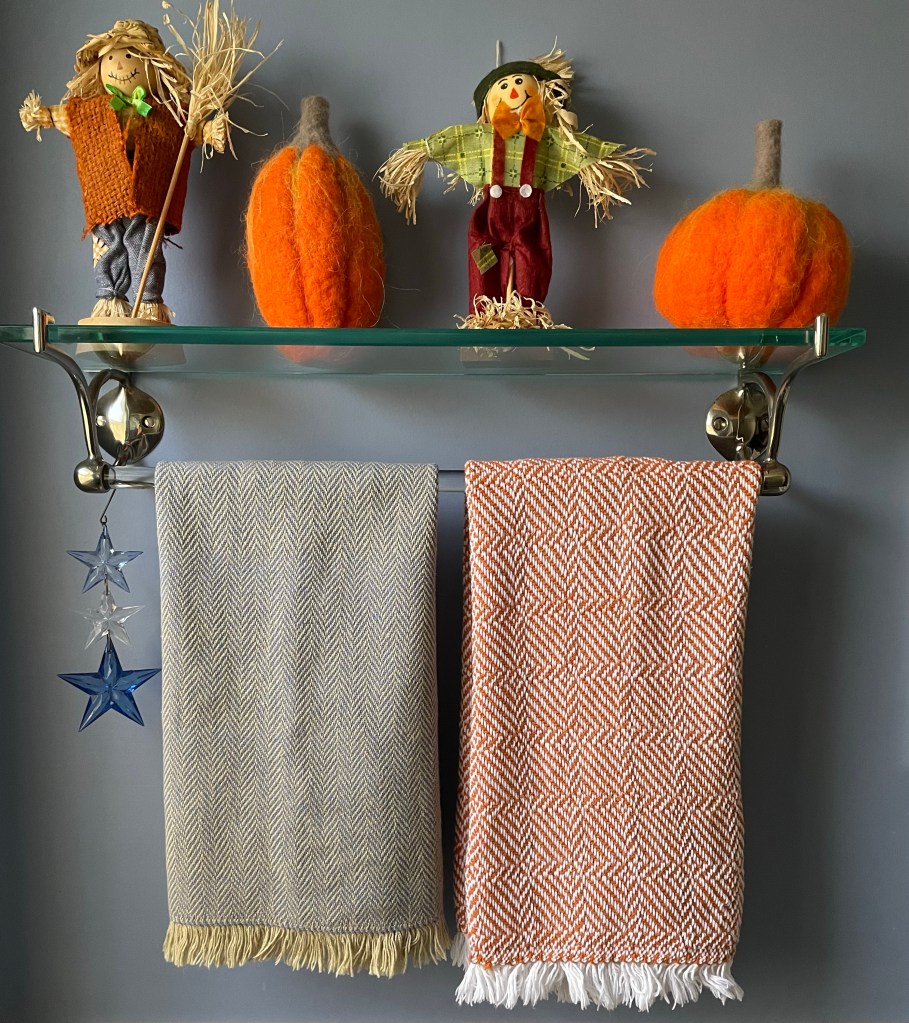
After cutting the four towels apart, I washed the first two towels with fringe just in time to pack the periwinkle blue herringbone towel in my suitcase for the Thanksgiving trip. I kind of randomly picked that towel to give my sister-in-law, but it turned out to be the perfect choice.
After I gave my sister-in-law her towel, she hung it up in their main floor bathroom which happens to be painted periwinkle blue! I had not remembered that. Also displayed there was the orange towel I have her last Thanksgiving.
After we got back from the Thanksgiving trip I hemmed and washed the third and forth towels.

The next photo shows the first two towels, both made with hemstitch and fringe, after washing (before I gave the blue one away).
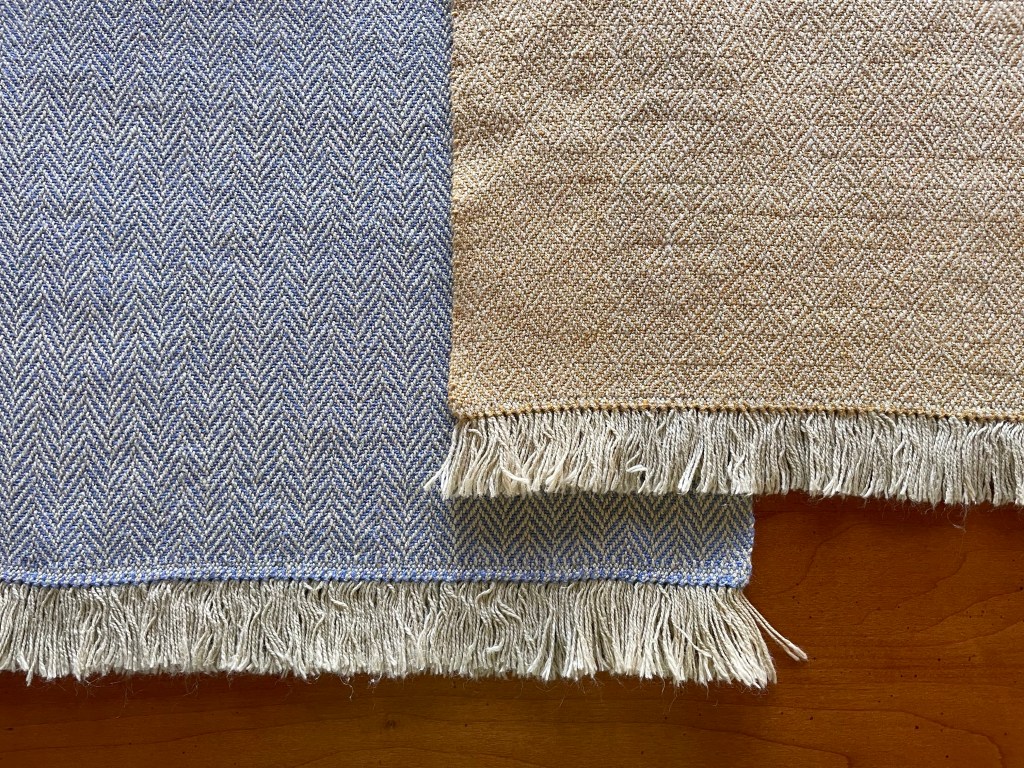
Before this project, my favorite towel that I had made was the yellow wonky towel (see blog post about that here). It was made with cotton warp and Duet cotton/linen blend weft using a zig zag pattern. The earlier yellow towel is heavier and the zig zags are going the other direction. I love the feel and weight of the Cottolin towels, but I really like the bigger scale of the zig zags on the yellow towel. I could figure out how to get that look with the Cottolin if I put my mind to it. You can see these two zig zag towels side by side below.
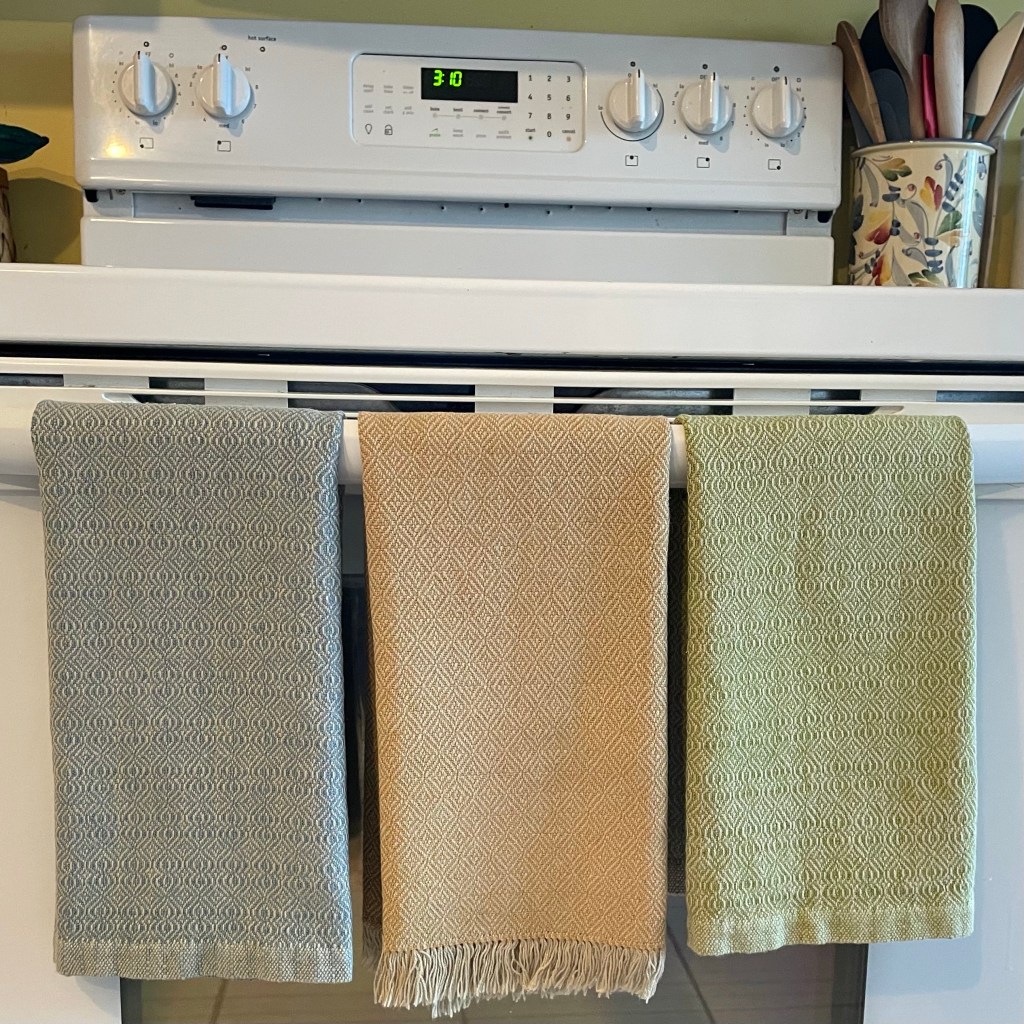
Three towels from the Cottolin project are shown below (the forth one is in California), hanging up on my stove handle. They will all likely end up as gifts too. I love these towels. They turned out well, look and feel nice, and will dry dishes beautifully.
Due to the pattern and number of yarn ends, I needed to use my floor loom with multiple heddles for this project. I will make more Cottolin towels for sure, when I have time to weave again on my floor loom. Before that happens, I will be working on rigid heddle weaving projects and other things NOT using my floor loom while we are in Arizona over the winter.


I loved following your progress with these towels. The outcome is beautiful.
LikeLiked by 1 person
Thank you! This is kind of diary for me, probably too detailed for some people!
LikeLiked by 1 person
I think it is important that we document our work. It is too easy to lose sight of all our progress, no matter how big or small.
LikeLiked by 1 person
Right and when people ask what you have been doing, it is hard to remember if you have not documented it.
LikeLiked by 1 person
I love the pattern of the green towel, but my favorite part was where you chose to redo a part because it was better “to love the outcome ” rather than get done faster. Beautiful work!
LikeLiked by 1 person
Thank you! It is not good to spend a bunch of time on something and not even like it. So always better to re-do if possible. I really want to make more towels like these but they take so darn long and I have so many other things I want to do too!
LikeLike
Meg, you really do very beautiful work!
LikeLiked by 1 person
Thank you and thanks for reading!
LikeLiked by 1 person
I’ve always struggled with how to sample, without wasting lots of yarn and time. It had never occurred to me to make up a mini loom to try different setts. Thanks for showing what you did!
LikeLiked by 1 person
I was not sure I wanted to do it again after trying to do 24 epi on the 12 epi mini loom! But since then I have done a couple more samples with 12 epi and with 8 epi that were much easier and quicker. It does seem like a good way to figure out what something might look like without using up too much yarn.
LikeLike
What a beautiful pattern! I love the diamonds in the weave.
LikeLike
Thank you! I like the diamond one too.
LikeLike