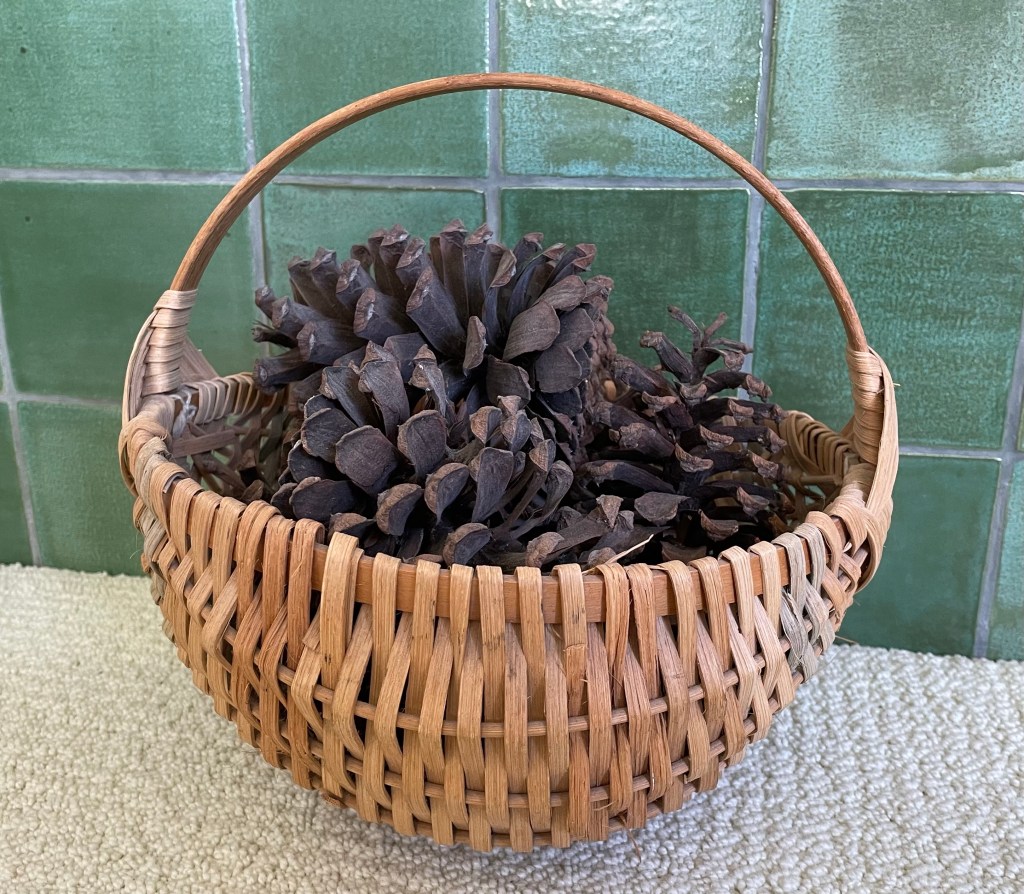
I have always loved baskets. Every basket is functional, but a handmade basket is also a beautiful work of art. Over 30 years ago my sister-in-law Marlene and I made baskets at the home of her cousin, Karen, who organized the get together. Karen invited an experienced basket maker to come and lead the afternoon session to a group of friends and family. All the materials were provided for a minimal fee of $10.00. We had a fun time and I came home with a basket that has been sitting in front of our fireplace ever since then. Sometime later when my sister lived in North Carolina, I collected giant pinecones from her yard that ended up in the basket. We have pine cones in Minnesota, but not that big!
I have another basket that my grandmother passed down to my mom. There is a notecard inside the basket that says it was purchased by my great grandmother, Mary Chase Laramie, from Native Americans (likely Ojibwe Indians) near Lake of the Woods in the early 20th century. Lake of the Woods is a large irregularly shaped lake, about 70 miles long by 60 miles wide, on the border between Minnesota and Canada. It is the 6th largest lake in the United States, after the Great Lakes, and known for excellent fishing.
Mary Chase had been an independent unmarried woman with a thriving homemade cosmetics business. After moving from Wisconsin to Crookston in northwestern Minnesota, she met John Laramie, a railroad engineer with four children whose wife had died. Mary was not keen on marriage but felt the children needed a mother. She married John and they went on to have four daughters together, including my grandmother. Mary and John owned a farm near Warroad, a small town on the Canadian border near Lake of the Woods. People in Minnesota know it as Hockeytown USA due to it’s strong hockey tradition and number of high school championship teams, as well as multiple Olympic and NHL team players, despite having a population of less than 2000. More importantly for this anecdote, Warroad was once one of the largest Ojibwe villages on Lake of the Woods (according to Wikipedia).

Once when I was watching Antiques Roadshow they talked about people bringing in items they thought had belonged to a famous person, with a story of how it came to be in their family and been passed down through multiple generations. But after examination, the Antiques Roadshow expert would determine that the item could not have belonged to the famous person due to materials or processes used much later than the person had lived. In the case of the Ojibwe basket, I am going to stick with my story given the time and place where my great grandma lived and the history of that area.
Following are photos of two more baskets I have (that I did NOT make). I use both of them for storing yarn, roving for spinning, spinning wheel bobbins, knitting projects in process, and whatever other random fiber related thing I don’t know where else to put. The contents change regularly. Sometimes I empty one of the baskets out and use it to bring things to an event.

I have been watching for the right opportunity to make another basket for years now. There are plenty of places that offer basket weaving classes, but other activities have had higher priority. Recently I became aware of a weekend basketmaking class offered in Fergus Falls. The first time I saw the information I dismissed it, thinking I did not have time. Later I saw another reference to the class and I decided to go for it. There would not be a more convenient opportunity to make another basket.
The class was offered through the Kaddatz Galleries, a non-profit organization that offers art education and gallery space. The teacher was Martha Bird, an artist and nurse from Minneapolis. Click here to see her web site. There was a full day of instruction on Saturday, and another half day session on Sunday. Each of the 5 students in the class received a kit with all the necessary materials for a fee of $85 (much less than retail value), plus the use of other accessories needed, such as a bucket, scissors, tape measure, clothespins, etc. Following is a photo showing the bucket with supplies, before anything was unpacked.
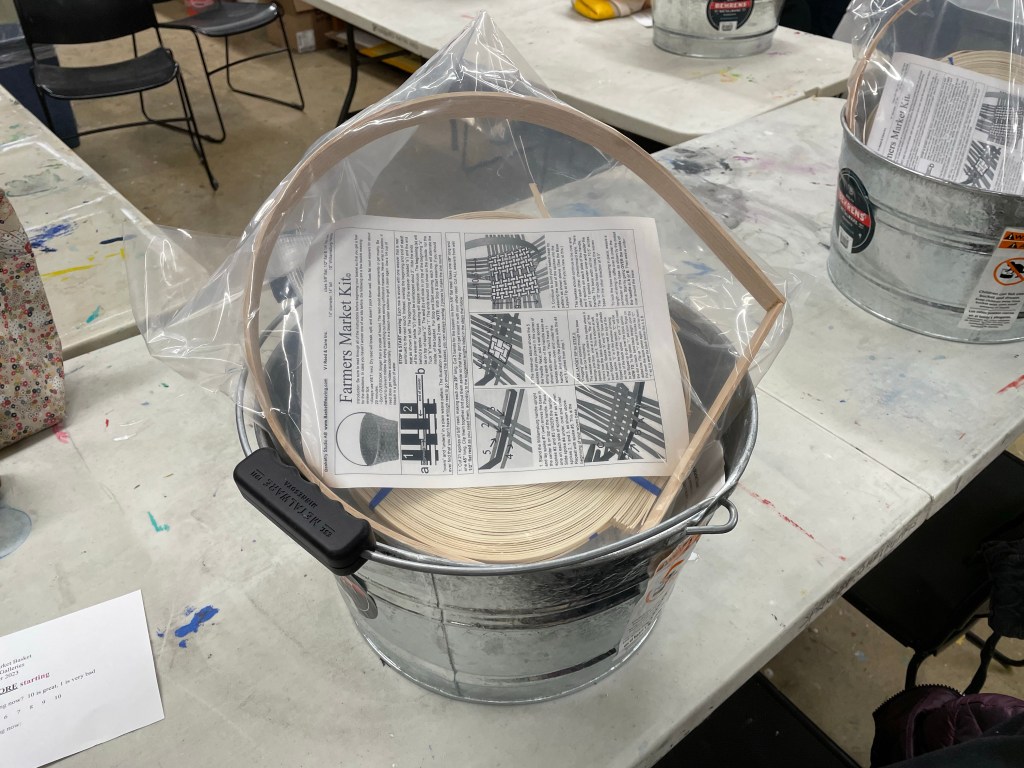
Inside the plastic bag were more than enough rattan reeds in three different sizes, plus a wooden rounded handle attached to a base. The first step was to cut 21 pieces of 5/8″ wide reed 29″ long. The strips of reed (called “stakes”) were then soaked in the bucket with water just enough so they would be able to bend without breaking, about one or two minutes.

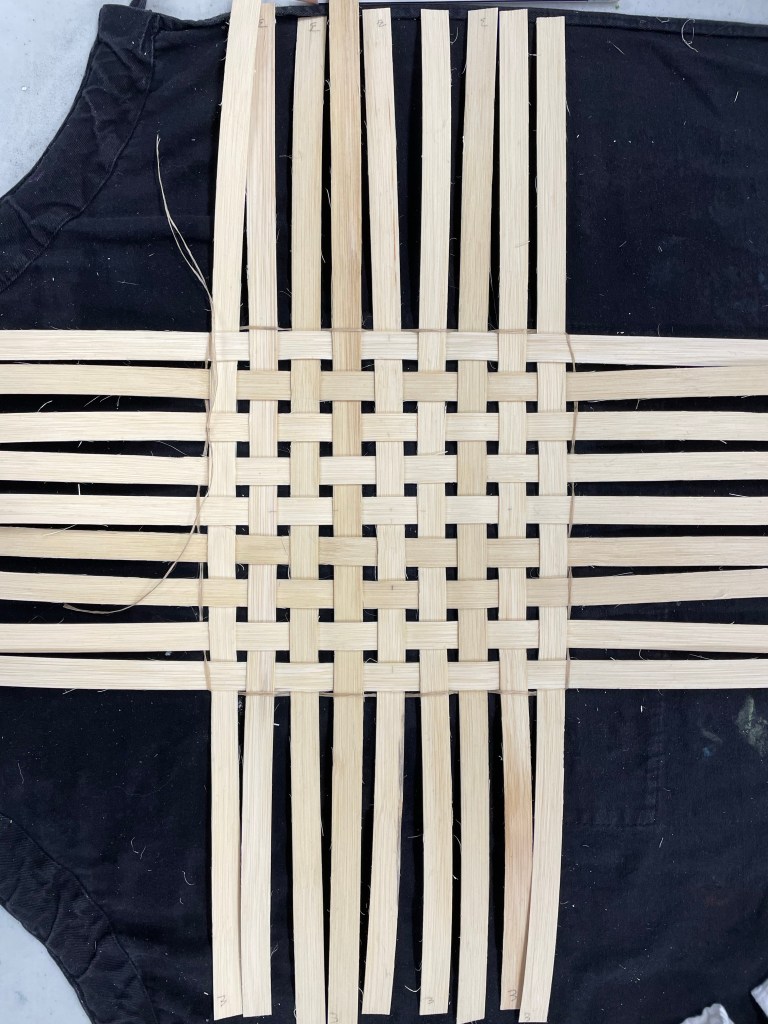
The bottom of the basket was made by weaving the 5/8″ “stakes” over and under each other and around the handle base. Eleven stakes were needed going perpendicular to the handle base.

We used five on each side going the other way to make a square basket. You could have used less and had a more rectangular basket.

The reeds have a smooth “good” side and a “bad” side that is more prone to shredding. The bad side was supposed to be on the inside, but it was not always easy to tell them apart and some reeds seemed to have two bad sides. I ended up with some bad sides on the outside. After the base was finished, it was time to spray it with some water so the stakes could be bent up for the sides. The sides were made of 1/2″ rattan “weavers”. We cut a total of 11 weavers measuring from 45″ to 48″. The longer ones were used at the top of the basket where it was wider. The rows at the bottom were the hardest to weave in, it got easier as you went up.
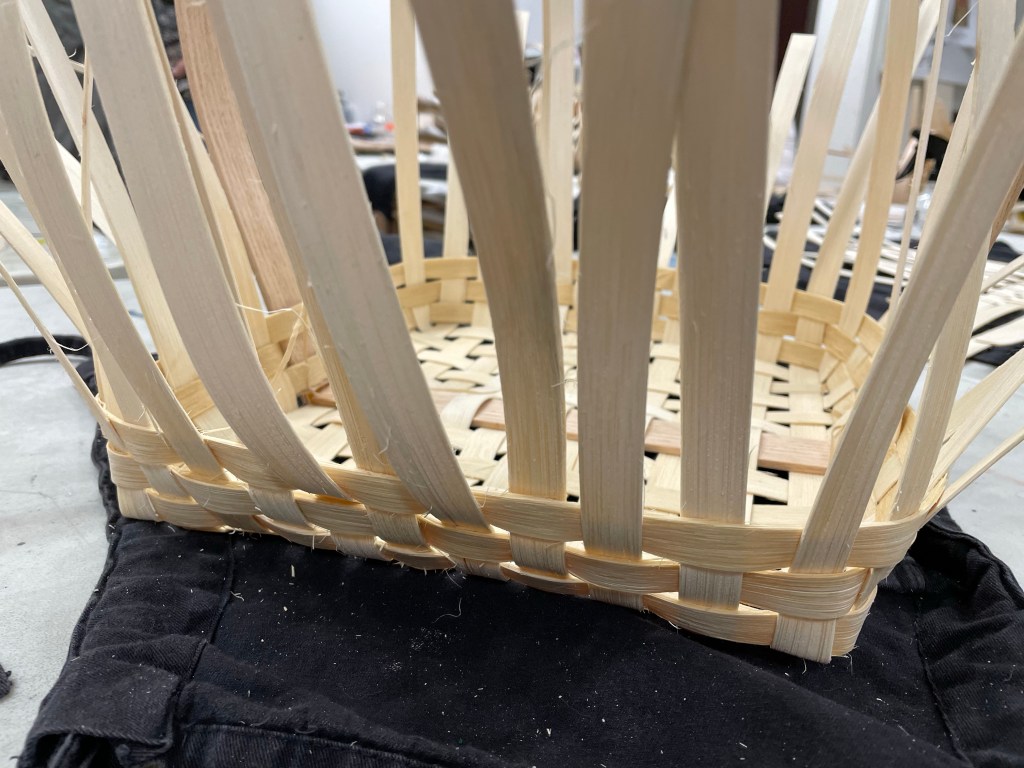
Clothespins were used to hold the reeds in place as we were working, especially closer to the bottom.

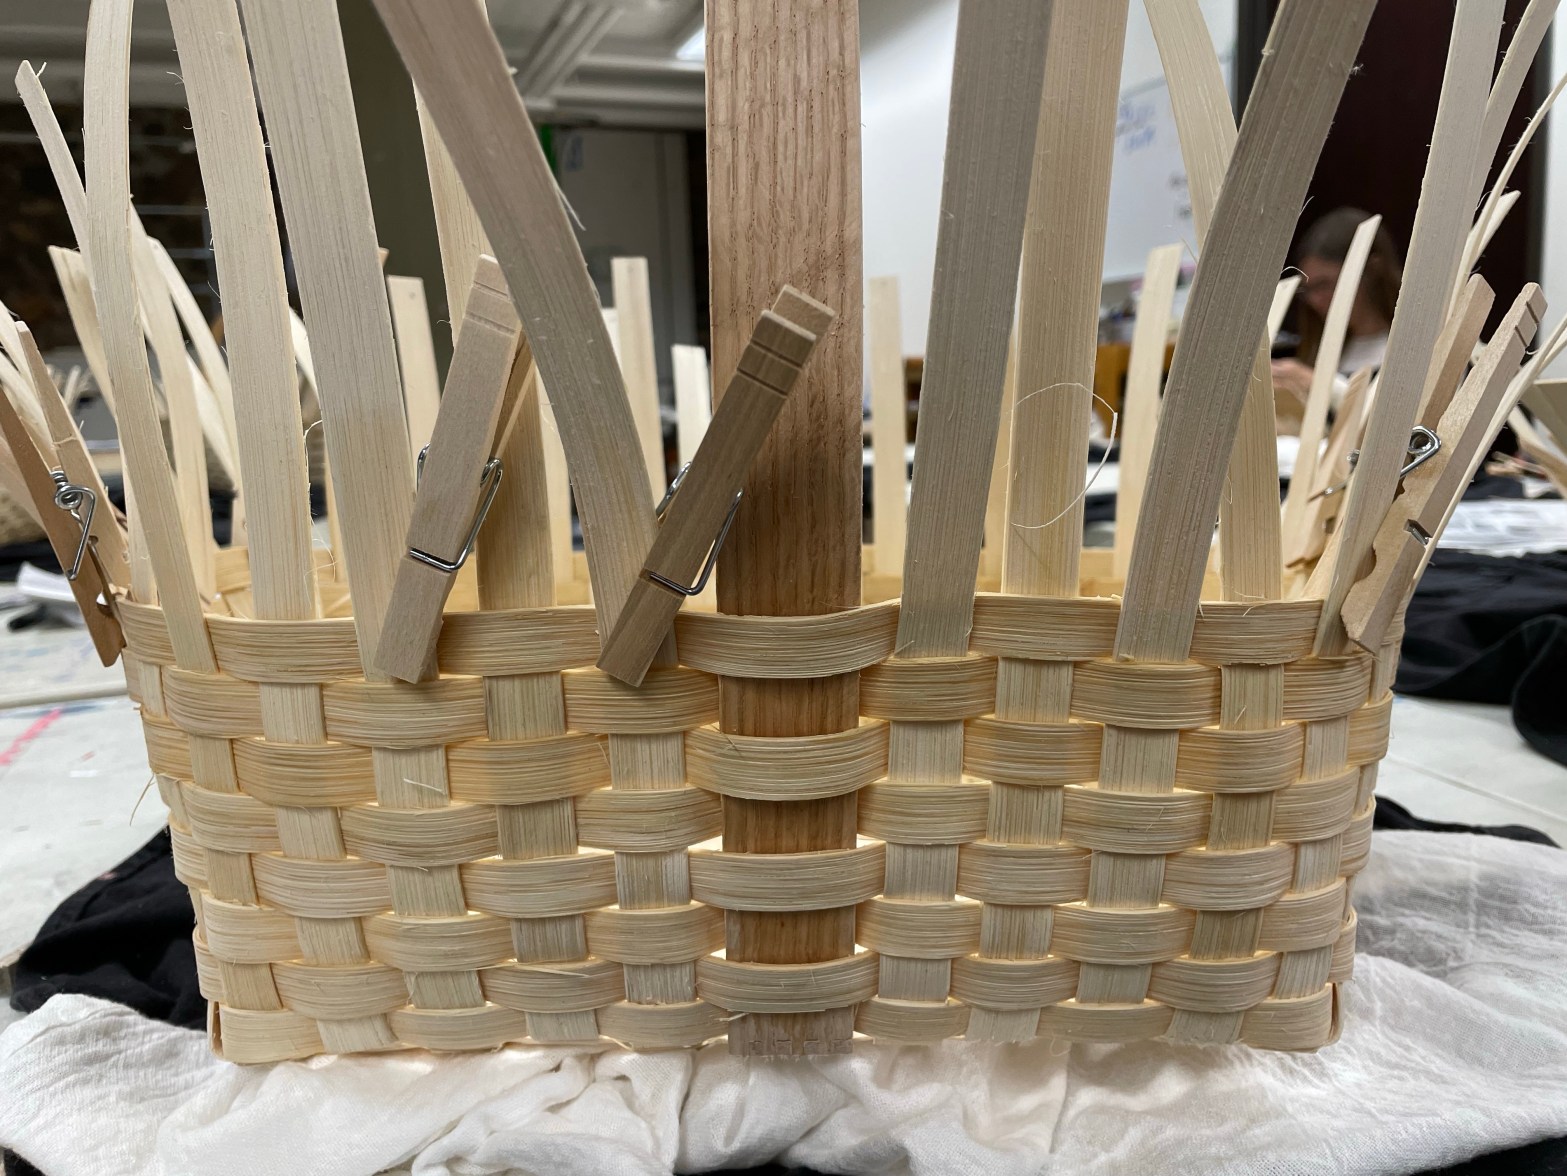
You could make your basket shorter by weaving in fewer rows, but we all had 11 which left enough of the sides sticking up to finish off the top properly. The reeds sticking up on the outside were folded over, trimmed and tucked in. The alternate reeds sticking up on the inside were cut off level with the top. The next photo shows the outside reeds folded over and held in place by clothespins before I trimmed and tucked. The photo after that shows the basket after all the trimming, tucking and cutting.


I did not get a good photo of the last part in progress when we wrapped some of the 3/4″ reed around both the outside and the inside at the top, and lashed it on with a long piece of narrow reed.
Everyone in the class had the exact same materials, but each basket came out a little differently. Mine was wider at the top. Some were more square. Each one had its’ own style. The finished size of my basket was 15″ x 13″ at the widest part of the top, and 10″ x 9 1/2″ at the bottom, and 6″ tall.

One of the women in the class did some extra credit. After learning the technique at the class on Saturday, she and her seven year old son collected cattail reeds Sunday morning and made a five inch square basket using rope for lashing and a handle at the top. It turned out amazingly, as you can see in the photo below.

After completing the market basket on Saturday, there were enough materials to make a another smaller basket during the half day session on Sunday. We all decided to make napkin baskets that would be square, lower, and not have a handle. The beginning was the same except without the handle. We used nine reeds each direction which turned out kind of big for napkins when we were all done.
Skipping ahead to the last step that I did not photograph on the first basket, the following photo shows the strips of reed getting lashed on at the top of my second basket. One of the students brought a length of old rope from her garage, so I added some at the top of my basket.

The finished size of my smaller basket is 8″ x 8″ at the base, 10″ x 10″ at the top, and 4″ high. It is too big for the everyday napkins we use, but could work for larger entertaining paper napkins, or does not have to be for napkins at all. Following is a photo of the completed second basket. On the second row from the bottom at the back in the photo you can see a mistake where I missed weaving behind one of the vertical “stakes”. I did not notice it until it was too late to fix. Oh well.

I was very happy with how both baskets came out, despite a few imperfections.

Everyone in the class had a good experience interacting with each other and working together learning a new skill. Martha was a wonderful teacher, explaining all the detailed steps in ways we could follow, and patiently giving individual help as needed. I could have found plenty of other things to do over the weekend, but I am so glad I decided to take this class.

Your weaving talents know no bounds, Meg! Your baskets are gorgeous, and I love the story about your great-grandmother. You are so lucky to have her basket.
LikeLiked by 2 people
Thank you! The teacher made it easy with very detailed step by step instructions. I probably won’t make any more unless I decide to take another class. I don’t want to buy a whole bunch more supplies!!!
LikeLiked by 1 person
Love reading about your fun class, Meg! The baskets are beautiful. Thanks for sharing! 💜
LikeLike
Thank you!
LikeLike
The baskets you made are simply beautiful! And how special it is to have one you made from 30 years ago and one from your great-grandmother, too! I do like how baskets are functional. It is so satisfying to make something – especially something with a purpose. Thank you for your post. It inspires me to continue to be creative – and to try my hand at something new sometime.
LikeLiked by 1 person
Thank you!
LikeLiked by 1 person
I love making things that are functional. Now that you are a pro, are you tempted to make more baskets on your own?
Great for gifts, especially with a hand woven dishcloth as a liner.
Very satisfying to complete something in basically one day!
LikeLiked by 1 person
I do not have any plans right now to buy my own supplies but you never know!
LikeLike
I love baskets too, and I have to say that yours are better than many I’ve seen in stores!
LikeLiked by 1 person
Thank you!
LikeLiked by 1 person
Wow, they look incredible! I’ve never attempted basket weaving (I expect it’s a lot harder to manoeuvre the reeds than it looks), but have always felt I should have a go one day.
LikeLiked by 1 person
Thank you. Yes you should try sometime!
LikeLiked by 1 person
What beautiful baskets!
LikeLiked by 1 person
Thank you!
LikeLiked by 1 person
Lovely Baskets Meg!
LikeLiked by 1 person
Thank you! The class was a great way to learn and make a couple of baskets with minimal investment of time and money.
LikeLike